How To Make A Transparent Gradient In Photoshop
How To Make A Transparent Gradient In Photoshop https://logosbynick.com/wp-content/uploads/2022/01/transparent-gradient-in-photoshop.png 800 470 Nick Saporito https://secure.gravatar.com/avatar/8e31bf392f0ba8850f29a1a2e833cdd020909bfd44613c7e222072c40e031c34?s=96&d=mm&r=gOf all the many things you can do in Photoshop, one useful technique that could be beneficial to know is creating transparent gradients where one end of the gradient is opaque and the other transparent. In this tutorial we’ll be using layer masks as a quick and easy way of creating a transparent gradient mask in Photoshop.
In short, to create a transparent gradient mask in Photoshop all you need to do is add a layer mask to the layer with your image on it, set your foreground and background colors to black and white (the default colors,) and then use the Gradient Tool to apply a gradient over the layer.
Layer Masks
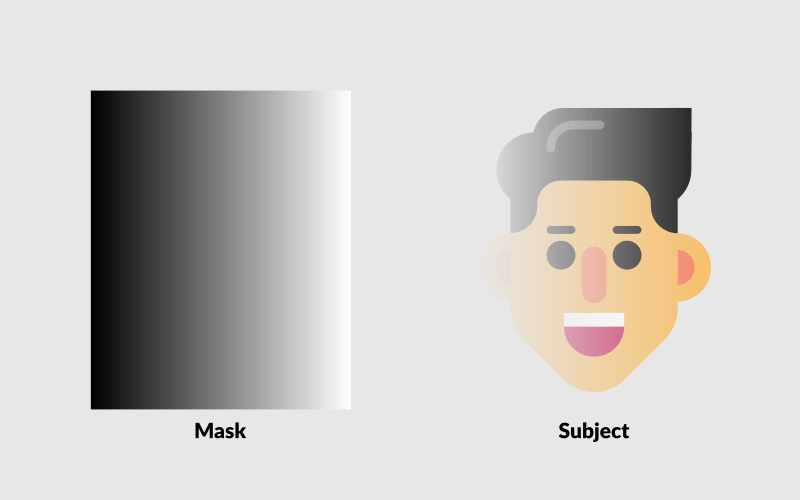
Layer masking is a way of selectively dictating the transparency and opacity of a layer by using black and white shades.
Areas of a layer mask filled with black will make the layer it’s applied to transparent, whereas areas filled with white will remain opaque. Everything in between (grayscale) will be partially transparent based on how dark or light the shade is.
Layer masks are also known as opacity masks in other applications.
This is the same concept used in a previous tutorial where we used Illustrator to create a transparent gradient. Let’s go over how to do the same in Photoshop.
Create A Transparent Gradient In Photoshop
The following video tutorial will walk you through the entire process, step-by-step, and in under 2 minutes:
Continue on for the written instructions.
Table of ContentsCreating A Transparent Gradient
Finalize |
Creating A Transparent Gradient
In this first part of the lesson we will go over the steps taken to apply a transparent gradient. Then, we’ll go over how to finalize and/or delete the effect.
Step 1: Set the foreground and background colors to black and white
Considering that we’ll be using layer masks to create our transparent gradient, we’ll first need to set the foreground and background colors to the default black and white.
Just above the foreground and background colors you should see an icon that depicts a black square and a white square:

Clicking this button will set your foreground and background colors to the black and white required for your layer mask.
Go ahead and click that button to make your foreground and background colors black and white if they aren’t set as such already.
Step 2: Add a layer mask to the layer with your image on it
Now let’s apply a layer mask.
Navigate to the Layers menu in the bottom-right corner of the screen, select the layer with your image on it, and click the Add Layer Mask button towards the bottom of the menu:
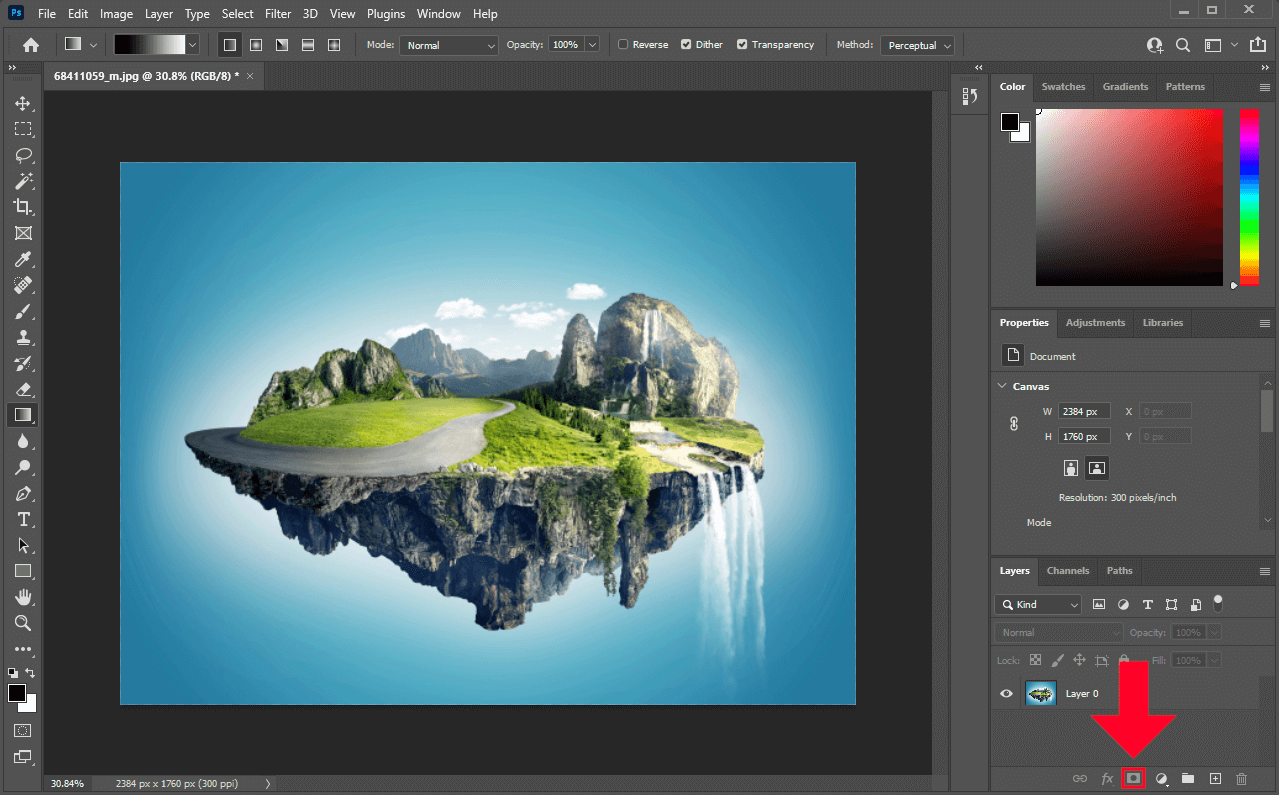
Clicking this button will apply a layer mask to the selected layer.
Nothing will visibility change on your canvas. However, you will now have a layer mask that allows you to selectively control the opacity of the layer it’s applied to.
Step 3: Use the Gradient Tool to apply a transparent gradient
All you have to do now to create a transparent gradient in Photoshop is simply grab the Gradient Tool (keyboard shortcut: G) and click and drag across your canvas to apply a gradient to your image:
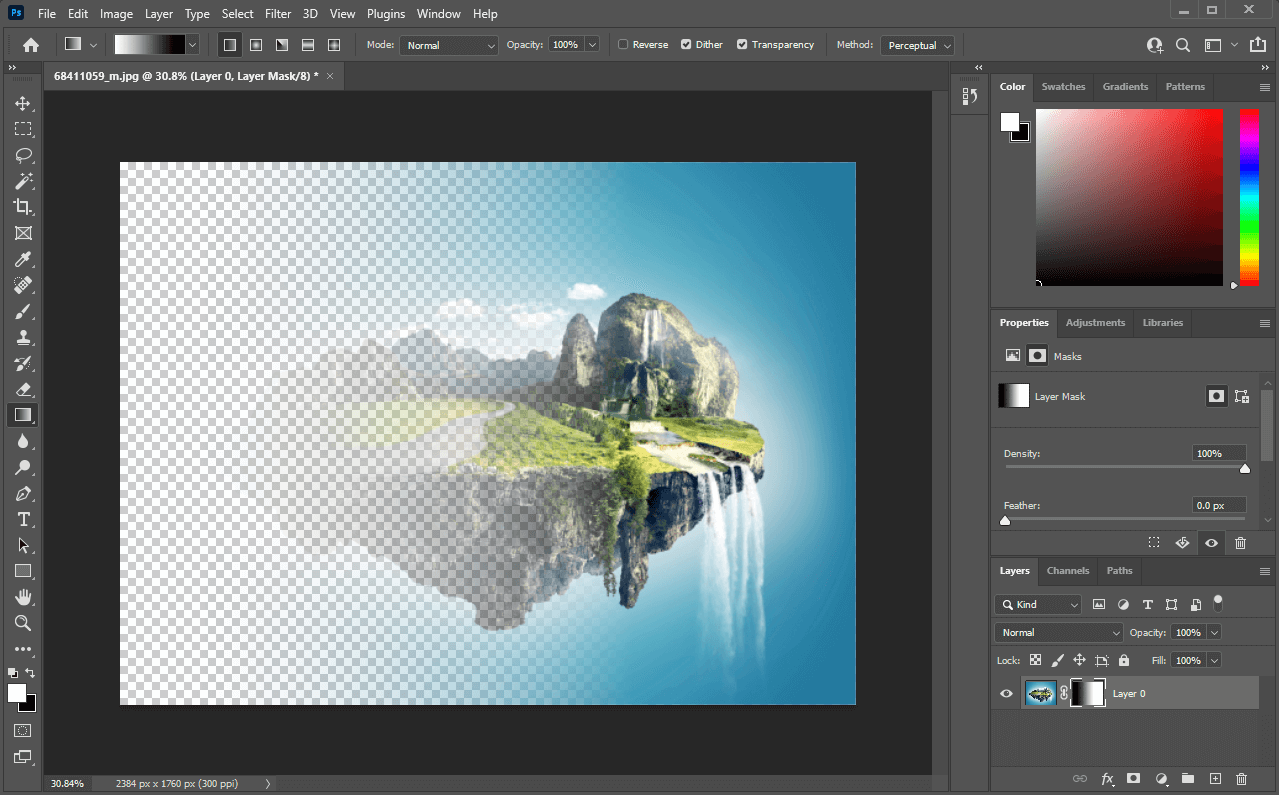
How the image looks with a linear gradient used as a transparent gradient.
If done correctly, the black side of the gradient will create transparency on your layer whereas the white side will remain opaque.
Towards the top of the screen you should see some tool settings:

The tool options at the top of the screen allow you to change the properties of your transparent gradient.
You can use these settings to dictate the properties of the gradient you’re applying.
Here are the 5 types of gradients to choose from:
- Linear: a gradient that follows a straight path
- Radial: a gradient that follows an elliptical path
- Angle: a gradient where multiple colors follow a circular path (otherwise known as a conical gradient)
- Reflected: a gradient where the two chosen colors are repeat multiple times
- Diamond: a gradient that follows a diamond-shaped path
Each of these gradient types follow different shape/path. Try them out to determine which type of gradient is best for your use case.
Within the tool settings menu you should also see an option labeled as Reverse. This will allow you to reverse your gradient so that the transparent areas become opaque and the opaque areas become transparent.
Finalize
Once you are finished applying your transparent gradient in Photoshop, you can choose whether to finalize the effect or you can delete it if you’d like. Let’s go over how to do each.
Apply the transparent gradient
One of the benefits of working with layer masks is that it’s a non-destructive process, meaning it can easily be done at a layer point if need be. However, if you’d like to finalize the effect you can simply right-click the layer mask and select Apply Layer Mask.
Selecting this will apply the mask to the layer, finalizing the effect. It should be noted though that once the effect is applied it will no longer be editable, so be sure that you are satisfied with the outcome before doing so.
Delete the transparent gradient
If at any point you’d like to delete the transparent gradient, simply right-click on the layer mask and select Delete.
Alternatively, you can temporarily disable the mask by selecting Disable Layer Mask. It can then be reapplied layer on by right-clicking the mask again and selecting Enable.
Conclusion
Creating a transparent gradient in Photoshop is simply an exercise in using layer masks. Fortunately, Photoshop makes this a simple process. Much simpler than the process used to do the same in Illustrator.
If you have any questions or need clarification on any of the steps taken in this lesson then simply leave a comment below.
Learn To Master The SoftwareGain a complete understanding of your favorite design apps with my comprehensive collection of video courses. Each course grants access to our private community where you can ask questions and get help when needed.
|
||||||||||||||||||||||||||||||||