How To Create A Transparent Gradient Mask with Illustrator
How To Create A Transparent Gradient Mask with Illustrator https://logosbynick.com/wp-content/uploads/2020/08/transparent-gradient-mask-with-illustrator.png 800 470 Nick Saporito https://secure.gravatar.com/avatar/8e31bf392f0ba8850f29a1a2e833cdd020909bfd44613c7e222072c40e031c34?s=96&d=mm&r=gIn this tutorial I’ll be demonstrating how you can create a transparent gradient mask with Illustrator using an Opacity Mask. This would be useful if you’re trying to apply a gradient of transparency to an image, an object, or a grouping of objects.
| To create a transparent gradient mask with Illustrator, select your object, open the Transparency menu, then click the Make Mask button. Then, create an object with a gradient of black to white, copy it to your clipboard, and paste it into your mask layer. |
The following is a written overview of the steps taken to create gradient masks. For complete step-by-step instructions I would recommend watching the video tutorial below:
Opacity Masks
Using an Opacity Mask allows you to control the visibility of subjects in creative ways. The standard transparency setting in Illustrator only allows you to control the visibility of the subject as a whole, but what if you only want to make specific areas of your subject transparent? Or, what if you want to make one side of your subject transparent, then slowly transition the other side to full opacity? This is where opacity masks come in handy.
How Opacity Masks Work
The opacity mask is a non-destructive layer that gets applied to a subject. Once applied, black areas of the mask will make the subject transparent, whereas white areas of the mask will leave it opaque. Everything in between — or grayscale — will be partially transparent depending on how light or dark the shade is.

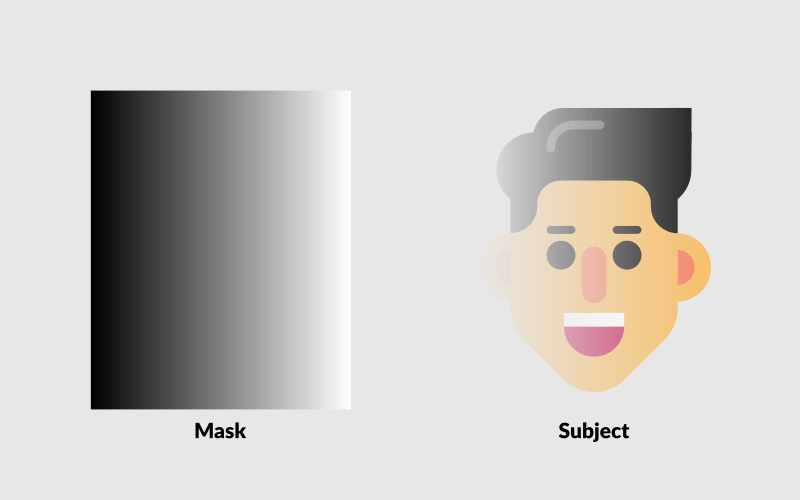
Here’s an example of how an opacity mask that consists of a gradient from black to white looks when applied to a subject…
Opacity masks are also known as layer masks in other applications.
Notice how the left side of the subject’s face is transparent, but the right side is fully opaque. This is how we will be creating our transparent gradient mask with Illustrator.
Create A Transparent Gradient Mask with Illustrator
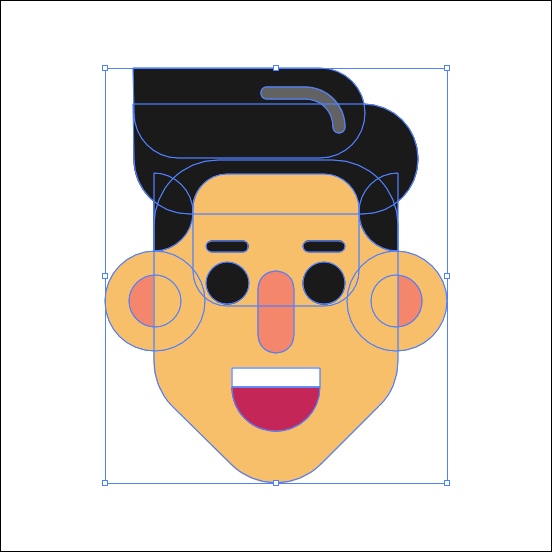
For this demonstration I’ll be applying the gradient mask to the following example graphic…

This is a flat vector avatar that I designed for another tutorial. If you want to follow along with what I’m doing then you can download free copies of these avatars here. Otherwise you can use whatever graphic or image you’d like.
The reason why this design works as a good example is because it consists of lots of individual objects, making it a good representation of how powerful opacity masks can be.
Step 1: Group Everything Together
Since opacity masks can only be applied to a single item at a time, the first step would be to select all of the objects and group them together. Then the mask can be applied to the grouping as a whole.
To do this, select all of your objects that you’d like to apply the mask to, then navigate to Object > Group, or press Control + G.
If your subject only consists of a single object or item then you can skip this step.
Step 2: Create A Gradient
Next we’ll grab the Rectangle tool and create a rectangle over your subject. Make sure the rectangle covers your subject entirely. It’s okay if it sticks out a bit.
Then, grab the Gradients tool and give your rectangle a gradient of black to white. You can choose a lineal, radial, conical, or any other gradient style you’d like. What matters is that it consists of black and white.

Now we’re going to cut the object so that we can paste into a different layer momentarily. Select the rectangle, then navigate to Edit > Cut or press Control + X. Your rectangle will disappear, but that’s okay. It’ll be back shortly.
Step 3: Make A Mask
The next step for creating our transparent gradient mask with Illustrator would be to open the Transparency menu. To access the Transparency menu, navigate to Window > Transparency. This is what the menu looks like…
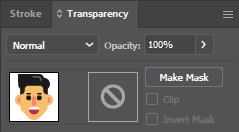
The left side of the menu represents your select object; the right side represents where the opacity mask will be applied.
With the Transparency menu opened, select your subject then click the Make Mask button. Your subject will temporarily disappear.

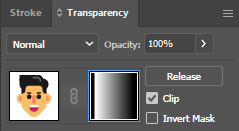
This is how the Transparency window will look once you’ve applied an opacity mask…

Notice how the right side is automatically filled with black. This explains why your subject is now transparent. In an opacity mask, black areas become transparent and white areas remain opaque.
Step 4: Apply Your Gradient
Now we must select the mask layer by clicking on it. It will be highlighted in blue once selected. This part is important because we want to make sure we’re applying the gradient mask to the mask layer and not the subject’s layer.
With the mask layer active, navigate to Edit > Paste or press Control + V. Your black and white gradient will now be used as an opacity mask.

Here’s the the Transparency menu looks with the gradient applied…
Notice the black and white gradient in the opacity mask layer.
Now you can grab the Gradient tool and adjust the gradient as needed directly on the canvas.
One thing I love about Illustrator is that you can edit opacity masks directly on the canvas!
Adjusting the handles of the gradient will allow you to control the way that the opacity mask is applied to your subject.
Once you are finished, make sure to navigate back to the Transparency menu and activate the subject layer by clicking on it. Then you can continue on with whatever it is you’re working on.
At any point you can undo the transparent gradient mask by selecting your subject and clicking the Release button in the Transparency menu.
Just in case you were wondering, yes, this works on raster images as well!
Conclusion
That should do it for today’s tutorial demonstrating how to create a transparent gradient mask with Illustrator. Give it a try yourself. Let your creativity run wild and see what you can come up with using different gradient shapes and styles. If you have any questions leave a comment below, and as always, thanks for watching!
Learn To Master The SoftwareGain a complete understanding of your favorite design apps with my comprehensive collection of video courses. Each course grants access to our private community where you can ask questions and get help when needed.
|
||||||||||||||||||||||||||||||||


Hi Nick – this was very helpful, thank you for sharing! I had other layers in my file that I had turned off to create the gradient mask and now I’m having a hard time figuring out how to find them to turn on… when I select layer menu it just show: Layers (Opacity Mask) … where are my other layers?
Hi Meredith, I’m not sure why your layers would disappear like that. I’ve never heard of that happening.
Meredith,
i hope you figured out that you need to go to the window menu and select transparency. there you can select the image vs the mask. selecting the image makes all of your layers visible again.
hope this helps.
So helpful! Thanks so much
Is there a way to add the transparent gradient to multiple layers at once versus creating a new mask for each image?
I don’t think there is a way to do it without all of the objects on the same layer.
I made a label for my work and received it from the printer. I used some icons and wanted to make them a bit see through so I took the opacity slider from 100% to 20%. The icons were printed on black so eventually when I got the label the icons became blueish. If I use this method (transparency mask) instead, will it save me from a misprint next time? It looks like the tint of colours become less opaque with a transparency mask, instead of becoming opaque ánd see through.
I don’t think gradient masks will fix this problem, assuming I’m not misunderstanding. I would just create fully opaque white copies of the objects and position them beneath the copies with reduced transparency. That way the appearance will be preserved.
I’ve done this several times but since the last AI update I can’t get the gradient to actually work on the graphic / photo I’m trying to fade out.
I can pull up the gradient and change it all I want and it does nothing …. do you have any idea what’s causing this?
I seen someone else was having problems with opacity masks since last update and so now I’m wondering …
Would be most interested to hear your feedback.
Thank you for the great video – I will be checking out more!
I’m not sure. I don’t know what the new update entails but I’ll update mine and see if there’s any difference.
Thanks for the great tutorial, Nick. I followed your instructions to create a gradient mask and everything worked fine. After working for a while But wanted to go back to edit the mask but I can’t seem to access the gradient. Do you know how to edit the mask?
You’ll have to use the Transparency menu to access that layer.