
Affinity Designer VS Illustrator | Everything You Need To Know
Affinity Designer VS Illustrator | Everything You Need To Know https://logosbynick.com/wp-content/uploads/2023/02/affinity-designer-vs-illustrator.png 800 470 Nick Saporito https://secure.gravatar.com/avatar/8e31bf392f0ba8850f29a1a2e833cdd020909bfd44613c7e222072c40e031c34?s=96&d=mm&r=gAffinity Designer and Adobe Illustrator are two of the more popular choices in the world of vector design software. Despite the fact that they both function in a way that is fundamentally similar, they also have a lot of differences between them, and those differences are significant enough to make choosing between them a real dilemma. In this article we’ll be comparing the two so you can decide which is best for you.
Affinity Designer And Illustrator Compared
| The main takeaway when comparing Affinity Designer versus Illustrator is that Illustrator is the industry-standard software that has more advanced features for working with vectors, whereas Affinity Designer has less of those features, but more image editing capabilities. |
| Application | Affinity Designer V2 | Adobe Illustrator |
| Used For | Vector design, image editing | Vector design |
| Supported Operating Systems | ||
| Minimum Requirements | Intel processor, Apple M1 OS X Mavericks 10.9 or later (Supported up to macOS Big Sur 11.0) 2 GB RAM 2.8 GB of disk space Minimum resolution of 1280 x 768 | Multicore 64 bit processor 8 GB of RAM (16 GB recommended) 2 GB of disk space 1080p resolution recommended 1 GB of GPU VRAM recommended |
| Price | One-time purchase: $69.99 | Subscription purchase: $31.49/mo with no contract, or $20.99/mo with yearly agreement, or $239.88/yr billed upfront |
| Mobile App? | iPad only | iPad only |
| Where To Purchase | Official website | Official website |
Key Takeaways:
- Affinity Designer has a pixel-based image editing environment in addition to its vector capabilities; Illustrator is primarily a vector tool.
- Each application has a handful of unique tools that the other doesn’t.
- Despite that, either one can be used professionally for vector design.
- Illustrator is sold as a subscription service, whereas Affinity Designer is a one-time purchase.
- Illustrator will add more bloat to your device as it has a parent app (Creative Cloud) that runs in the background at all times.
- Each application has a companion app for the iPad, although they both have limitations compared to the desktop version.
Check out our video presentation (originally made for YouTube) comparing the two applications:
Read on for a more thorough comparison.
About Affinity Designer
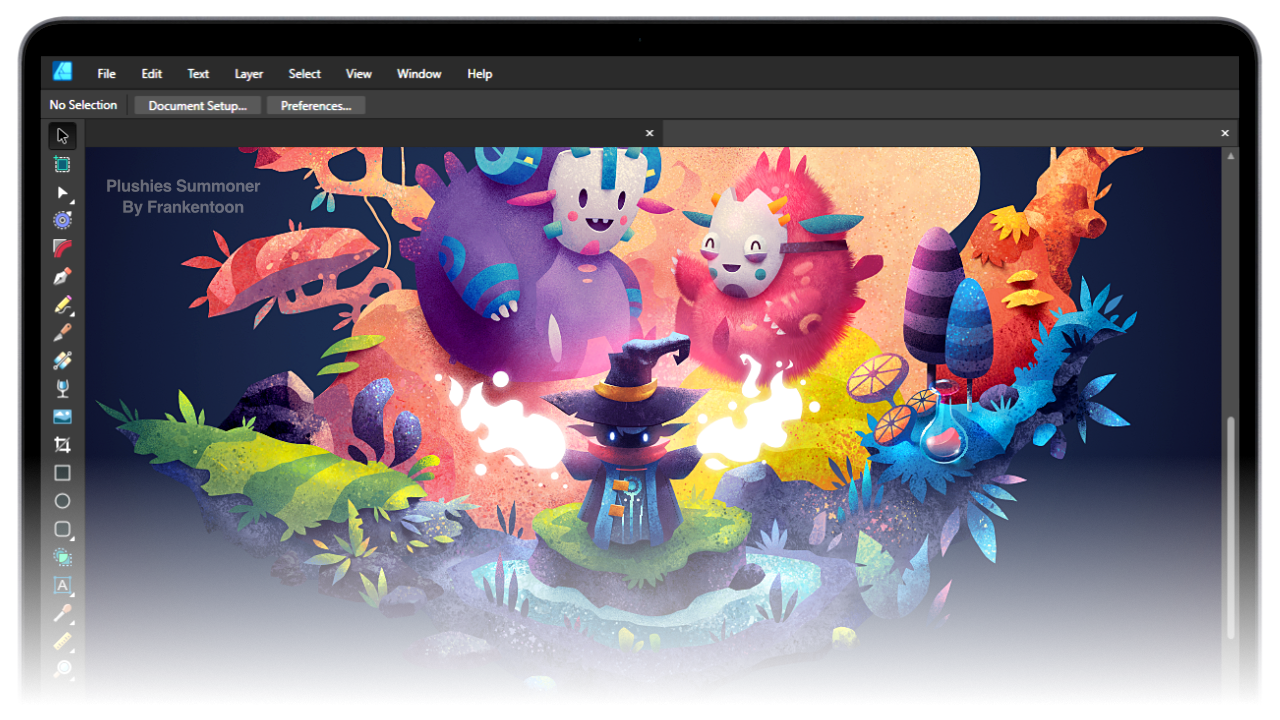
Affinity Designer is a vector design application developed by Serif Europe Ltd. It serves as a lower-cost alternative to Adobe Illustrator, which is currently the industry standard when it comes to vector design.
Click to enlarge
Not only does Affinity Designer have all of the fundamental tools and capabilities you would expect from a vector design app, but it also has image editing capabilities built in via its Pixel Persona, making it a fantastic all-in-one design solution.
This is quite rare to see in a vector design tool, and it really makes Affinity Designer stand out among the rest.
About Illustrator
Adobe Illustrator is the industry-standard vector design application, developed by none other than Adobe.

Click to enlarge
What makes Illustrator special is all of the advanced tools and features it contains for working with vector graphics. There’s virtually nothing you cannot do (in terms of vector design anyway) with Adobe Illustrator.
Despite all of its robust features though, its ability to edit images and photos is very limited — especially when compared to Affinity Designer.
Affinity Designer VS Illustrator: Technical Comparison
Let’s have a closer look at how these tools compare when it comes to features, usability, and performance.
Table of ContentsAdvantages Of Using Affinity Designer
Advantages Of Using Illustrator
iPad App Pros & Cons |
Advantages Of Using Affinity Designer
Affinity Designer certainly has its share of technical advantages. Let’s get started by going over some of the benefits you’ll enjoy by choosing Affinity Designer over Illustrator.
Image Editing Capabilities
In a way, Affinity Designer is a 2-in-1 design solution. It breaks down into two separate personas: it has the Designer Persona, which is meant for working with vector graphics, and it has the Pixel Persona as well, which is meant for working with pixel-based images.
Each persona has its own set of tools to work with:
![]()
This means that not only can you create vector graphics in Designer, but you can also perform many image editing tasks as well, such as:
- Cropping photos and objects
- Deleting backgrounds from images
- Blur and sharpen
- Make selections by color
- Shape-based marquee selections
- Magic wand-style selections
- Paint and erase
- Dodge and burn
Having the ability to switch back and forth between vector and pixel environments, all in a single application, is very convenient. As an Illustrator user, you won’t have the ability to do this. You’ll have to switch back and forth between Illustrator and Photoshop.
Adjustment Layers
Another area where Affinity Designer shines is that it allows you to add adjustment layers to your work:

Affinity Designer allows you to apply pixel-based adjustment layers to vector layers.
Adjustment layers are non-destructive edits you can make to the contents of a layer. They can be toggled on and off at any time.
What’s great about how adjustment layers work in Designer is that it allows you to add pixel-based adjustments to vector layers if you want! This means that you can adjust the color curves of a vector layer, the white balance, shadows and highlights, exposure, and more.
Illustrator doesn’t have the ability to add pixel-based adjustments to vector layers. In fact, it doesn’t allow for adjustment layers at all.
More Grid Options
One distinct advantage Affinity Designer has over Illustrator is that it provides more options when applying grids to your canvas. This is an area where Illustrator falls short to even free design applications.
In Illustrator, you can only create grids using vertical and horizontal lines, and the only properties of your grid you can change are the color of the grid lines and the spacing between each grid line. For whatever reason, you can’t change the angle of grid lines in Illustrator, which can be incredibly frustrating when trying to create isometric art.
Affinity Designer, on the other hand, allows you to create grids of all types, including isometric grids and grids at a custom angle:
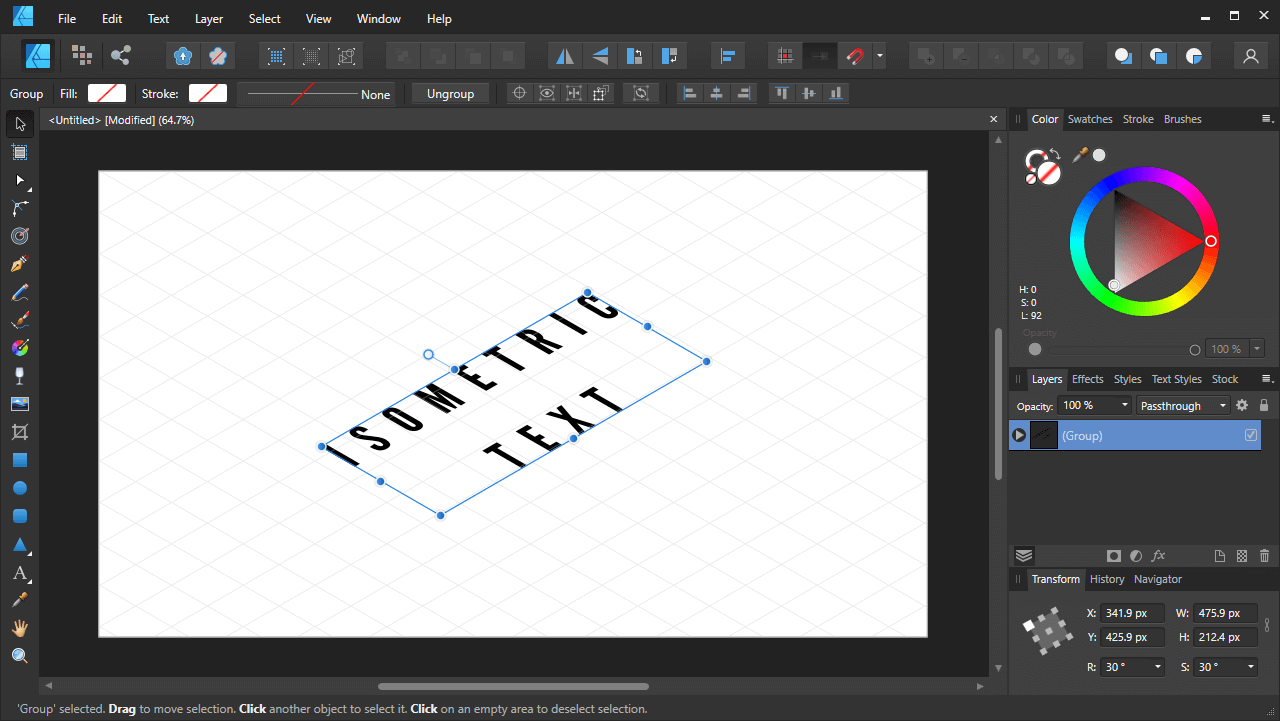
How your isometric text looks once applied to the isometric grid.
Not only that, but Designer also has a built-in isometric tool that allows you to transform objects to fit your grid lines:
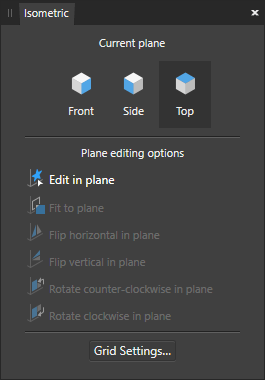
The Isometric Menu allows you to place objects on isometric planes. It also allows you to change the position and orientation of your selected object, relative to the grid.
As of right now, Illustrator has nothing of the sort. So, if you’re someone who plans on creating a lot of isometric art, or anything else that relies heavily on the use of grids, then you’d be better off with Affinity Designer over Adobe Illustrator.
Simplified & Modern UI
Another benefit you’ll enjoy as an Affinity Designer user is how intuitive the user interface is. One of the downsides of using Illustrator is that it’s not very organized. For example, it has three different tools that do the job of one tool (the Nodes Tool) in Affinity Designer. Affinity Designer’s layout is simpler, more organized, and therefore easier to learn– but without sacrificing anything.
One example of this would be working with gradients. When working with gradients in Designer, you can reposition each end of the gradient with freehand movement by simply clicking and dragging on either handle:
Illustrator has a much clunkier way of handling gradients. One end of the gradient is used for repositioning the gradient, whereas the other end is used for rotating and resizing it:
I’ve always found this method of working with gradients to be needlessly complicated, and it’s one area in which Adobe can learn from Affinity.
Another example of Designer having a more intuitive UI would be in the way that strokes are applied. In Illustrator, strokes are applied to your objects by manually inputting a numerical value or by holding a click over the up arrow:
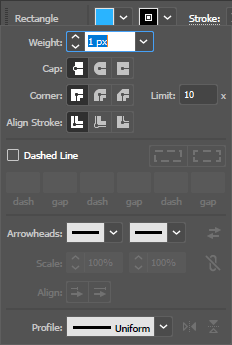
In Affinity Designer though, you’re provided with a handy slider that allows you to make your strokes bigger and smaller much more quickly, and it makes for a better experience if you want to size your stroke with freehand motion as opposed to manually inputting numerical values:
These are just a couple of examples of Affinity Designer having a much more intuitive user interface than Illustrator. As you continue to use the software and explore all of its features, you’ll see that this is a pretty common theme.
Easier Offsetting Controls
Tying in with user interface controls would be the ability to offset objects, which is another area where Affinity Designer casts a shadow over Illustrator.
Offsetting is an essential function when it comes to vector design. It’s a way of enlarging or shrinking an object by adding an equal amount of space around its perimeter, as opposed to simply increasing its width and height.
In Illustrator, the way to offset an object is to navigate through a menu system to find the feature, then manually input a numerical value to offset your object by:
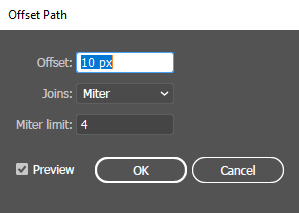
This is problematic if you don’t know exactly how big the offset should be and just want to manually eyeball it.
In Designer though, offsetting has its own dedicated tool — known as the Contour Tool — that can be accessed directly in the tool menu, or by using a keyboard shortcut.
Not only does the Contour Tool allow you to offset your objects by inputting a numerical value like Illustrator does, but it gives you on-canvas handles for freehand adjustment as well:
Easier To Work With Anchor Points
Anchor points are the individual coordinate points that make up a vector object. For example, the anchor points of a square would be the four points in each corner. Moving those corners (or anchor points) would change the shape and appearance of the square.
Anchor points can be used to change an object’s shape, size, contour, position on the X and Y axis, and many other structural properties. In Illustrator, you’ll need to use 4 different tools to edit anchor in all possible ways:
- Direct Selection Tool
- Add Anchor Point Tool
- Remove Anchor Point Tool
- Anchor Points Tool
This means that you regularly have to switch back and forth between all of these tools when editing anchor points, which can be tedious.
In Affinity Designer, all of these functions can be performed with a single tool — the Node Tool, which basically combines all 4 of Illustrator’s anchor point-editing tools into 1 handy tool — making it much easier to work with.
A good example of this would be the tutorial I made demonstrating how to create a drip effect with Illustrator. In order to add drips to the object, I had to regularly switch back and forth between the different tools. When I made the same tutorial for Affinity Designer though, I was able to get it done without all of the back and forth between tools.
Transparency Tool
One of the most under-appreciated tools in Affinity Designer is the Transparency Tool, which can be used to quickly apply transparent gradients to objects.
In Illustrator, this is a process that requires you to make an object with a black and white gradient first, then apply it as an opacity mask to create the effect. However, as I demonstrated in a recent tutorial, the Transparency Tool lets you apply transparent gradients with just a click and drag of the mouse.
Fewer Hardware Requirements
Another area where Affinity Designer has a modest advantage over Illustrator is hardware requirements. According to Adobe’s documentation, Illustrator requires the following:
- A processor with 64-bit support
- 8 GB of memory
- 2 GB of disk space
By comparison, Affinity Designer requires:
- 2 GB of memory
- 2.8 GB of disk space
This means that Affinity Designer will run better on lower-end devices than Illustrator. Additionally, Affinity Designer doesn’t have a parent application (Creative Cloud) that runs in the background at all times and hogs system resources like Illustrator does. Another plus for Designer. ^Top
Cheaper Cost
The final advantage for Affinity Designer that we’ll be examining is price. Adobe Illustrator requires that you pay a subscription (monthly or yearly) to use it. It is currently sold in a variety of subscription options, each of which vary in price:
- $31.49/month with no contract, or
- $20.99/month with a yearly agreement, or
- $239.88/year billed upfront
Discounts may be available for students. It should also be noted that Illustrator’s subscription includes the iPad app (or you can purchase the iPad app by itself for $14.99/month.)
Affinity Designer, on the other hand, only requires a one-time purchase. Currently, it is priced at $69.99 for the desktop version, but the iPad app will need to be purchased separately at $19.99.
It should also be noted that the Affinity Designer Windows app is separate from the Mac version. So, if you purchase it for Windows, you can use it on as many Windows devices as you’d like, but if you want to use it on a Mac you’ll have to purchase a copy of the Mac version.
Advantages Of Using Adobe Illustrator
Now that we’ve gone over some of the advantages of using Affinity Designer, let’s have a look at some of the benefits you’ll enjoy as an Illustrator user. Illustrator’s greatest advantage is its vast and robust suite of tools and features for working with vectors. When it comes to vector design tools, Illustrator is the industry-standard.
Vector Image Tracing Abilities
One thing Adobe Illustrator can do that Affinity Designer cannot is create auto-generated vector tracings of pixel-based images:

Even after the release of V2 last November, Affinity Designer still lacks this capability. And based on some of the feedback I’ve received on YouTube, this is a dealbreaker for many users.
As an Illustrator user you’ll have access to the software’s advanced image tracing tool, which allows you to trace vector copies of photos in color or black and white.
Tools For Creating Charts And Graphs
One handy feature Illustrator offers is the ability to quickly generate pie charts and graphs via the dedicated graph tools:
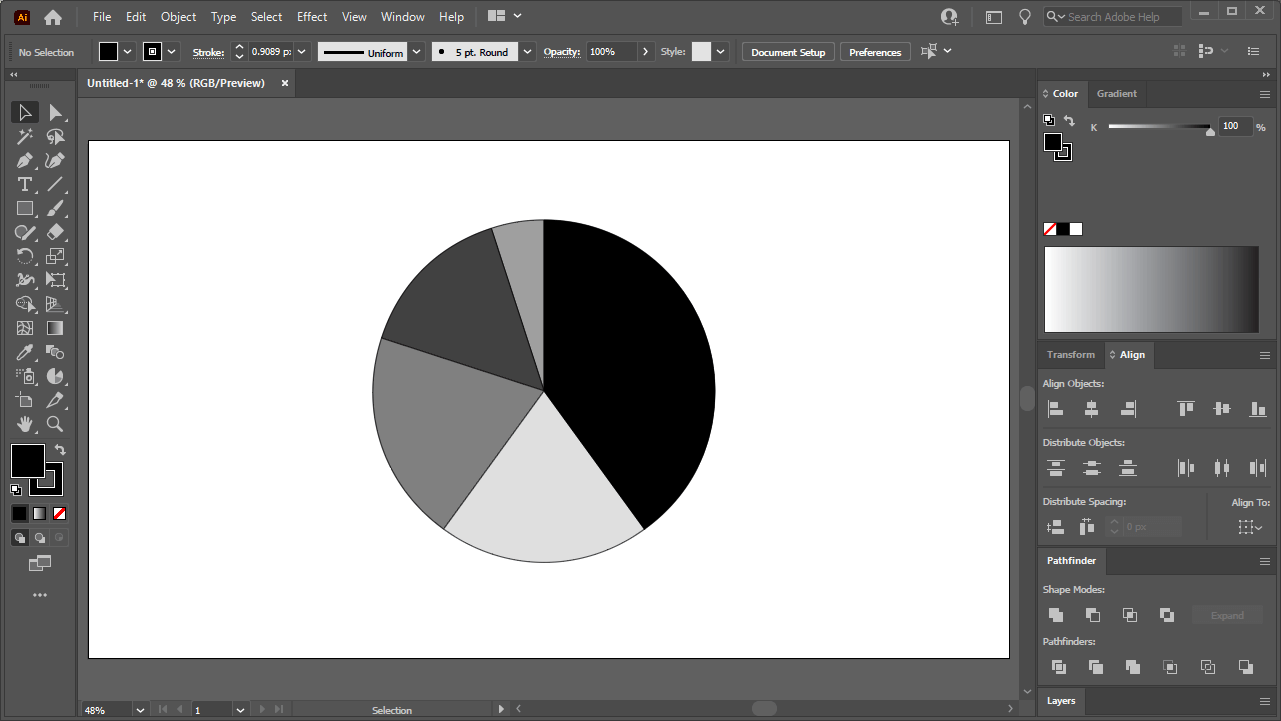
Normally, this is something you’d have to manually draw using shapes and Boolean operations. In Illustrator though, you can simply input your numerical values into the tool and an editable chart/graph will be rendered on your canvas.
This can be really handy when designing something like an infographic, a report, or a presentation document. If this is something you may find yourself regularly designing then the choice between Affinity Designer and Illustrator should be clear.
3D Capabilities
Another feature that is unique to Adobe Illustrator is its ability to take flat, 2D vector objects and make them into 3D vector objects:
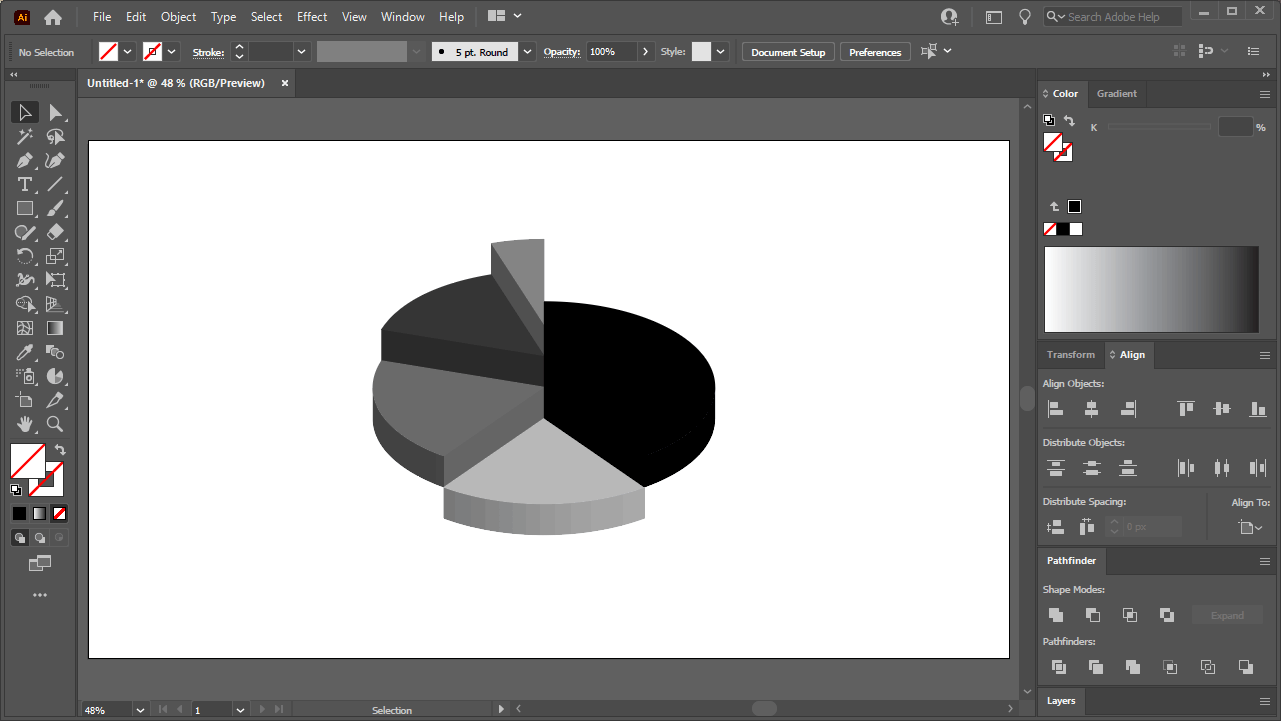
This is something I’ve yet to see in any other vector design app.
Typically, if you want to create a 3D vector object, you’d have to draw it manually. In Illustrator though, you’re only a few clicks away from making your flat objects 3D.
The Blend Tool
In Illustrator, the Blend Tool is an advanced feature that lets you create many copies of an object that follow along a path, among other things. This can be used to make all kinds of unique creations:
There is no such tool or workaround for doing something similar in Affinity Designer. This may not be an essential function for vector design, but it’s a powerful tool that can inspire you nevertheless.
Mesh Gradients
A mesh gradient is a way of coloring an object by assigning different shades to various coordinate points along a grid:
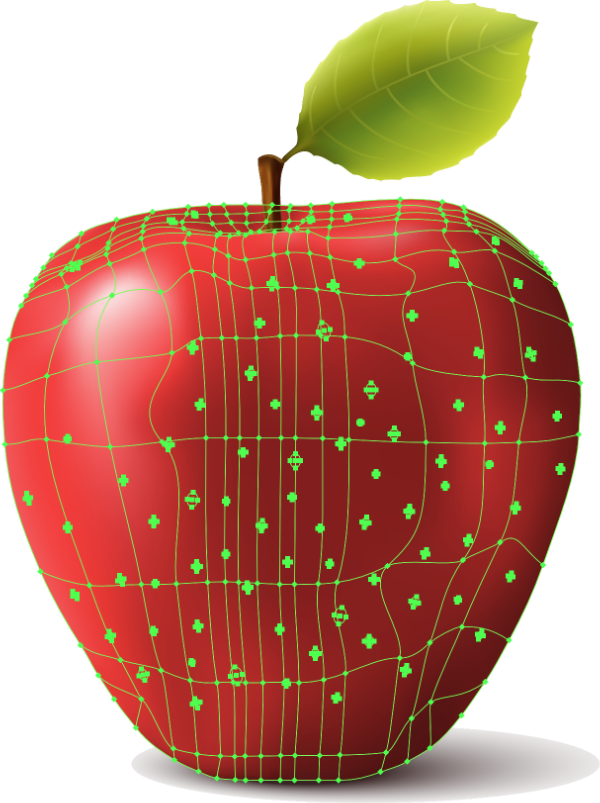
In Affinity designer, you can only create gradients that follow a linear, circular, or conical path. There is no way to create mesh gradients in the software just yet.
In Illustrator, however, you’ll be able to create mesh gradients with as many coordinate points as you’d like, which can further enhance your creativity.
iPad App Pros & Cons
Both Affinity Designer and Illustrator have mobile apps for the iPad. However, they are not as comprehensive as their desktop counterparts. And they’re only available on the iPad— not Android or any other mobile platform (not even iPhone.)
Affinity Designer
As of version 2.0 — released in November of 2022 — The Affinity Designer iPad app now has nearly all the features of the desktop version.
That said, being on a mobile device, it is fundamentally different from the desktop version and will take some getting used to. For example, the user interface is confusing, but labels are provided to indicate what everything is. They can be toggled on at any time by tapping the help icon:

Despite how advanced it is for an iPad app, it is still missing certain capabilities from the desktop version. For example, you cannot shear objects up and down in the Affinity Designer iPad app; only left and right.
Illustrator
Much like Affinity Designer, Illustrator’s iPad app is streamlined for the mobile environment and looks nothing like the desktop version:

Although the visual difference will take some getting used to, you should be able to find most of the tools and features from the desktop version. Adobe does acknowledge that some features are unsupported on the iPad though, such as the ability to create mesh gradients.
Conclusion
Much like other software comparisons I’ve written about, the battle between Affinity Designer vs Illustrator comes down to your personal needs. While it’s safe to say that Illustrator is the industry-standard tool when it comes to vector design, that doesn’t necessarily mean that it’s the best option for you, and it also doesn’t mean that the alternatives aren’t just as capable– and in some instances better. Hopefully this breakdown has guided you towards making the right choice. If you have any questions or need clarification on anything in this post, simply leave a comment below.
Learn To Master The SoftwareGain a complete understanding of your favorite design apps with my comprehensive collection of video courses. Each course grants access to our private community where you can ask questions and get help when needed.
|
||||||||||||||||||||||||||||||||


> “For example, you cannot shear objects up and down in the Affinity Designer iPad app; only left and right.”
It doesn’t seem to work with finger tap’n’dragging on canvas as of v2.0.4, but:
• it works with the Apple Pen, although finding the “sweet spot” is quite a hit-or-miss
• in the Transform panel, use the center-side anchor, then set rotation to the opposite shear value, e.g. shear: 9°, rotation: -9° – because all that vertical sheer on desktop does is rotating in the opposite direction at the same time…
Thanks for sharing!
Thank you for always sharing good content, Nick.
You are a legend in this arena, thanks again.
Apart from trying AI, what are the available options for Vector Image Tracing for Affinity Designer users?
Inkscape is free and open source and has a built-in image tracer just as good as Illustrator’s. I have a tutorial on how to use it here: https://logosbynick.com/trace-bitmap-in-inkscape/
I am a beginner and willing to learn and start freelance logo design on freelancing sites (like fiverr, upwork etc).
would like to know your thoughts Nick on should I get the Designer or Illustrator?
Considering the cost factor, I am thinking of choosing Designer as my option, but not sure on what difficulties will be there on commercial space (from client side) because of choosing Designer over illustrator.
Any suggestions based on your experience with clients over the years would be helpful.
Btw i had also purchased your all in one bundle course and its great, thanks for making the contents.
Thanks
Affinity Designer V2 should be all you need if you just want to freelance. I worked as a freelancer using just Inkscape for many years. I wouldn’t recommend it, especially if you can afford something like AD. Illustrator is definitely not a requirement though.
Nick,
I am an IT manager looking for a low cost alternative to AI. We are a Print Finisher. We don’t Print anything but we diecut and foil. With AD can I trust that a 25″ x 45″ layout will print true to size just like output from AI would? If our dies are off by a fraction it’s a bad day…
Thanks,
Kevin
Hi Kevin, I may not be the best person to ask about this as I’ve never actually tried what you’re describing, but I don’t see why it wouldn’t be true to size. I do know that you can change the DPI settings to match Illustrator’s though.
I would like to add the export persona as a feature in Designer that isn’t matched in Illustrator. This is very handy when developing logos & branding assets. Similar to the slice tool in Illustrator, except you can specify multiple export file types and resolutions for each asset. If you need to subsequently update an asset’s design, then you can update all the exported files with one click, or even continuously update an asset you are using in developing an app, animation or web site.
Hi! Can affinity import ai files with layers from illustrator?
Yes, I just tested this and can confirm. I created an AI file with layers and it opened in AD without a problem. Just be aware that some Illustrator-specific features may not translate over, but for the most part it should work fine.
Excelent article! However I would like to know what are the advantages/disadvantages of Inkscape compared to these two. Does it have some of Illustrator’s features that Affinity Designer does not have?
I have yet to make a comparison breakdown between Inkscape and Affinity Designer, but I did do a post and video on Inkscape vs Illustrator if you want to check that out here: https://logosbynick.com/illustrator-vs-inkscape/