How To Create A Vector Drip Effect with Adobe Illustrator
How To Create A Vector Drip Effect with Adobe Illustrator https://logosbynick.com/wp-content/uploads/2020/04/Illustrator-drip-effect.png 800 470 Nick Saporito https://secure.gravatar.com/avatar/8e31bf392f0ba8850f29a1a2e833cdd020909bfd44613c7e222072c40e031c34?s=96&d=mm&r=gIn this tutorial I’ll be demonstrating how you can add a drip effect to any of your vector designs using Adobe Illustrator. This is something that can be applied to text, individual letters, logos, icons, or any other vector object.
The following is a brief overview of the steps taken to add a dripping effect to your vector designs. For complete step-by-step instructions I would recommend watching the video tutorial below, otherwise you could follow the written steps below. This isn’t something that’s too difficult to convey through text.
Vector Drip Effect
The first thing we have to do is pick an object to add drips to. For this tutorial I’ll be using the following object…

For demonstrative purposes I’m using the letter D from “drip”. The font being used here is Milkshake. You can use whatever font you’d like, but for something like this I would recommend a cursive and hand-drawn-style font.
To add drips to the letter I will be primarily using two different tools — the Add Anchor Points tool and the Direct Selection tool.
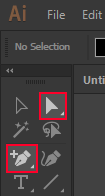
We’ll be toggling back and forth between these tools quite often, so for the sake of saving yourself a lot of time I would recommend using the keyboard shortcuts to activate them. Press A to activate the Direct Selection tool and + to activate the Add Anchor Points tool.
The first step is to grab the Add Anchor Points tool and click the edge of the design where you’d like the drip to peak. This will add a new anchor point that you can manipulate further.
Now grab the Direct Selection tool and click and drag that anchor point downward.

All you have to do now is manually adjust the handles of the anchors points to make the drip look more fluid and natural. Personally, I think it looks good when you make the top of the drip thin and then wider at the bottom.
Simply repeat these steps throughout various areas of your design to complete your dripping effect.

And that’s all it takes! It may take some practice to get a feel for working with anchor points and their corresponding handles, but that is how you can manually add a dripping effect to all of your vector designs with Adobe Illustrator.
Leave a comment below if you have any questions. As always, thanks for watching!
Learn To Master The SoftwareGain a complete understanding of your favorite design apps with my comprehensive collection of video courses. Each course grants access to our private community where you can ask questions and get help when needed.
|
||||||||||||||||||||||||||||||||


Can this be done on affinity designer?
Yes
That was cool my man much appreciated.
Glad to help!
Thank you! Quick and easy explanation…..my kind of tutorial!