Make A Repeat Pattern In Affinity Designer Using A Single Object
Make A Repeat Pattern In Affinity Designer Using A Single Object https://logosbynick.com/wp-content/uploads/2022/01/affinity-designer-repeat-pattern-2.png 800 470 Nick Saporito https://secure.gravatar.com/avatar/8e31bf392f0ba8850f29a1a2e833cdd020909bfd44613c7e222072c40e031c34?s=96&d=mm&r=gToday I’ll be sharing a neat little trick that will allow you to create seamless patterns with ease. In this tutorial we’ll be going over how to make a single object into a repeat pattern in Affinity Designer. This will be done in such a way that the result will be a single square tile that can be replicated and stacked next to each other infinitely.
The secret to making patterns is understanding the symmetry of shapes. To make a repeat pattern in Affinity Designer we’re simply going to place the object in the center of a square-shaped document, then place duplicate copies of the object directly over each of the document’s four corners.
This will result in a single square tile that can be used as a repeat pattern. Let’s get to work!
Make A Repeat Pattern In Affinity Designer
The following video tutorial will walk you through the entire process of turning a single object into a repeatable pattern tile:
Continue on for step-by-step instructions.
Table of Contents |
Step 1: Create a new document sized at 400 x 400 pixels
In order to create a repeat pattern in Affinity Designer we’re going to need a square canvas to work from. Create a new document by navigating to:
File > New
Size your document at 400 x 400 pixels. Your new, blank document should look something like this:
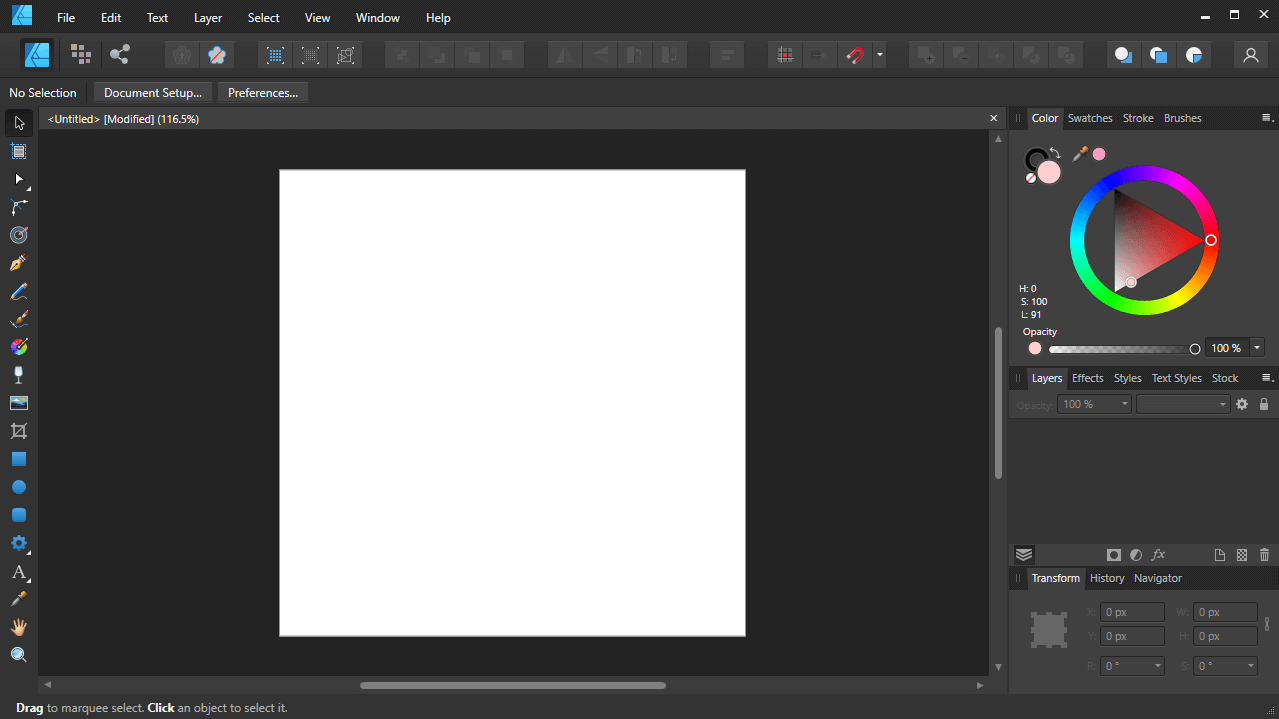
A square canvas sized at 400 x 400 pixels will be required to follow along with this lesson.
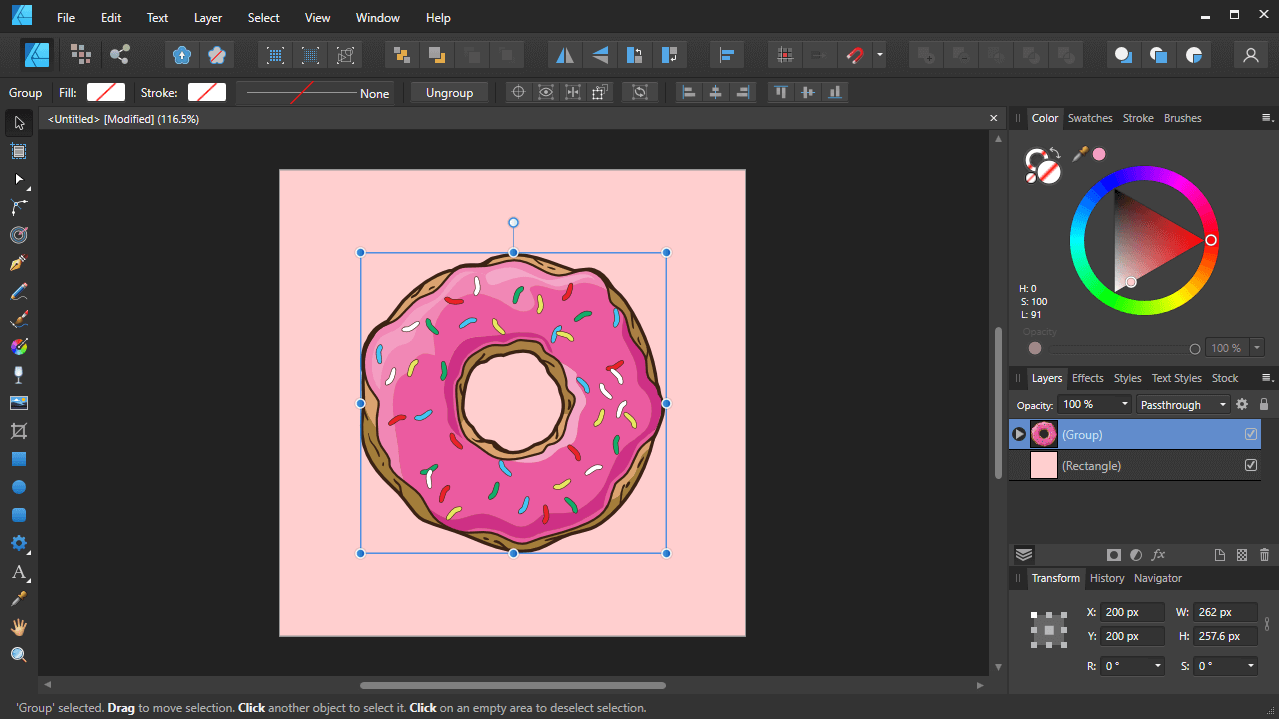
Step 2: Place your object in the center of document
Now we are going to import the object that we’d like used as the repeat pattern. For this demonstration I will be using the following example graphic:
A seamless pattern will be made using this example subject.
You can use whatever object you’d like though. You can even use a simple shape (such as a circle or square) for the time being if you just want to get a sense of how this works.
Note: the object you choose does not have to be symmetrical. This method works for virtually any object!
If you’d like your pattern to have a background then create a rectangle sized at 400 x 400 pixels and place it directly in the center of your canvas. Fill it with whatever color you’d like the background of your repeat pattern to be.
Use the Alignment menu to place the object directly in the center of your canvas, and scale it down so that it fits comfortably in the document with a modest amount of padding around its perimeter (refer to the example screenshot above for reference.)
Step 3: Place duplicate copies of the object over each of the four corners
Now we are going to create duplicate copies of the object and place the centers of them directly over each of the document’s four corners.
To duplicate your object, click on it to select it and then hold Alt while clicking and dragging. This will create a duplicate of the object.
Create 4 copies of the object and place them directly over the corners of your document:
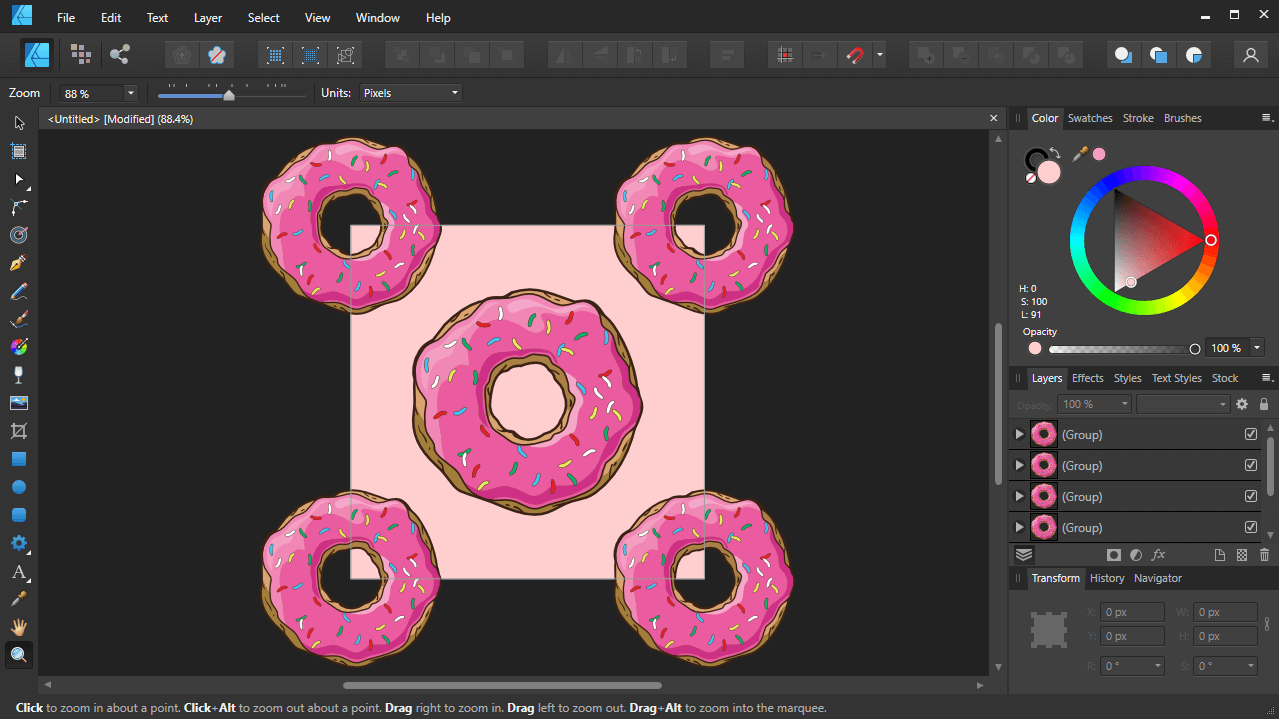
For this demonstration I made the center object slightly larger. This will give the pattern a varied look where some subjects are larger than others. If you’d like your pattern to be consistently sized then you can skip this step.
In order for this repeat pattern to be seamless we will need to ensure that the center points of each object object are placed exactly over each corner. To accomplish this we will be enlisting the help of the Transform menu, which will allow us to manually input X and Y coordinates for the locations of our objects.
Select one of the objects in the four corners and navigate to the Transform menu. There two input fields we will be focusing on are as follows:

The Transform menu is located in the bottom-right corner of the screen.
- The anchor point selector: this grid-like icon dictates the reference point of the object in question. Make sure to click on the box in the center of the icon, since we want to place the object based on its center point.
- The X and Y input values: these numerical values represent the location of the object (or its chosen anchor point) on the X and Y axis of the document.
Select each of the four objects in the corners of your document and make sure that they are placed at the following coordinates:
- Top left corner: 0, 0
- Top right corner: 400, 0
- Bottom left corner: 0, 400
- Bottom right corner: 400, 400
Step 4: Export the document as a JPG file
At this point your repeat pattern is ready for export. Assuming you have placed your objects correctly, your document can be used as a repeatable, seamless pattern tile.
To export your pattern, open the Export menu by navigating to:
File > Export
Within the Export menu choose the JPEG option and apply the settings as indicated in the screenshot below:
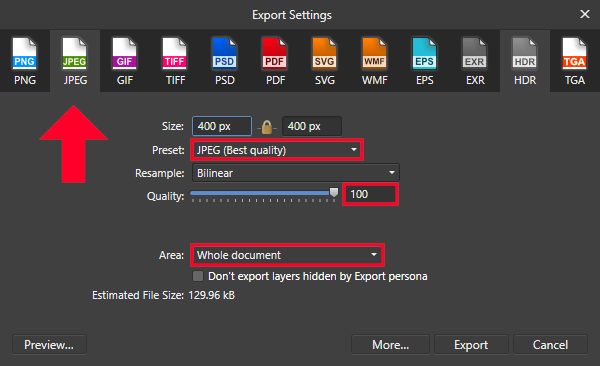
Make sure you are exporting the whole document and not a selection.
Click the Export button and you will be prompted to choose a location on your hard drive to save the file to.
At this point you have successfully created a repeat pattern in Affinity Designer:

This square can be duplicate and stacked next to each other repeatedly to make a seamless pattern.
This tile can be repeated infinitely to create a seamless pattern.
How To Use Your Repeat Pattern In Affinity Designer
Now that you’ve created a repeat pattern, let’s have a look at how you can apply it as a fill property in Affinity Designer. This is something we touched on in a previous lessen about pattern fills.
Preferably in a new document, create a rectangle or some of kind of shape that you’d like to fill with your newly-created pattern:
Now we will use the Fill Tool to apply the pattern as a fill. You can access this tool in your toolbar (represented as a color wheel/disc) or by using the keyboard shortcut, which is G:
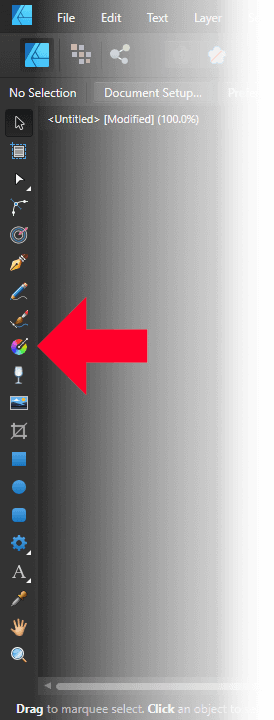
The Fill Tool can be used to apply your pattern to an object.
With the Fill Tool selected, look towards the top of your screen where the tool settings are. You should see an input field labeled as Type. From that dropdown menu, choose the Bitmap option.
You will then be prompted to choose a file on your hard drive to use as the fill data. Locate the repeat pattern you just created and select it.
Once selected, you should have adjustment handles on your canvas that will allow you to apply your repeat pattern as desired:
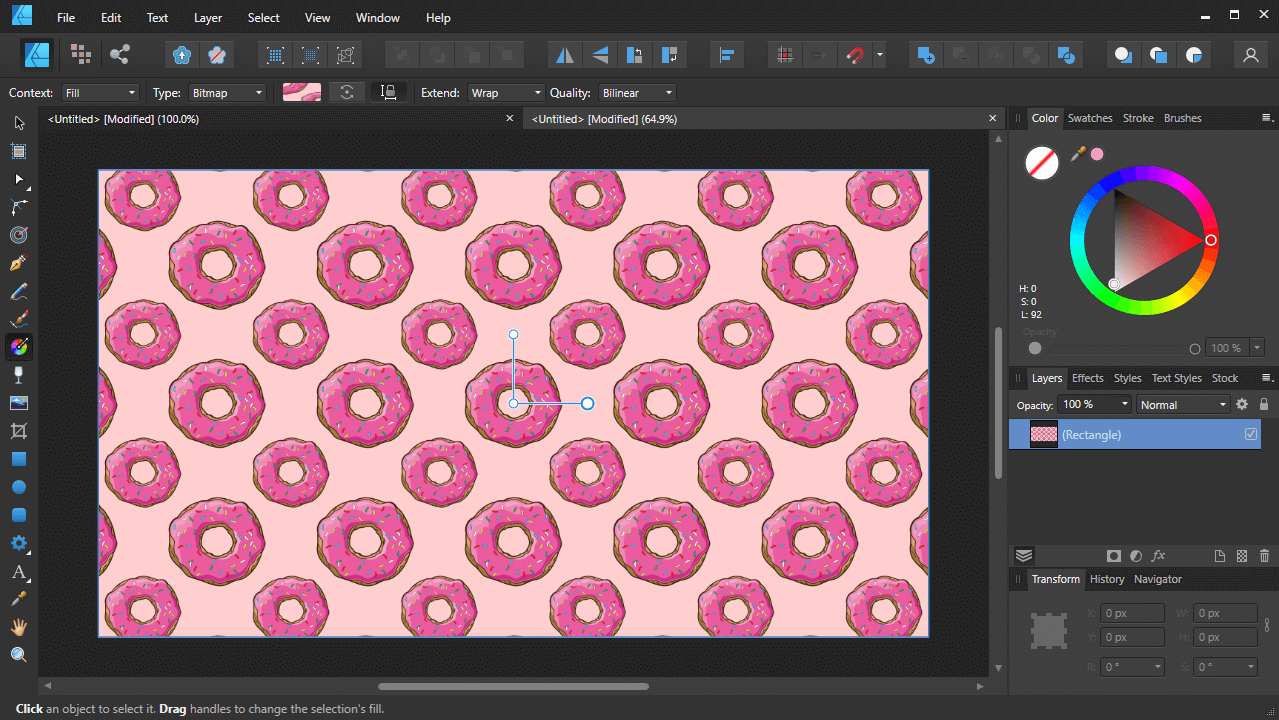
How the pattern looks once applied.
You can use this tool to see just how infinite and seamless the pattern you’ve created is.
Conclusion
Thanks to the ease of use of the Transform menu, making a repeat pattern in Affinity Designer is simply a matter of arranging a few copies of an object on a square canvas and exporting it as a JPEG. The result is a seamless, repeatable pattern that can be used for whatever you’d like!
If you have any questions or need clarification on any of the steps taken in this lesson, simply leave a comment below.
Learn To Master The SoftwareGain a complete understanding of your favorite design apps with my comprehensive collection of video courses. Each course grants access to our private community where you can ask questions and get help when needed.
|
||||||||||||||||||||||||||||||||


hi
i managed to follow with reading the steps ratherthan video,
if one wanted to print the pattern created, to know that it will seamlessly print, what would be the settings for this, at the moment i only have paper (but looking at fabric to print on) largest i can go is A3 at home,
hope that made sense ( im using windows desktop not mac if that helps) printer is a cannon pixma series