Save Multiple Artboards To A PDF In Illustrator
Save Multiple Artboards To A PDF In Illustrator https://logosbynick.com/wp-content/uploads/2021/02/multiple-artboards-pdf.png 800 470 Nick Saporito https://secure.gravatar.com/avatar/8e31bf392f0ba8850f29a1a2e833cdd020909bfd44613c7e222072c40e031c34?s=96&d=mm&r=gCreating PDF documents with multiple pages may seem baffling if you’re using design software like Illustrator, because Illustrator utilizes design spaces known as artboards rather than pages. Fortunately, this isn’t nearly as confusing as it may seem. In this tutorial I’ll be demonstrating how to save multiple artboards to a PDF in Illustrator, and I’ll also be addressing how to set the order of your artboards to determine which page numbers they will represent.
Saving multiple artboards to a PDF in Illustrator is simply a matter of opening the Artboards menu, setting the numerical order of your artboards, then saving your work in PDF format.
How To Save Multiple Artboards To A PDF In Illustrator
| To save multiple artboards to a PDF in Illustrator, open the Artboards menu to designate the numerical order of your artboards, then save your work as a PDF document. Each artboard will then be represented as individual pages in the result PDF file. |
The following steps will walk you through the process of exporting your work as a multi page PDF where each artboard is represented by its own page. For a complete walkthrough, feel free to check out the video tutorial I’ve put together:
The lesson is simple enough to follow via written format though, so if you’d rather scan through the steps in this article then carry on.
Step 1: Create Your Artboards
Before we can save our work as a multi page PDF, we first have to generate some pages. In Illustrator, those pages will be represented by artboards.
By default, you will already have an artboard present when you open a new document. It is represented by the white canvas. So create a new document and set the size to be whatever you’d like each page to be in your PDF.
For this demonstration I will be using the standard 8.5″ x 11″ document size, which is the size of your standard sheet of paper.
The default artboard will represent page 1 in the PDF that we’re going to export.
Now we need to create multiple copies of this artboard. To do this, grab the Artboards Tool (keyboard shortcut: Shift + O) select your artboard, then click and drag it while holding Alt on your keyboard to create a copy of it. If you’d like your artboards to be placed on the same vertical or horizontal plane, make sure to hold Shift as well to constrain it to that axis.
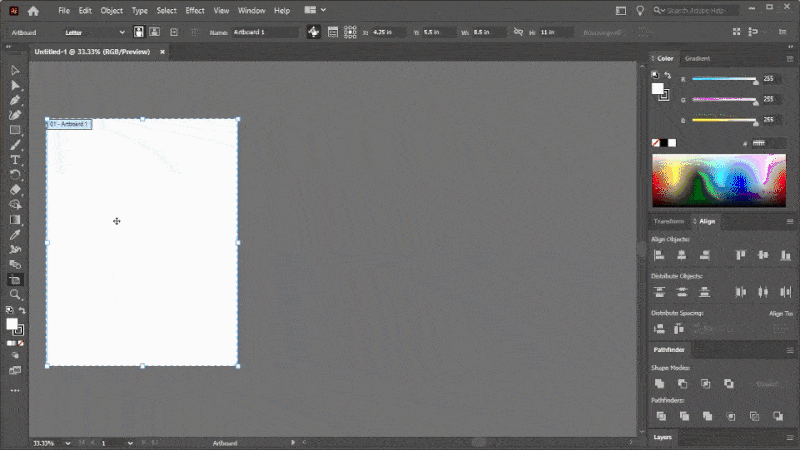
You can duplicate your artboards by clicking and dragging them, and then holding Alt on the keyboard.
Make as many copies as you’ll need for your document. For this demonstration I will be creating a 3-page PDF document, so I created 3 artboards.
If you’d like to assign the sizes of your artboards based on designs you’ve already created then I have a tutorial for that here.
Step 2: Name Your Artboards
Now we need to name our artboards. This will help us keep everything organized. By default, your duplicated artboards will be given names like “Artboard copy 1” and so on, so we’ll need to use a more universal naming system in order to keep track of everything.
To change the names of your artboards, grab the Artboards Tool, click on the artboard, then navigate to the tool settings at the top of the page. You will see an input box for the name:
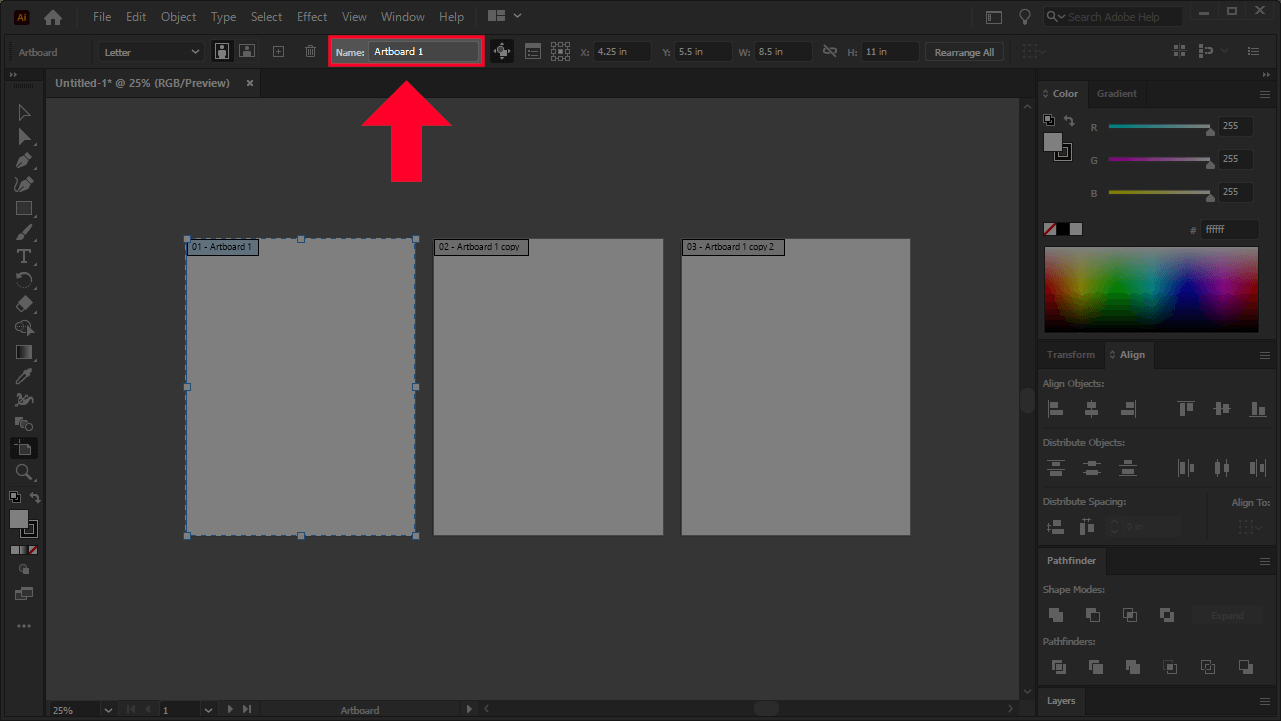
Make sure to designate a name for each artboard. This will make it easier for you to organize your pages moving forward.
If you do not see these tool settings then navigate to Window > Control to activate it.
Proceed to give all of your artboards names that make chronological sense. For this demonstration I will be naming them as follows:
- Page 1
- Page 2
- Page 3
And so on.
Step 3: Designate The Order Of Your Artboards
Whenever you save multiple artboards to a PDF with Illustrator, the order of the pages are determined by the order in which you created the artboards. So page 1 would be the default artboard you get when you create a new document, then page 2 would be the first duplicate you created of the artboard, and so on.
To see the chronological order of your artboards, open the Artboards menu by navigating to Window > Artboards.
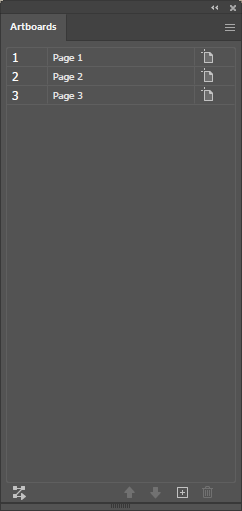
The Artboards menu allows you to designate the order of the pages in the PDF you’ll be exporting.
As you can see, the name of the artboard is indicated on the right, and their numerical positions are indicated on the left. You can change the order of your artboards by selecting them and using the arrow buttons located at the bottom of the menu.
The chronological order of this list will represent the order of your pages in the PDF document you export. So make sure that your pages are in the order you’d like.
You can also locate the order of a given artboard by checking the label in its top-left corner:
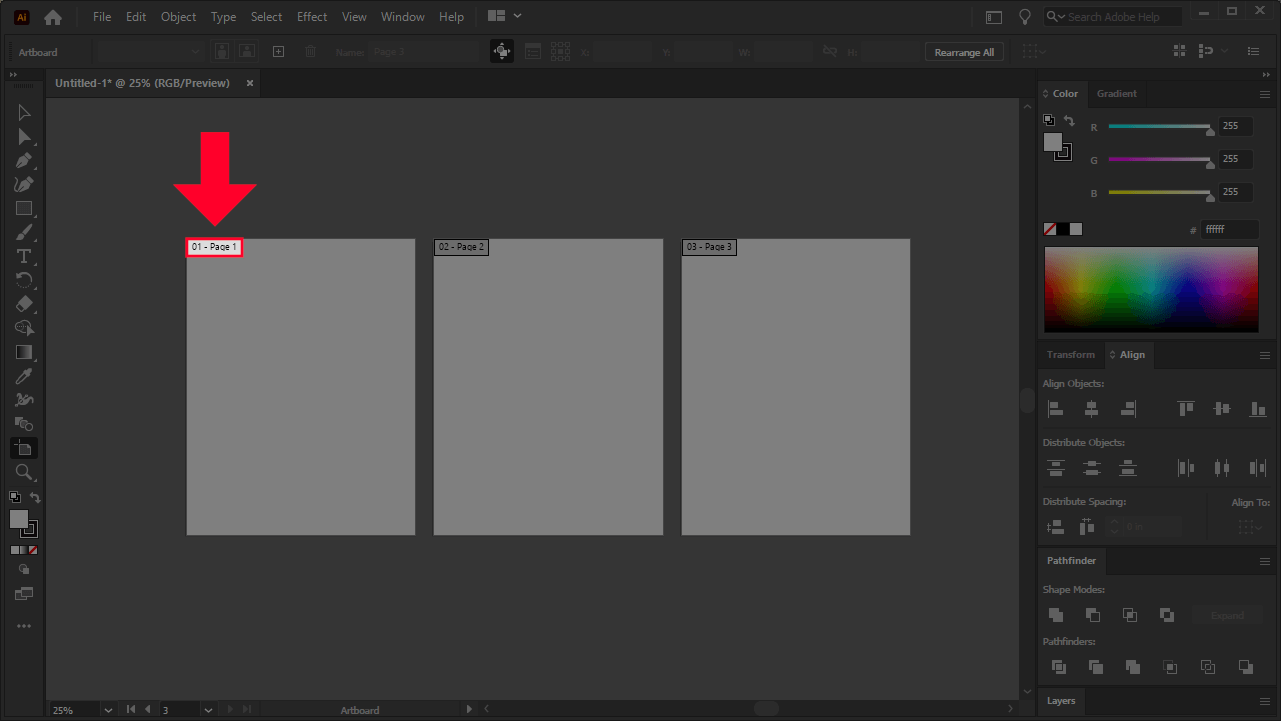
Make sure you have the Artboards Tool selected if you want to view these labels.
The label contains the order of that particular artboard to the left, and its name to the right.
Step 4: Save Your Work
Once you’re finished arranging the pages of your document and dictating the order they should be in, all you have to do now is save your work as a PDF document.
To do this, navigate to File > Save As and choose Adobe PDF from the dropdown menu.
Now locate your PDF file on your hard drive and open it up to inspect it. It should be comprised of a series of pages represented by each artboard in the order you placed them in.
Conclusion
Knowing how to save multiple artboards to a PDF in Illustrator will allow you to create your own brochures, guides, manuals, ebooks, and more, with ease. Unlike other applications, Illustrator makes it quite easy to create a multi page PDF document. Unfortunately this isn’t so simple with other vector applications, namely Inkscape.
If you have any questions, or if any part of these instructions were unclear, simply leave a comment below. Thanks for visiting!
Learn To Master The SoftwareGain a complete understanding of your favorite design apps with my comprehensive collection of video courses. Each course grants access to our private community where you can ask questions and get help when needed.
|
||||||||||||||||||||||||||||||||


Is there any tutorials for Ipad user?
For this tutorial I only have the desktop lesson.
Thanks nick, this was helpful
Thank you for this! Really helpful!