How To Make Brushes In Affinity Designer
How To Make Brushes In Affinity Designer https://logosbynick.com/wp-content/uploads/2021/02/make-brushes-affinity-designer.png 800 470 Nick Saporito https://secure.gravatar.com/avatar/8e31bf392f0ba8850f29a1a2e833cdd020909bfd44613c7e222072c40e031c34?s=96&d=mm&r=gOne of the many features in Affinity Designer that makes it such a powerful tool for vector design is having this ability to work with brushes. This is a feature that is mostly utilized in raster environments like Photoshop or GIMP, but that doesn’t mean that brushes don’t have a place in a vector application. In this tutorial I’ll be demonstrating how you can make brushes in Affinity Designer based on your own designs and custom shapes. Knowing how to do this will allow you to explore your creativity and come up with interesting, unique designs of your own.
In short, vector brushes in Affinity Designer are simply PNG images stretched along a path. So what we’ll essentially be doing is creating a design, exporting it as a PNG image, then importing it back into the software to utilize it as a brush.
Make Brushes In Affinity Designer
| To make brushes in Affinity Designer, export your design as PNG image, then open up the Brushes tab, click the menu icon, select “New textured image brush,” and choose your saved PNG image when prompted. |
The following steps will walk your through the process of creating your own custom brushes in Affinity Designer. For a more immersive learning experience, it is recommended that you watch the video tutorial that I’ve put together:
The video will guide you through some of the more complicated steps that may be difficult to learn through written format. However, if you’d like to give the written tutorial a try then continue on.
Contents
Step 1: Create A Design For Your Brush
In order to make brushes in Affinity Designer we first need an object, design, or sketch to make into a brush. This can be anything, including:
- Vector objects
- Text objects
- Raster images
- Groups of objects
- Clipping paths
- & more
Virtually anything can be used as a brush in Affinity Designer, but for this demonstration I’ll be opening up the Pixel Persona and creating a rudimentary scribble:
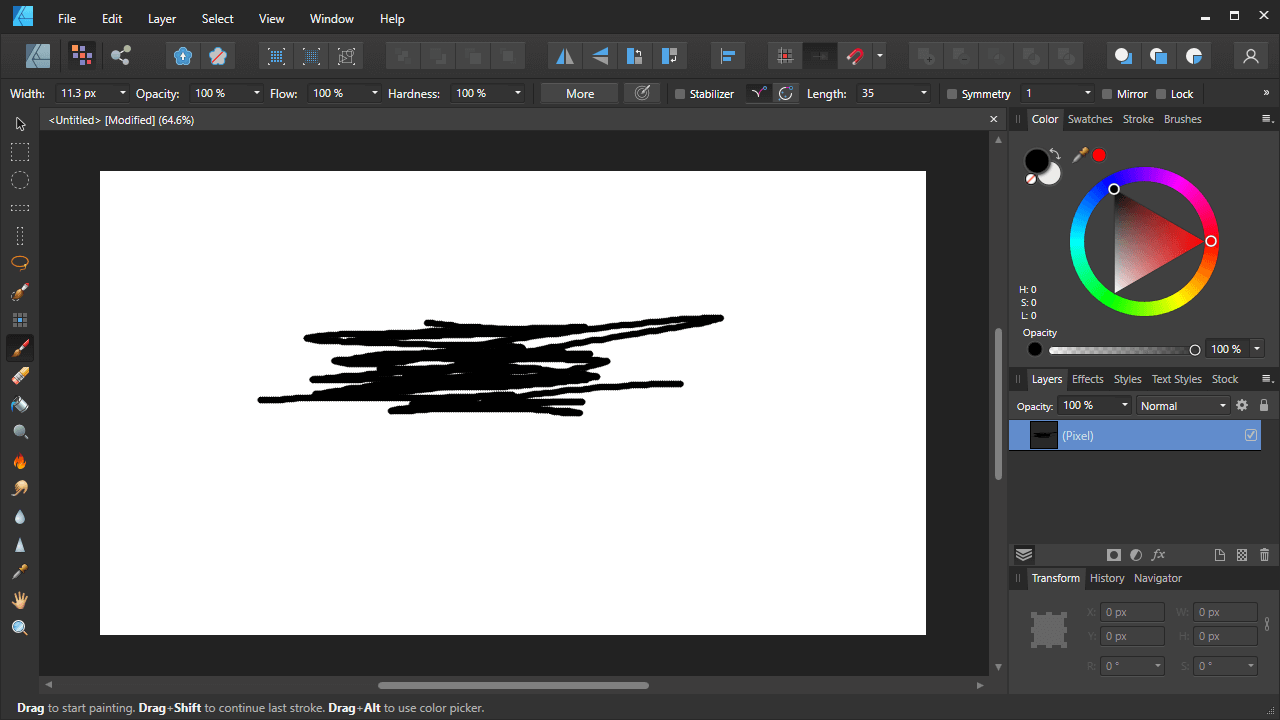
This rudimentary scribble will make for a nice brush stroke once converted.
You don’t necessarily need to do the same. You can use whatever object you’d like.
If you’d like to follow along with what I’m doing then make sure to check out the video tutorial above in which I walk you through the process of using the Pixel Persona to create this scribble.
Step 2: Export Your Design As A PNG
Once you have some kind of object in place that you’d like to make into a brush, the next step is to export it as a PNG image. If you want to make brushes in Affinity Designer using your own designs then they will have to be in PNG format. It won’t work with any other file type.
Open up the Export Persona, open the Layers tab, select the layer that you object is located on, then click the button at the bottom of the menu labeled Create Slice.
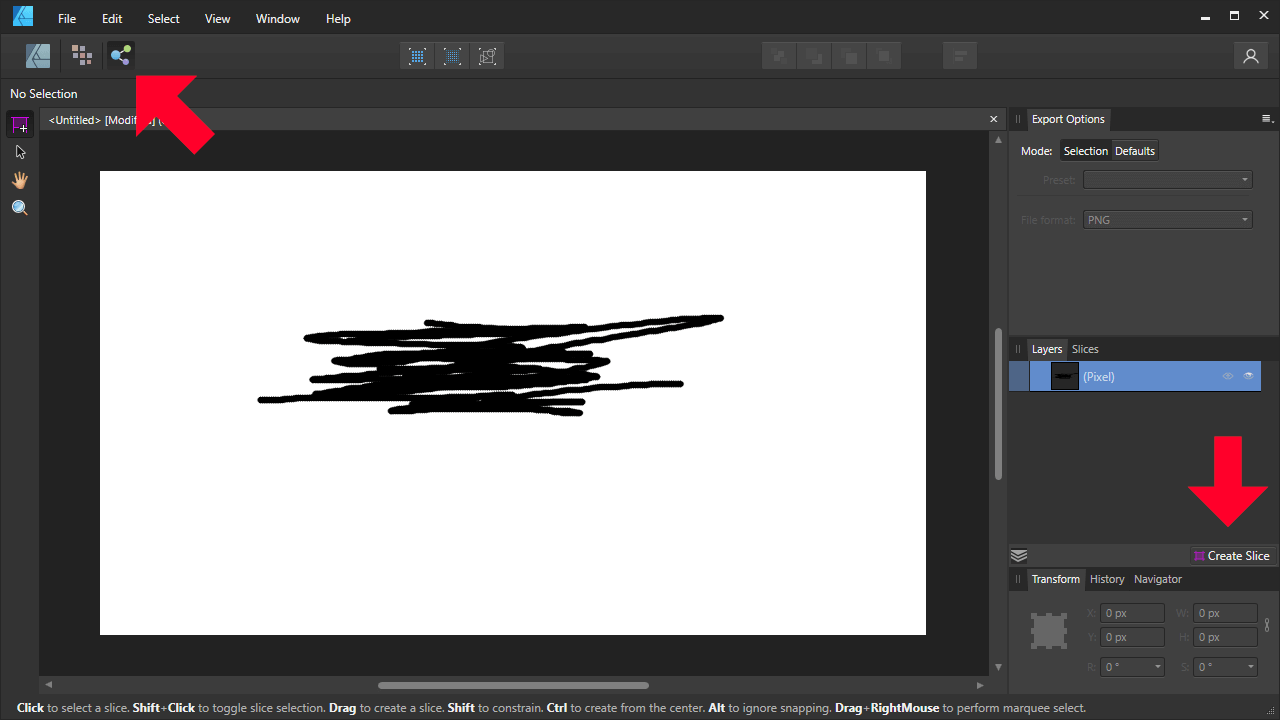
The Export Persona can be accessed using the icon at the top of the screen that looks like a share button. The Layers menu is located on the bottom-right of the screen.
A light blue box should appear around your object, indicating that you have created a slice that can be used for exporting.
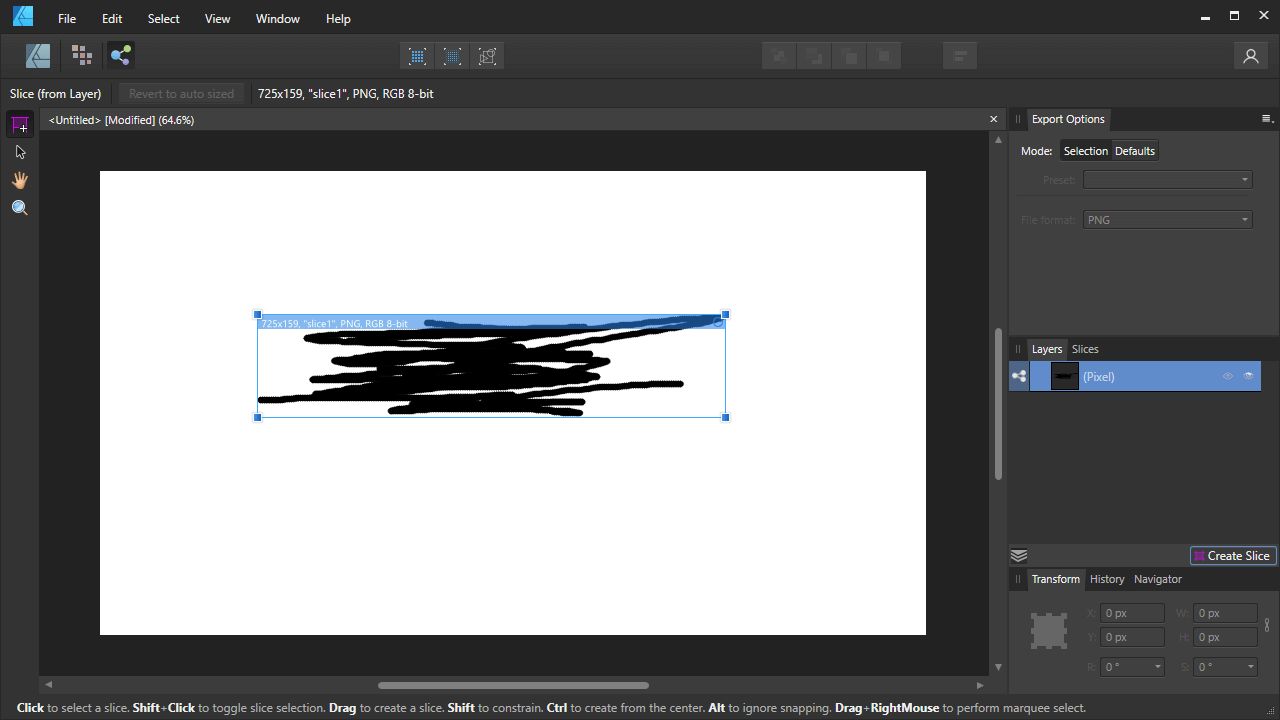
Creating a slice from a layer will allow you to export the contents of that layer.
Now click on the Slices tab, located next to the Layers tab, and expand the menu associated with your newly-created slice:
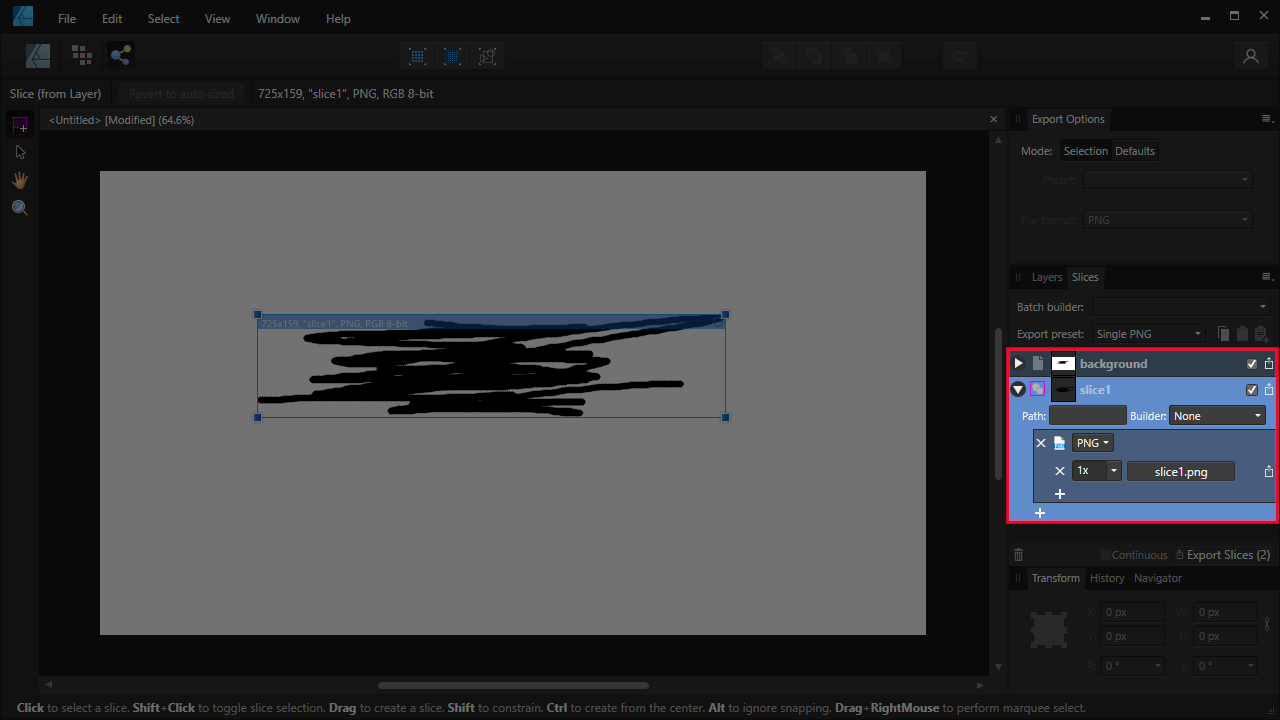
The Slices menu will allow you to designate the properties of your exported image, including file type, size, location, file name, and more.
In the menu, make sure you have the following presets:
- PNG as the file type
- 1x as the size
Now click the little white icon located to the right of the slice name. You will be prompted to choose a location on your hard drive to export your slice to, and you’ll also be able to name the file as well.
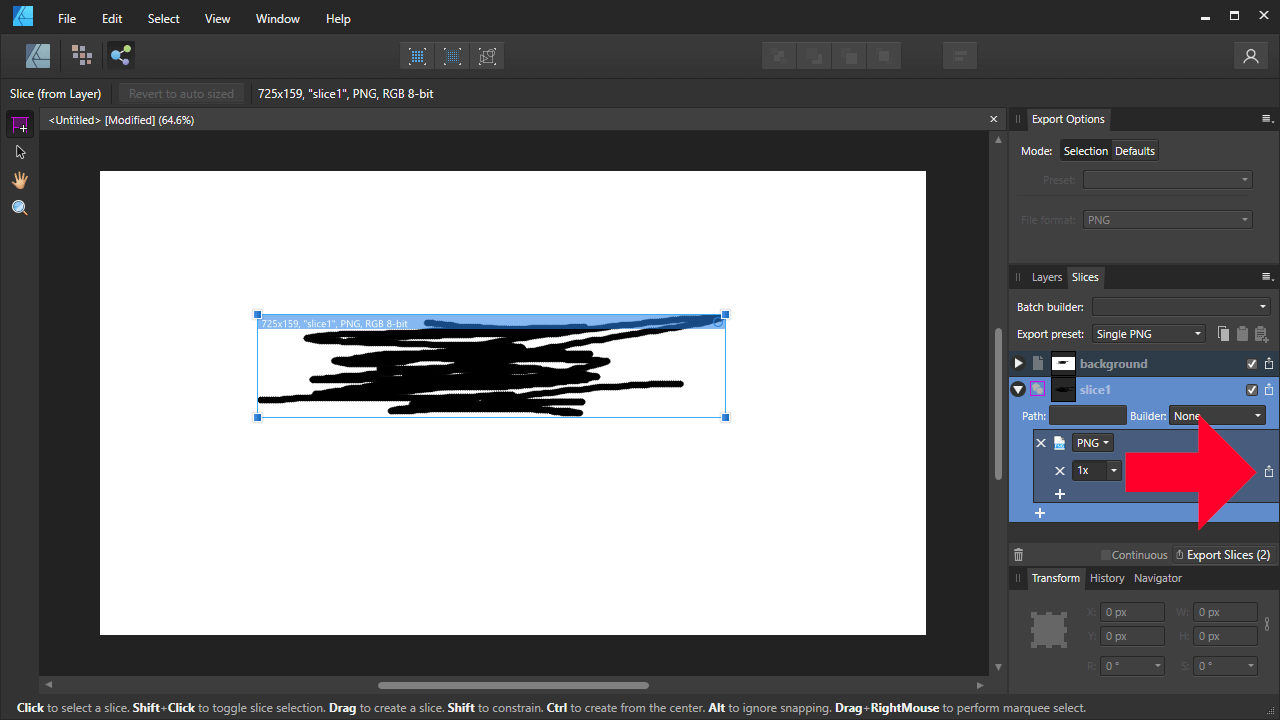
The Export button is a tiny white icon located next to the export properties. Click the image to enlarge.
Once saved, your object/slice should be accessible on your hard drive as a PNG image.
Step 3: Import Your PNG As A Textured Brush
Now it’s time to add a new textured brush using your PNG image, allowing you to make brushes in Affinity Designer with your own designs.
To do this, navigate back to the Designer Persona and locate the Brushes tab in the top-right of your screen. You will see an index of brushes to choose from:
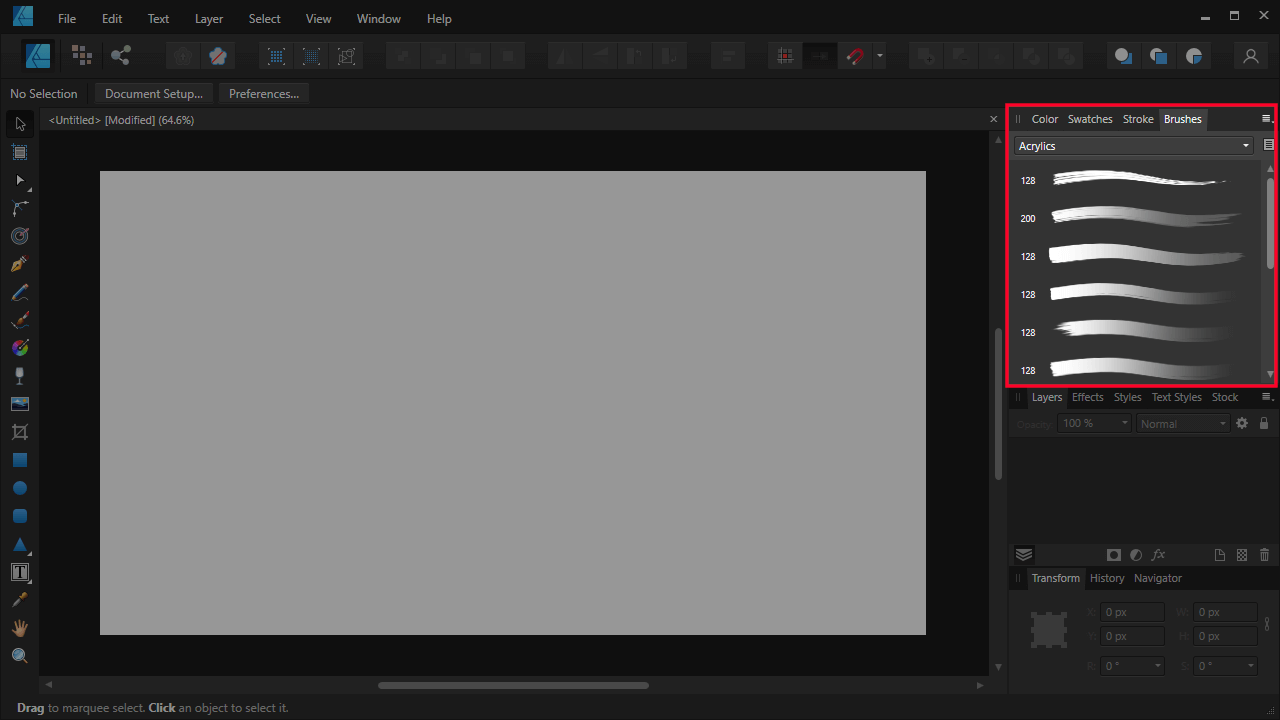
Each brush is indexed under its own category. You can choose to place your own brush in any category you’d like, or you can create a new category for custom brushes, which be ideal for organizational purposes.
Click the little menu icon to the right of the Brushes tab and select New Textured Image Brush.
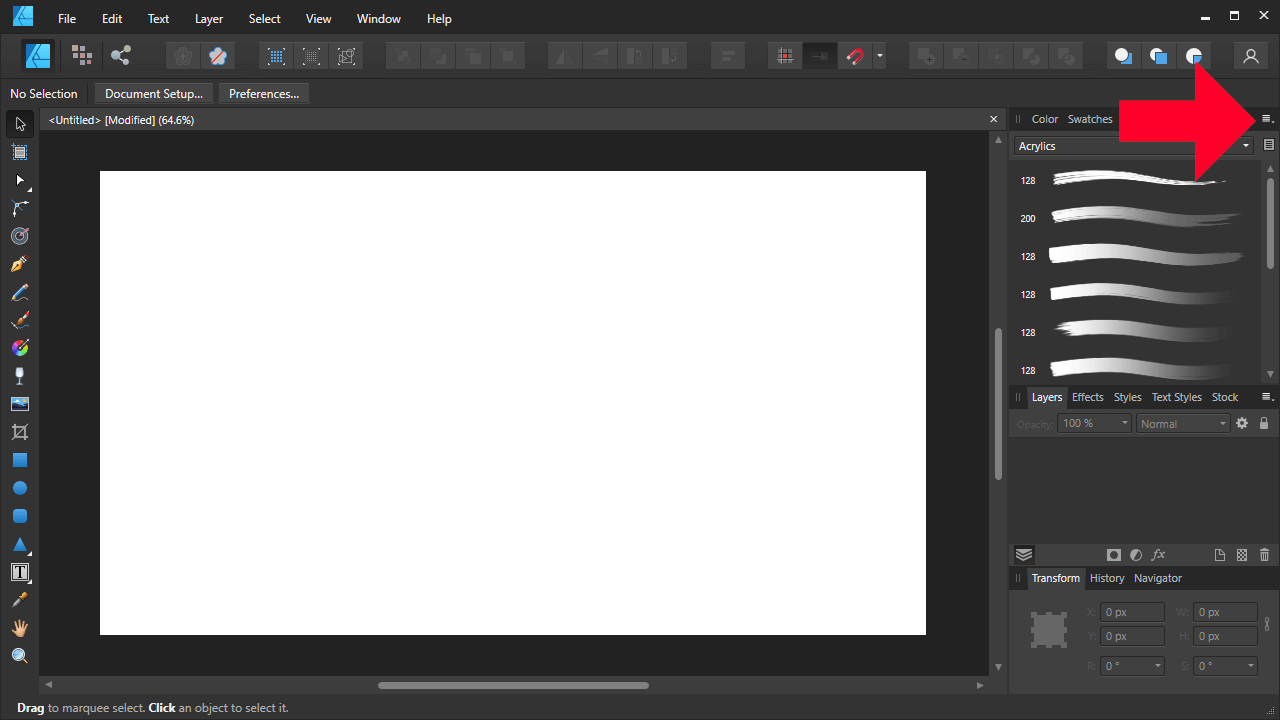
Add a new textured image brush by clicking on the little hamburger menu to the right of the Brushes tab, then selecting it from the list.
Brush Types
The reason why we’re choosing textured image brush instead of textured intensity brush is because the image brush is what allows us to use the shape that we’ve created as a brush.
According to Affinity’s documentation, intensity brushes:
Creates a brush stroke based on the opacity values of a raster image.
However, image brushes:
Creates a brush stroke based on the color values of a raster image.
Or in other words, intensity brushes are used when you want to create a brush based on an image, whereas image brushes are used when you want to create a brush based on a shape.
Once selected, your imported PNG will now be usable as a brush:
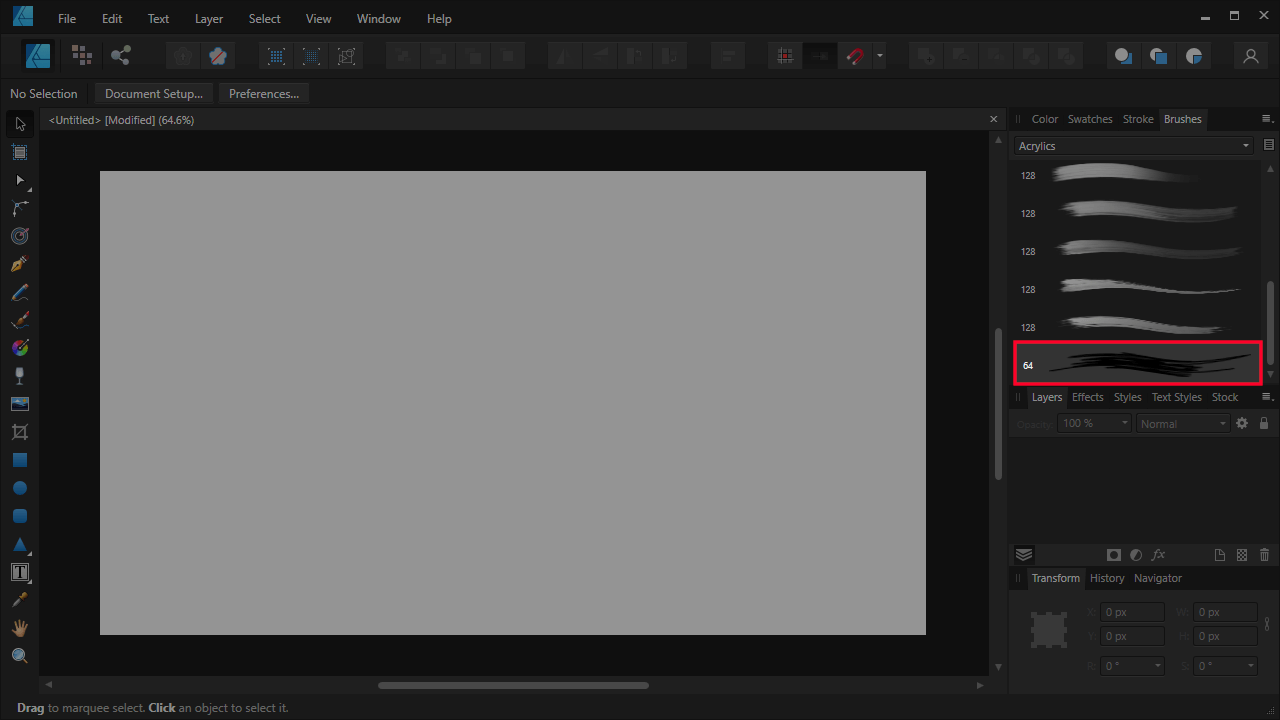
Your newly added brush will populate in the Brushes menu.
Using Your Custom Brush
Now that you know how to make brushes in Affinity Designer, let’s go over how to utilize them.
Grab the Vector Brush Tool (keyboard shortcut: B) and select your custom made brush from the Brushes tab. You should be able to paint on the canvas with it:
Click and drag on the canvas to create a brush stroke using your custom brush.
A vector path will be created following your hand motion. You can edit this path further using the Nodes Tool (keyboard shortcut: A)

The brush stroke will follow a path, which can be altered using the Nodes Tool.
Adjusting Your Brush
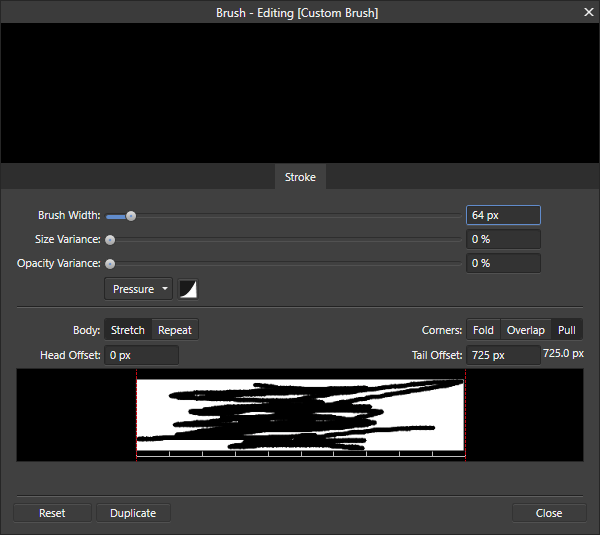
You can edit the properties of your custom brush by simply double-clicking it, which will open the brush editor:
Refer to the video tutorial at the beginning of the lesson to see how all of these settings affect your brush strokes.
The brush editor allow you to make various alterations to the behavior of your brush, including:
- Brush Width: This controls the size/thickness of the brush stroke.
- Size Variance: Allows you to make it so that your brush thins out to a point near the end of the brush stroke.
- Opacity Variance: Can make it so that your brush transitions to transparency towards the end of the brush stroke.
- Body: Choosing Stretch (default) will make it so that your PNG image stretches the length of your brush stroke. Choosing Repeat will make it so that the PNG image is repeated multiple times along the path.
The preview box at the bottom of the menu with red lines on each side represent the start and end point of the brush. Moving the lines inward will make it so that only a potion of the brush is used.
It is recommended that you watch the video tutorial at the beginning of the post for a thorough demonstration of how all of these settings work.
Changing The Color Of A Textured Image Brush
Although the textured image brush allows us to make brushes in Affinity Designer based on a custom shape, it’s not without its downsides.
Unfortunately, you cannot change the color of a textured image brush. Therefore, the color you export the PNG image in will be the color that the brush strokes output as. However, there is a workaround which will allow you to change the brush’s color.
To change the color of a textured image brush, simply add an adjustment layer by navigating to: Layer > New Adjustment > Recolor.
This will add an adjustment layer that allows you to change the color of your brush strokes:
You can change the color of your brush strokes by adding an adjustment layer.
Conclusion
Knowing how to make brushes in Affinity Designer is a useful skillset to have, especially if you plan on doing any kind of detailed sketches or illustrations. Although this feature leaves a lot to be desired (complete vectorization and simplified color controls, for example) it’s still acceptable and welcomed, and it’s a refreshing change of pace when compared to other vector graphics applications (like Inkscape) which don’t have a brush feature at all and require workarounds.
Despite the barebones restrictiveness of working with custom brushes, there’s an abundance of stock brushes that come with Affinity Designer that can be even more useful and are worth exploring, so considering playing around with them a bit.
If you have any questions or if any part of these instructions were unclear, simply leave a comment below. Thanks for visiting!
Learn To Master The SoftwareGain a complete understanding of your favorite design apps with my comprehensive collection of video courses. Each course grants access to our private community where you can ask questions and get help when needed.
|
||||||||||||||||||||||||||||||||


How would I make a chisel brush?
Short and sweet. Thanks Nick for clear instructions on creating a custom image brush.
Awesome. Thank Nick for the color workaround.