How To Resize Images with Affinity Designer
How To Resize Images with Affinity Designer https://logosbynick.com/wp-content/uploads/2021/05/resize-images-with-affinity-designer.png 800 470 Nick Saporito https://secure.gravatar.com/avatar/8e31bf392f0ba8850f29a1a2e833cdd020909bfd44613c7e222072c40e031c34?s=96&d=mm&r=gAffinity Designer is one of the most versatile design applications in existence. Not only does it handle vectors as well as its industry-standard adversary, but it also has an entire suite of tools meant for editing photos and images. Today’s tutorial will be a demonstration of such. We’ll be going over how to resize images with Affinity Designer, and then export them in any format you’d like, at their new size.
In order to resize images with Affinity Designer we’ll need to work with two tools — the Move Tool for the resizing, and then the Artboards Tool to change the size of the document to match the resized image. Then, we’ll be using the Export Persona to export the resize image in your desired file formats.
This tutorial would be an excellent lesson to follow along with if you’re a beginner. It makes for a nice introduction to some of these essential tools.
Resize Images with Affinity Designer
The following video tutorial will walk you through the process of resizing your images, resizing the artboard to match the resized image, and then exporting your work:
Continue on for the written instructions.
Table of Contents |
Step 1: Open your image with Affinity Designer
To get us started, we must first open our image in Affinity Designer. To do this, navigate to File > Open and locate the image you’d like to resize on your hard drive.
For this demonstration I will be resizing the following example image:
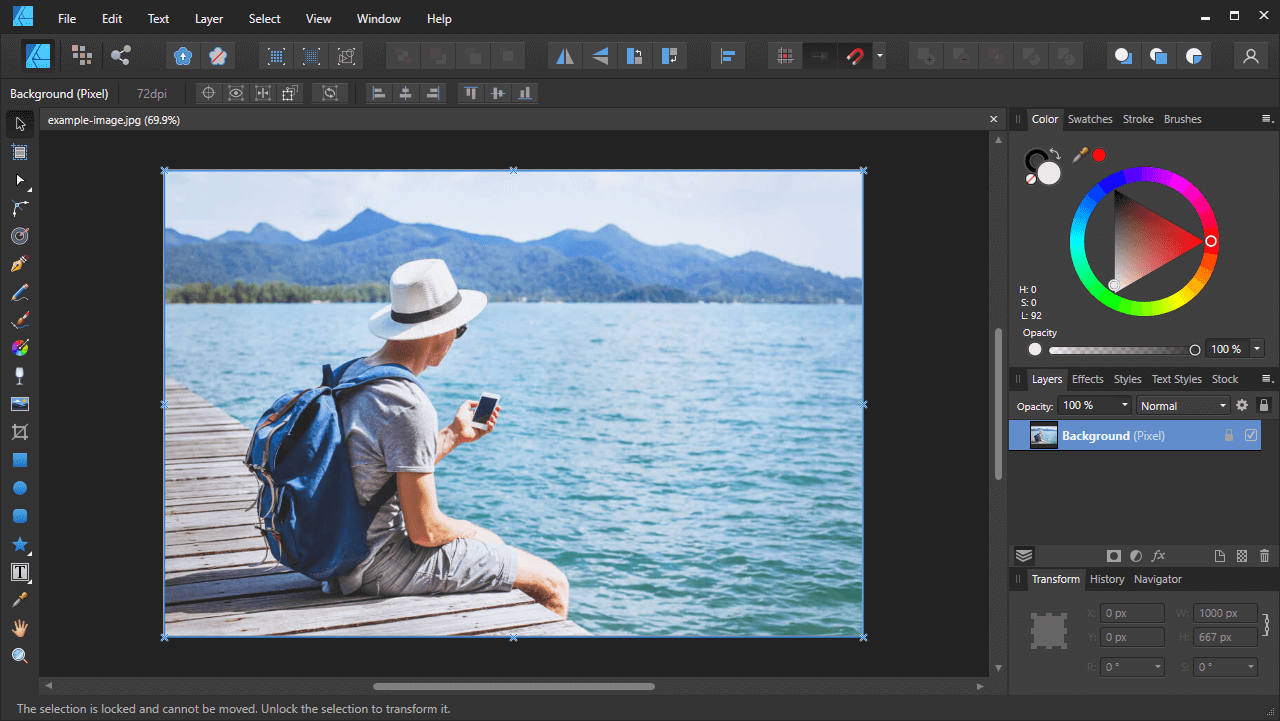
It is recommended that you open your image as a new document, using the Open prompt, as suggested above. Do not import your image into an already existing document, otherwise this tutorial might not work as expected.
Step 2: Resize your image using the Move Tool
Once we’ve opened our image, we’ll be using the Move Tool to resize it. However, we must unlock the layer in order to do so.
Click the little lock icon next to your image layer’s name in the Layers menu:
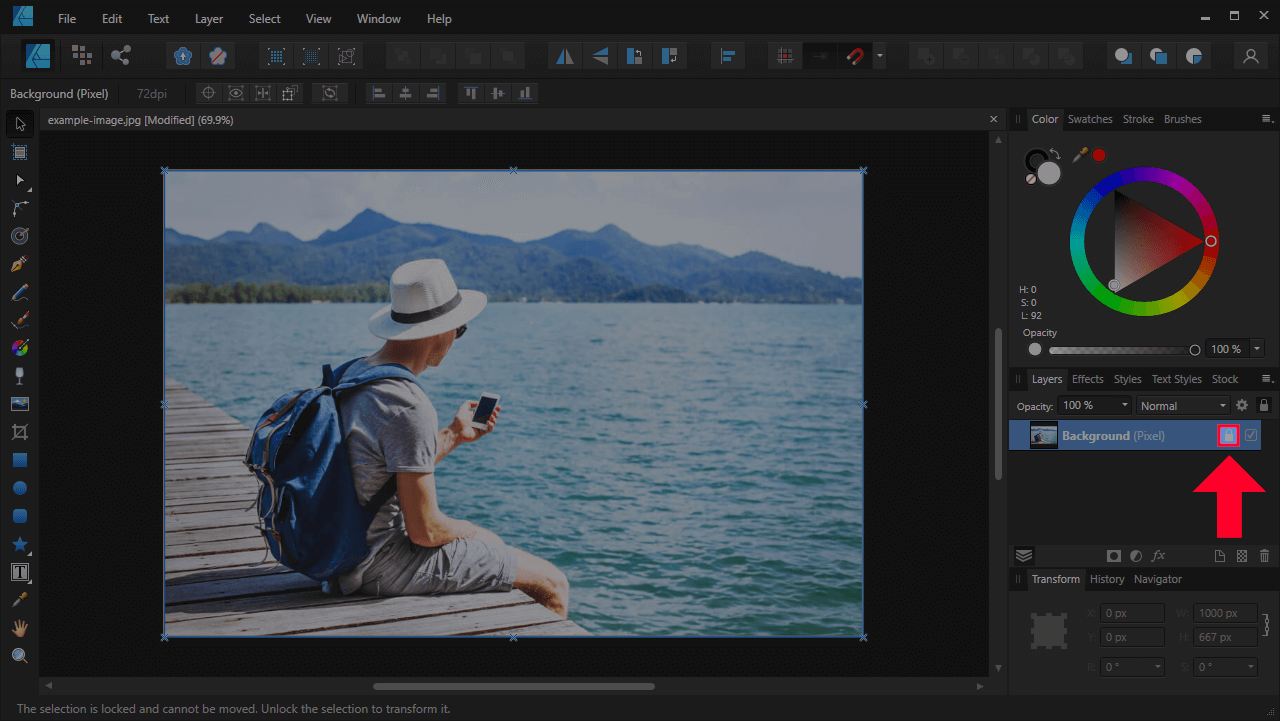
Your layer must be unlocked before you’ll be able to resize it.
Once the layer is unlocked, you should notice round handles in the corners of your image. To resize an image with Affinity Designer all you have to do is grab one of those handles to scale it up or down:
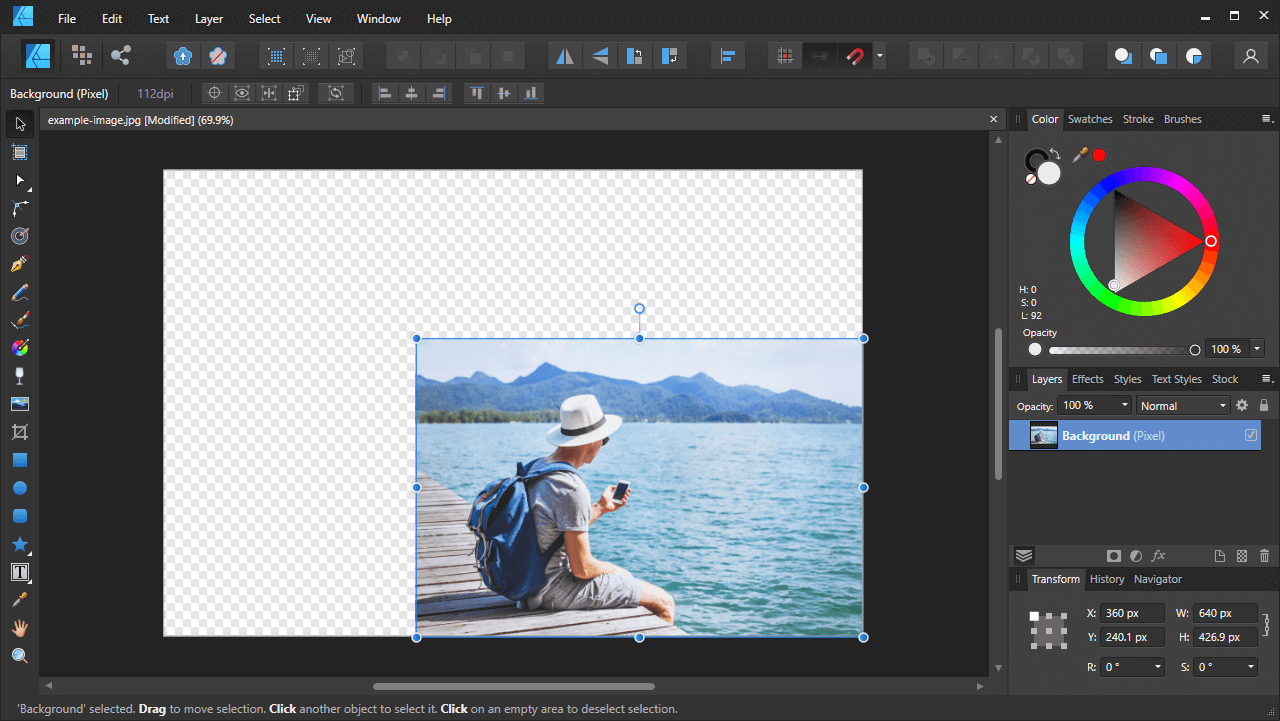
After resizing your image, you’ll notice a checkerboard pattern in the space that the original image occupied.
By default, your image will scale with the aspect ratio locked in place. This ensures that you do not distort your image. If you’d like to distort the image, simply hold the Shift key while scaling.
If you’d like to resize your image based on a specific numerical value, you can do so using the Transform menu, which is located at the bottom-right corner of your screen:

The Transform menu is located in the bottom-right corner of the screen, and it allows you to resize an image based on a specific numerical value.
The W value represents the width of the image and the H value represent its height. Make sure to enable the Lock Aspect Ratio icon to the right if you’d like to ensure that your image is not distorted as it is resized. If you’d like to distort your image then leave it disabled.
Step 3: Change the size of your artboard to match the resized image
Once you’re finished resizing your image, you’ll have to change the size of the canvas (or “artboard” as it’s called) to accommodate the newly-resized image. Although you may have scaled down your image, the document boundaries are still set to the original image’s dimensions.
To do this, we’ll be using the Artboards Tool, which can be accessed just below the Move Tool in the tools menu. Before grabbing the Artboards Tool though, make sure that you still have your image selected.
Once selected, look towards the top of the screen where the tool options menu is. Change the Size dropdown menu to Selection and then click the Insert Artboard button:
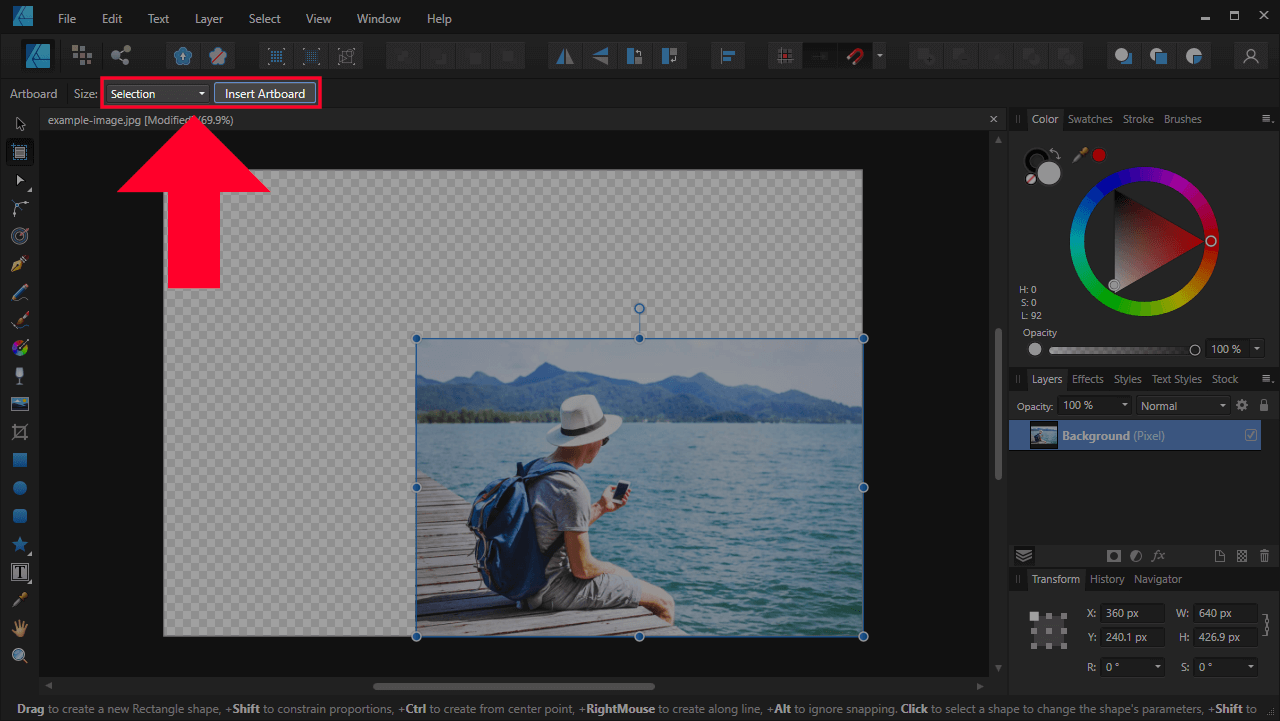
This will get rid of the old page border and apply a new canvas that is sized based on the dimensions of your newly-resized image:
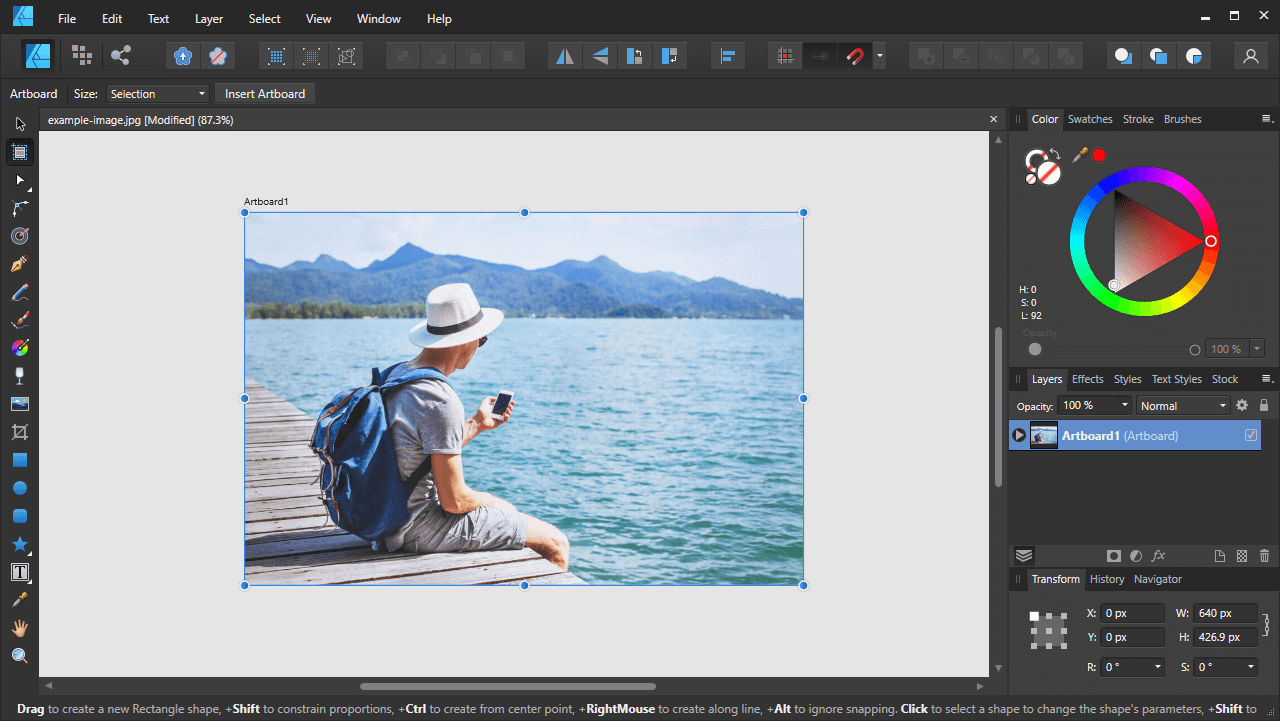
By default, your new artboard will be titled “Artboard 1”.
Step 4: Export your resized image using the Export Persona
There’s no point to resizing images with Affinity Designer if they only exist in Affinity Designer. Chances are, you’ll want to use your newly-resized image elsewhere, meaning we’ll have to export our work in a usable file format.
First, change the name of your layer from “Artboard 1” to whatever you’d like the saved file name to be. This can be done by clicking on the layer name:
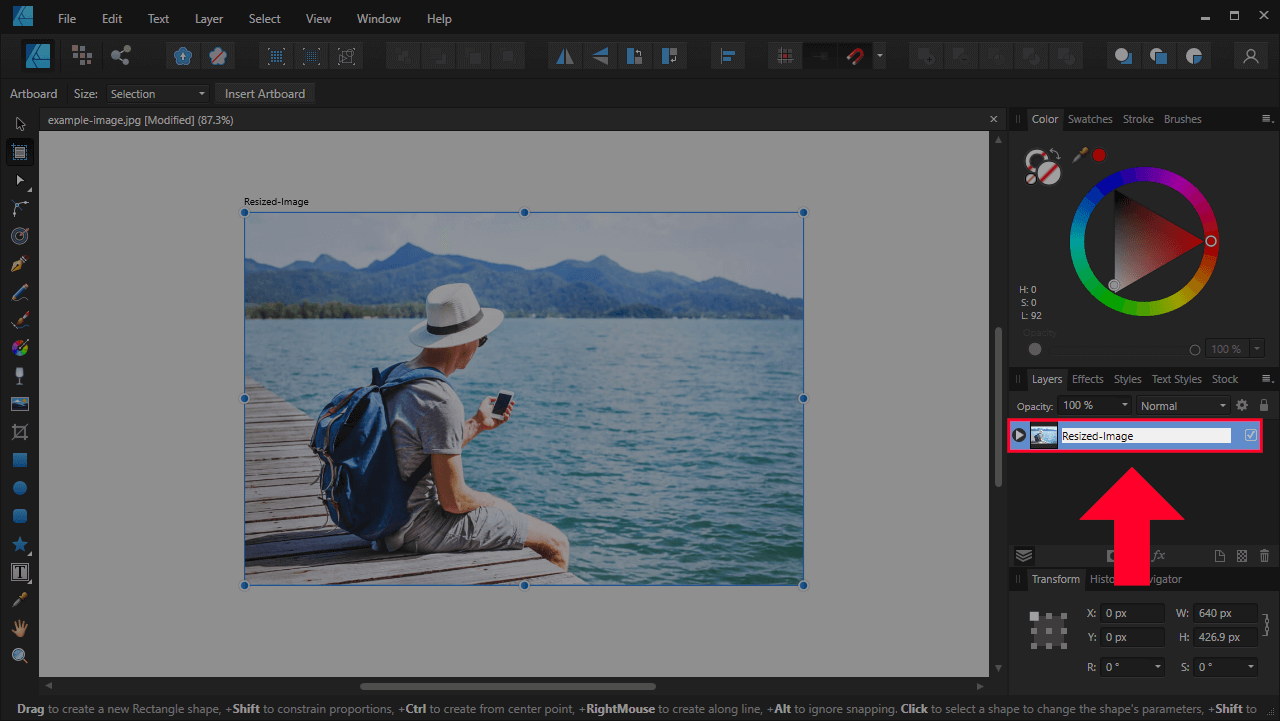
The name of the layer will dictate the name of the exported file.
For this demonstration, I will be naming my resized image “Resized-Image” (clever, I know.)
Now we can export the image using the Export Persona. To access it, navigate to File > Personas > Export.
Look for the Slices menu on the right-hand side of your screen, where the Layers menu typically is. Select the slice labeled with your chosen file name, then click the little arrow next to it to expand the menu:
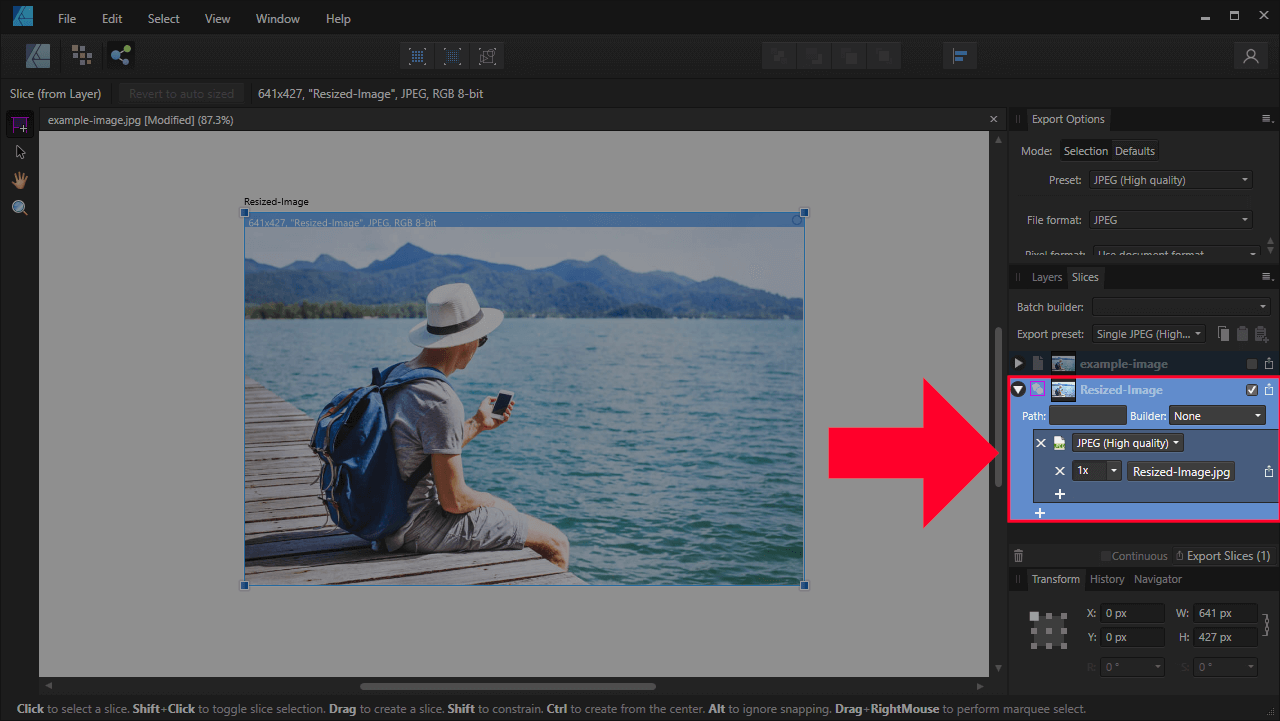
Make sure to export at 1x, as depicted above. Otherwise your resized image will export at a different size than what you set it as.
From here, you can choose the file type you’d like to export your resized image as. By default, the image’s original file format will be chosen. In my example it would be JPEG format, so that’s what I’ll be exporting it as.
All you have to do now is press the Export Slices button at the bottom of the menu and you will be prompted to choose a location on your hard drive to save your image.
Once chosen, you are finished! Navigate to the location to ensure that your image is there, and that’s it. That is how you can resize images with Affinity Designer.
Conclusion
This tutorial is barely scratching the surface of what Affinity Designer is capable of when it comes to editing images. Not only can you resize images with Affinity Designer, but you can also crop images, delete white backgrounds, and more. Check out the plethora of tutorials I have on this channel to learn more about what this powerful application can do.
If you have any questions or need clarification for any of the steps in this tutorial, simply leave a comment below.
Learn To Master The SoftwareGain a complete understanding of your favorite design apps with my comprehensive collection of video courses. Each course grants access to our private community where you can ask questions and get help when needed.
|
||||||||||||||||||||||||||||||||


What is the best format and size for saving/exporting a logo design with text for printing large, and other advertising purposes?
The best practice is to save it in vector format (svg, ai, pdf) so it can be scaled to any size needed when being placed on a large item you’re designing.
After typing the text and clicking onto corner to enable type to be resized all I get is a drop down and no ability to alter size or shape.
Are you trying this with the select tool? I don’t think it works like that with the regular text tool.
Hi Nick. Forgive me ahead of time for being long winded, and thank you in advance for your time. You’re a lifesaver. I’m new not only to Affinity Designer, but to any sort of design software. Talk about a learning curve! This article was the only one I found online that I could make sense of. I make art the old fashioned way but of course need to be able to digitize it once it’s done. I got AD in order to adjust pixels and dpi once I’ve scanned or photographed my work. (That may be the only thing I will ever do with the software.)
So I was able to follow your article to change the pixels based on a specific numerical value using the Transform menu, change the size of the artboard afterwards, and export the resized image using the Export Persona.
Now I need to change the dpi. I found that I could do that under File/Document Set Up, but that is nothing like Affinity’s instructions copied below. Is the method I used going to work for changing an image to web resolution (72 dpi, 1000 pixels on the long side)? What about for changing to 300 dpi, 2500 pixels long side for a virtual gallery? And finally, for printing?
AFFINITY’S INSTRUCTIONS (which I couldn’t follow because I couldn’t find the document menu in order to select Resize Document. Nor could I find the Resample Option in order to switch that off. If I need to do things according to these instructions, can you tell me where to find those things?):
“To scale an image:
From the Document menu, select Resize Document.
Ensure the Resample option is switched off.
Change the DPI to control the number of pixels (dots) which will be printed per inch when your document is printed. Set higher values (e.g., 300dpi) for professional printing.
Click Resize.
You will see no change in the image on the page as this procedure only affects the image’s metadata.”
Yours truly, Gail
Hi Gail, try grabbing the Move Tool, and then there should be a button that says “Document Setup” in the tool bar towards the top of the screen. The DPI settings will be in there.
Grabbed Move Tool, clicked “Document Setup” changed DPI, clicked ok.
Again reading the instructions copied below: I found Resample defaulted to Bilinear but with no option to disable it, nor did I find the word “Resize” anywhere. I do find “Objects will: Rescale / Anchor,” where I can select one or the other. I left it at the default, “Rescale.”
“To scale an image:
From the Document menu, select Resize Document.
Ensure the Resample option is switched off.
Change the DPI to control the number of pixels (dots) which will be printed per inch when your document is printed. Set higher values (e.g., 300dpi) for professional printing.
Click Resize.
You will see no change in the image on the page as this procedure only affects the image’s metadata.”
Thank you again, Gail
Hi @LogosByNick! Thanks for the video. However, I have a challenge whereby after resizing my image, it becomes blurry after exporting it. I wan to use it on a book cover but this is blocking me from using the image because every time I resize and export it, it looks blurry, not sure why. Any ideas?
What format are you exporting it as? And what are the DPI settings?
Thank you! I really enjoy your tutorials — always clear and to the point!
Two questions, if I may. One related to this tutorial and one that isn’t:
1. Why is it better to use Export Persona instead of just exporting from Designer Persona (DP)? Jpeg is an option in DP.
2. In Affinity Designer, is there a way of cropping images in bulk and then exporting them in bulk? For ex., I create transparent designs in 4500 x 5400, with the design near the top (not centered vertically). I export those and I also want to reuse them elsewhere. But I not only need to change the dimensions to 3000 x 3500, I also need to crop any empty space at the bottom of the original design so that it is now more or less centered vertically.
If that’s not possible on AD, do you know if it’s possible to do using different software or website?
Thanks again! All the best.
Hi Diana, thanks for the feedback. Addressing your questions:
1.) The Export Persona provides more options to choose from. For example, you can export in various different formats at once.
2.) As far as I know, something like that doesn’t exist.