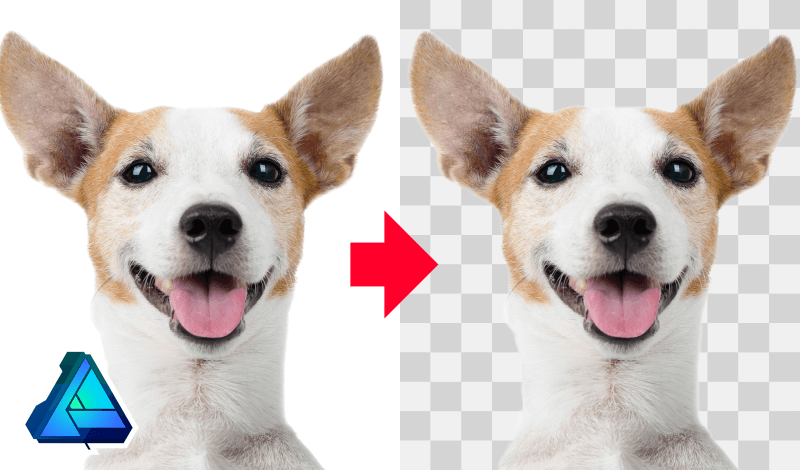
How To Remove A White Background with Affinity Designer
How To Remove A White Background with Affinity Designer https://logosbynick.com/wp-content/uploads/2020/12/remove-white-background-with-affinity-designer-1.png 800 470 Nick Saporito https://secure.gravatar.com/avatar/8e31bf392f0ba8850f29a1a2e833cdd020909bfd44613c7e222072c40e031c34?s=96&d=mm&r=gIn this tutorial I’ll be demonstrating how you can easily remove a white background with Affinity Designer. Considering that Affinity Designer is a vector-based application, you would naturally assume that it wouldn’t be the best tool for removing backgrounds from photos. However, Designer comes equipped with a powerful pixel editor that allows you to make basic edits to photos, one of which would be the Selection Brush Tool, which we’ll be using for this tutorial.
Remove A White Background with Affinity Designer
The following is an outline of the steps taken to remove a white background with Affinity Designer. For a more thorough learning experience, consider watching the video tutorial below:
Step 1: Open Your Photo
The first step is to open the photo you’d like to remove the background from.
To do this, navigate to File > Open and locate the image on your hard drive.
For this tutorial I’ll be using the following example photo:
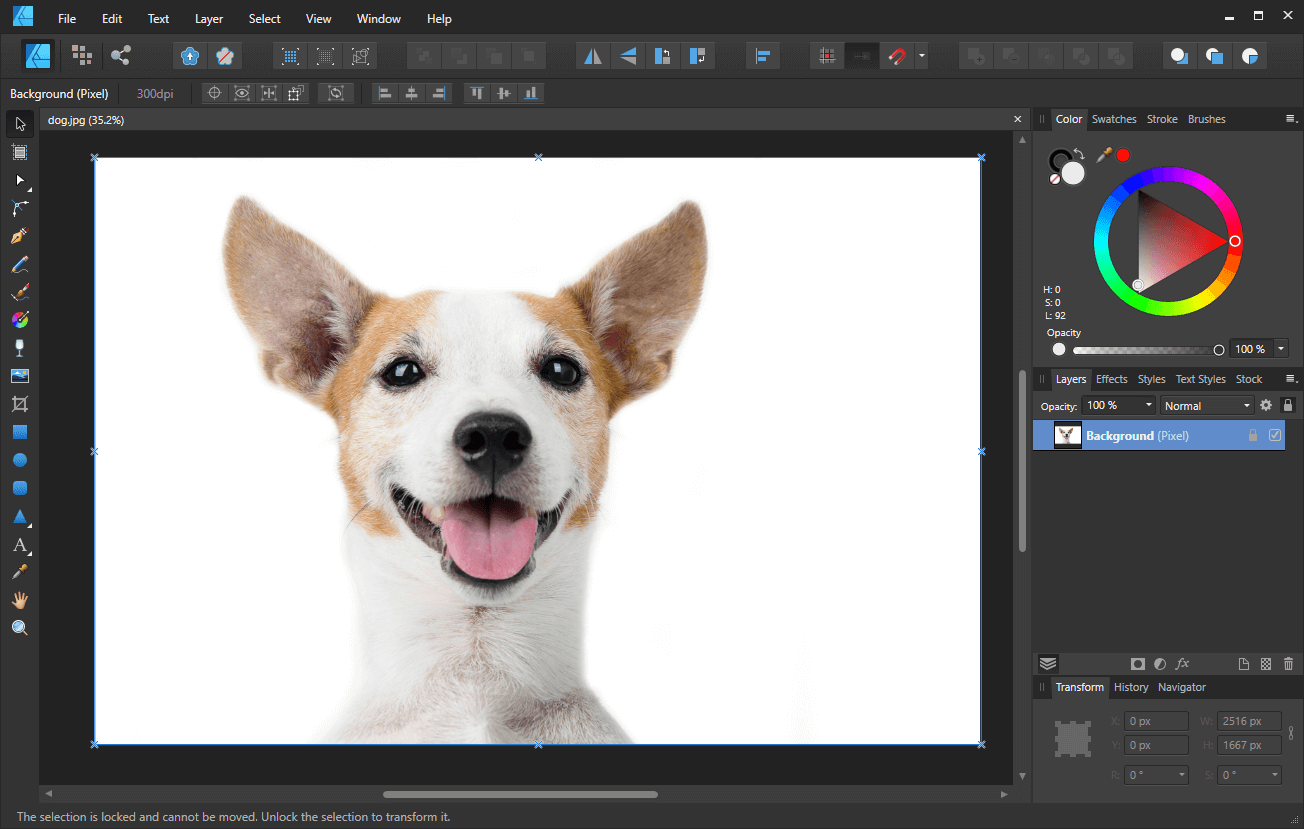
The example photo being used for this demonstration is a dog against a white background.
Step 2: Navigate To The Pixel Persona
Considering that we’re working with a rasterized photo rather than vector objects, we’re going to use the Pixel Persona for this lesson.
The Pixel Persona allows you to make basic edits to photos, much like Photoshop or GIMP would. This makes Affinity Designer a unique application in that it can be used for both vector design and raster editing.
To access the Pixel Persona, look for the icon in the top-right of your screen. It is representing by a series of colored boxes:
The Pixel Persona can be accessed using its designated icon in the top-left corner of the screen.
Once opened, you should immediately notice that the tools on the left-hand side of your screen have changed. This is because editing pixels requires different tools than you would typically use for editing vectors.
Step 3: Unlock and Rasterize Your Layer
Next, we have to unlock the layer. Navigate to the right-hand side of your screen to the Layers tab.
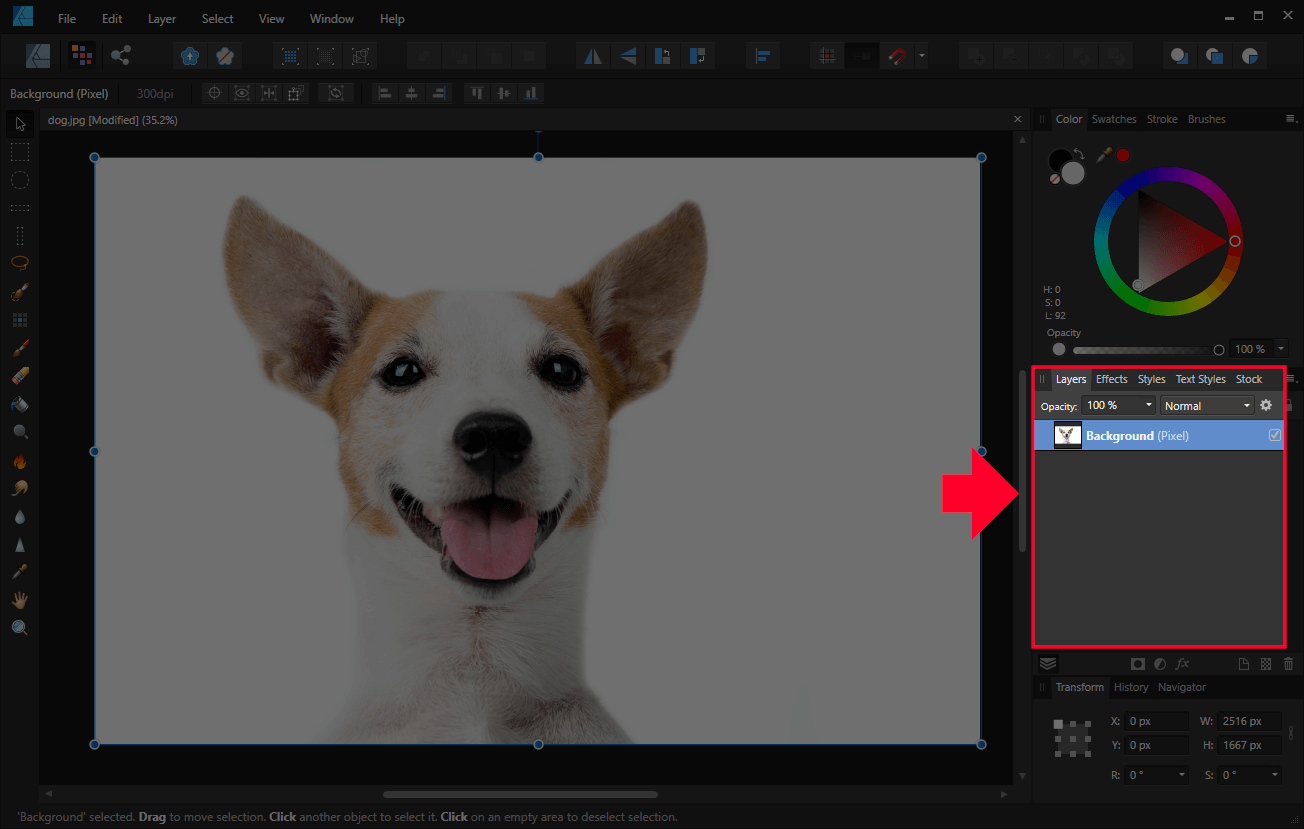
The layers tab is located on the right-hand side of the screen.
Right-click on your layer and look for Lock in the menu. If it is enabled (you’ll see a check icon next to it,) simply click on it to disable it. This will unlock access to the layer so that we can edit the photo that’s on it.
Next, right-click the layer and select Rasterize. This will convert it to a pixel layer, which will allow us to delete portions of the image.
Step 4: Create A Selection With The Selection Brush Tool
In this next step we’ll be creating a selection around our subject using the Selection Brush Tool. Considering that written instructions may be a little difficult to learn from for something like this, it is recommended that you watch the video tutorial at the top of the page for these next two steps.
The Selection Brush Tool is a freehand brush that allows us to paint a selection around the subject of our photo. The tool’s internal algorithm automatically detects where the edges of your subject are and differentiates it from the white background.
For this tutorial we want to make sure that we have both the Snap To Edges and Soft Edges tool settings enabled. The snap to edges setting is what allows the tool to auto-detect the edges of your subject, and the soft edges setting will give your subject a more tapered finished along the edges. Without this setting enabled you will end up with hard, pixelated edges that do not look clean.
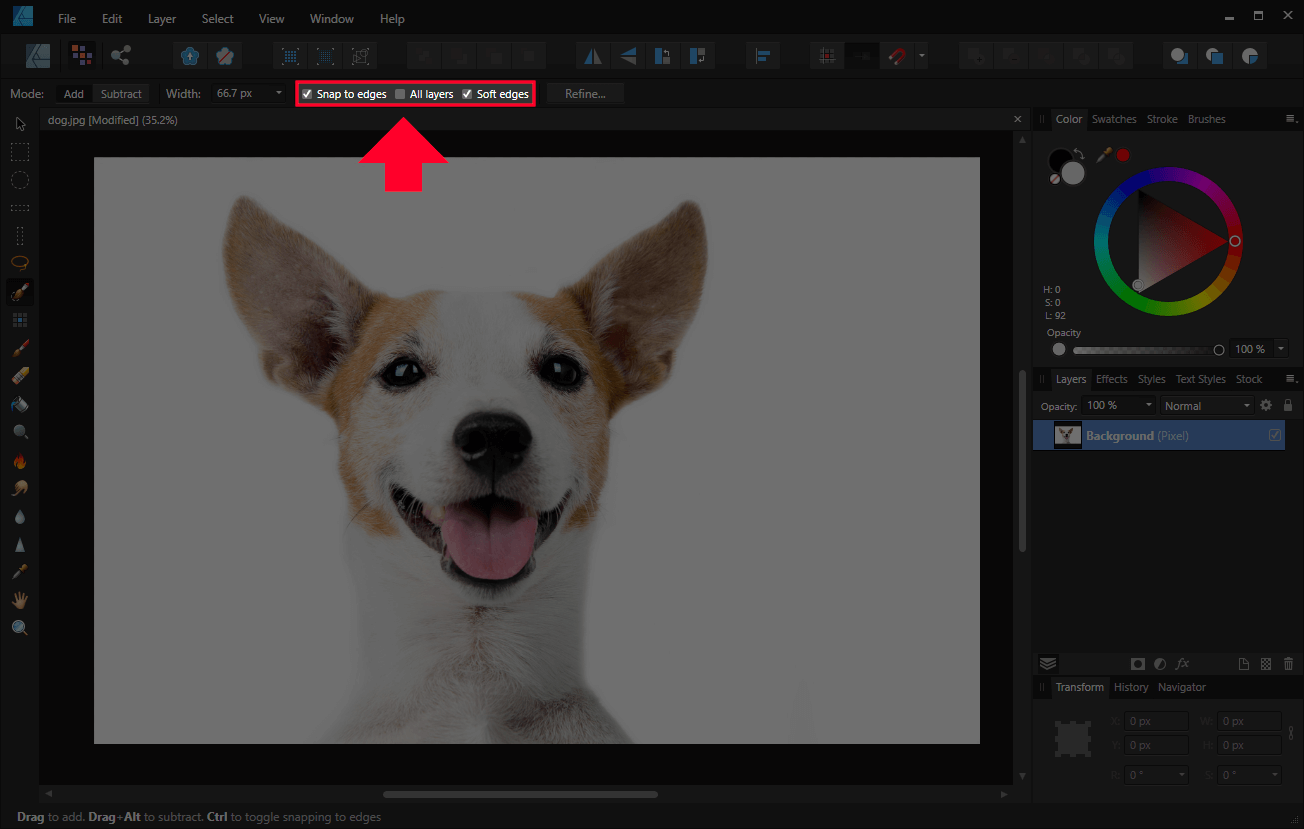
Make sure that you have both Snap to edges and Soft edges enabled.
Once the settings are in place, use the left and right bracket keys on your keyboard to set the size of your brush, then manually draw a selection going around your subject. Make sure to fill in the remaining white area of the image as well.
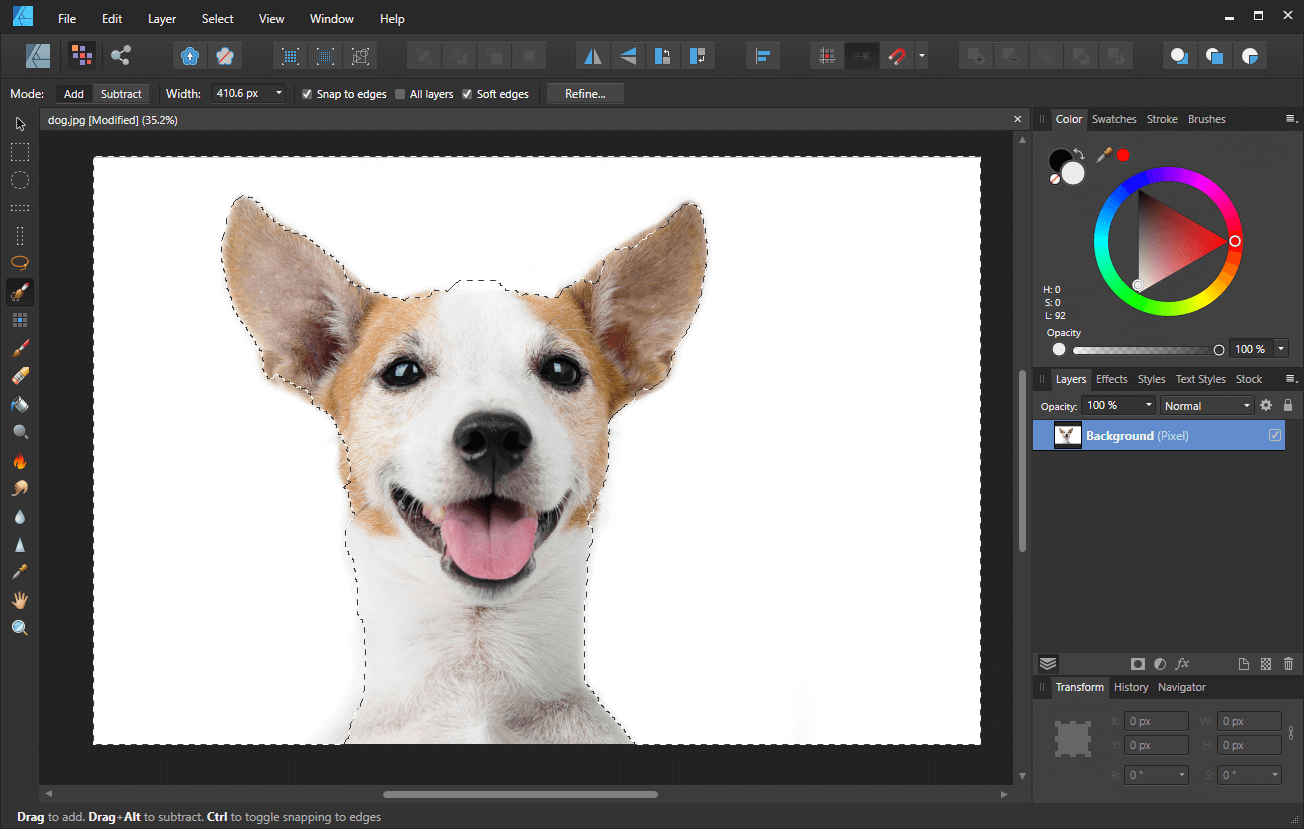
You might end up with a crude selection that isn’t quite accurate. This will be corrected later on.
Don’t worry if your selection doesn’t precisely match the edges of your subject. We’re going to correct that in the next step.
Step 5: Refine Your Selection
Now it’s time to make a few adjustments to the rudimentary selection we previously, and make it so that it outlines your subject more accurately.
Zoom in on your subject and use the Selection Brush Tool to manually correct the imperfections of your outline, only working from the inside out. To do this, hold Alt on your keyboard, and then click and drag.
Holding Alt allows you to remove parts of the selection, whereas not holding Alt allows you to add to the selection. Navigating back and forth through these two functions, go through your image and make sure your subject is perfectly outlined.

Once refined, your selection should track your subject more accurately.
Next, open the Refine Selection menu by clicking the button in the toolbar that reads Refine. Once opened, you’ll notice that a red mark has been applied to your subject.
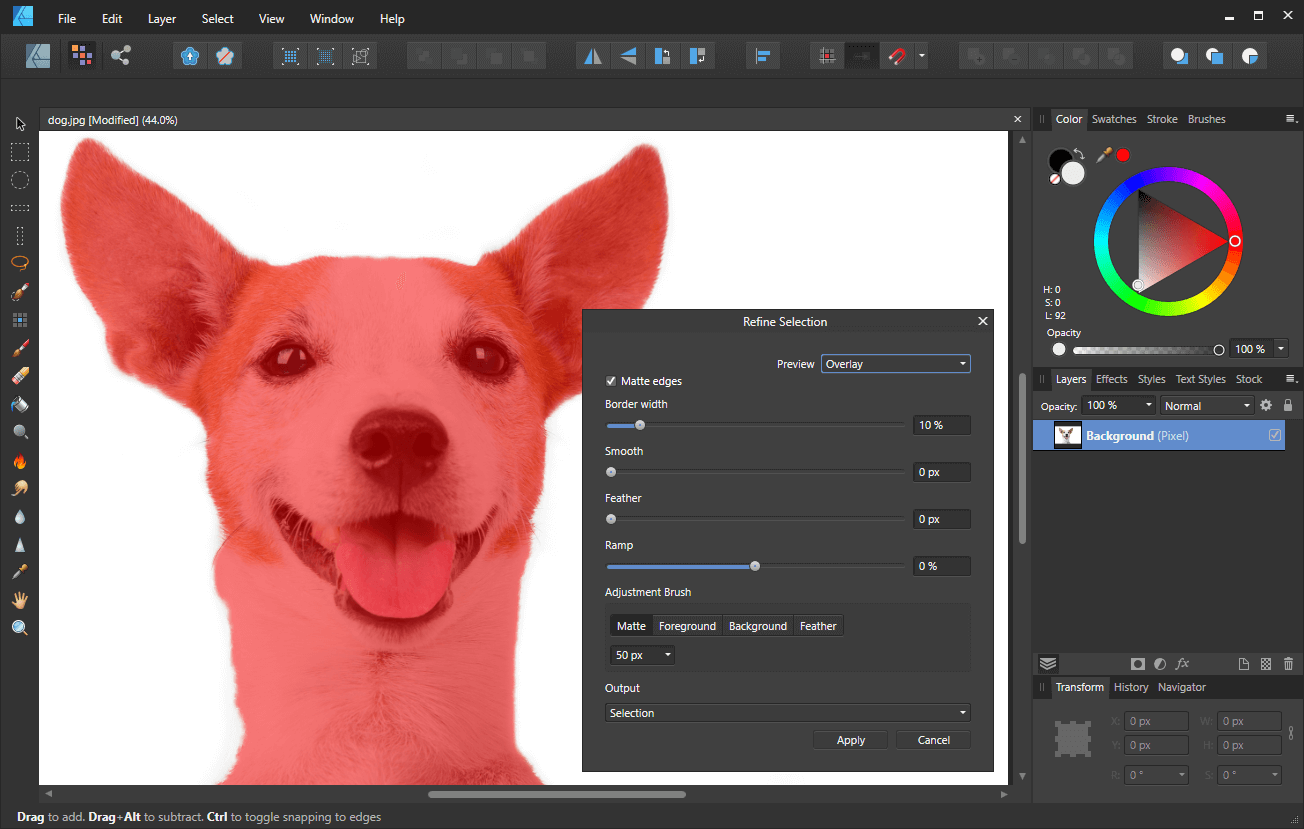
The Refine Selection Menu allows you to further tweak your selection.
The red mask represents where your selection has been placed, and it gives you a better visualization of how a photo would look once you remove a white background with Affinity Designer.
You can zoom in on the edges of your photo to get a closer look. If there’s any details that are excluded from the mask, like stray stands of hair for example, you can simply paint over them, and the algorithm will expand the selection to include them.
The Refine Selection menu also allows your make adjustments to other properties:
- Border Width
- Smooth
- Feather
- Ramp
- & more
You can go ahead and play around with these settings if you’d like to tweak your selection some more. If your selection already looks good as it is though, then it would be wise to leave it as is.
Once you’re happy with your preview, go ahead and click Apply to finalize the changes.
Step 6: Delete The Background
This is where the magic happens! Once your refined selection is in place, all you have to do to delete the white background is simply press Delete on your keyboard.
You’ll know the background has been removed if you see a checkerboard pattern behind your subject:
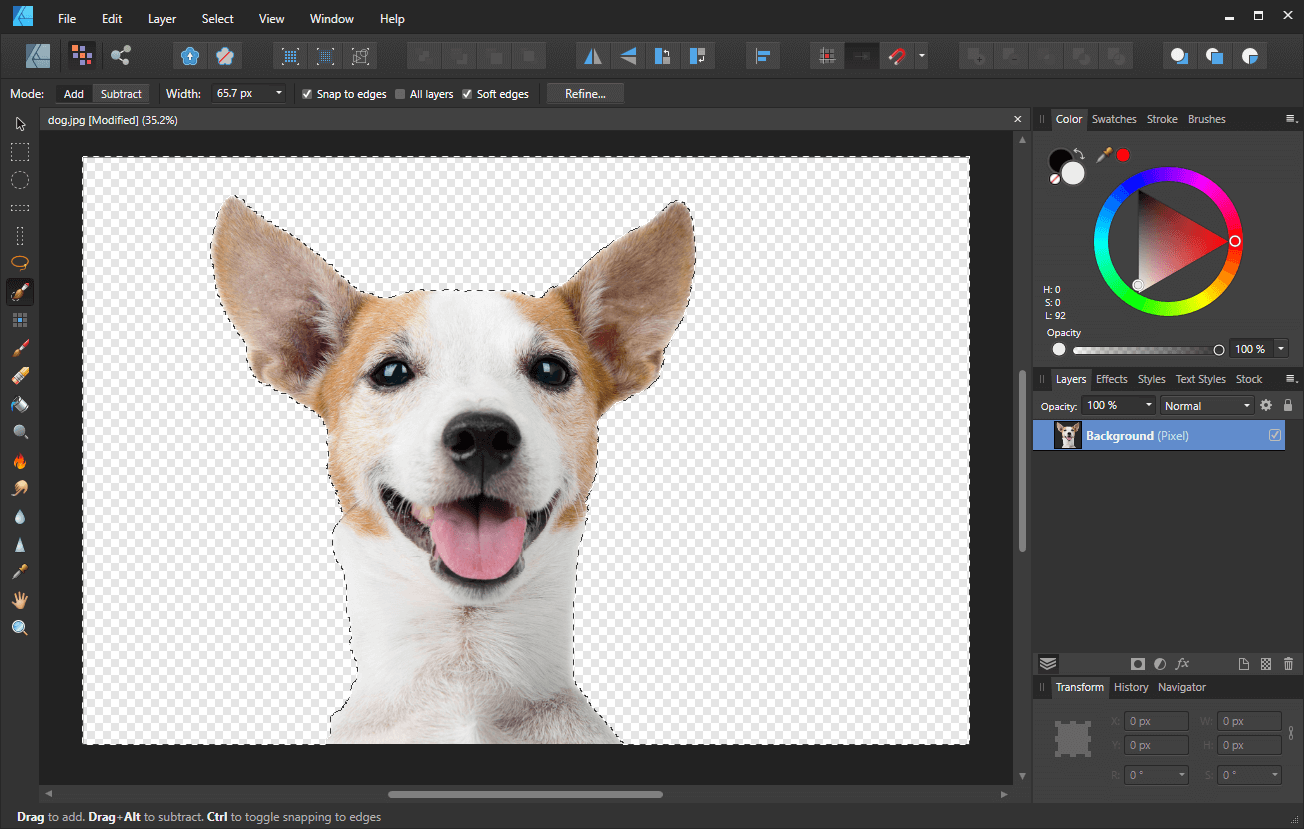
The white background has successfully been removed.
With the background deleted, we can now release the selection. To do this, navigate to Select > Deselect or press Control + D on your keyboard.
Step 7: Export Your Image
Now that we have removed the white background, it’s time to save (or export) our work. To do this we’ll be using the Export feature rather than Saving As. “Saving” the document will only save the photo in Affinity’s native format for editing later on. If you want a usable copy of your image with the background delete, you’ll have to export it.
Navigate to File > Export to open the Export menu.
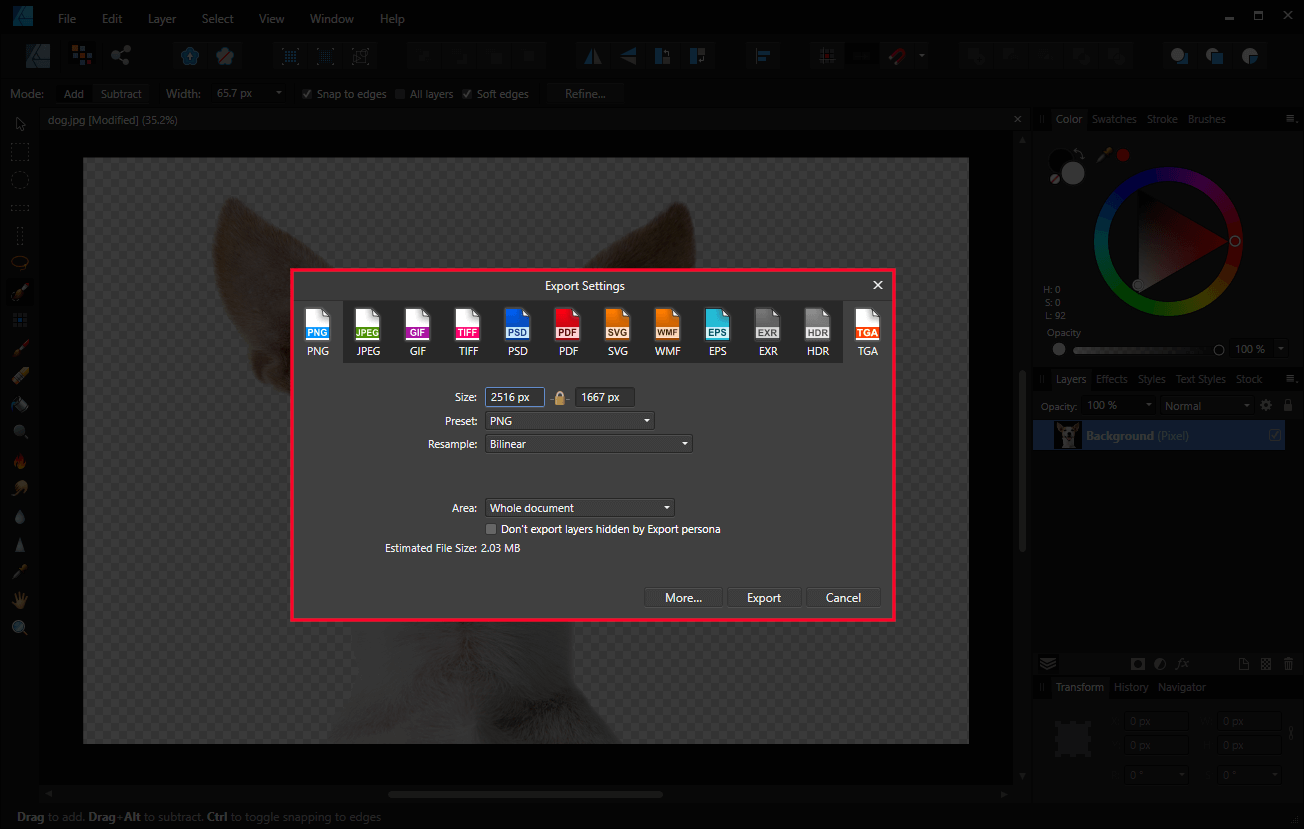
The Export Menu allows you to save your work in a variety of formats.
In the Export menu, make sure that you choose to export your document as a PNG file. This is very important! Other formats, like JPG, do not support transparency. So if you export your document as a JPG file then you are going to end up with a white background again. Exporting your document as a PNG file ensures that your image will have a transparent background.
Leave the default settings as they are, then click the Export button. You will then be prompted to name your document and choose a location for it to be saved to. And with that, you are finished! That is how you can easily remove a white background with Affinity Designer!
Conclusion
Considering that Affinity Designer is primarily a vector design tool, it’s really impressive that it has pixel-editing features built in. You would normally have to use something like GIMP for this sort of task, but tools like the Selection Brush Tool make it quick and painless to do things like remove a white background with Affinity Designer.
If you have any questions or if any part of this explanation is unclear, simply leave a comment below. As always, thanks for visiting!
Learn To Master The SoftwareGain a complete understanding of your favorite design apps with my comprehensive collection of video courses. Each course grants access to our private community where you can ask questions and get help when needed.
|
||||||||||||||||||||||||||||||||


Hi, thanks so much for video. I got all the way to the end but when I press delete on my keyboard nothing happens!? Is this anything you can help with? Thanks!
Sounds like the layer is locked. If not that then try right-clicking the image layer and selecting Rasterize.
Hey Nick,
Awesome tutorial. I cannot get it to work, I first made the mistake and selected the wrong area, I then corrected myself after I worked out what I did wrong and when I press delete it deletes everything and just leaves an outline of where image is supposed to be, everything turns to transparent background.
I have been having a lot of problems with affinity and I am beginning to wonder whether it was all worth it. Thanks for your help.
Try inverting your selection after you’ve created and refined it. Go to Select > Invert Pixel Selection.
ALSO, I had same issue Jeremy. If just pulling in a JPG, I had to Rt click and “Rasterize…” first. I did this while in vector mode if it matters.
Best, Ed
OK! A+, I have been using tutorials for Affinity for years. This is the best ever. BECAUSE Nick shows you the steps and speaks clearly about the step when he does it. And he does not skip simple steps. Other videos go fast over key steps so much that sometime i have to reply to find where the mouse pointer went in 0.005 seconds. TY NICK!!!!!!!!!
Thank you, Ed!
I am having a similar problem as Jeremy. I select the background, and when I refine the background, the image I want to keep is highlighted in red. Yet when I click apply, my image disappears as well as the background. I tried inverting my selection as well and that didn’t help. It will show me the outline of the image I want to keep with a checkerboard background, but the image itself is…?
Hi Rebecca, check the tool settings when using the Selection Brush. They should match my settings in the video. If that doesn’t fix the problem then report back and I’ll see what else it can be.
Hi Nick. Thanks a lot. I’ve watch the tutorial from Affinity website but it’s so hard to understand. Yours simple and easy to understand & most importantly it works. Thanks.
Thanks for the feedback! Glad to help.
How do I do a selection on background?
Am facing same challenge
There’s a video tutorial at the top of the post where I demonstrated how to do this. Did you check that out?
Hi! Thank you for the information. However, every time I try to do this, it keeps erasing the item I want to keep instead of the background. What do I do?
You have to create the selection on the background, not the subject. Sounds like you’re doing the inverse.