
How To Curve Text with Affinity Photo
How To Curve Text with Affinity Photo https://logosbynick.com/wp-content/uploads/2021/05/curve-text-affinity-photo.png 800 470 Nick Saporito https://secure.gravatar.com/avatar/8e31bf392f0ba8850f29a1a2e833cdd020909bfd44613c7e222072c40e031c34?s=96&d=mm&r=gThanks to an update for the version 1.9 release of Affinity Photo, it is now possible to place text on a path. This means that you can wrap your text around circles and flow it along various types of contours of your choosing. In this tutorial I’ll be demonstrating all of the different ways that you can curve text with Affinity Photo thanks to this new update.
The process used to curve text with Affinity Photo is the same as it is for Affinity Designer. So, if you already know how to do this in Designer, you also know how to do this in Photo. If you don’t, then fear not. By the end of this tutorial you will know how to curve text in virtually every Affinity application.
Curve Text with Affinity Photo
| To curve text with Affinity Photo, use the Pen Tool to draw a path to place your text on. Then, grab the Artistic Text Tool and click on the path. A blinking cursor will populate, indicating that you can now type on the path. |
The following video tutorial will walk you through the process of using Affinity Photo to place your text on a path. It should be noted that this tutorial is for the desktop version of the app.
If you’d like to curve text with Affinity Photo for the iPad then check out the tutorial I made for it on YouTube.
Continue on for the written instructions.
Table of ContentsPlace Text On A Path:
Wrap Text Around A Circle: |
Place Text On A Path with Affinity Photo
Let’s first go over how to place your text on a curved path that you’ve drawn.
Step 1: Use the Pen Tool to create a curved path
In order to curve text with Affinity Photo, we first need a path to place the text on.
There’s various ways to create paths, but for this lesson we’ll be using the Pen Tool to manually draw a curved path to place the text on, which will effectively curve the text.
Grab the Pen Tool and draw a straight line on your canvas. Then, grab the Nodes Tool (located in the same submenu as the Pen Tool) and curve the line by clicking and dragging it:
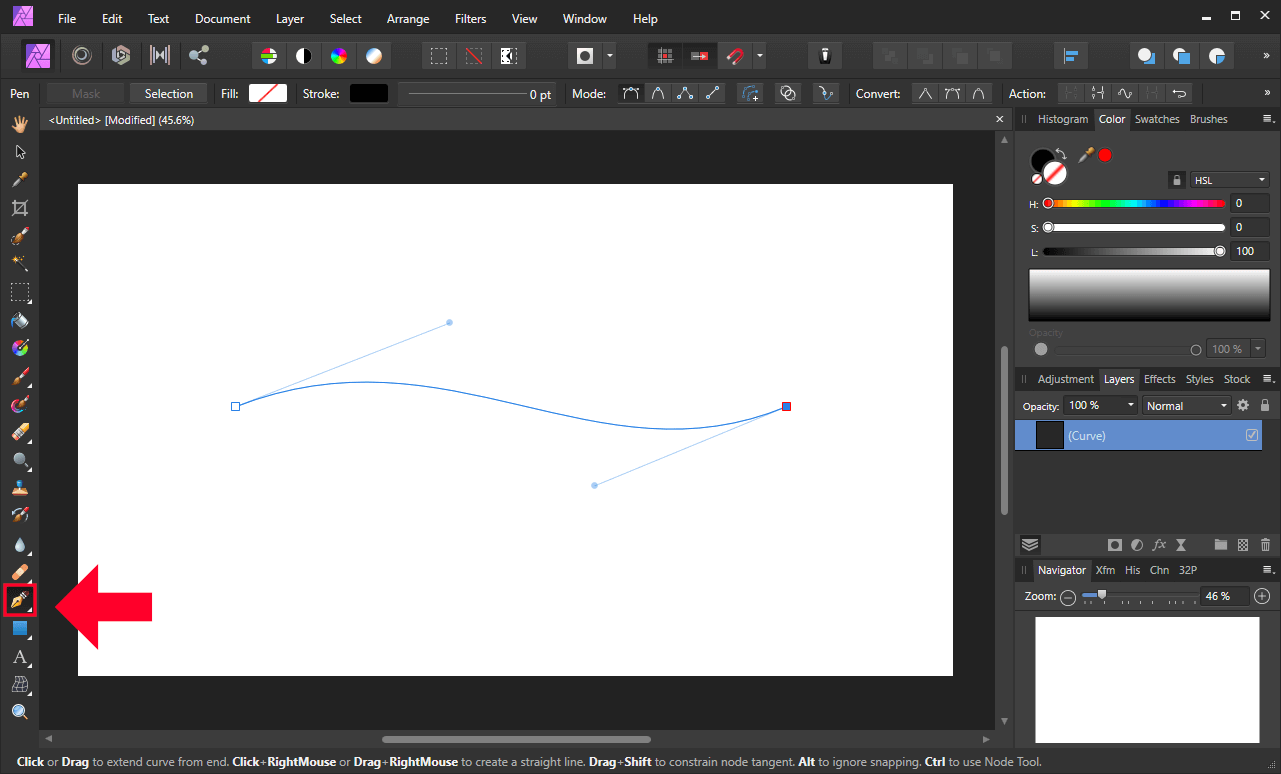
In Affinity Photo, the way that you curve text is by placing it on a curved line that you’ve drawn beforehand.
Step 2: Use the Artistic Text Tool to place your text on the path
Once you’ve drawn your path, you can grab the Artistic Text Tool and click on the path to place your text on it. A blinking cursor will appear on the contour of the path, indicating that any text you type will be placed on the path.
Go ahead and type in your text:
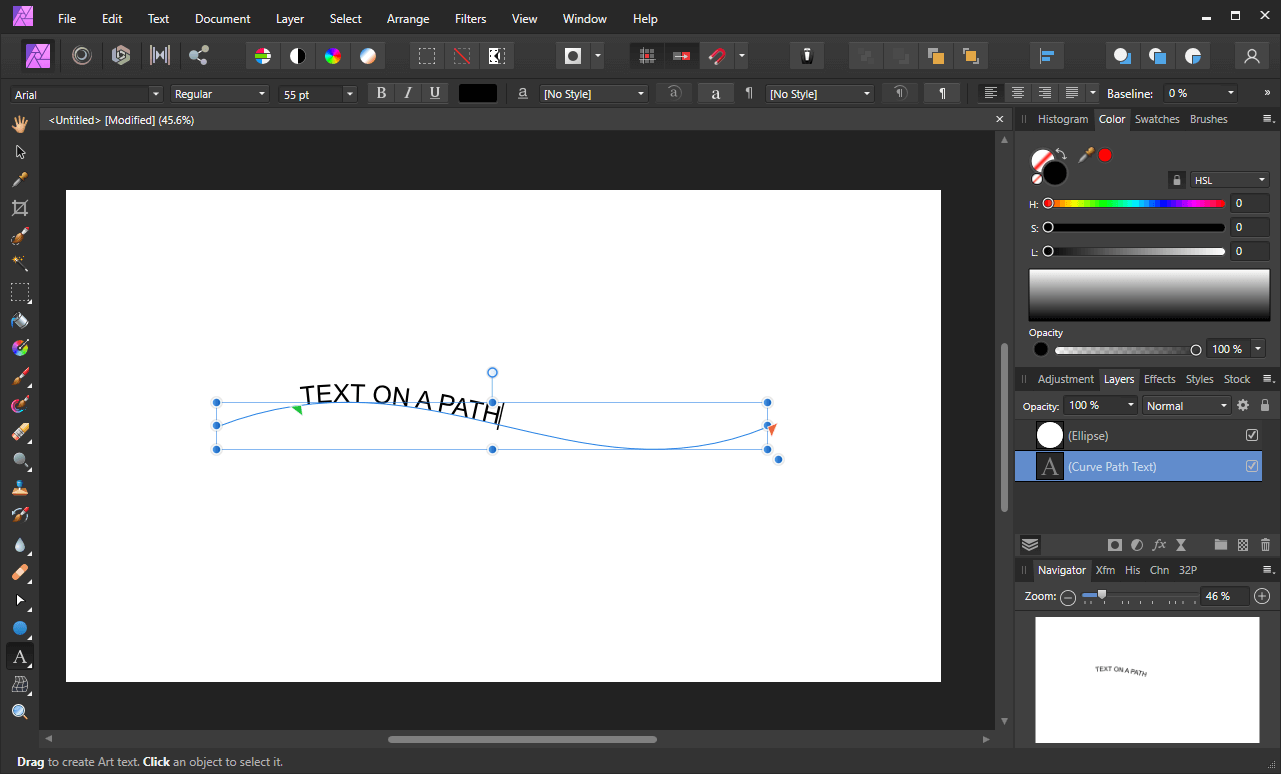
The green triangle on the left side of the path represents the starting point of the text. The red triangle on the right represents the end point of the text.
You can move these points according to your own preferences. For this demonstration, I’ll be moving them the ends of the path:

As depicted in the above screenshot, the text moved all the way to the beginning of the path, because that’s where I placed the green triangle.
Step 3: Edit the properties of your text
Once you’ve placed your text on the path, now you can edit its attributes to your liking.
The following properties of your text can be altered while it’s on a path:
- Font
- Size
- Color
- Style: bold, italics, underline
- Alignment: left, right, center, fill
To edit the properties of your text, select all of it by pressing Control + A on your keyboard.
For this demonstration, I made my text larger, changed the font, and aligned it to the center so that it lines up directly in the middle of the path:

To change the spacing between the letters of your text (otherwise known as kerning,) simply hold Alt and use your arrow keys. The right arrow key will increase the spacing between the letters, whereas the left arrow key will decrease the spacing between the letter:
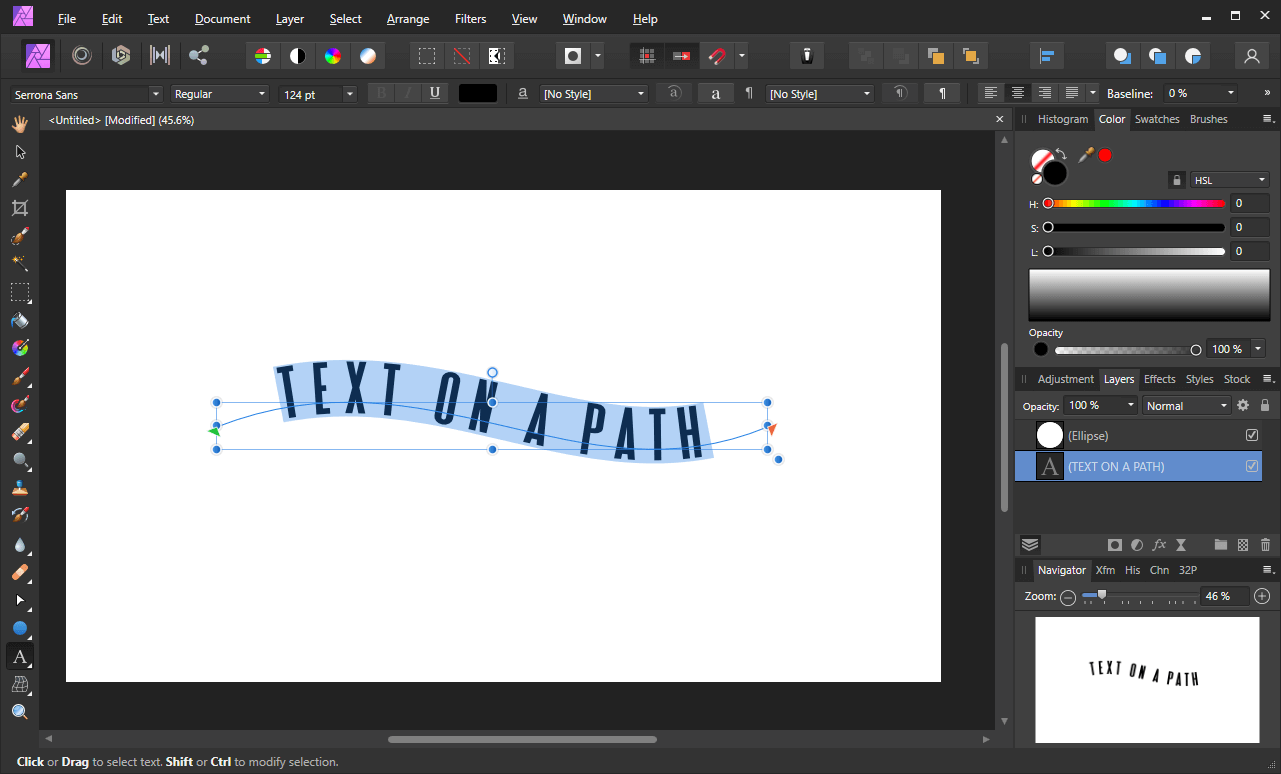
Holding Alt and using the right arrow key will increase the spacing between your letters so long as you have all of the text selected.
You can also change the spacing between individual letters by deselecting the text and placing the blinking cursor between the two letters you’d like to adjust.
Finally, you can change the horizontal positioning of your text relative to the path by adjusting the Baseline preset in the tool settings.

By default, the Baseline of the text in 0%. By increasing it to 20%, the text moved down into the path rather than on top of it.
Wrap Text Around A Circle with Affinity Photo
Now that we’ve demonstrated how to place text on a manually-drawn path, let’s go over how to curve text in Affinity Photo by placing it on a circle.
Step 1: Create a circle
In order to place your text on a circle, you’ll first need a circle to place it on. So, grab the Ellipse tool and draw a circle on your artboard:
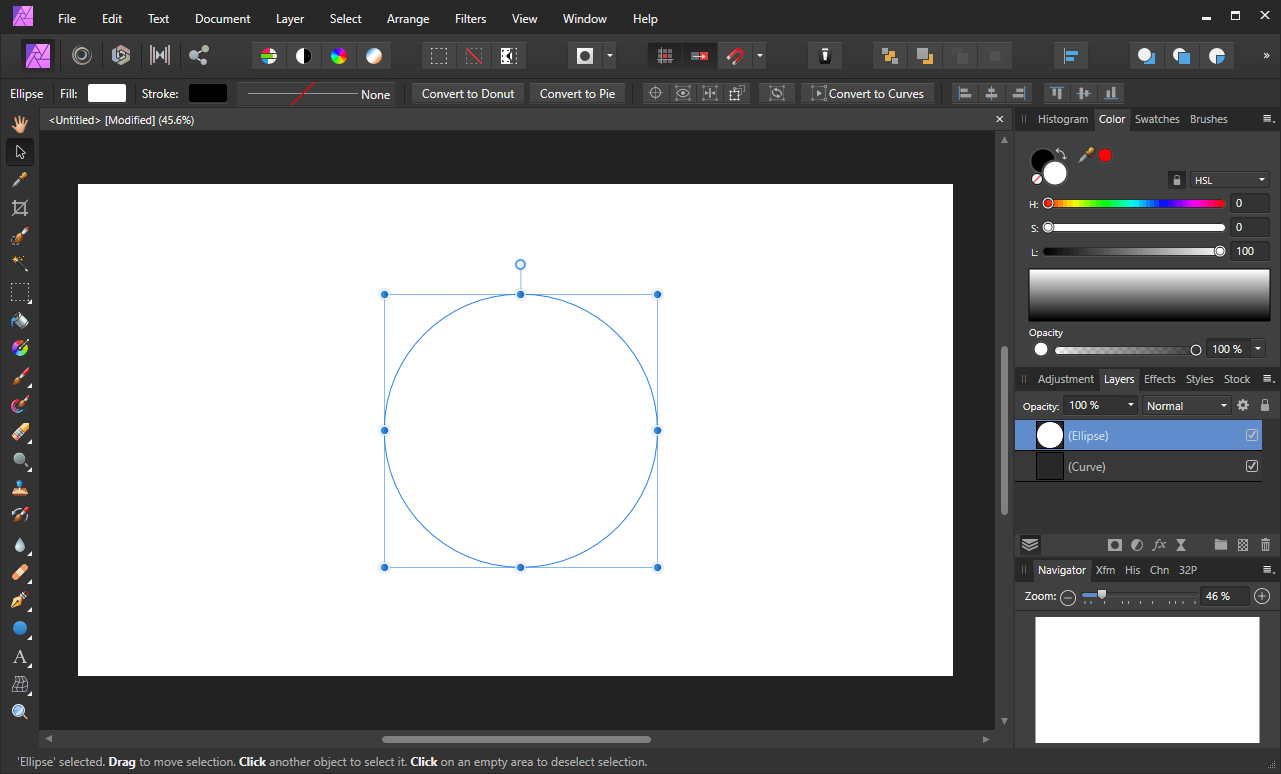
Text will be placed on this circle.
By the way, this technique works with virtually any shape, so don’t feel confined to just using a circle.
Step 2: Use the Artistic Text Tool to place your text on the circle
Now we will use our circle as a reference point for curving the text with Affinity Photo.
Much like we did in step 2 of the previous process, you can place your text on the circle by simply clicking on it with the Artistic Text Tool.
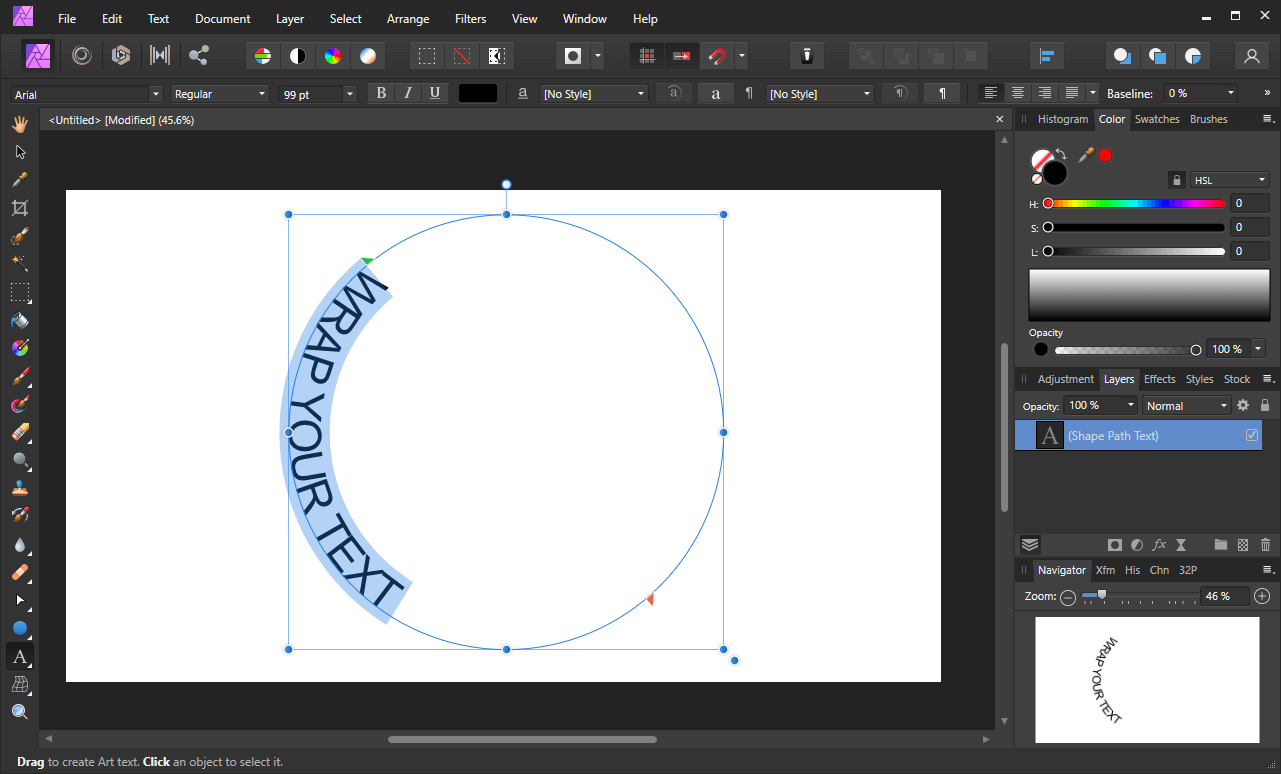
Clicking on the outer edge of the circle will wrap the text around the outside it:

To wrap your text around the outside of the circle, make sure you click on the outer edge of the path.
Clicking on the inner edge of the circle will wrap the text along the inside of it:
To wrap your text around the inside of the circle (or the bottom of it,) make sure to click on the inner edge of the path.
As is the case for manually-drawn paths, the green triangle represents the starting point of the text, and the red triangle represents the end point:
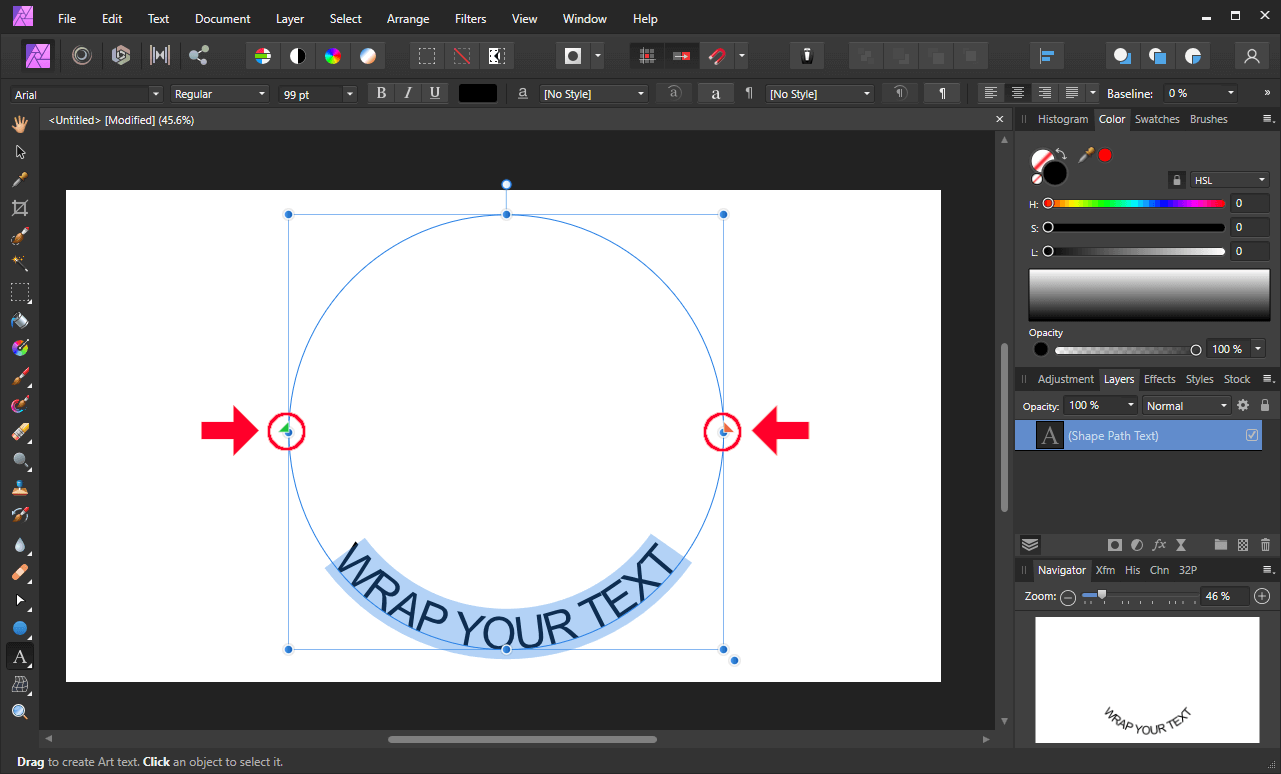
The left side of the circle is the designated starting point. The right side is the designated end point. The text is then aligned to the center, ensuring that it wraps arounds around the bottom half of the circle.
Step 3: Edit the properties of your text
Once you’ve positioned your text where you’d like it to be, you can edit the properties and style of it the same way we did in step 3 previously.
Change the font, style, and alignment to your liking. Then, you can change the kerning (or spacing between the letters) by holding Alt and using the arrow keys.
Finally, you can change the Baseline setting to make it so that the text runs through the middle of the path. This would be useful if you’re trying to have a line of text on top and another line on the bottom, and you want them both to be on the same path.
Conclusion
Now that you know how to curve text with Affinity Photo, you can also use this technique when working with Affinity Designer and Affinity Publisher. The text editing tools in the Affinity suite of applications couldn’t possibly be easier to work with. In fact, curving text is easier in Affinity software than it is in any other design application I’ve used thus far.
If you have any questions or need clarification about anything we’ve gone over in this lesson, simply leave a comment below.
Learn To Master The SoftwareGain a complete understanding of your favorite design apps with my comprehensive collection of video courses. Each course grants access to our private community where you can ask questions and get help when needed.
|
||||||||||||||||||||||||||||||||


Hi, thank you… but how would i go about pasting a block of text to a curved path. i have been trying for hours and i just can’t seem to work it out.. so i have 7 lines of text on a curved label for a tapered bucket and i need the text fields to align with the curved label?
Thank you Nick,
Great tutorial.
Is it possible to put text on the top of the ellipse and bottom of the ellipse so that ll the text is upright rather than having text upside down on the bottom of the ellipse?
E.g. Have the top text on the outside of the ellipse and the bottom text on the inside of the ellipse (or vice versa)
Thank you,
Chris
Hi Chris, yes that can be done. You’ll just have to click the inside edge of the path so that it’s placed on this inner part of the circle. I addressed that here: https://logosbynick.com/curve-text-with-affinity-photo/#5