How To Design A Logo with Procreate
How To Design A Logo with Procreate https://logosbynick.com/wp-content/uploads/2021/05/procreate-logo-tutorial-2.png 800 470 Nick Saporito https://secure.gravatar.com/avatar/8e31bf392f0ba8850f29a1a2e833cdd020909bfd44613c7e222072c40e031c34?s=96&d=mm&r=gDon’t let Procreate’s simple interface and streamlined features fool you. Despite being a drawing app first and foremost, it can handle a surprising amount of design tasks. In fact, you can even design a logo with Procreate so long as you keep your expectations within reason, and in today’s tutorial I’ll be demonstrating how to do just that.
Considering that Procreate is a raster editor and not a vector design app, it’s certainly not the best tool for designing logos. Especially when you realize that there’s an inability to create offsets (which is a major handicap when it comes to logo design.) That said, if you have no other options, you can still design a functional logo with Procreate and export it as a PNG image with a transparent background.
In this tutorial I’ll be demonstrating how you can create a logo that depicts two letters interlocking with each other, and encased within a circle with a border around it. Let’s get started!
Design A Logo with Procreate
The following video tutorial will walk you through the process of designing a logo with Procreate:
The lesson involves a lot of steps — not all of which can be conveyed effectively through a written format — so it’s recommended that you follow the video tutorial if you want complete step-by-step instructions that you can follow along with. The following will be a brief overview of the approach we’ll be taking.
Table of Contents
|
Step 1: Create The Letters
The first step we need to take to create a logo with Procreate is open a new canvas and turn off the visibility of the background layer. We’re not going to delete it, but we will be leaving it off for the duration of the tutorial because logos need to have transparent backgrounds.
Once you’ve done that, we’re going to add some text to the canvas. First, select the color you’d like the text of your logo to be. For this design we’ll be using the color white.
Now tap the wrench icon in the top-left corner of the screen to add some text. We’re going to create two different text objects: one for each letter. So for the sake of efficiency, create a text object for the first letter, duplicate that layer, and edit the text to change it to the other layer.
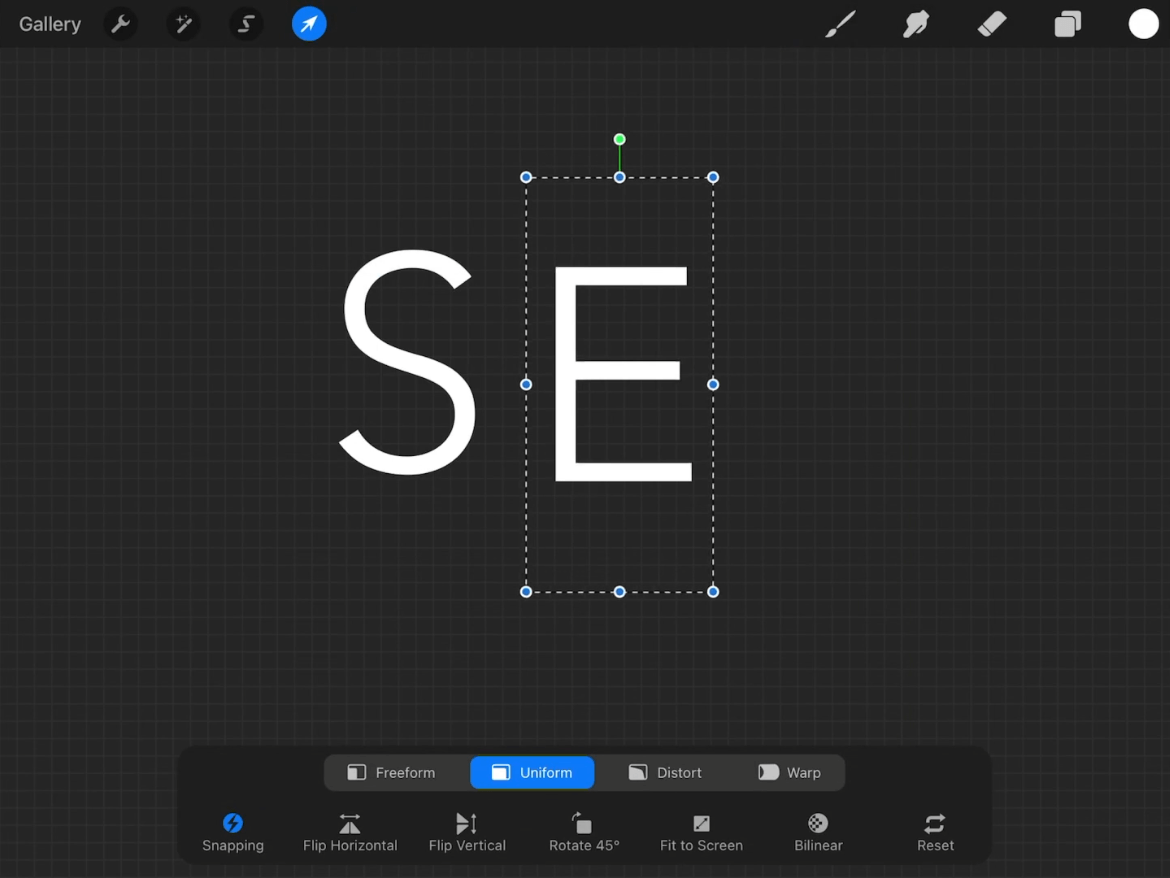
In order to ensure that the letters can intertwine with each other, it’s important that you use a lightweight font.
As you can see, I’ll be using the letters S and E for this logo design tutorial. These letters intertwine nicely with each other. Obviously, you can use whichever two letters you’d like (or you can three letters if you’re feeling bold.)
The font being used for these letters is Avenir Light. It’s important that you choose a lightweight font for this style of logo. The heavier the font weight is, the less likely it is that you’ll be able to find enough negative space between them to make them intertwine.
Next, we’ll be rasterizing each text layer, then using the Select Tool to manually move them and position them next to each other, as depicted below:
Place the letters wherever it is that they interlock best.
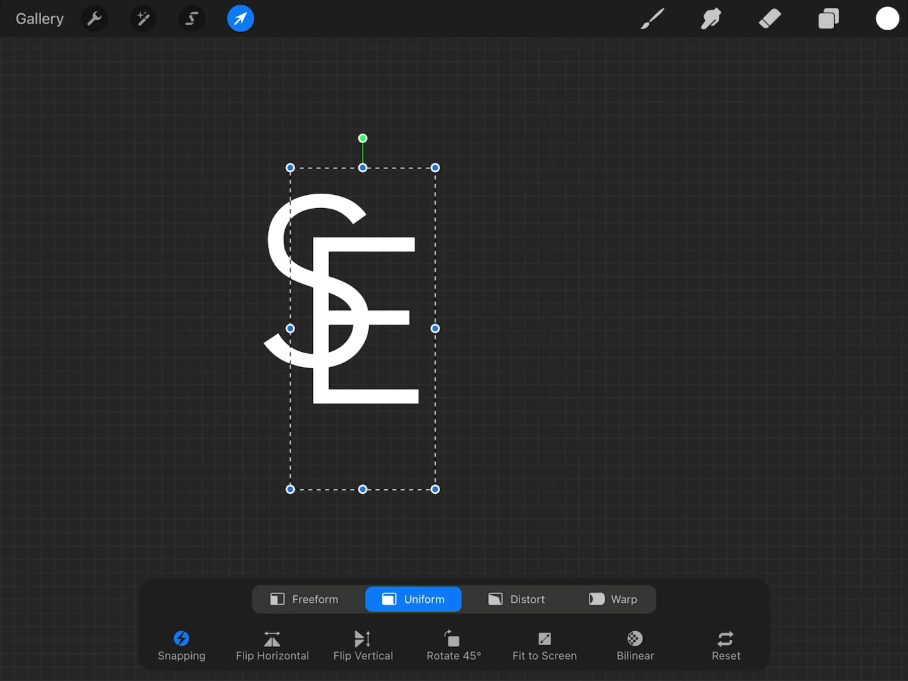
Once you have your letters positioned as needed, grab the Eraser and start erasing segments of each letter that intersect with each other. You’ll have to switch between active layers in order to erase each letter.
This will make it look as if the two letters are intertwined with each other:
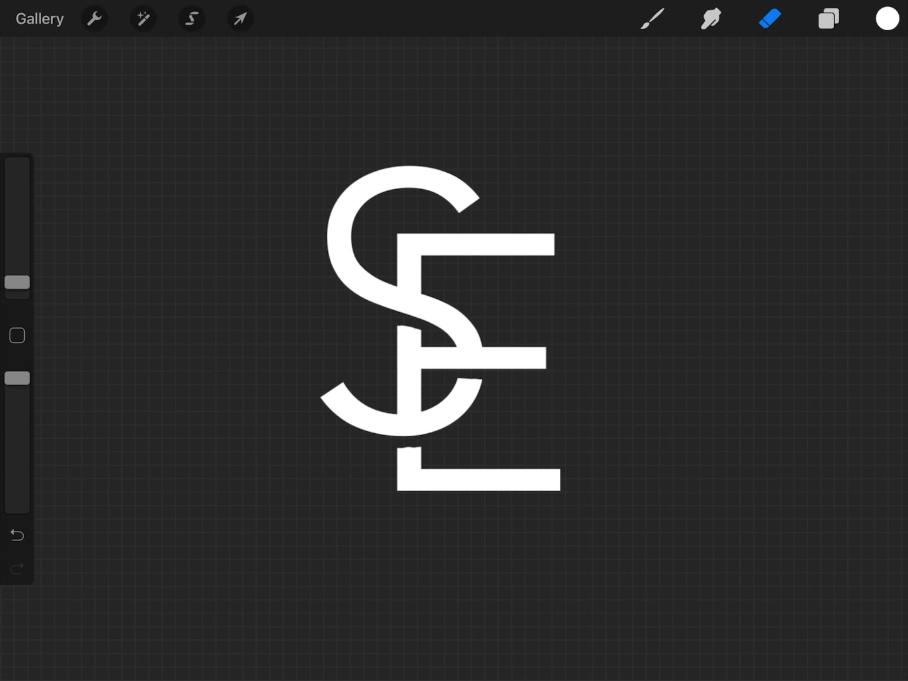
Once that’s finished, we’ll be merging each of these letters together.
To do that, simply open the Layers menu, tap the text layer positioned at the very top, tap it again to get the flyout menu, and choose Merge Down. This will place the two letters on a single layer.
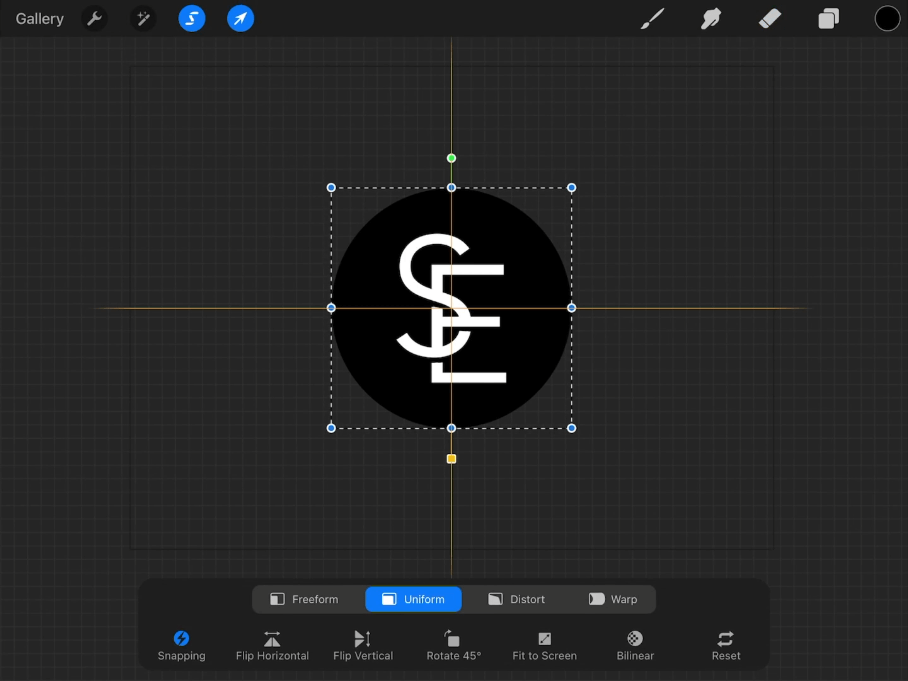
With both letters now merged to a single layer, grab the Select Tool and move them towards the center of the canvas.
You’ll have to enable snapping to ensure that they’re placed directly in the center. You’ll know they’re aligned when you see a yellow rule on both the vertical and horizontal axis:
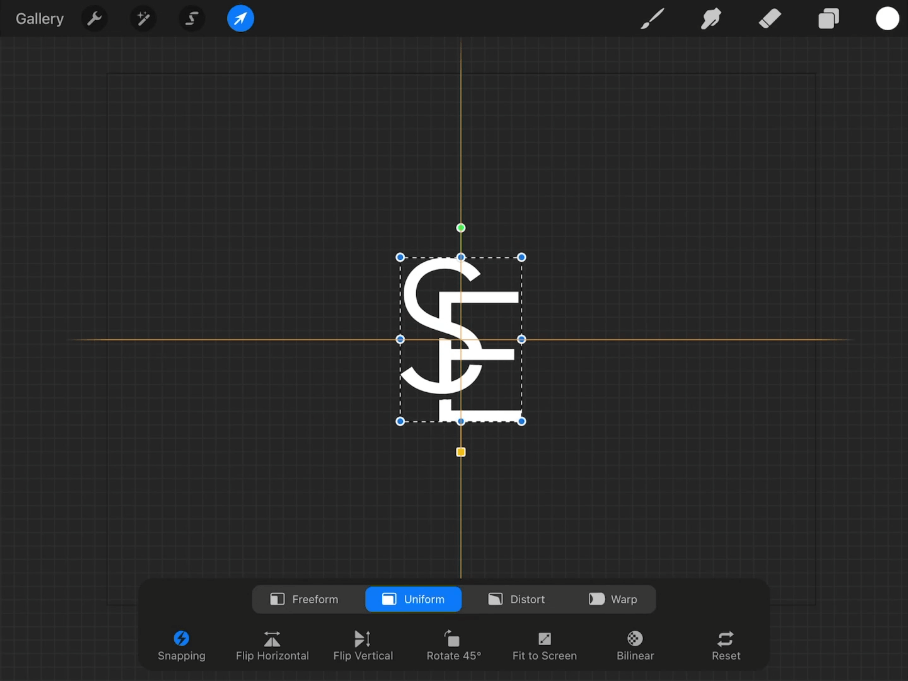
The yellow guides indicate that the selected object has been snapped to its respective axis.
At this point the iconic mark of the logo is complete. If you want, you can export it as a variation for your logo design that can be used as an icon.
Step 2: Create The Circle Emblem
The next step in our quest to design a logo with Procreate is to create a circle going around the letters, and then apply a border as an accent.
To do this, we’re going to active Layer 1, which should be unused thus far.
Grab the Selection Tool, select Ellipse and drag a tap on your canvas to create an ellipse. You can ensure that your ellipse is a perfect circle by holding a tap on the canvas with your other hand while drawing it:

Holding a tap on the screen with your other hand will ensure that your selection is created as a perfect circle.
Now we need to fill our selection in.
For this logo design, we’ll be filling the circle with black (feel free to use a different color if you’d like though!) To fill your selection, first select your color from the color picker. Then, tap and drag the color circle into the selection. This will fill your circle with the chosen color.
Once the circle is filled in with your chosen color, grab the Select Tool again and move the circle to the center of the page, using the snapping guides as a reference (same as we did in step 1.)
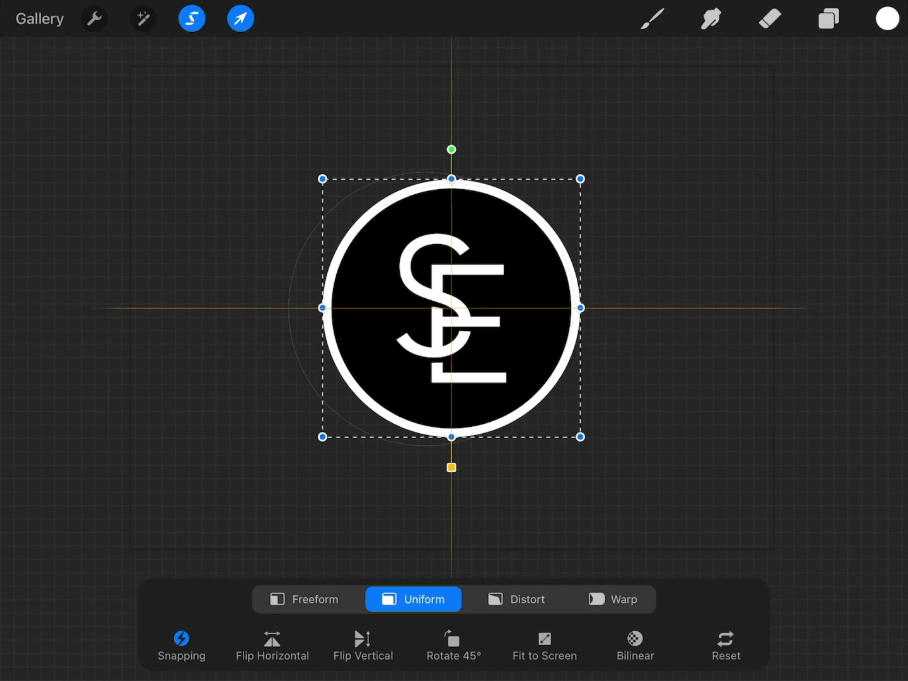
Next, we’re going to add a white border going around the circle.
To do this, simply repeat the steps taken to create the black circle. However, first create a new layer and position it beneath the black circle’s layer. Then, make sure that the circle you create is slightly bigger than the black circle, and fill it with white this time:
Now we will create one more circle to apply to the logo design. This one will be black again, and it’ll be larger than the white circle. Make sure to place this one on its own layer and well, and position it beneath the white circle’s layer:
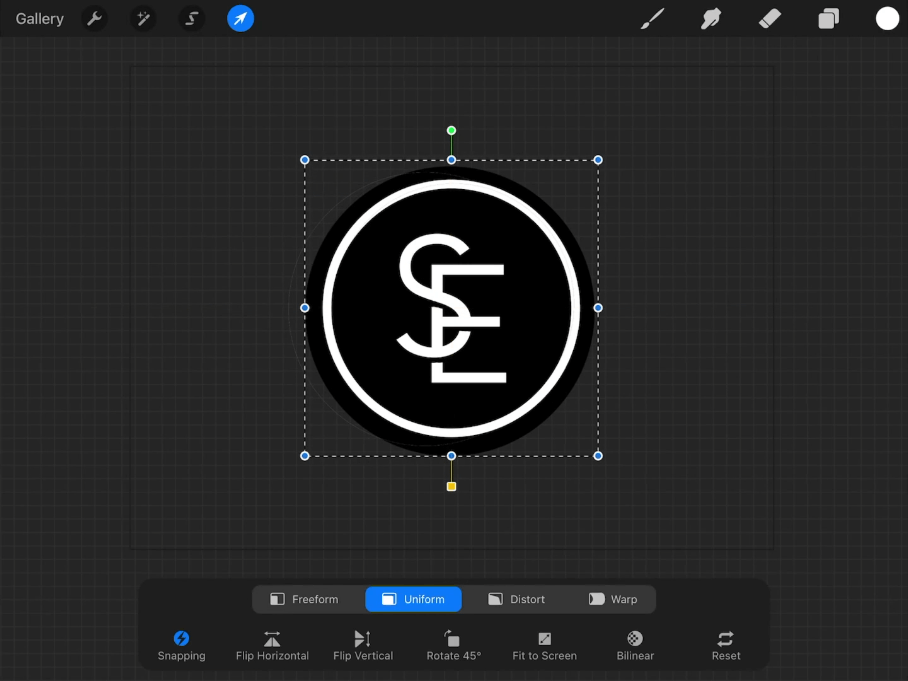
As a shortcut, you can simply duplicate the original black circle layer, move it to the bottom, and then scale it up using the Scale Tool.
At this point the design portion of the logo is complete.
Step 3: Resize The Canvas
Whenever you design a logo with Procreate (or any software for that matter) you’ll want to ensure that the page border matches the dimensions of the logo, otherwise there could be too much padding around it for it to be used effectively on the web.
To resize your canvas around your newly-designed logo, tap the wrench icon in the top-left corner, select Canvas, and tap Crop and Resize.
Move the boundaries of the canvas inward so that they fit around your logo:

At this point the logo design is finished! All we have to do now is save it as a usable logo file with a transparent background.
Step 4: Export As A Transparent PNG
In this final step we’ll be exporting the finished logo design as a PNG file with a transparent background. This will ensure that your logo can be placed on top of any type of background, and the background will show through around the edges of the logo.
It is important that you export your work as a PNG file. Other file formats, like JPEG, will not support transparency, so you’ll have a white background by default.
To export your finished logo design, tap the wrench icon in the top-left corner, tap on Share, and select PNG from the list.
Finished logo design, made with Procreate.
And that is how you can design a logo with Procreate!
Conclusion
It’s important to understand that whenever you design a logo with Procreate, you’re going to have limitations. Seeing as how Procreate works in a raster environment, you’re not going to have the scalability that you would get from working with vectors, so it’s important to make sure that you design your logo at a really large size, because it’s easier to scale down than it is to scale up. Thankfully, iPads typically have a very high screen resolution (for a mobile device anyway,) so creating your canvas from your screen size is a good start.
Not only can Procreate be used to create these simple interlocking letter logos, but it would also be great for making a logo out of your signature (and simple enough that you probably wouldn’t need a tutorial.)
If you have any questions, or if any part of this lesson was unclear, simply leave a comment below.
Learn To Master The SoftwareGain a complete understanding of your favorite design apps with my comprehensive collection of video courses. Each course grants access to our private community where you can ask questions and get help when needed.
|
||||||||||||||||||||||||||||||||


