How To Make An Image Black And White With Procreate
How To Make An Image Black And White With Procreate https://logosbynick.com/wp-content/uploads/2023/03/bw-procreate-header-1024x602.webp 1024 602 Nick Saporito https://secure.gravatar.com/avatar/8e31bf392f0ba8850f29a1a2e833cdd020909bfd44613c7e222072c40e031c34?s=96&d=mm&r=gRemoving color from an image is a straightforward process, but depending on the composition of the image, you’ll likely have to make some adjustments to accommodate for the change in appearance. In this tutorial we’ll be going over how you can make an image black and white with Procreate by removing the saturation and adjusting the color curves.
This is a simple task which only requires a few steps thanks to Procreate’s simplicity and ease of use. Let’s have a closer look.
Make An Image Black And White With Procreate
The following video tutorial will walk you through the entire process — including adjusting for brightness and contrast — in just over 1 minute:
Continue on for the written instructions.
Converting Images To Black & White |
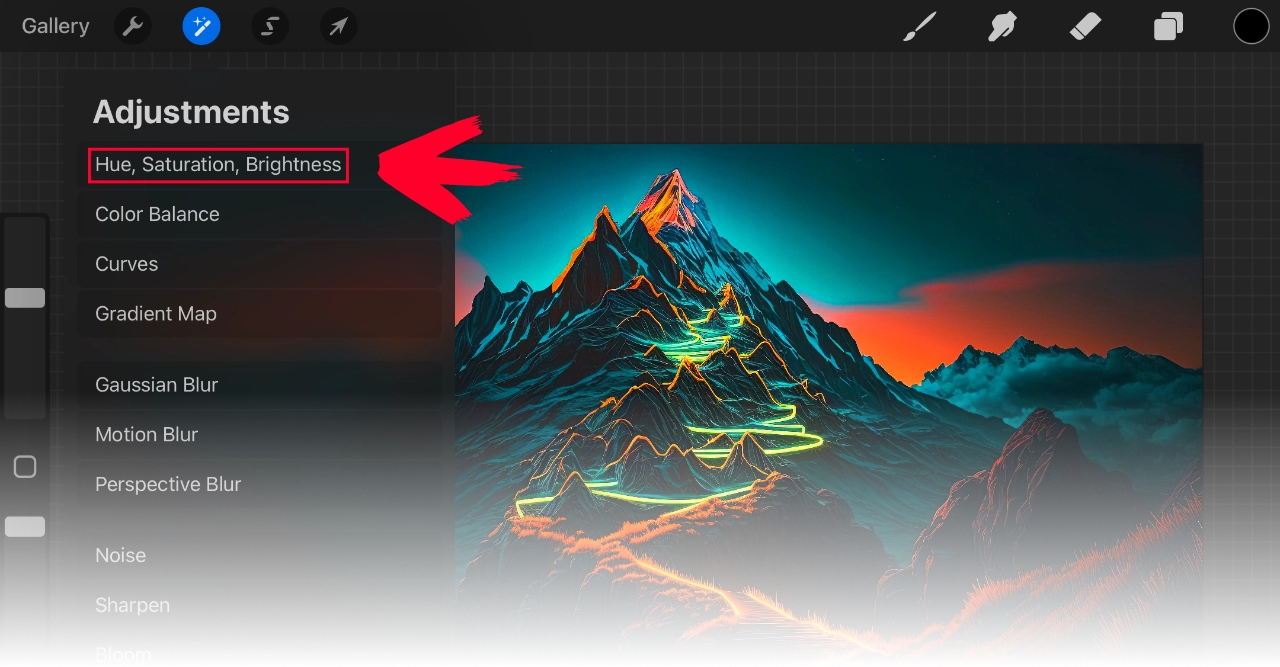
Step 1: Apply a “Hue, Saturation, Brightness” adjustment
First we must ensure that we have our image layer selected, then open the Adjustments menu, which is represented as a gear icon in the top-left corner of the screen:
Click to enlarge.
From the menu, select “Hue, Saturation, Brightness“.
Step 2: Remove the Saturation from the image
At the bottom of your screen you will see a menu with three sliders. The slider we’ll be using in this lesson is the Saturation slider, which is located in the middle:

Click to enlarge.
Simply tap and swipe the slider all the way to the left to lower the saturation. This will remove the color from the image entirely, leaving you with grayscale, or “black and white”.
Step 3: Adjust the brightness and contrast
Depending on the composition of your image, you may have to adjust the color curves to accommodate the change in brightness and contrast.
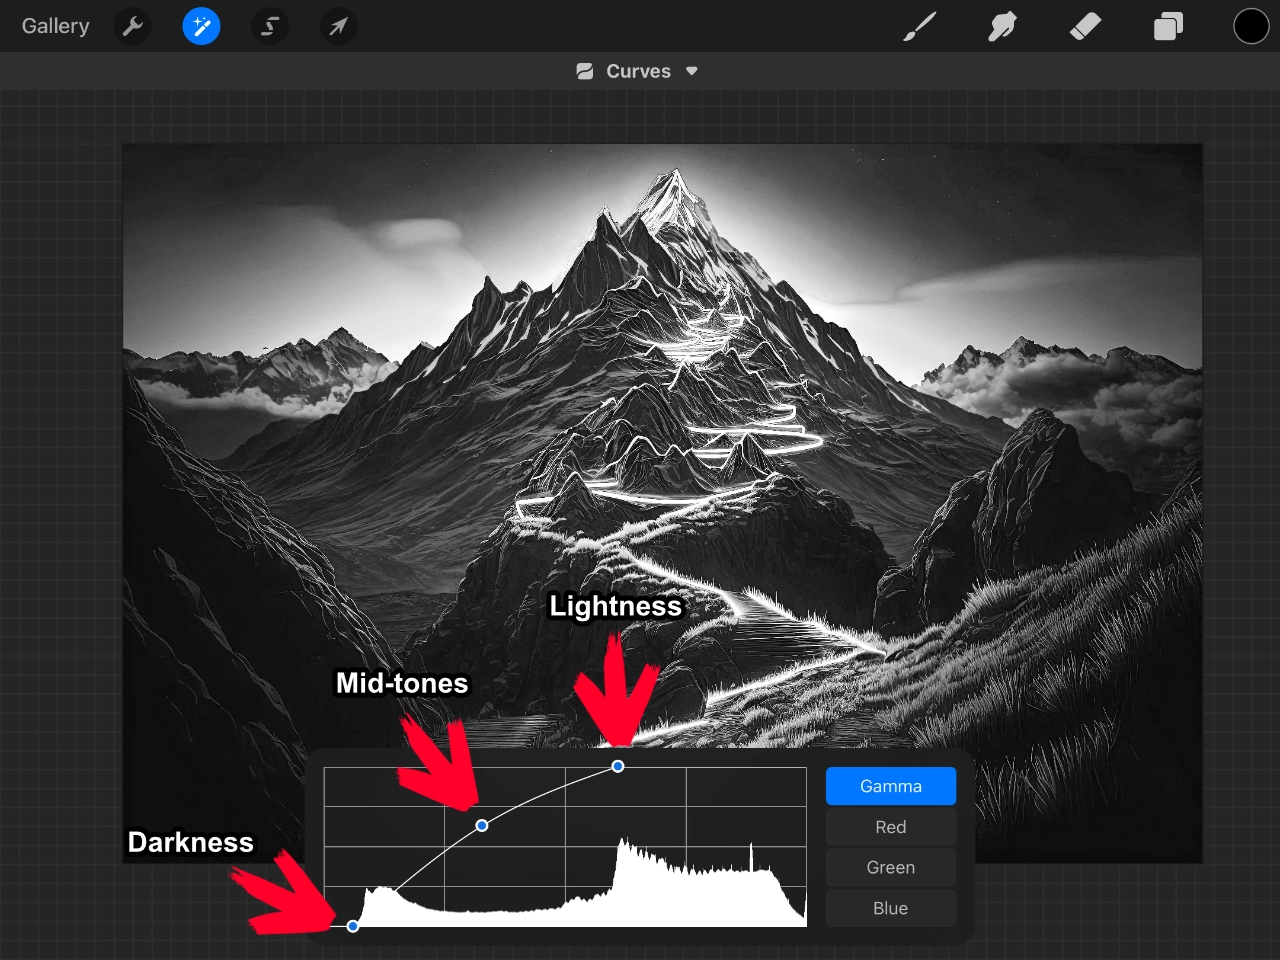
To do so, go back to the Adjustments menu and this time select Curves from the list. A menu should populate at the bottom of your screen that looks something like this:
Adjusting the color curves is optional, but it can help your black and white images pop more.
First, make sure you have Gamma selected from the options located on the right-hand side of the image. Then, use the nodes on the graph to adjust the brightness and contrast of the image:
- The node on the bottom-left represents the dark areas of the image. Move it to the right to darken the dark area.
- The node on the top-right represents the lighter areas of the image. Move it to the left to bright the lighter areas.
- To adjust the mid-tones, move the line between the two nodes left and right to adjust to increase and decrease the mid-tone ranges.
Again, every image is different, so you will need to use your own judgment in determining the proper threshold for each of these values. The idea is to give the image enough contrast without losing fine details.
Once you are finished you can simply tap on the Adjustments menu icon to finalize the changes and close out of the menu.
In Conclusion
As it turns out, there is no feature that allows you to directly convert an image to grayscale or “black and white”. Therefore, to make an image black and white with Procreate it must be done manually.
Thankfully, this is a simple enough task that even novices and beginners can follow along. If you run into any issues along the way though just leave a comment below.
Learn To Master The SoftwareGain a complete understanding of your favorite design apps with my comprehensive collection of video courses. Each course grants access to our private community where you can ask questions and get help when needed.
|
||||||||||||||||||||||||||||||||


