
How To Crop An Image In Illustrator
How To Crop An Image In Illustrator https://logosbynick.com/wp-content/uploads/2021/05/crop-image-illustrator.png 800 470 Nick Saporito https://secure.gravatar.com/avatar/8e31bf392f0ba8850f29a1a2e833cdd020909bfd44613c7e222072c40e031c34?s=96&d=mm&r=gNestled deep within all of Illustrator’s fancy vector tools and features is the ability to crop an image with as much ease as any other design application, vector-based or not. Typically, you wouldn’t bother with trying to crop an image in Illustrator because the software is not meant for image manipulation. However, Illustrator’s crop feature is so simple and easy to use that it couldn’t possibly be more efficient.
Unlike Affinity Designer. which can also crop images, Illustrator doesn’t have a dedicated tool for cropping. The crop feature is a tool setting that can be found within the Selection Tool. From there, you can crop your image freehand or by inputting a numerical value of your choosing.
Crop An Image In Illustrator
| To crop an image in Illustrator, select the image with the Selection Tool and click the Crop Image button in the tool settings menu. From there, you can crop your image freehand or by inputting a numerical value. Once you are finished, press the Apply button to apply your changes. |
The following video tutorial will walk you through the process of using Adobe Illustrator to crop images:
This is a rather simple process though, so continue on if you prefer to learn through a written format.
Table of Contents |
Step 1: Open your image
In order to crop an image in Illustrator we first need to open our image. To do so, navigate to File > Open and choose your image from your hard drive.
For this demonstration I will be cropping the following example image:
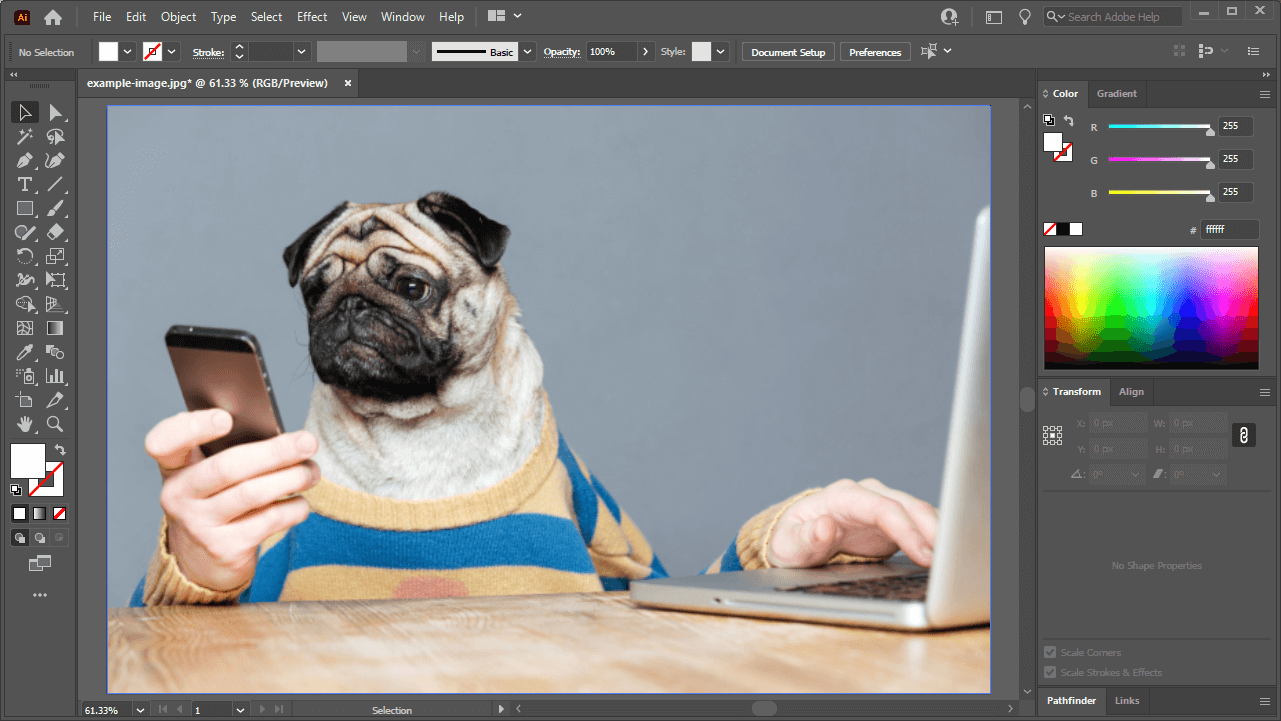
Click to enlarge.
If you don’t have your image saved to your hard drive, you can also copy and paste it onto your canvas if you’d prefer.
Step 2: Select your image with the Selection Tool
Next, grab the Selection Tool, which is the first tool at the top of the toolbox, represented by an arrow with an outline around it. Or you can grab it by pressing V on your keyboard.
With the Selection Tool activated, click on your image to select it. You’ll know you have your image selected when you see the square white handles in the corners and on the sides of the image:
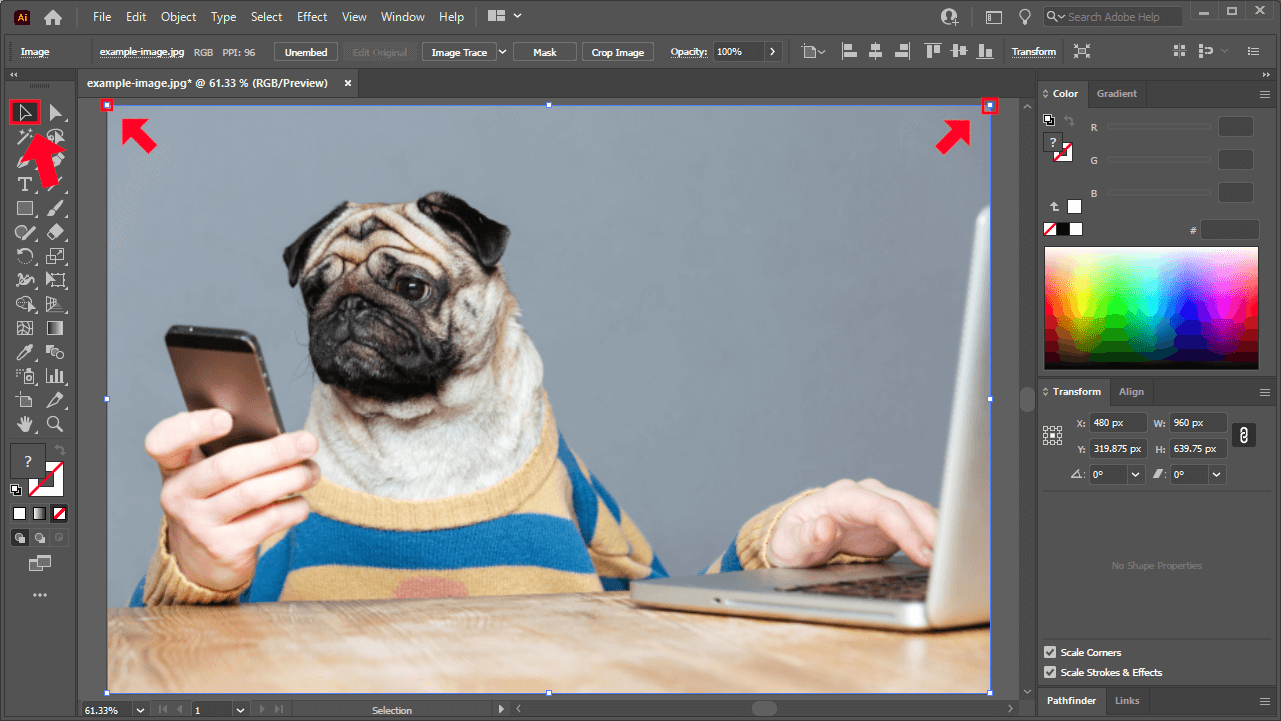
You must have your image selected with the Selection Tool in order to crop it.
Step 3: Crop your image using the Crop Image button
Now that you have your image selected, look towards the top of your screen, where the tool settings menu is. You should see a button labeled with Crop Image:
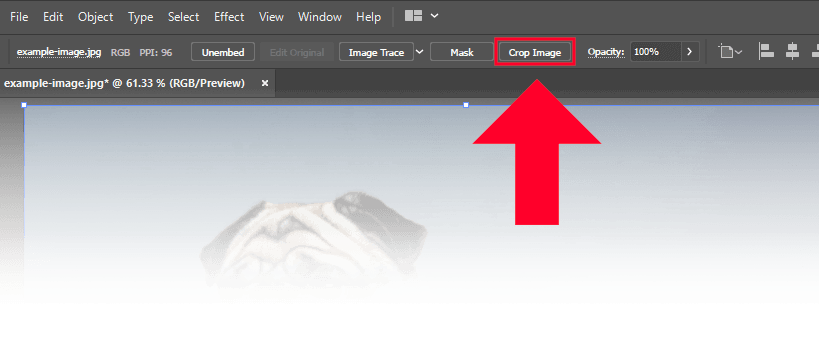
Illustrator’s cropping feature is nestled within the Selection Tool’s tool settings.
If you don’t see that button (or the tool options,) navigate to Windows > Control. This will enable the settings.
Clicking the Crop Image button will open up another menu that will allow you to crop an image in Illustrator.
Freehand Crop
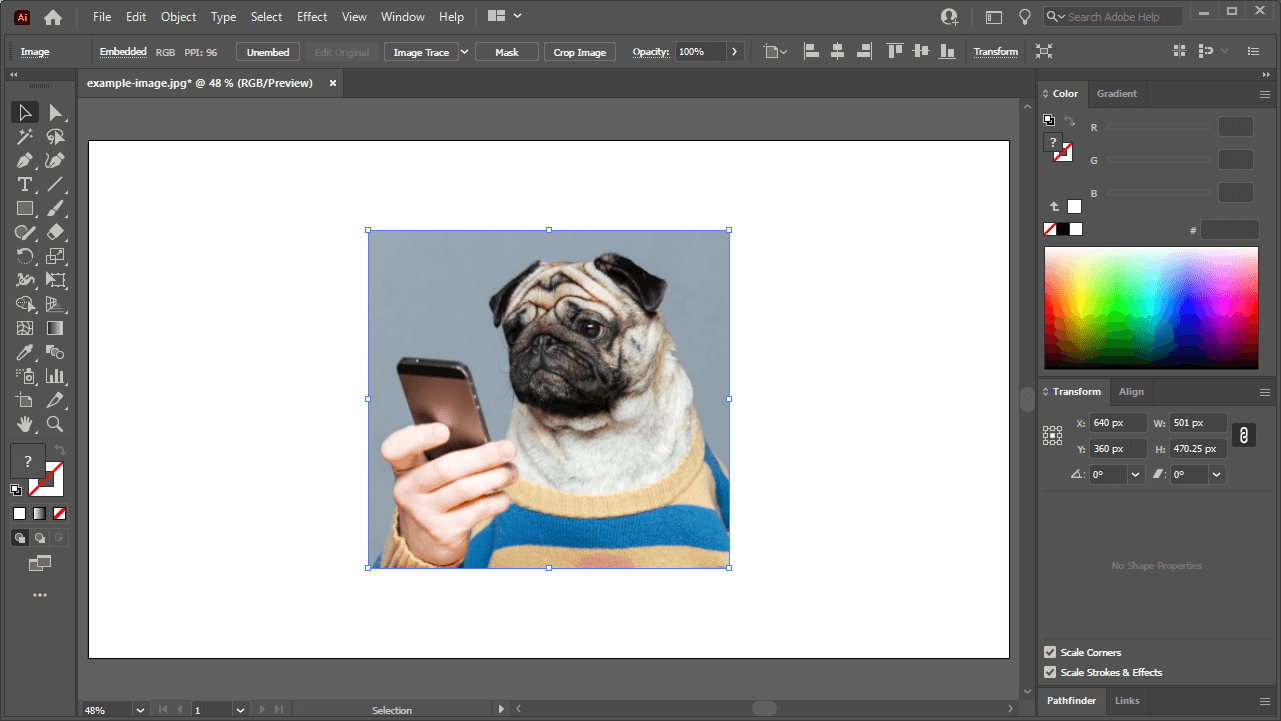
You can crop your image manually by clicking and dragging the handles at the top, bottom, and side edges of your image:
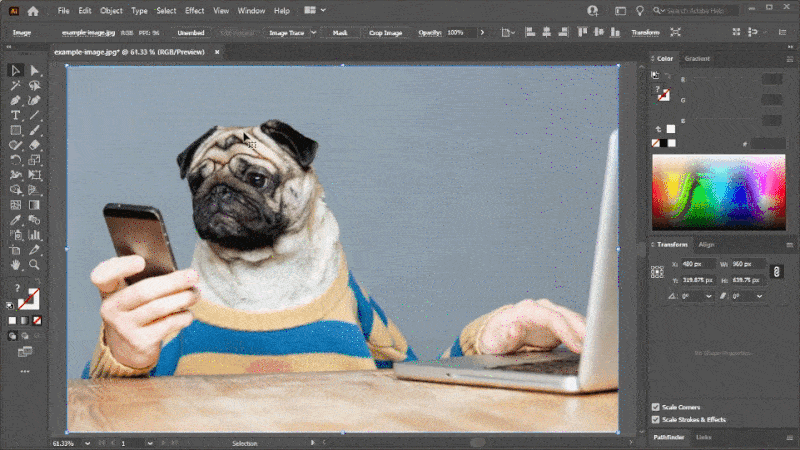
The cropping handles around the edges of the image can be clicked and dragged to your preference.
If you need to move the location of the crop at any point, you can do so by simply clicking and dragging inside of it, which will allow you to move it.
Crop Using A Numerical Value
If you need to crop your image based on a predetermined numerical value, you can do so using the input values in the tool settings menu:
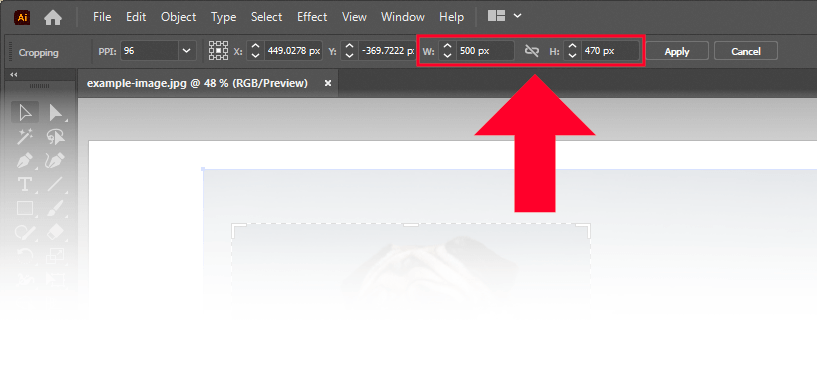
The width and height inputs are useful if you need to crop your image based on a predetermined numerical value. Or if you simply want to make the dimensions of your image have rounded numbers.
The W field represents the width and the H field represents the height. The chain icon between them will lock the aspect ratio when enabled so that the crop won’t become distorted as you change it. Leaving it deselected will allow you to change the width and the height independent of each other.
Once again, if you need to move the location of the crop preview relative to your image, you can simply click and drag it. Just make sure to click within the cropping area and not the edges of the box.
Once you are satisfied with the preview crop, you can apply it by clicking the Apply button in the tool settings window, or by pressing Enter on your keyboard.
Step 4: Export your newly-crop image using the Export Asset menu
Whenever you crop an image in Illustrator you’ll need to export your newly-cropped image in a usable format. Typically, this is either PNG or JPG format.
To export the image with its new dimensions we’ll be using the Export Asset menu, which allows us to save individual objects in a variety of formats.
To open the Export Asset menu, select your image and navigate to File > Export Selection. The Export Asset menu will populate:
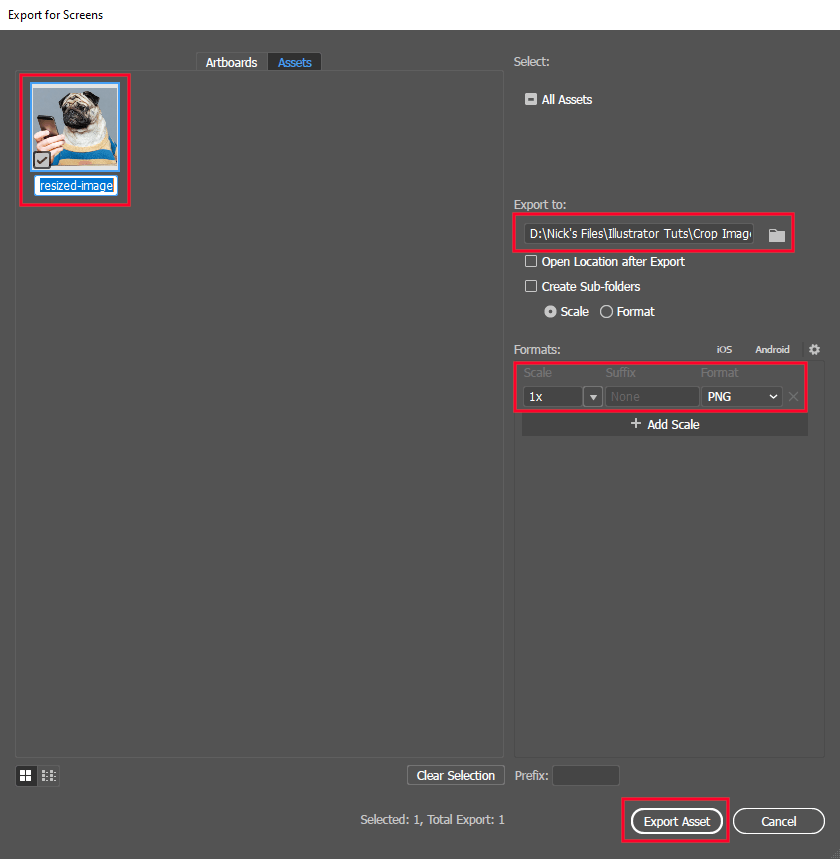
The Export Assets menu allows you to save your work in a variety of different formats and sizes.
The menu contains four areas of importance that’ll require your attention, all of which are outlined in red in the screenshot above. They are as follows:
- File name: This is the input box located beneath the thumbnail preview of your image. Change the name of this from “Asset 1” to whatever you’d like your newly-cropped file to be named. For this demonstration, I used “resized-image”.
- Export to: This is where you can choose the location on your hard drive that you’d like to save your work to. Clicking the folder icon to the right will prompt you to choose your location.
- Formats: This is where you can choose the file formats you’d like to save your work as. The inputs are as follows:
- Scale: This represents the size at which the image will be exported. Set it to 1x to export at the original size you were working with in Illustrator.
- Suffix: This will be added to the name of your file. It’s useful for when you create multiple size variations of a single object. Since we’re just exporting a single object, leave it blank.
- Format: This is where you can choose the file format it is saved as. For images, it would be either PNG or JPG. If your image uses transparency in any way, use PNG. Otherwise, JPG should be sufficient.
- Export Asset: Pressing this button will export your work based on your chosen settings.
To export your newly-cropped image, simply press the Export Asset button and then close out of the menu. Your image should be waiting for you in its designated location.
Conclusion
Knowing how to crop an image in Illustrator is a simple process that can save you a lot of time if you’re working primarily in a vector environment and you need to include some imagery. It’s much more convenient to use the built-in cropping feature than it is to launch another application (like Photoshop or GIMP) and crop it there. Thanks to Adobe’s robust features, cropping images couldn’t be easier.
If you have any questions, or if any part of this lesson was unclear, simply leave a comment below.
Learn To Master The SoftwareGain a complete understanding of your favorite design apps with my comprehensive collection of video courses. Each course grants access to our private community where you can ask questions and get help when needed.
|
||||||||||||||||||||||||||||||||


