How To Group Layers In Procreate | 2 Simple Steps
How To Group Layers In Procreate | 2 Simple Steps https://logosbynick.com/wp-content/uploads/2021/05/procreate-group-layers-2.png 800 470 Nick Saporito https://secure.gravatar.com/avatar/8e31bf392f0ba8850f29a1a2e833cdd020909bfd44613c7e222072c40e031c34?s=96&d=mm&r=gLearning how to design in a mobile environment means having to endure a unique learning curve, especially if you’re long-time desktop designer who is set in their ways. Tasks that would otherwise be mindless actions on a desktop application can be dumbfounding on a mobile app. One of these tasks would be grouping layers in Procreate, which, upon first sight, may seem not possible if you’re taking the interface at face value. However, that’s not exactly the case. In this tutorial we’ll be solving this mystery by going over how to group layers in Procreate.
In short, the way that you group layers in Procreate is by selecting each layer that you’d like to group at the same time, then clicking the “Group” option that populates at the top of the menu after selecting multiple layers at a time. There’s more to this subject though, like ungrouping your grouped layers, renaming them, and flattening them — all of which we’ll be going over in this tutorial.
How To Group Layers In Procreate
| To group layers in Procreate, select each layer that you’d like to group by sliding it to the right. Then, click the “Group” button that populates at the top of the menu when you have multiple layers selected. |
The following video tutorial will walk you through the process of grouping layers in Procreate:
This is a simple sort of lesson though, so feel free to follow the written instructions below if you prefer that format.
Table of Contents |
How to group layers in Procreate
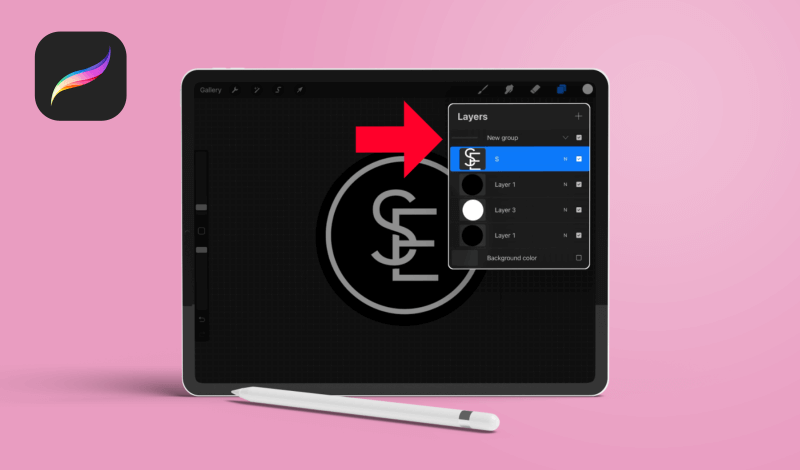
To group layers in Procreate, first open your Layers menu. For this demonstration I will be using the logo design tutorial that I made last week.
By default, you should see one of your layers selected, as indicated by its blue highlight:
By default, one of your layers will already be selected.
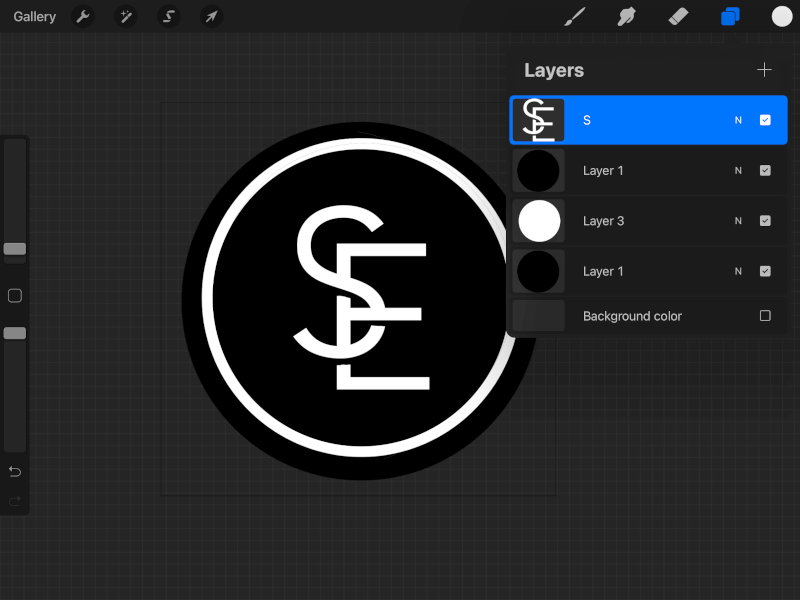
In order to groups some of these layers together, we’ll have to select at least two of them at once.
To select multiple layers in Procreate, simply slide each layer to the right. You’ll notice that those layers turn blue as well once selected:
Each layer that you select will turn blue.
All of the layers that you have selected will be grouped together, so it’s important that you only select the layers you’d like to group together.
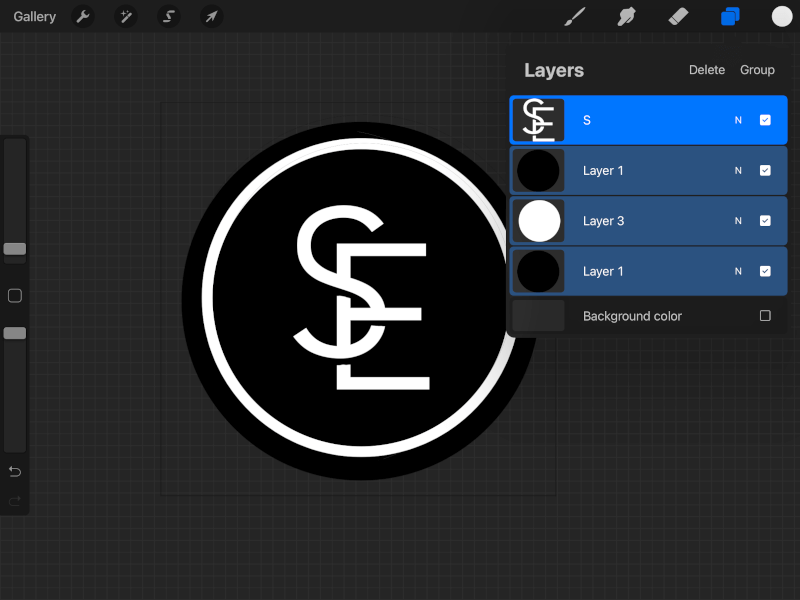
Once you have your layers selected, you should see an option to “Group” the layers together at the top of your menu:
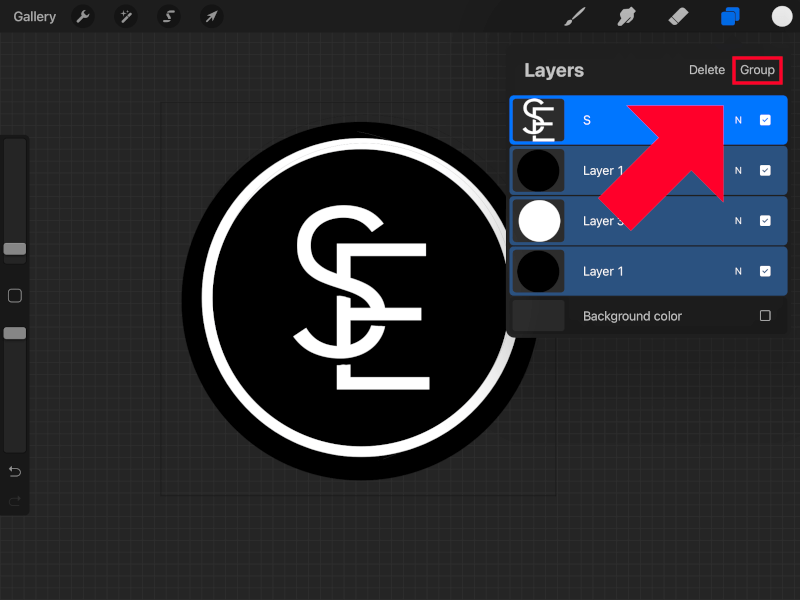
You must have multiple layers selected in order for the Group Layers button to populate.
Simply tap that button. Your layers will be placed within a new layer group of their own:
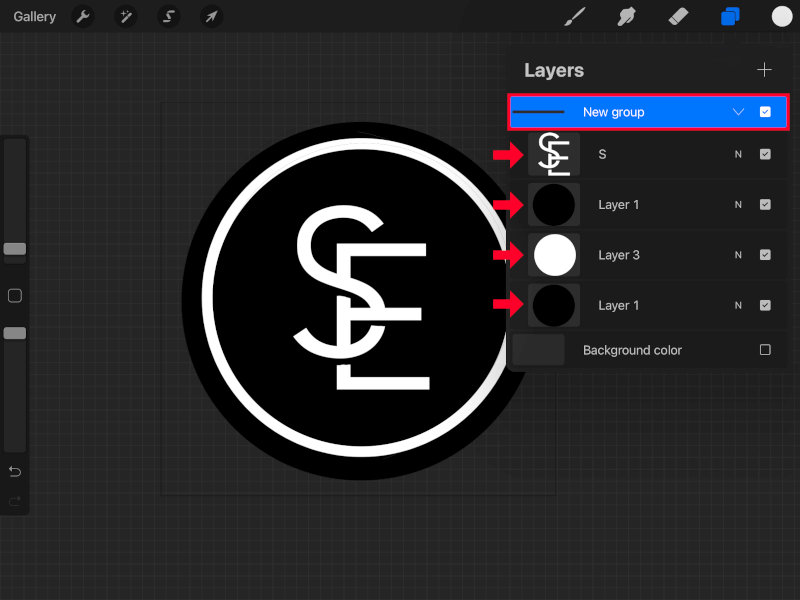
By default, the new layer group will be titled “New group”.
How to rename layer groups in Procreate
Now that you know how to group layers in Procreate, let’s go over how to rename your new layer group.
To rename your layer group, simply tap on it. A menu should appear:
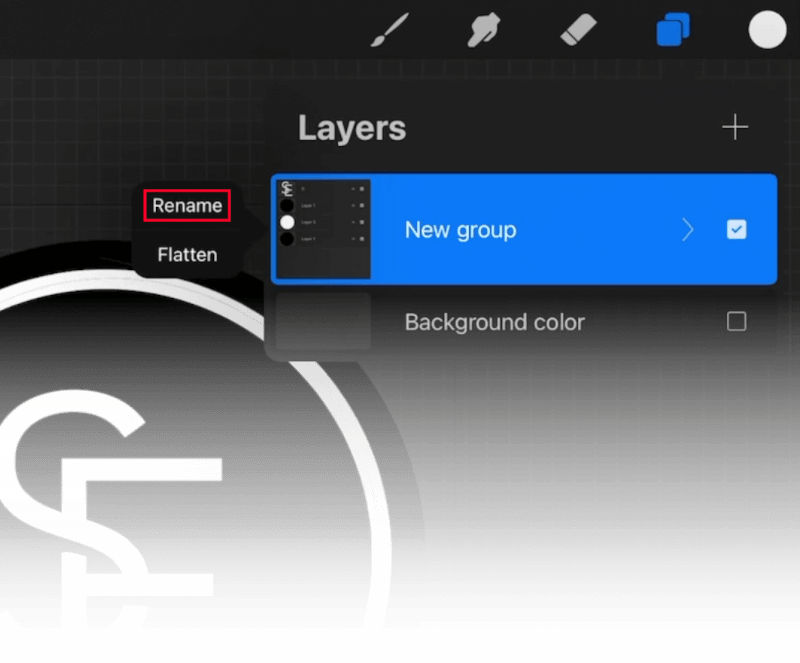
You may have to tap on the layer group twice to make this menu appear.
Select “Rename” and you will be prompted to choose a new name for your layer group:
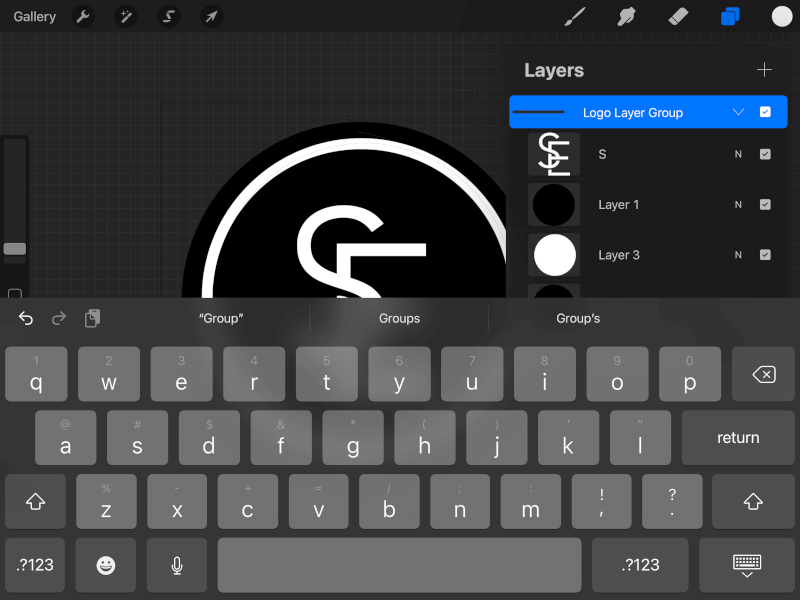
For this demonstration I renamed the layer group to “Logo Layer Group”.
How to flatten layer groups in Procreate
Layer groups don’t just allow you to organize your layers. They also allow you to flatten the grouped layers in case you’d like to combine them all. This is a more efficient approach then tapping on each individual layer and selecting “merge down”.
To flatten a layer group in Procreate, tap on the layer group menu to bring up the following menu:
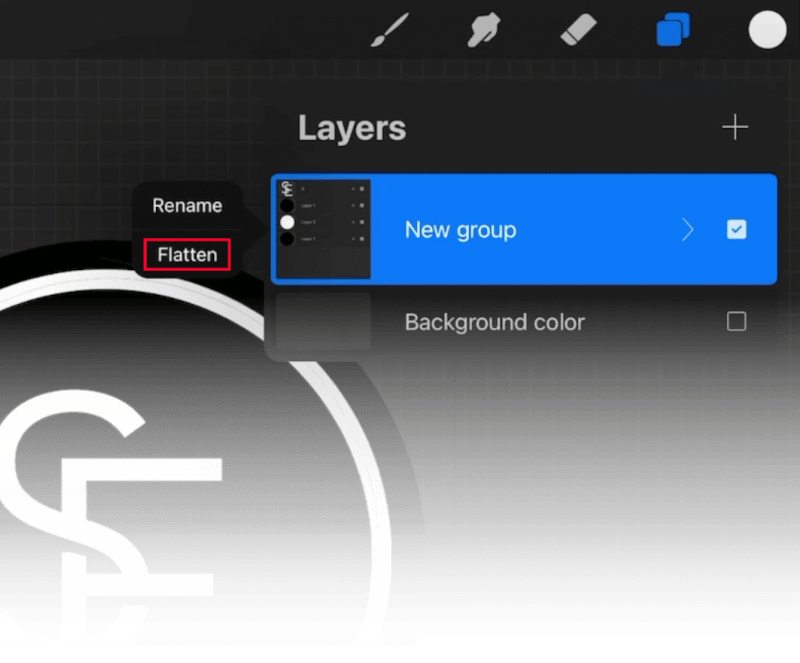
Simply select “Flatten“. Your layer group will be flatten into a single layer:
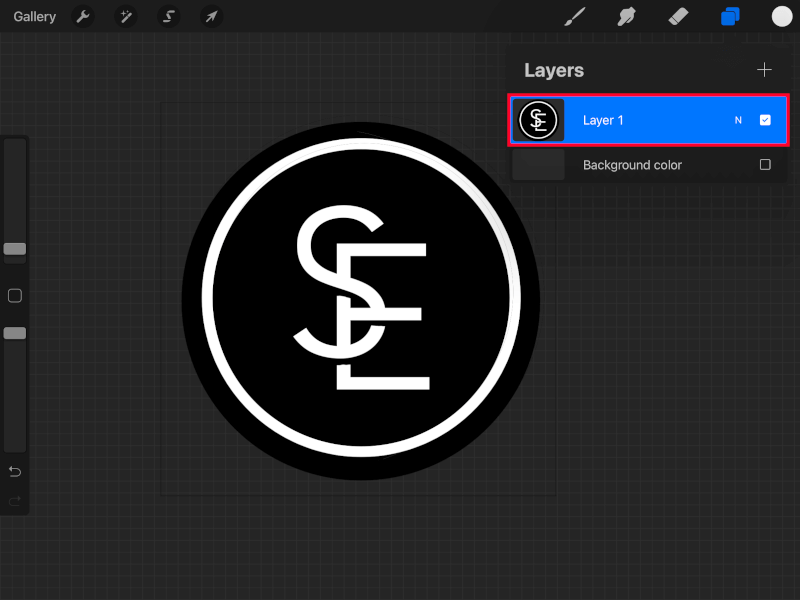
By default, the flattened layer group is named “Layer 1”.
It should be noted though that this action is final. There’s no way to separate your layers again once they’ve been flattened, so make sure you understand exactly what it is you’re doing beforehand.
How to ungroup layers in Procreate
Once you know how to group layers in Procreate, you may be wondering how you can ungroup layers later on.
Unfortunately, there’s no direct way to release a layer group. You’ll have to move each individual layer out of the group one-by-one.
To do this, simply hold a tap over one of the layers, causing it to float. Then, move the layer out of the group by placing it above (or below) the layer group. Repeat this process for each individual layer within the group.
Once you are finished, you can delete the empty layer group by sliding it to the left and tapping the red “Delete” button.
Conclusion
Although Procreate may seem to be a simple, streamlined app on the surface, looks can be deceiving. Throughout my time using this app I’ve come across many instances where I wanted to do something, but figured the feature doesn’t exist because it’s not available in plain sight. As is the case when trying to group layers in Procreate though, sometimes you need to dig a little deeper to find what you’re looking for.
If you have any questions, or if any part of this lesson was unclear, simply leave a comment below.
Learn To Master The SoftwareGain a complete understanding of your favorite design apps with my comprehensive collection of video courses. Each course grants access to our private community where you can ask questions and get help when needed.
|
||||||||||||||||||||||||||||||||


