How To Replace Every Instance Of A Color In Illustrator
How To Replace Every Instance Of A Color In Illustrator https://logosbynick.com/wp-content/uploads/2021/09/illustrator-replace-color.png 800 470 Nick Saporito https://secure.gravatar.com/avatar/8e31bf392f0ba8850f29a1a2e833cdd020909bfd44613c7e222072c40e031c34?s=96&d=mm&r=gThe way that you’d typically replace colors in Illustrator is by selecting an object and then changing its fill color. What if there’s lots of objects with that color though, and changing each of them individually would be too time-consuming? In this tutorial we’ll be going over a shortcut that allows you to replace a color in Illustrator in a way that it applies to every object in the document.
In short, there’s two ways to replace a color in Illustrator. For one, you can select all objects with a specific color and then change the fill color, or you can use the Recolor Artwork menu — a feature we touched on briefly in a previous lesson about brightening colors in Illustrator. We will be going over both methods in this lesson.
Replace A Color In Illustrator
The following video tutorial will walk you through both processes used to replace a color with another color in Illustrator:
Continue on for the written instructions.
Table of ContentsOption 1: Replace A Color By Selection
Option 2: Replace A Color Using Recolor Artwork
|
Option 1: Replace A Color By Selection
This first method for replacing a color would be the ideal approach to take if the colors you’d like to replace are obscured in groups, clipping paths, are layered beneath other objects, or are organized in any other way that makes them difficult select.
Step 1: Select the object with the Direct Selection Tool
The first step would be to grab the Direct Select Tool (keyboard shortcut: A) and then click on a single object that contains the color you’d like to replace:
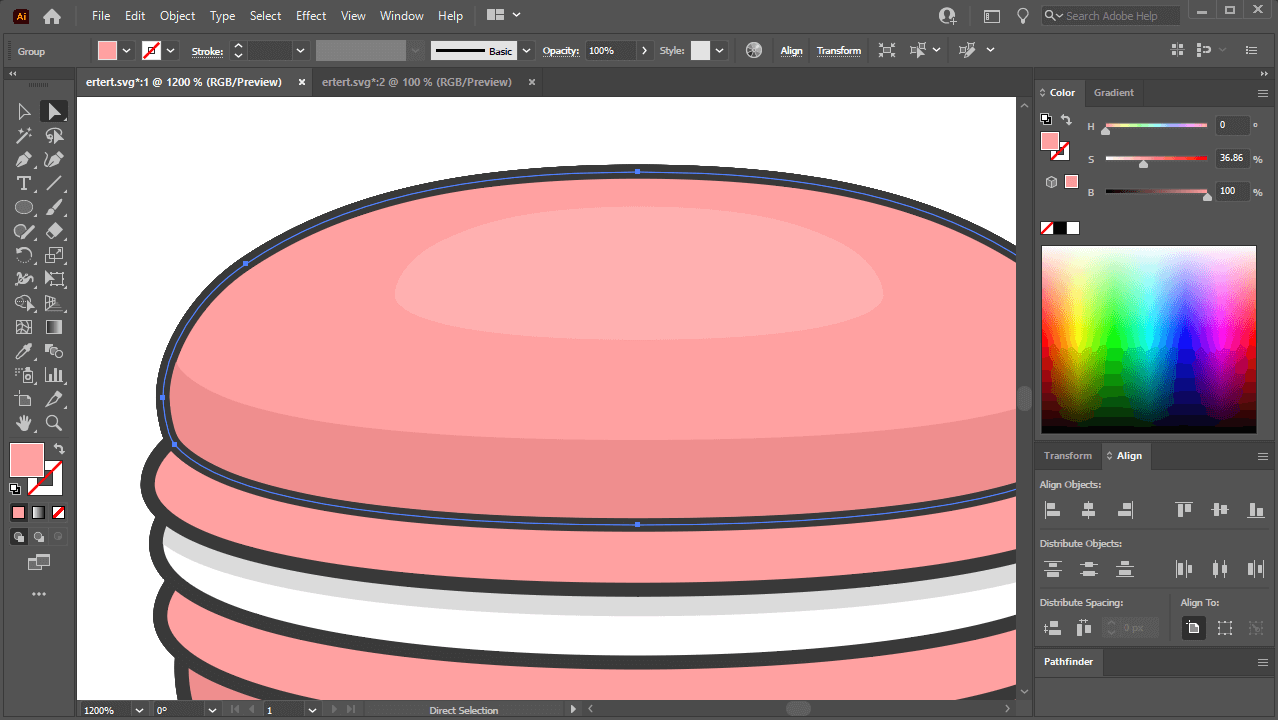
You can confirm that you have the correct object selected by checking the color indicator.
The reason we’re using the Direct Select Tool (as opposed to the Select Tool) is because the former can click through groups and masks, making it easier to select your object.
Step 2: Select all objects with the same fill color
Now we are going to select every object on the document that has the same fill color.
This is something that could be an arduous process if done manually, but thankfully there is a quick and easy way to select objects with the same color in Illustrator.
With your object selected, navigate to:
Select > Same > Fill Color
This will select every other object on your document with the same fill color:
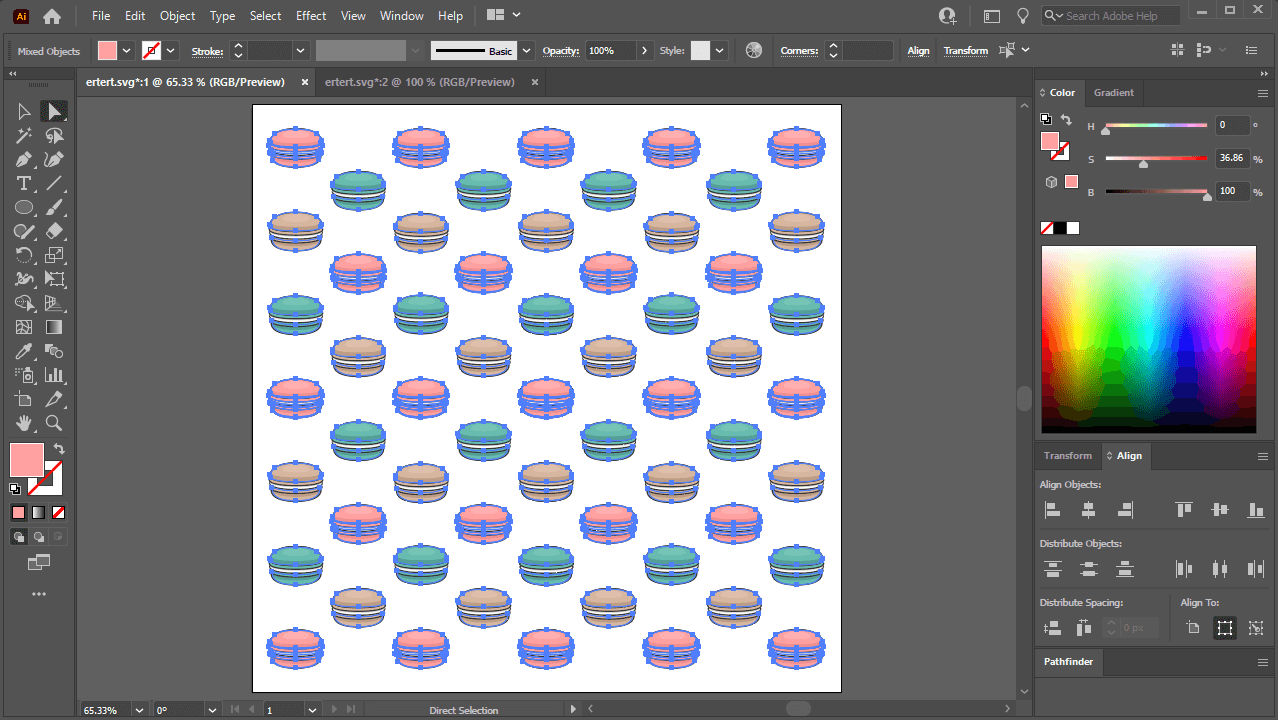
All objects with the same fill color will also be selected once applied.
Step 3: Change the color of the selection
With all of the objects selected, you can simply change their color the same way you would for an individual object:
- By double-clicking the Fill indicator at the bottom of the toolbar, or…
- By opening the Color menu by navigating to Window > Color
Go ahead and change your selection color to the color you’d like it replaced with:
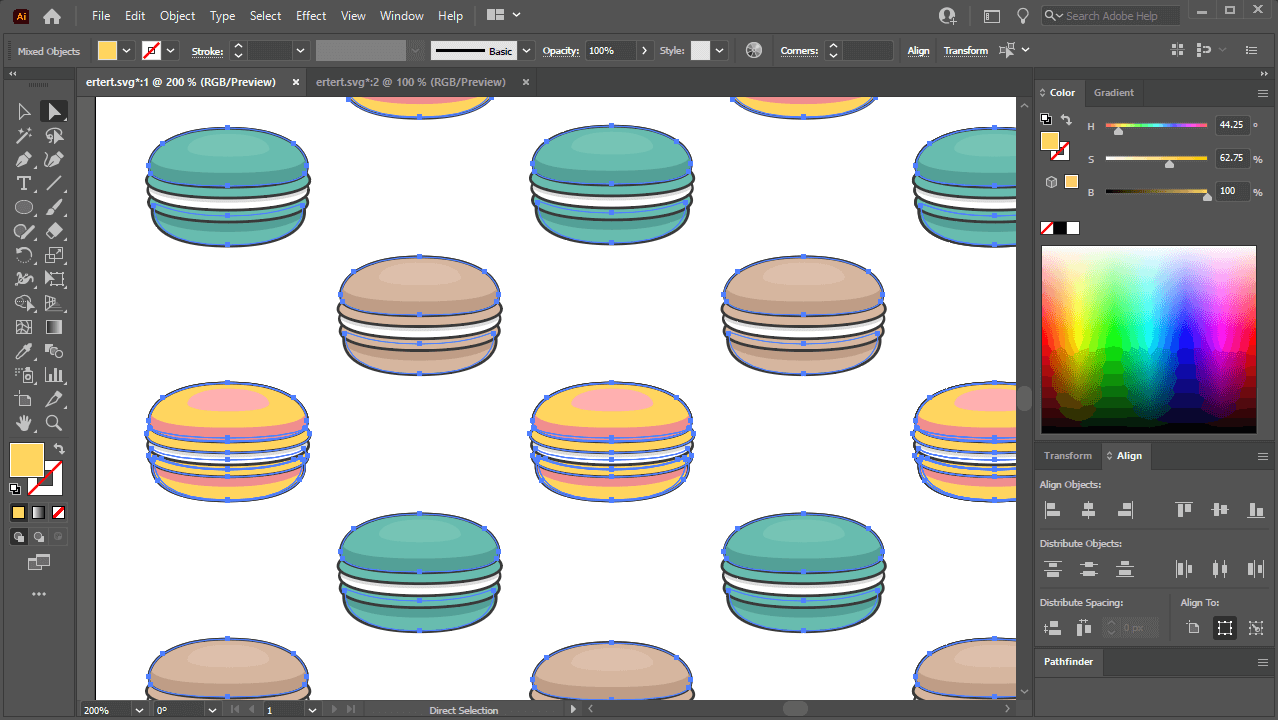
You can change the color of all the selected objects the same way you would normally change an object’s fill color.
And you’re done!
This method also works for stroke colors as well. All you have to do is select all objects with the same stroke color rather than fill color, and then change the stroke color of the selection as you normally would.
Option 2: Replace A Color Using Recolor Artwork
This next method for replacing colors would be ideal if you’re looking to replace more than a single shade of a color. So for example, you don’t just want to replace the color red; you also want to replace lighter and darker shades of red as well.
Step 1: Select all objects
In order for this method to work you must have all of the objects on your document selected.
To do so, press Control + A on your keyboard, or navigate to:
Select > All
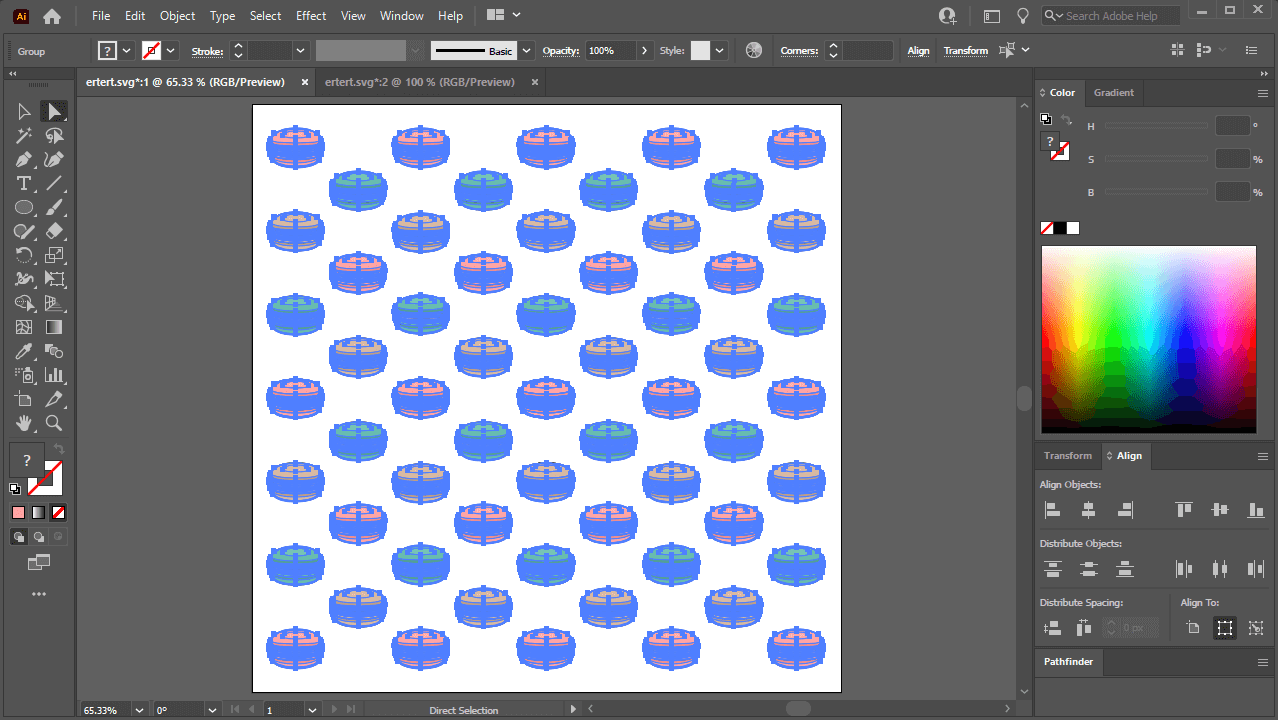
Select all objects by pressing Control + A.
Step 2: Open the Recolor Artwork menu
With all of your objects selected, open the Recolor Artwork menu by navigating to:
Edit > Edit Colors > Recolor Artwork
The menu should look something like this:

Once you are in the Recolor Artwork menu, click on the Advanced button.
Step 3: Locate the color(s) you’d like to replace and change them
The Recolor Artwork menu gives you granular control over the colors used in your document. So much so that it allows you to replace colors in Illustrator if need be.
In the Current Colors section of the menu you will see a list of every color used in your selection:
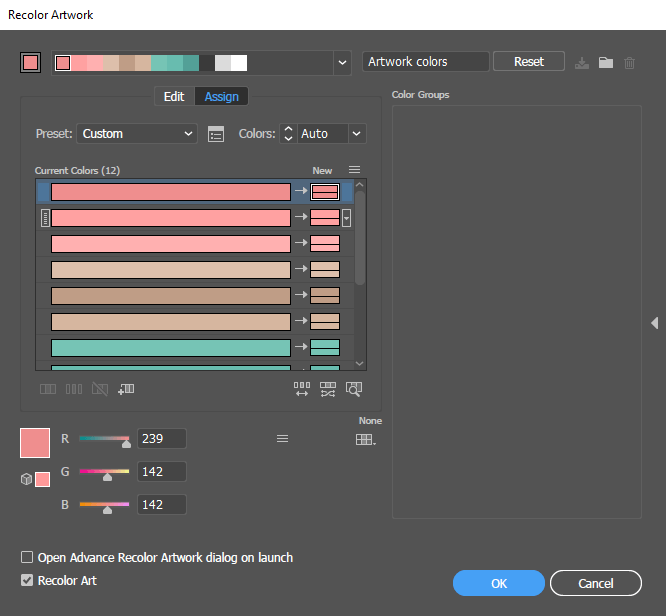
All of the colors used in a the document are listed in this menu.
The wider stripe on the left represents the original color. The smaller stripe to the right of it represents the new color that it will be changed to.
By default, the original color is used as the new color as well. You can change that though by simply double-clicking on it and changing it to whatever color you’d like.
If there’s any other colors you’d like to replace as well, now would be the time to go through the list and change each color as needed. Press OK once you are finished:
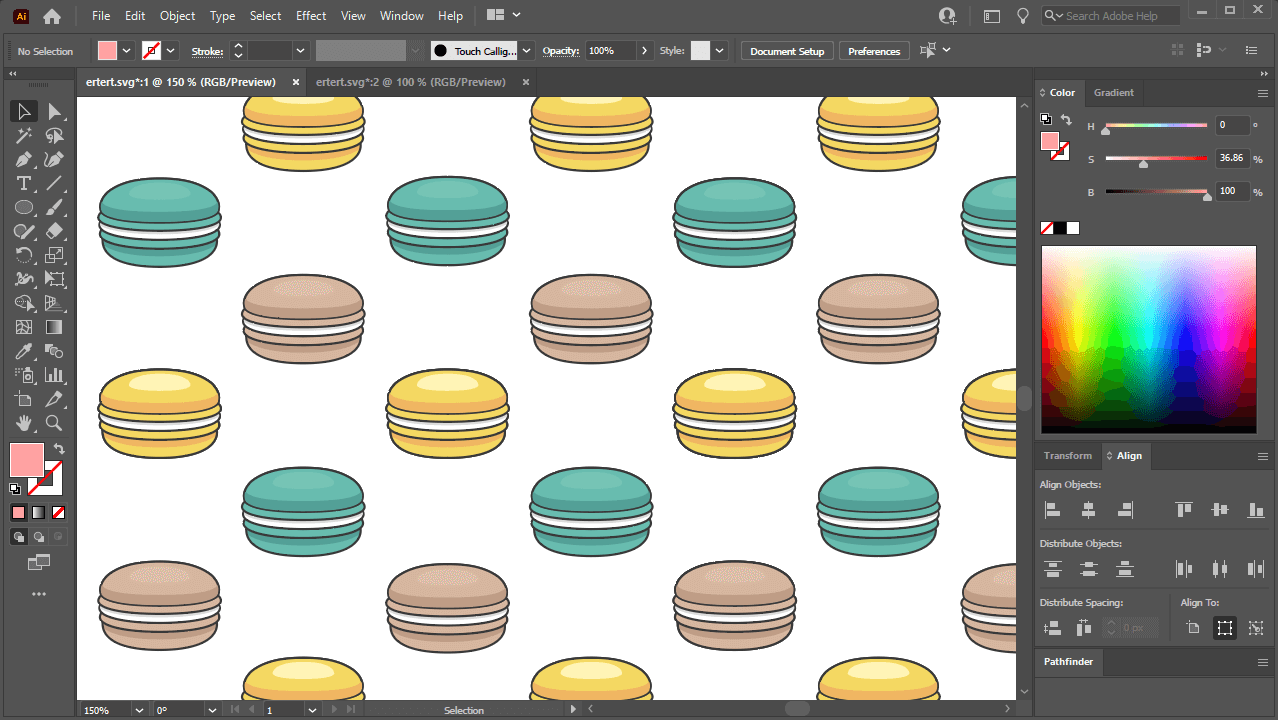
Using the Recolor Artwork menu I was able to replace multiple colors at a time.
And that is how you can replace multiple colors in Illustrator using the Recolor Artwork menu!
Conclusion
One of the benefits of using such an advanced piece of software is that there’s multiple ways to replace a color in Illustrator — whether it be a single color or multiple variations of the same color. Other applications don’t offer as many controls and therefore cannot handle this process as efficiently as Illustrator can.
If you have any questions or need clarification on any of the steps taken in this tutorial, simply leave a comment below.
Learn To Master The SoftwareGain a complete understanding of your favorite design apps with my comprehensive collection of video courses. Each course grants access to our private community where you can ask questions and get help when needed.
|
||||||||||||||||||||||||||||||||


Thank you so much for sharing this! Had no idea I could do this and it will make life so much easier!!
Trace Bitmap is a lot of fun once you’re familiar with it!
hey I want to recolor all my blacks for printing, but it only gives the option for RGB, not CMYK.
It’s there, you just have to click on Advanced, and then there’s a small menu icon near the RGB values that allows you to switch to another color format like CMYK.
Thanks a lot, Nick! This trick will save me from future trouble. Kudos!