
How To Remove A White Background with Adobe Illustrator
How To Remove A White Background with Adobe Illustrator https://logosbynick.com/wp-content/uploads/2020/04/remove-background-with-adobe-illustrator.png 800 470 Nick Saporito https://secure.gravatar.com/avatar/8e31bf392f0ba8850f29a1a2e833cdd020909bfd44613c7e222072c40e031c34?s=96&d=mm&r=gTrying to work with an image that doesn’t have a transparent background can be a pain, especially if it has a white background and you need to overlay it onto a backdrop that isn’t white. In this tutorial I’ll be demonstrating how you can remove a white background with Adobe Illustrator. This method can also work with any other type of background, whether it be a solid fill, a pattern, or something photographic.
Removing the background from an image is something that would be better suited for a photo manipulating program, like Photoshop or GIMP, but it most certainly can be done with Illustrator if that’s your tool of choice. The way that we’ll be doing this is by creating a silhouette-like tracing of your image’s subject, then using it to create a clipping mask.
Remove A White Background with Adobe Illustrator
| To remove a white background with Adobe Illustrator, use the Pen Tool to manually draw a shape around the subject of your image, then use that shape as a clipping mask for the image. |
The following is a brief overview of the steps we’ll be taking to remove the background from your photos with Illustrator. For complete step-by-step instructions, please watch the video tutorial below. There’s only so much that I can convey through written text.
- Step 1: Create a silhouette-like tracing over your subject.
- Step 2: Use your tracing as a clipping mask for the image.
- Step 3: Create a new artboard for your image and export it as a PNG file.
Let’s get started!
Step 1: Create A Tracing
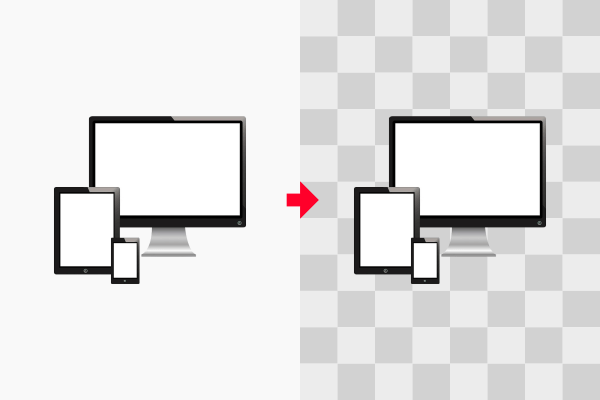
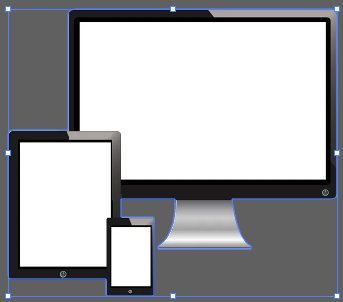
For this tutorial I’ll be using the following example image. As depicted, the goal is to remove the white background around the subject of the image and replace it with transparency (represented by the checkerboard pattern.)
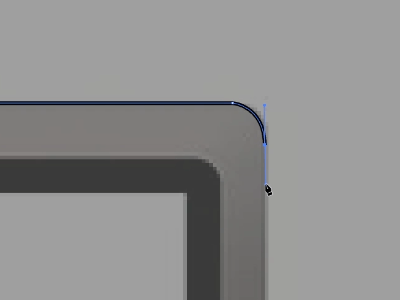
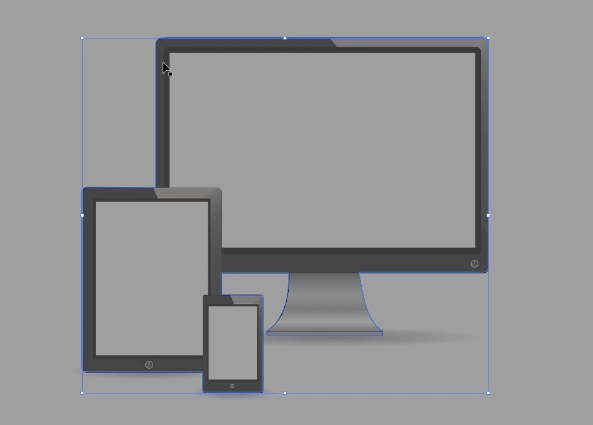
The first thing we have to do is manually create a silhouette-like object in the shape of the subject of your image. I placed a green tracing over my subject below to illustrate what I mean.

The green object will be used as a clipping mask and everything outside of it (the white background) will become transparent.
To create this object I used the Pen Tool and drew it manually.
If you’re not familiar with the Pen Tool yet, make sure to check out a tutorial I recently made on how to use the Pen Tool.
Step 2: Create A Clipping Mask
In order to remove a white background with Adobe Illustrator, we’re technically not going to remove the background; we’re simply going to extract the subject from the photo by making a clipping mask.
A clipping mask sort of works the same way a cookie cutter works. Think of your object as the cookie cutter and your image is the dough. You can use your object to grab only the portion of the image that the object occupies.
An added benefit of using this approach is that it’s not permanent. It can be undone at any point in the future if you so desire.
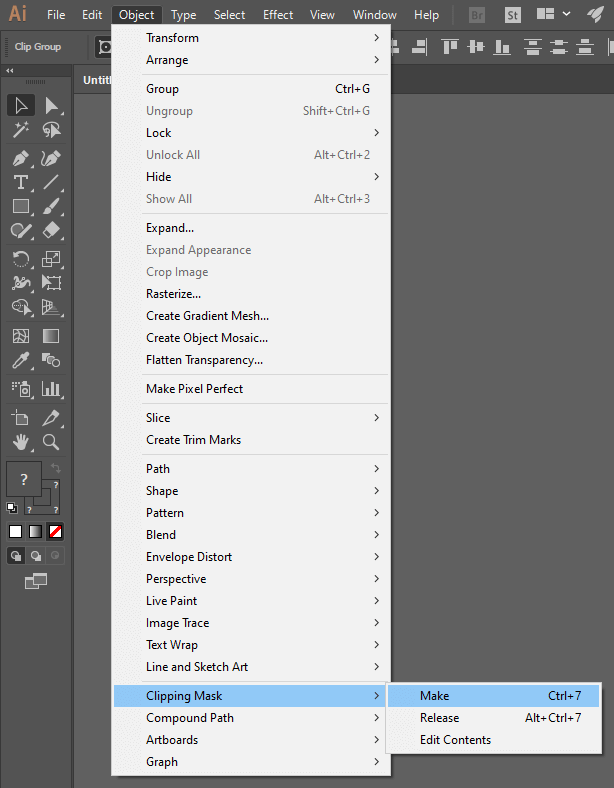
To make your clipping mask, select both your object and the image and navigate to Object > Clipping Mask > Make.
This will effectively remove the white background from your image. You can even move the image off of the artboard to see the gray background of Illustrator showing through.
You can undo this at any point by navigating to Object > Clipping Mask > Release.
Step 3: Exporting Your Work
Now that you’ve cropped the subject of your image from your background, it’s time to export your finished work.
Grab the Artboard Tool (keyboard shortcut: shift + o) then click on your image twice to create a new artboard around it, but make sure to move your image off of the original artboard and into the gray area first. Then you can delete the original artboard.
If you’re unsure about how to do this then check out the tutorial I made about sizing your artwork to the artboard with Illustrator.
After you have removed the white background from your image and placed a new artboard around it, it’s time to export your work. Navigate to File > Export > Export for Screens to bring up the Export menu.
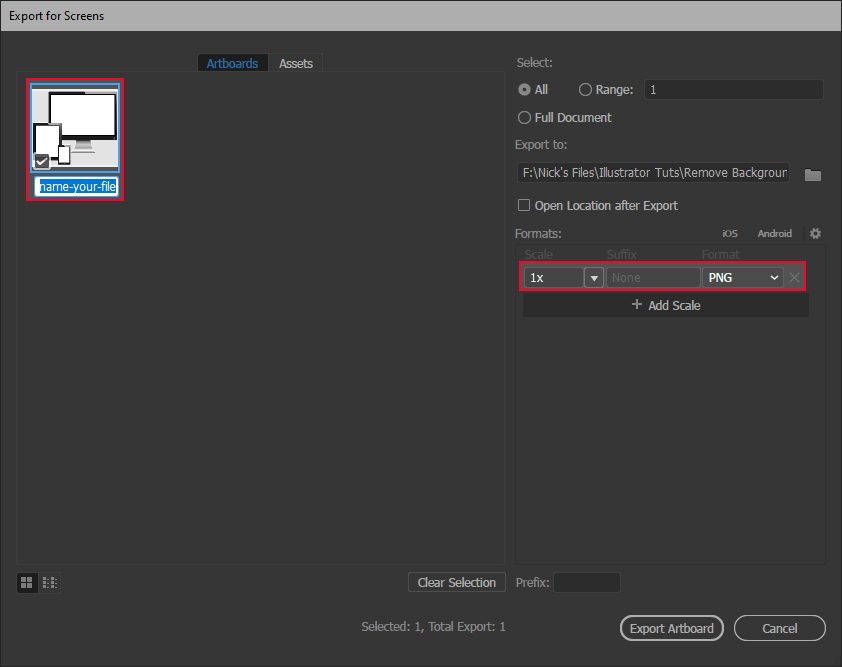
You can choose the file name by changing the name of the artboard in the top-left portion of the menu. You can choose the folder location to export it to by clicking the folder icon in the upper-right portion of the menu. Finally, under the Formats section, click Add Scale and choose the following settings…
| Scale | Suffix | Format |
| 1x | None | PNG |
It’s important that you choose PNG over any other format because PNG allows for transparency layers, whereas JPG does not. If you export your image as a JPG file then it’s going to make the background white by default, which defeats the entire purpose of this tutorial.
Once you have your settings in place, delete any other scales that may be listed by clicking the X icon to the right of them.
Now click Export Artboard to export your image and navigate to the file location on your hard drive to confirm that the white background has indeed been removed and replaced with transparency.
If at any point you want to go back and make changes to your work, you can save your document separately as an AI file. This is Illustrator’s native format that will allow you to pick up where you left off later on.
Conclusion
That should do it for today’s tutorial on how to remove a white background with Adobe Illustrator. Like I previously mentioned, Illustrator isn’t the best tool for this sort of task, but it can certainly get the job done. If you’d like to use an application more suitable for removing backgrounds from images then check out GIMP — a free and open source photo manipulation software similar to Photoshop. I have a tutorial on removing background with GIMP here.
If any part of this tutorial was unclear simply leave a comment below and I’ll see what I can do to help. As always, thanks for watching!
Learn To Master The SoftwareGain a complete understanding of your favorite design apps with my comprehensive collection of video courses. Each course grants access to our private community where you can ask questions and get help when needed.
|
||||||||||||||||||||||||||||||||


