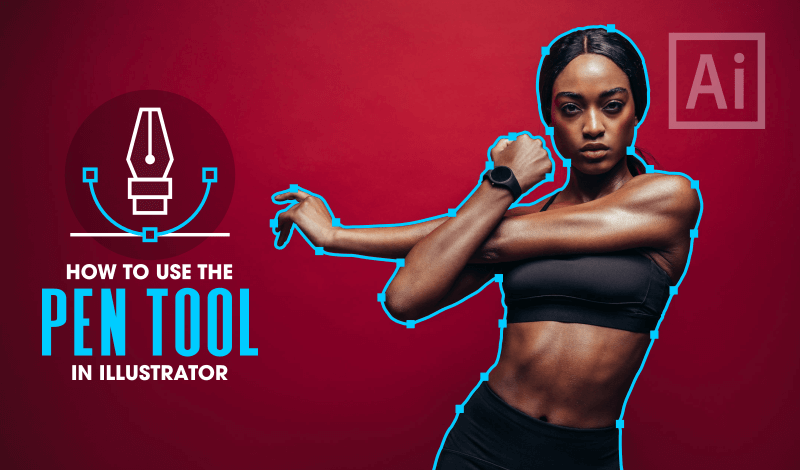
How To Use The Pen Tool in Illustrator | The Complete Guide
How To Use The Pen Tool in Illustrator | The Complete Guide https://logosbynick.com/wp-content/uploads/2020/04/how-to-use-the-pen-tool-in-illustrator-1.png 800 470 Nick Saporito https://secure.gravatar.com/avatar/8e31bf392f0ba8850f29a1a2e833cdd020909bfd44613c7e222072c40e031c34?s=96&d=mm&r=gThere’s many tools and techniques that need to be learned in order to master the art of vector illustration, but none may be more important than knowing how to manually create freehand lines and shapes. In Adobe Illustrator, the tool that allows you to do that is the Pen Tool, and in today’s tutorial I’ll be demonstrating how to use the Pen Tool in Illustrator.
The following is a written guide explaining how to use the Pen Tool in Illustrator. I’ve included animations to help illustrate each point. However, there’s a video tutorial below that will guide you through the explanation if you find it easier to learn that way:
The Pen Tool
In Adobe Illustrator, the Pen Tool allows you to manually draw freehand lines and shapes. It allows you to draw straight or curved edges that can be used either as independent lines or as complete shapes.
The Pen Tool is particularly useful when it comes to things like tracing vector silhouettes, or manually creating a shape that can’t be created using any of the other tools.

The Pen Tool is great for tracing and cropping subjects from the background.
As powerful as the Pen Tool is, it comes with a bit of a learning curve. It may take you a while to get a handle on how it functions, and once you do have an understanding of its functions it may take an even longer time for you to become proficient enough with it to be able to create any shape you want.
All good things come with time though, and the Pen Tool is no exception to that. Once you have mastered this tool your vector illustration skills will become boundless.
How To Use The Pen Tool in Illustrator
The Pen Tool comes with a lot of features, each of which serve unique and important purposes. Here are the important features I’ll be covering in this tutorial
- Creating lines and shapes
- Locking lines to an axis
- Adding new anchor points
- Deleting anchor points
- Creating curved lines
- Creating curved lines with corners
- Relocating anchor points as you draw them
Let’s begin!
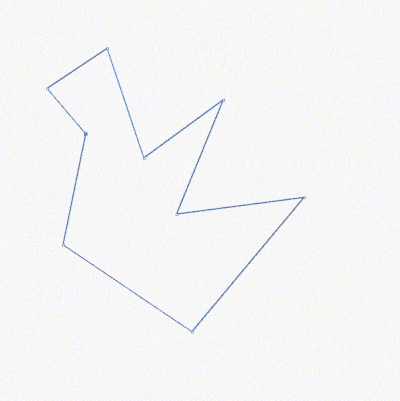
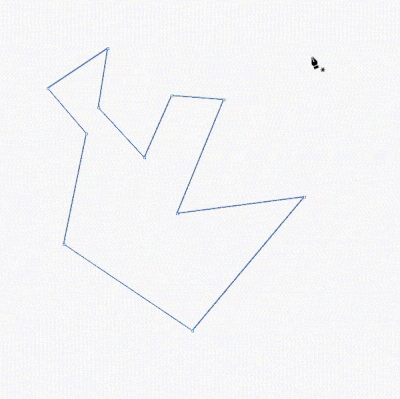
1. Creating Lines & Shapes
If you click on the canvas with the Pen Tool selected you will notice that it generates an anchor point where you clicked, and a blue line will follow your cursor as you move it around. This blue line represents a preview of where a line will be place if you click again.

Once you click again it’ll add another anchor point and a line will be generated between both anchor points. At this point you can simply press Enter on your keyboard and you will have generated a line.
However, if you keep clicking you’ll see that you can continue creating new anchor points wherever you’d like, until you click on the original anchor point to close the path.

This is how you would go about creating custom shapes with the Pen Tool.
2. Locking Lines To An Axis
Let’s say you want to add anchor points in a perfectly straight line that follows the X or Y axis. You can do this by holding Shift on your keyboard, which will restrict your lines to either the horizontal or vertical axis based on which direction you move your cursor.

Holding Shift also allows you to create your lines diagonally at perfect 45 degree angles.
3. Adding New Anchor Points
After you’ve finished creating your shape/line, you can add new anchor points by simply clicking on the line with the Pen Tool still active.
As you hover your Pen Tool over the edge of a line, you’ll notice that the cursor changes from an asterisk to a plus symbol. That’s how you know it’s ready to add points to a line.
You can then move and alter those anchor points with the Direct Select tool later on if you desire.
4. Deleting Anchor Points
The Pen Tool also allows you to delete anchor points if you so desire.
Once your shape or line is completed, you can hover your cursor over an anchor point. Once it’s located precisely over a point, the cursor will change to a minus symbol. Simply click on the anchor point to delete it.
As you can see in the above animation, the path that the line follows will default to the nearest anchor points to either side.
5. Creating Curved Lines
The Pen Tool also allows you to create curved lines if necessary.
To create a curved line, instead of clicking on the canvas to create a point, click and drag instead to make the line between the two points curved. You can dictate the contour of the curved line by moving your mouse around. Then, once you’re happy with the shape of the curve, you can finalize it by releasing the click.

This is one of the most challenging aspects of knowing how to use the Pen Tool in Illustrator. Once you’ve mastered the process of creating curved lines that follow the precise path that you want them to follow, you can pretty much draw whatever you’d like!
6. Creating Curved Lines with Corners
Whenever you create a curved line with the Pen Tool, the next anchor point you generate will also follow a curve. If you’d rather end the curve with a sharp corner instead, you can do that by simply ending the path by pressing Enter on your keyboard. Then, you can click on the anchor point again to continue on with your drawing in regular straight lines.

This is particularly useful when tracing a subject. You’ll have to create curved lines that end in straight corners quite frequently, so this is a good technique to familiarize yourself with.
7. Relocating Anchor Points
One of the most challenging aspects of creating curved lines with the Pen Tool is knowing exactly where to place them. It’s difficult to contemplate where a curved line is going to be generated after placing your anchor point, so sometimes you need to adjust the position of the anchor point accordingly.
To relocate your anchor point, simply press down on your Space bar and move your mouse around to adjust the placement of the point.

It should be noted that the anchor point can only be moved if you haven’t finalized its position by releasing the click yet. If you’ve already placed the point then you’ll have to undo that action by pressing Control + Z on your keyboard.
Changing The Pen Tool’s Settings
Finally, if you want to change some of the ways that the Pen Tool functions, you can do so in the Preferences menu, which can be activated by navigating to Edit > Preferences > Selection & Anchor Display.
This will bring up the following window…
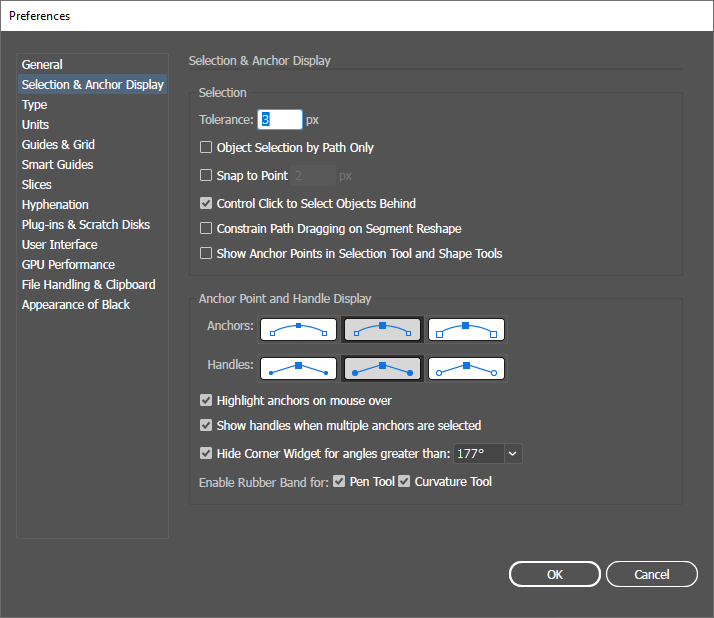
From there you can change how the anchor points and handle previews are displayed, as well as snapping settings, highlights, and angles. You can also opt to turn off the rubber band preview if you’d like, but I’m not sure what purpose that would serve.
That is how to use the Pen Tool in Illustrator! If you have any questions or need clarification about anything simply leave a comment below, and if you liked this tutorial be sure to check out my other Adobe Illustrator tutorials. As always, thanks for watching!
Learn To Master The SoftwareGain a complete understanding of your favorite design apps with my comprehensive collection of video courses. Each course grants access to our private community where you can ask questions and get help when needed.
|
||||||||||||||||||||||||||||||||


