How To Quickly Remove A Background In Affinity Photo
How To Quickly Remove A Background In Affinity Photo https://logosbynick.com/wp-content/uploads/2021/06/remove-a-background-with-affinity-photo.png 800 470 Nick Saporito https://secure.gravatar.com/avatar/8e31bf392f0ba8850f29a1a2e833cdd020909bfd44613c7e222072c40e031c34?s=96&d=mm&r=gOf all the different ways you can edit an image, one of the most common edits you may be looking to make is removing its background. This is an essential function for any graphic designer, and today we’ll be exploring exactly how to do so in Affinity Designer. Thanks to the Selection Brush — a very handy tool that allows you to quickly remove a background in Affinity Photo — this is a task that can be accomplished in minutes.
As we’ve gone over in previous tutorials, there’s many different ways in which you can delete a background to transparent, depending on the software you’re using. Some methods are quicker than others, but may produce a less accurate crop. However, other methods that do produce an accurate crop tend to take some more time.
Affinity Photo offers a nice balance between accuracy and promptness thanks to their Selection Brush tool, which uses a built-in algorithm to automatically detect where the edges of a subject are, then allows you to refine that selection afterwards. Let’s dig in!
How To Remove A Background In Affinity Photo
The following video tutorial will walk you through the entire process of deleting a background transparent using Affinity Photo for the desktop:
Continue on for the written instructions.
Table Of Contents
|
Step 1: Open your image and unlock the layer
To get us started, let’s first open the image in Affinity Photo by navigating to:
File > Open
Locate your image on your hard drive and select it. It will be opened in its own tab:
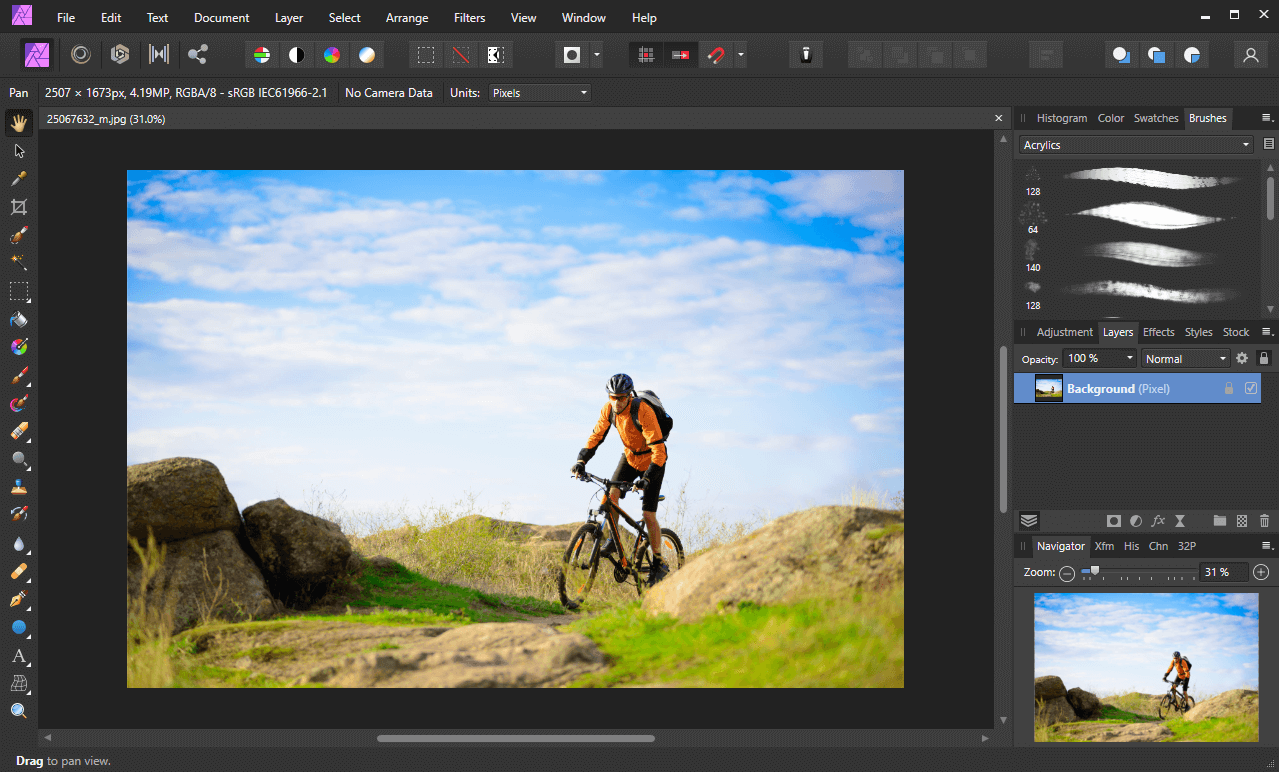
How your image looks once opened with Affinity Photo
In order to remove a background in Affinity Photo, you must first unlock the layer that the image is located on.
By default, your image should open in a locked layer, as indicated by the little lock icon on the right-hand side of it in the layers menu:
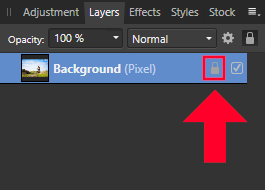
The layer lock icon is easy to miss. It’s a tiny little padlock icon on the right-hand side of the layer’s label.
Simply click on the lock icon to unlock it. This will allow us to alter the image as needed.
Step 2: Set the layer to “Rasterize & Trim”
This next step is really important, and as I went over in my tutorial about deleting a white background with Affinity Designer, it’s often overlooked.
In order to make edits to the image layer, we first need to tell Affinity Photo that we’d like to edit this layer as if it were any other layer that we created in the software.
To do so, simply right-click on your image layer and select Rasterize & Trim:
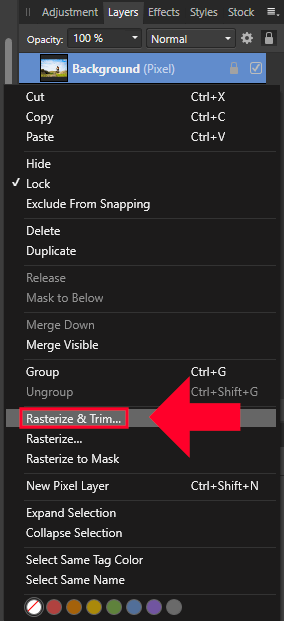
You must select “Rasterize & Trim” in order to edit the image layer further.
Just to reiterate, this step is important. If you do not apply this setting to your layer, you will not be able to delete the background to transparent.
Step 3: Use the Selection Brush to create a rudimentary selection around your background
With the layer unlocked and primed for editing, we can now begin the process of removing the background by creating a selection around the background.
To do this, we’ll be using the Selection Brush, which can be located in the toolbar on the left-hand side of your screen, or by simply using the keyboard shortcut, which is W.
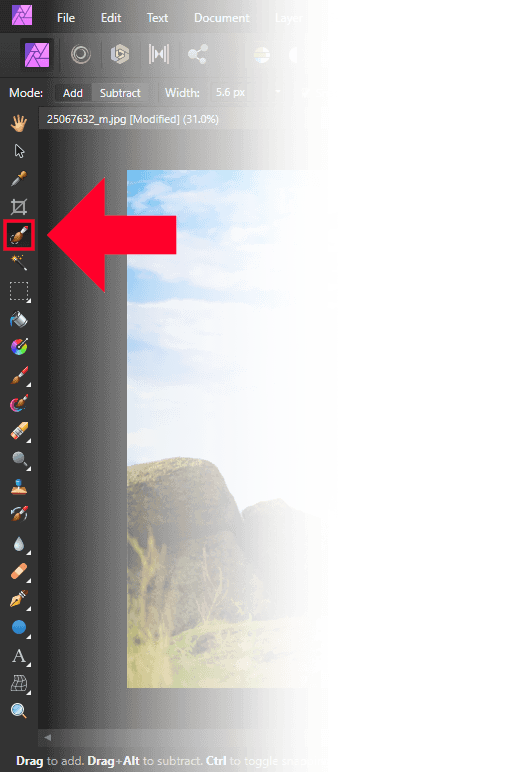
The location of the Selection Brush in the toolbar (click to enlarge.)
Once selected, you should notice that your cursor has changed to a circle. This represents the size of your selection brush. You can increase its size by using the right bracket key (]) or decrease its size using the left bracket key ([).
Set the brush to a fitting size and begin to manually paint over your background. You will notice that as you paint, a selection — represented by a marquee/moving dotted lines — populates on your screen as an indicator of what is selected. You will also notice that the brush automatically detects where the edges of your subject are:
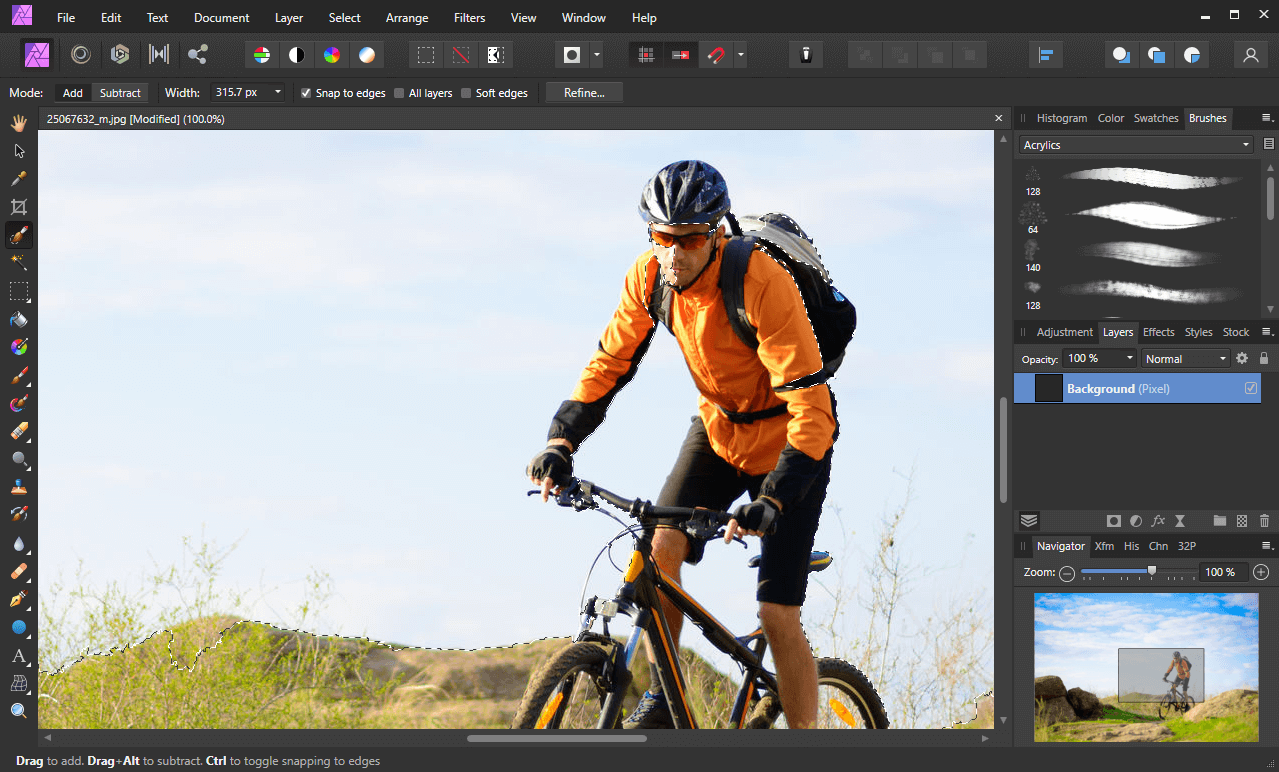
The marquee around the subject (or dotted line) is an indicator of the selection being created (click to enlarge.)
It should be noted that the Selection Brush is far from perfect. It is very likely that it will not accurately trace your subject, but that’s okay because we’ll be refining the selection in the next step. For now, we’re just focusing on creating a rudimentary selection around the background.
Step 4: Refine the selection further using the menu options
Once you’re finished creating your rudimentary selection around the background, you can refine that selection so that it’s more accurate by clicking the Refine button in the toolbar towards the top of the screen:
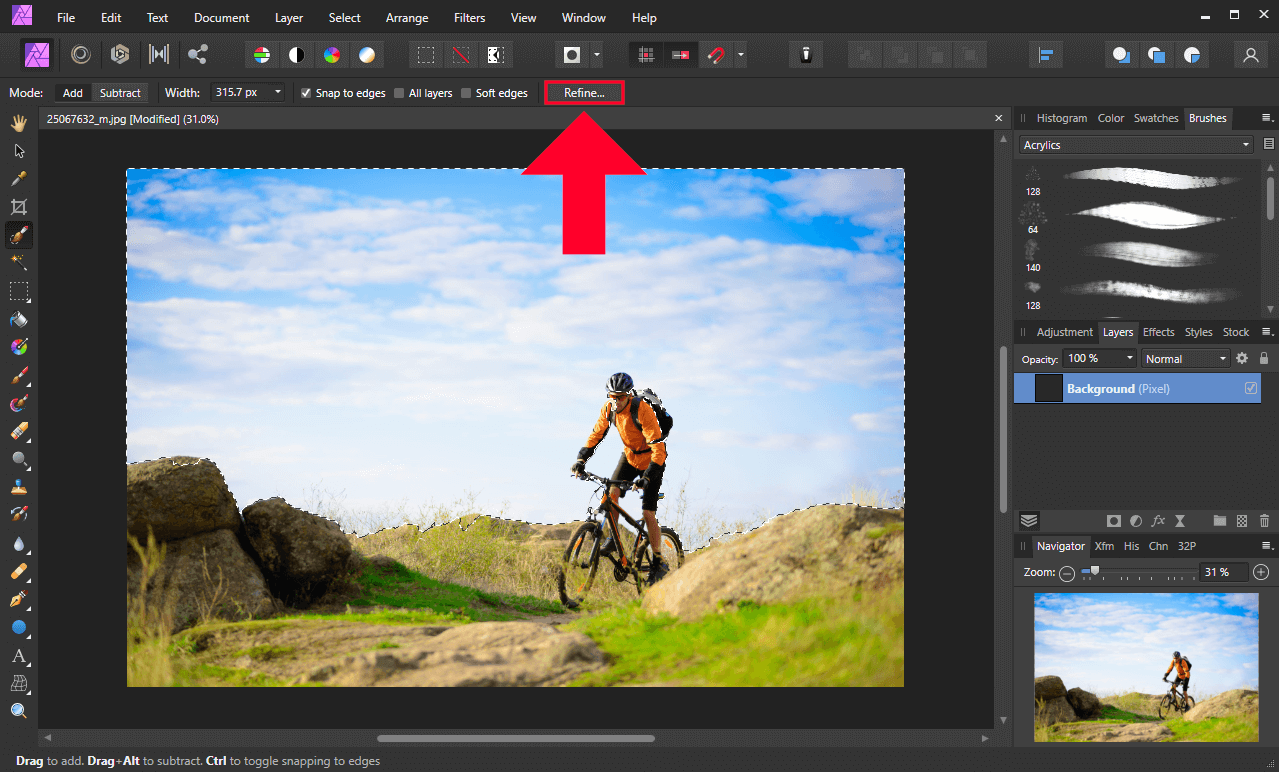
The Refine button is located in the tool settings menu towards the top of the screen.
This will open up the Refine Selection menu, and it will also apply a red mask over the areas outside of your selection:
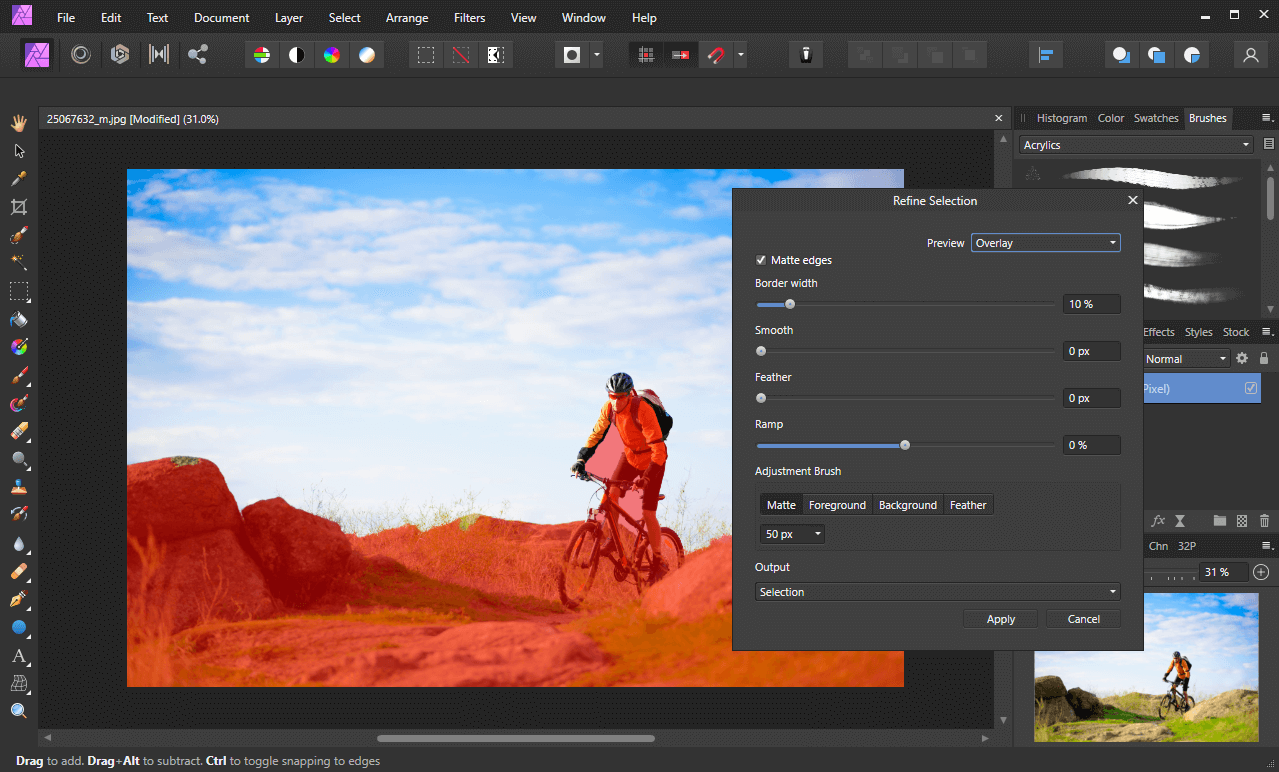
Within the Refine Selection menu you will see several options:
- Matte
- Foreground
- Background
- Feather
For this lesson we will be focusing exclusively on the Foreground and Background settings.
This is where things can become a little confusing. The Foreground setting does not represent the foreground of your image; it represents the selection you just created around your background (which would be the background of your image.) The Background setting represents the area outside of your created selection, which would be the foreground of your image.
Toggle back and forth between these two settings and carefully paint over the areas of your image where the selection needs to be corrected:
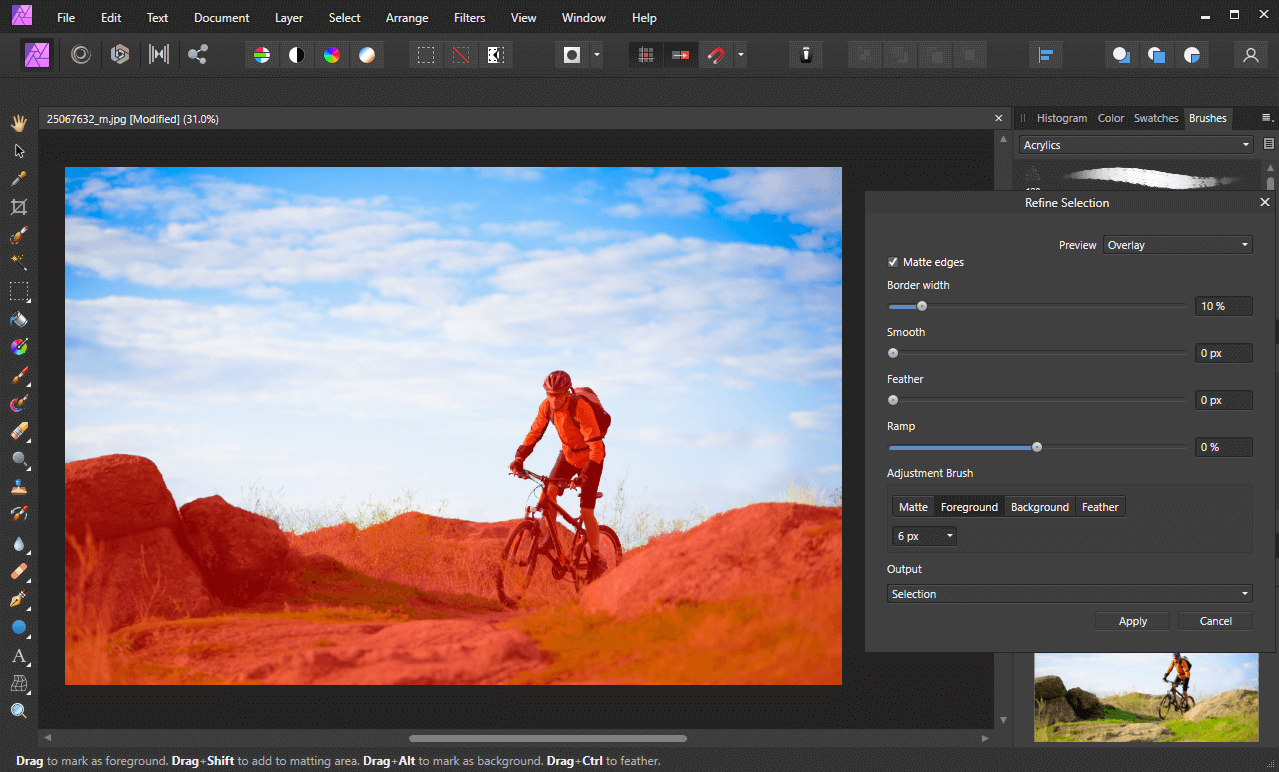
When finished, the red mask should accurately fit the contours of your subject.
Make sure to use your bracket keys to shrink or enlarge your brush as needed.
By the time you are finished, you should be left with an accurate selection over the foreground of your image, represented by the red mask.
If you need further clarification on this step then be sure to watch the video tutorial above where I demonstrate exactly how this works.
Once you are finished refining your selection, click the Apply button in the Refine Selection menu. The marquee outline on your canvas should update to accurately reflect your selection over the image’s background.
Step 5: Delete your background to transparent
With your selection refined, all you have to do now in order to remove a background in Affinity Photo is simply press Delete on your keyboard if you’re a Windows user. For Mac users, go to:
Edit > Cut
The background of your photo will be deleted to transparency, represented by the checkboard pattern in the background:
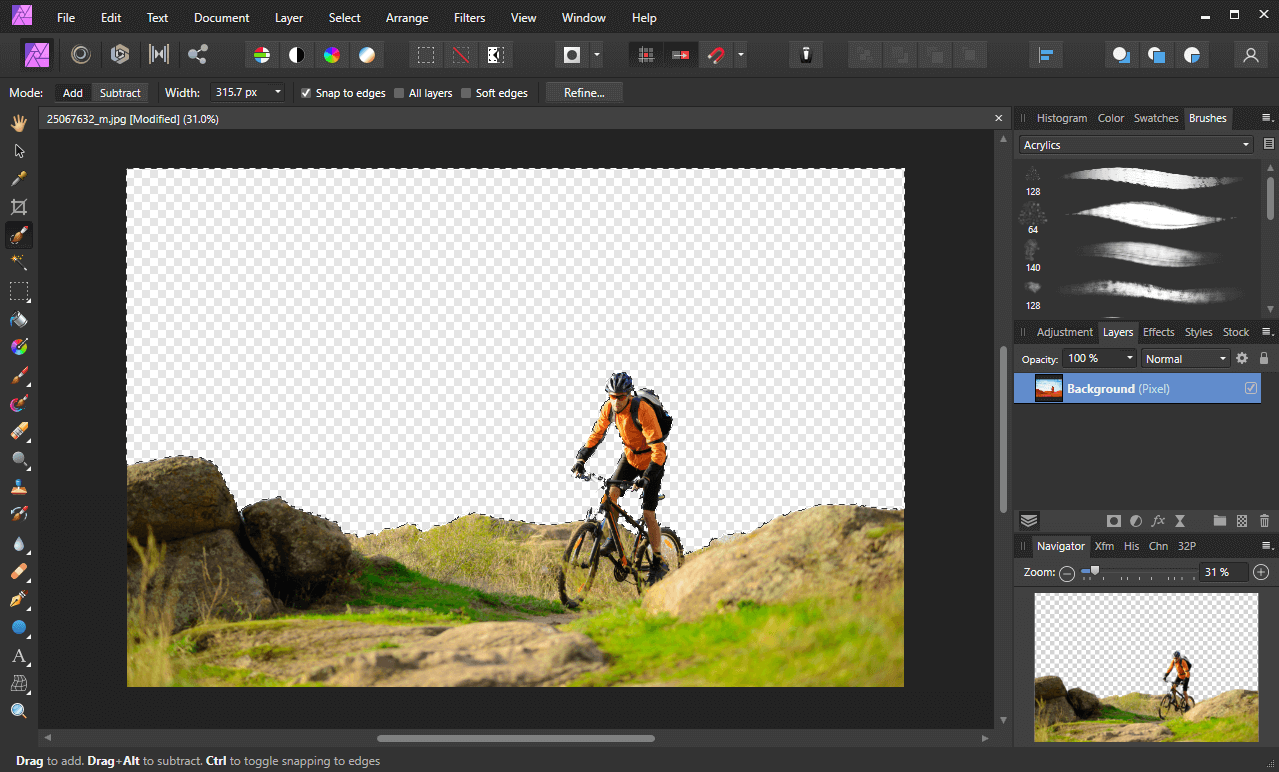
The checkerboard pattern represents areas of transparency, meaning the background has successfully been removed.
Once you’ve removed your background, you can release the selection by pressing Control + D on your keyboard, or by navigating to:
Select > Deselect
This will remove the marquee from your image.
Step 6: Export your image as a PNG file
Now that you’ve deleted the background from your image using Affinity Photo, it’s time to save your work to a usable file format. For this, we’ll be exporting it as a PNG file.
PNG files are preferable when working with transparency because it’s one of the only image formats that includes an alpha channel. Or in other words, it contains a separate layer that is reserved exclusively for transparency, meaning you can overlay your image onto any backdrop and it will show through the transparent areas.
In order to preserve the transparency of your deleted background, do not export your work as a JPG file. JPEG images do not support alpha channels (or transparency,) meaning your deleted background will default to some other color, like white.
To save your image as a PNG file, navigate to:
File > Export
This will open up the Export menu:

Make sure to export your image as a PNG file in order to preserve its transparency.
You will see a variety of different file formats to export your work as, but make sure to choose PNG from the tabs at the top of the screen, and leave the default settings as they are.
Once you press the Export button, you will be prompted to choose a location on your hard drive to save your PNG image to. And you’re done!
Conclusion
Thanks to the Selection Brush, you can quickly remove a background in Affinity Photo in a matter of minutes. And unlike other methods for deleting backgrounds to transparency — such as drawing paths and selecting by color — the Selection Brush allows you to make precise selections around your image’s background with relative ease.
If you have any questions or need clarification for any of the steps in this lesson, simply leave a comment below.
Learn To Master The SoftwareGain a complete understanding of your favorite design apps with my comprehensive collection of video courses. Each course grants access to our private community where you can ask questions and get help when needed.
|
||||||||||||||||||||||||||||||||


Thank you for your fantastic explanation to simplify the whole process.
Glad to help!