
How To Import An Image With Affinity Photo
How To Import An Image With Affinity Photo https://logosbynick.com/wp-content/uploads/2022/02/affinity-photo-import-image.png 800 470 Nick Saporito https://secure.gravatar.com/avatar/8e31bf392f0ba8850f29a1a2e833cdd020909bfd44613c7e222072c40e031c34?s=96&d=mm&r=gWhen working in Affinity Photo, you may find yourself wanting to import an outside image onto your current workspace so that you can work with it further. This process is very straightforward if you’re already familiar with the Affinity suite, but not so much if you aren’t. Do not fret, however, because in this tutorial we’ll be going over exactly how you can import an image with Affinity Photo.
In short, the secret to knowing how to import an image with Affinity Photo is familiarizing your self with Affinity’s dialect. In Affinity Photo, the import feature isn’t called “import”; instead it’s called “place“. This can be a little confusing if you’re accustomed to the import label commonly used in other design applications.
That said, you now know everything you need to know in order to import images into your workspace in Affinity Photo. Just select the File menu at the top of the screen and choose Place. However, there’s one consideration you may want to keep in mind, as well as a couple of alternative methods for importing images, so continue on for all the details.
Import An Image With Affinity Photo
Check out the brief explainer video I put together for a quick demonstration:
This is a pretty simple process though, so watching the video lesson isn’t necessary if time is of the essence.
As previously mentioned, there is nothing within Affinity Photo labeled with “import”. Instead, the designated term for this feature is Place.
To import (or “place”) your image, navigate to:
File > Place
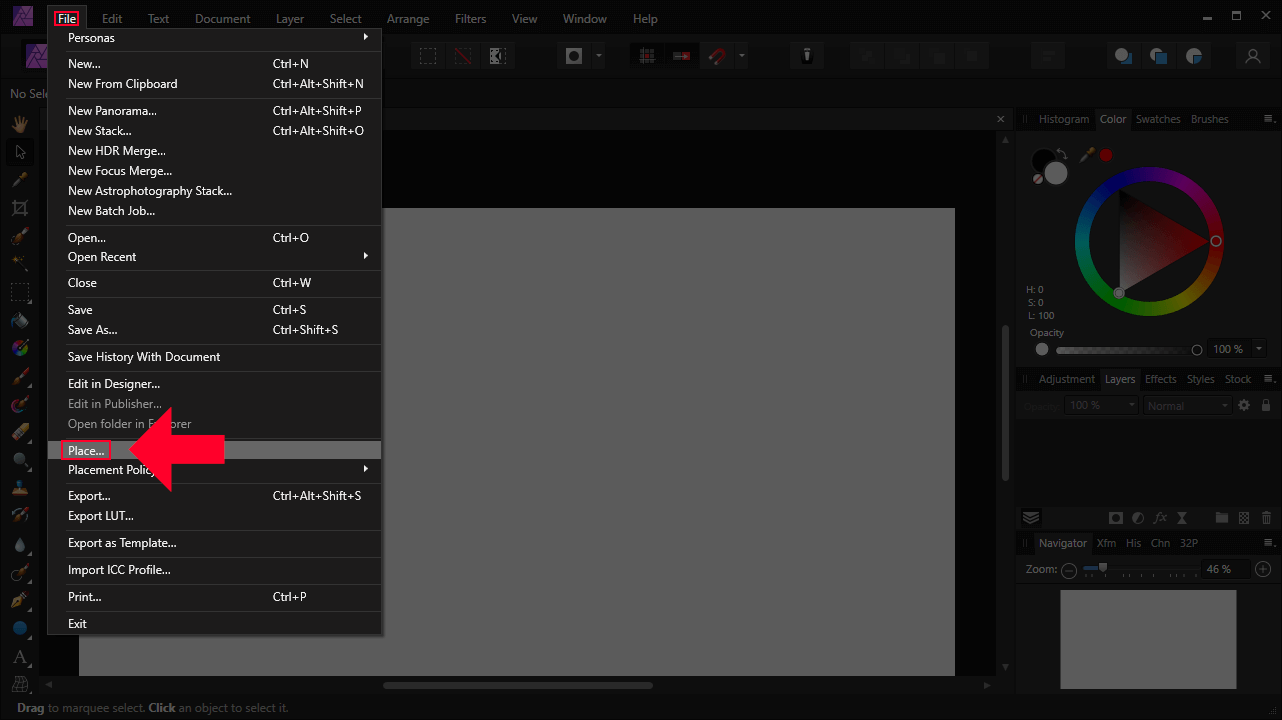
The “import” feature is called “place” in Affinity Photo.
You will then be prompted to locate the image file on your hard drive that you’d like to import into Affinity Photo.
Once you’ve selected your image, you should notice that it isn’t imported just yet. Instead, your cursor changes to depict a downward-pointing arrow with a blue ellipse beneath it. This cursor indicates that it has your image ready to place, but the software wants you to pick a location on your workspace to place it.
Simply click on the canvas to place your imported image:
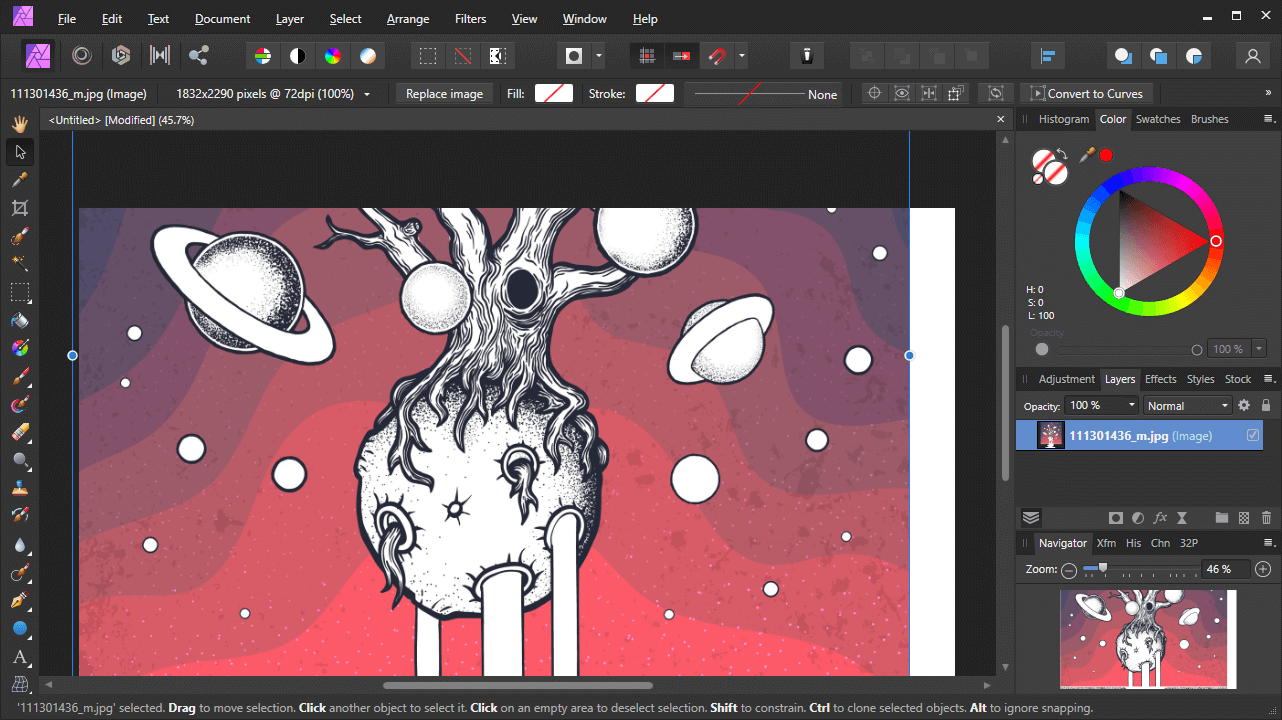
The imported image will be placed wherever you click with your mouse.
And that’s it! That is how you can easily import images into Affinity Photo.
Placement Policy
Before placing your image, you may want to check the Placement Policy setting first. Navigate to:
File > Placement Policy
Within that menu you will see two options:
- Embedded
- Linked
The difference between the two is that Embedded will make a new copy of the image that exists only within your document. Any changes made to that image will only be applied to the image within the document and not the original image file on your hard drive.
Linked, on the other hand, links the imported image to the original file located on your hard drive so that any changes made to it will also update the original image file to reflect it.
This is similar to how Illustrator’s image embedding policy works. Choosing Embedded is ideal if you plan on sending this file to another user as embedding the image will make it so that it remains within the document, even if the other user doesn’t have the image saved on their hard drive.
Linked is ideal if you want to save disk space by linking your imported image instead of creating a duplicate copy of it. The downside of using linked, however, is that if you send this file to someone else they will not be able to use the imported image unless they have it saved to the same location on their hard drive as yours and it has the same name.
Other Ways To Import Images
Using the Place feature isn’t the only way to import an image with Affinity Photo. Another method you could opt for is simply clicking and dragging the image file onto your workspace, which will automatically place (or import) it. This method is simpler if you’re working with a dual monitor setup.
Finally, you can also import an image by simply copy and pasting it. Just copy your image and then navigate to:
Edit > Paste
Or you can use the keyboard shortcut, which is Control + V.
Conclusion
When looking to import an image in Affinity Photo, your natural inclination may be to use the Open feature. However, that doesn’t import your image onto your current workspace. Instead, it just opens it up in a new tab. As we’ve gone over in this tutorial, you’ll need to use the Place feature to properly import images. Or you can simply copy and paste or click and drag them onto the canvas.
If you have any questions or if any part of this lesson was unclear just leave a comment below!
|
Become A Master of Affinity Designer!Want to learn more about how Affinity Designer works? Check out my Affinity Designer Master Class – a comprehensive series of over 60 videos where I go over every tool, feature and function and explain what it is, how it works, and why it’s useful. |
Learn To Master The SoftwareGain a complete understanding of your favorite design apps with my comprehensive collection of video courses. Each course grants access to our private community where you can ask questions and get help when needed.
|
||||||||||||||||||||||||||||||||


I have an older MAC desktop compute (version 10.15.7) Is there any minimum required MAC version to use Affinity?
Can Affinity import and deal with JPEG images as well as RAW?