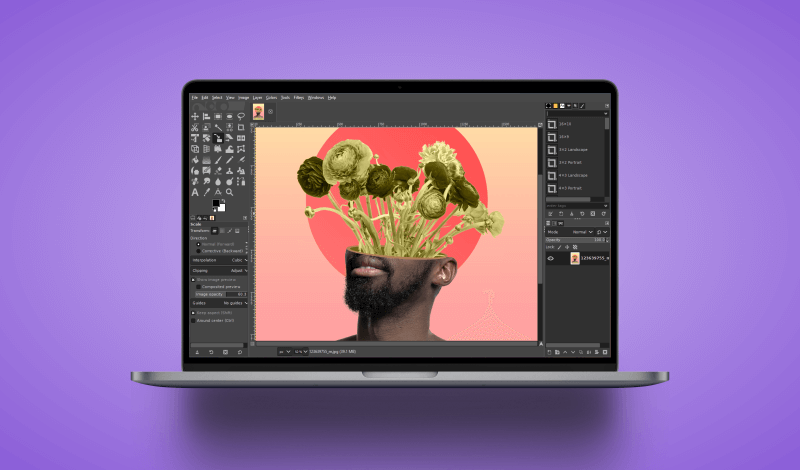
2 Ways To Resize An Image In GIMP – Manually And Numerically
2 Ways To Resize An Image In GIMP – Manually And Numerically https://logosbynick.com/wp-content/uploads/2022/02/gimp-resize-image.png 800 470 Nick Saporito https://secure.gravatar.com/avatar/8e31bf392f0ba8850f29a1a2e833cdd020909bfd44613c7e222072c40e031c34?s=96&d=mm&r=gResizing an image is probably the most basic and common transformation you can make in a photo editing application like GIMP. Fortunately, GIMP couldn’t make this process easier if they tried. In this tutorial we’ll be going over two different ways to resize an image in GIMP. One method allows for manual scaling, whereas the other lets you resize your image by inputting numerical values.
In short, the way to resize an image in GIMP is to open the Scale Image menu and input the numerical values that you’d like to resize your image by. If you’d like to resize your image manually, using on-canvas handles, you can do so using the Scale Tool. Let’s go over each method in depth.
How To Resize An Image In GIMP
The following video tutorial will walk you through both methods of resizing images:
Continue on for the written tutorial.
Table of ContentsResize An Image Numerically
Resize An Image Manually |
Resize An Image Numerically
Let’s first go over the easiest way to resize an image in GIMP, which is by using the Scale Image menu.
This method will allow you to resize your image by inputting a numerical value of your choosing. So, this would be the ideal method to use if you need your image to be a specific size.
Step 1: Open up the Scale Image menu
To resize an image with this method we will be using the Scale Image menu. It can be accessed by navigating to:
Image > Scale Image
Once opened, the menu should look something like this:
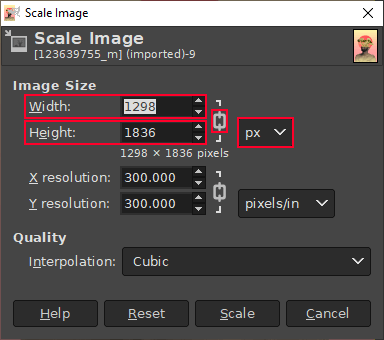
The pertinent information is outlined in red.
The input fields highlighted in red are what we’ll be paying attention to in this tutorial. The other settings are important but not relevant to resizing images in GIMP.
Step 2: Apply your desired settings
Let’s have a look at what some of the settings in the Scale Image menu represent:
- Width: This represents how wide the image is horizontally.
- Height: This represents the size of the image’s vertical height.
- Chain Icon: This setting allows you to lock the aspect ratio. When enabled, both dimensions will scale proportionately to prevent distortion.
- Units: This dropdown represents the preferred units of measurement. The default is Pixels (px).
Go ahead and input your desired settings. If you want to resize your image so that it is smaller, you will obviously want to input a letter numerical value than what is currently there, and the opposite is true if you’d looking to scale up.
Enable the aspect ratio lock if you’d like to ensure that your image does not get distorted when resizing. If you’d like to change the width and height independently then you can leave this setting disabled.
Step 3: Press the Scale button to apply the changes
Once you are finished inputting your desired setting, all you have to do now to resize your image is simply press the Scale button. The changes will be applied and you will have successfully resized your image.
If you want to clear whatever input you’ve made, you can do so by pressing the Reset button. You can also press Cancel to exit this menu without making any changes to your image.
The benefit of using this method to resize an image in GIMP is that it also scales the page document size in accordance with the image, which effectively removes an entire step.
Resize An Image Manually
Now that we’ve gone over how to resize an image using numerical values, let’s go over how to resize an image in GIMP manually, by clicking and dragging the on-canvas handles.
This method is ideal if you don’t know exactly how much you’d like to scale your image by, and would rather eyeball it to see how it looks. This method also allows you to resize just the image and not the canvas if need be.
GIMP has a built-in tool for scaling individual layers known as the Scale Tool. It should be noted though that if your image has multiple layers then this tool will only scale individual layers and not the entire image. When resizing images with multiple layers it is recommended that you follow the first method.
That said, if all you’re looking to do is resize your image then chances are you’re only working with one layer. Let’s proceed.
Step 1: Activate the Scale Tool
Activate the Scale Tool in the tools menu on the left-hand side of your screen:

Alternatively, you an access it via the keyboard shortcut, which is Shift + S.
Step 2: Click on the image to activate the scaling handles
In order to resize an image using the Scale Tool, you will need to click on the image first to activate it.
Once you’ve activated the image, scaling handles (represented as empty squares) will populate in the corners and sides of your image:

Click to enlarge.
In addition, you will have a dialog menu that allows you to resize your image numerically if desired.
Step 3: Resize your image by clicking and dragging the scaling handles
All you have to do now to resize your image is simply click and drag one of those square handles:

As you click and drag to resize the image, it should scale proportionately by default. Or in other words, the aspect ratio of the image will be locked so that the width and height do not become distorted.
To resize your image in such a way that allows you to resize just the width or just the height independent of each other, simply hold Shift on the keyboard while clicking and dragging. The aspect ratio lock will be released and you will then be able to distort your image.
Once you are finished resizing your image to your liking, all you have to do to apply the changes is press the Enter key on your keyboard.
Step 4: Resize the canvas to fit the image
The one downside of resizing your images with this method is that it only resizes the image an not the actual canvas itself, as represented by the transparent checkerboard pattern where the image used to be:
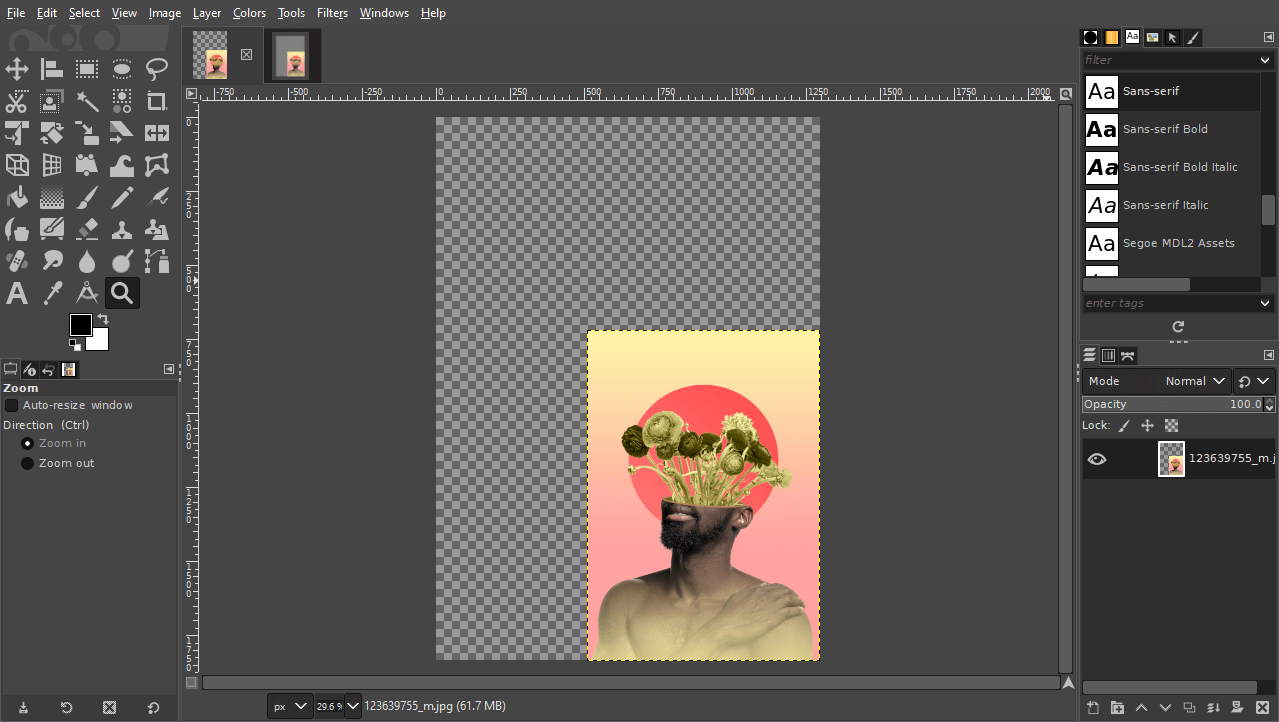
The empty space is now occupied by transparency, or a checkerboard pattern (click to enlarge.)
In order to correct this we will need to resize the canvas, or Crop To Content as the feature is labeled in GIMP.
To do so, simply navigate to:
Image > Crop To Content
If done correctly, the canvas should now be the same size as your resized image, and the checkboard pattern (or white background if your image has no alpha channel) should be gone.
Save & Export Your Work
Knowing how to resize an image in GIMP cannot be a productive endeavor if you don’t know how to properly save and/or export your image once it is resized. Otherwise, you just have a resized image that only exists inside of the software, which is pretty useless.
Let’s first go over how to save your work in case you’d like to edit this document again in the future.
Saving Your Work
To save your work in its current state, navigate to:
File > Save As
This will prompt you to choose a location on your hard drive to save the workspace to. GIMP’s native format is XCF, and that will be the default file format that is applied when saving your work.
If you’ll only be editing this image in GIMP then leave it as XCF. If you’d like to edit this file in other photo editing applications — such as Adobe Photoshop and Affinity Photo — then save as PSD.
Export Your Resized Image
To save a usable image file of your resized image, you will need to export it. To do so, navigate to:
File > Export As
Or you can press Control + Shift + E on your keyboard.
You will then be prompted to choose a file format and location on your hard drive to export the image to. Available formats include:
- JPG
- PNG
- TIF
- And more
If your image contains any transparent values then be sure to export it as a PNG file, otherwise the transparency will be lost. Otherwise JPEG should be suitable.
Conclusion
Knowing how to resize an image in GIMP is one of the most common transformations you will make to an image, and lucky for us Open Source users, it’s a relatively simple process. GIMP makes it easy to resize your image manually or by entering your own preferred measurements.
If you have any questions or need clarification on any of the steps we’ve gone over in this lesson just leave a comment below.
Learn To Master The SoftwareGain a complete understanding of your favorite design apps with my comprehensive collection of video courses. Each course grants access to our private community where you can ask questions and get help when needed.
|
||||||||||||||||||||||||||||||||


I used your tutorial and it worked great!
Glad to hear that, Uday 👍