
How To Draw A Circle In GIMP | 2 Minute Tutorial
How To Draw A Circle In GIMP | 2 Minute Tutorial https://logosbynick.com/wp-content/uploads/2022/03/gimp-draw-circle.png 800 470 Nick Saporito https://secure.gravatar.com/avatar/8e31bf392f0ba8850f29a1a2e833cdd020909bfd44613c7e222072c40e031c34?s=96&d=mm&r=gIf you’re using a photo editing app like GIMP then drawing basic shapes (such as circles) may seem a bit perplexing at first. This is because GIMP isn’t meant for creating shapes like a vector design app is. However, it can still be done, and with relative ease too! In this tutorial we’ll be going over two different ways in which you can draw a circle in GIMP using the Ellipse Select Tool.
In short, the way to draw a circle with GIMP is to use the Ellipse Select Tool and click and drag on your canvas to create a selection in the shape of a circle. Then, you’ll be able to fill that circle with whatever colors, patterns or bitmaps you’d like. Let’s demonstrate how.
Draw A Circle In GIMP
The following video tutorial will walk you through the entire process in only 2 minutes:
Continue on for the written tutorial.
Table of Contents |
Step 1: Activate the Ellipse Selection Tool
In order to draw a circle in GIMP we will need to use the Ellipse Select Tool. This tool allows you to create selections on your canvas in the shape of ellipses and circles.
You can locate the tool in your toolbar:
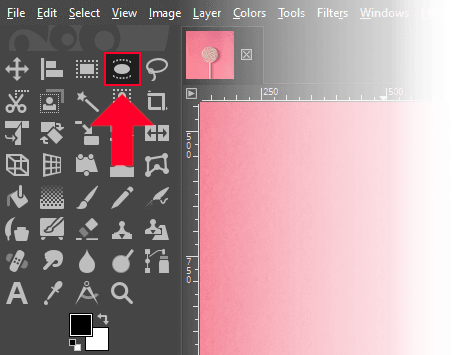
The Ellipse Select Tool is located near the top of the tools menu.
Alternative, you can use the keyboard shortcut, which is the letter E.
Step 2: Click and drag to draw a circular selection with the tool
With the Ellipse Select Tool enabled you can now click and drag on your canvas to create a selection.
In its default mode, the tool will allow you to draw ellipses that follow your hand movement:

The ellipse being drawn follows your hand movement with the mouse.
Holding the Shift key while clicking and dragging will allow you to draw a perfect circle:

Holding both Shift and Control will draw the circle from the center point, starting where you clicked, as opposed to the opposite corner:

Alternatively, there’s a setting in the tool settings menu for the Ellipse Select Tool that forces the tool to draw only perfect circles. Just check the box that reads Fixed:
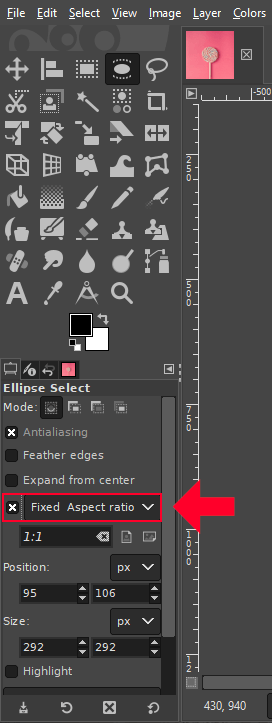
Tick the Fixed box to draw a perfect circle.
Make sure that you have the aspect ratio set to 1:1 otherwise you won’t be able to draw a circle in GIMP without holding Shift. And be sure to deselect this setting once you are finished otherwise GIMP will leave it enabled until you do.
Once you have these settings in place you will be able to draw a perfect circle by default and without having to hold the Shift key.
Once you are finished drawing your circle you can release the click and whatever keys you may be using as well. The resulting circle will be depicted as a single dotted marquee.
Step 3: Fill the selection with a color to complete it
Up until this point we’ve only demonstrated how to create a selection in the shape of a circle. In order to make this selection a proper circle we will have to fill it with something.
You can fill your circle with virtually anything you’d like, including:
- Solid colors
- Gradients
- Patterns
- Textures
- Images
- And more
For this demonstration we will be filling the circle with a solid fill color.
Click on the Foreground Color to open the color picker menu and choose a color for your circle:
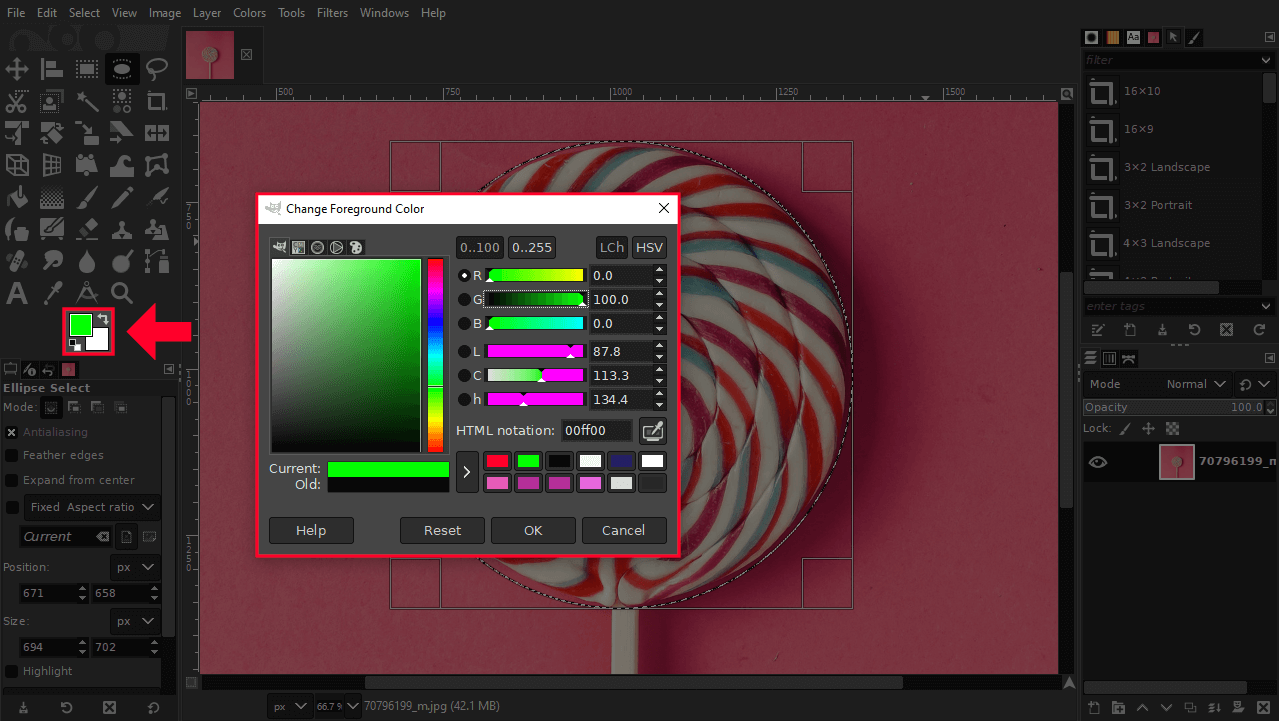
Change the foreground color to whatever you’d like the fill color of your circle to be.
Once you are finished all you have to do is click OK and then click and drag the foreground color inside of your selection and release it:

This will fill your circle with the selected color.
Tip: you can add an outline around your circle instead of filling it by using the Stroke Selection tool in the Edit menu.
Once you are finished filling/outlining your circle, simply release the selection by going to:
Select > None
Or you can use the keyboard shortcut: Shift + Control + A
This will remove the marquee (or dotted line) from your circle and you are finished!
Conclusion
Although GIMP isn’t necessarily designed for drawing shapes, it’s still possible, and it’s easy enough to do that there’s no need to launch other applications if all you need to do is draw a circle in GIMP for example. Thanks to the selection tools, drawing common shapes (such as circles) is not only possible, but also quite efficient!
If you have any questions or need clarification on any of the steps taken in this lesson then please leave a comment below.
Learn To Master The SoftwareGain a complete understanding of your favorite design apps with my comprehensive collection of video courses. Each course grants access to our private community where you can ask questions and get help when needed.
|
||||||||||||||||||||||||||||||||


Leave a Reply