Rotate An Image In GIMP With This Shortcut
Rotate An Image In GIMP With This Shortcut https://logosbynick.com/wp-content/uploads/2022/03/gimp-rotate-image.png 800 470 Nick Saporito https://secure.gravatar.com/avatar/8e31bf392f0ba8850f29a1a2e833cdd020909bfd44613c7e222072c40e031c34?s=96&d=mm&r=gSo you’ve taken a photo and for whatever reason it rendered sideways. Or maybe you have an image that you’re working on and need to rotate it slightly in order to make some freehand edits. You’re in luck either way, because we’ll be addressing image rotation in today’s lesson. In this tutorial we’ll be going over a keyboard shortcut that will allow you to quickly rotate an image in GIMP.
In short, the quickest way to rotate an image in GIMP is to press Shift + R on your keyboard to bring up the Rotate Tool. From there you can manually rotate your image by clicking and dragging it, or you can manually input a numerical value (in degrees) to rotate your image by.
Alternatively, you can also rotate an image using the menu system. However, the implications of these methods vary, so you’ll want to make sure you’re choosing the correct method. Let’s dig in!
Rotate An Image In GIMP
The following video tutorial will walk you through all of the ways in which you can rotate an image in GIMP:
Continue on for the written tutorial.
Table of Contents
|
Option 1: Rotate An Image Using The Menu System
The quickest way to rotate an image in GIMP is to use the menu system.
The way this works is quite simple — navigate to:
Image > Transform

You can quickly rotate an image via the menu system.
Within the transform submenu you should see various options for rotating your image:
- Rotate 90° clockwise
- Rotate 90° counter-clockwise
- Rotate 180°
Each of these are fairly straightforward in what they do. However, you will also see another option labeled “Arbitrary Rotation“. This is essentially a shortcut to the Rotate Tool, which we’ll be utilizing in the next two options, so you can disregard that for now.
Some Things To Keep In Mind…
Whenever you rotate an image in GIMP via the menu system there are a few conditions that you should be mindful of:
- This method will rotate the entire image — including the canvas and all of its layers. If you just want to rotate in individual layer then it is recommended to use options 2 or 3.
- Using this method you will only be able to rotate your image in 90 or 180 increments. If you need to rotate your image freehand, or using a specific number of degrees, then proceed to options 2 or 3.
Option 2: Rotate An Image Freehand
The second way in which you can rotate an image in GIMP is by using the Rotate Tool, which can be accessed in your tools menu, or you access it by pressing Shift + R on your keyboard.
The benefit of using this method is that it provides for more granular control over how you rotate an image in GIMP.
Once you’ve enabled the Rotate Tool, you can rotate your image in a freehand motion by simply clicking and dragging anywhere on the canvas. The image will rotate in such a way that it follows your hand movement:

Click and drag to freehand rotate your image.
If you hold Shift while rotating then the image will only rotate in 15 degree increments:

You can see exactly how many degrees your image is being rotated by (in real time too) by referencing the Rotate menu in the top-right corner of the screen.
Once you are finished rotating your image, simply press the Enter key on your keyboard to finalize the changes.
Change The Rotation Point
When rotating your image, you may notice that by default the image rotates around the center. This is because that is where the rotation center — represented as a circular crosshair — is placed by default:

The black arrow points out the rotation point of the image.
You can change the rotation point of your image by simply clicking and dragging that rotation center elsewhere. Once moved, your image will rotate around that axis:
Reset The Rotation Point
Let’s say you’ve changed the rotation center of the image and you’d like to place the rotation center back in the middle of the image.
You could technically do this manually using the X and Y axis as a reference, but an easier way would be to simply click the Readjust button in the Rotate menu:
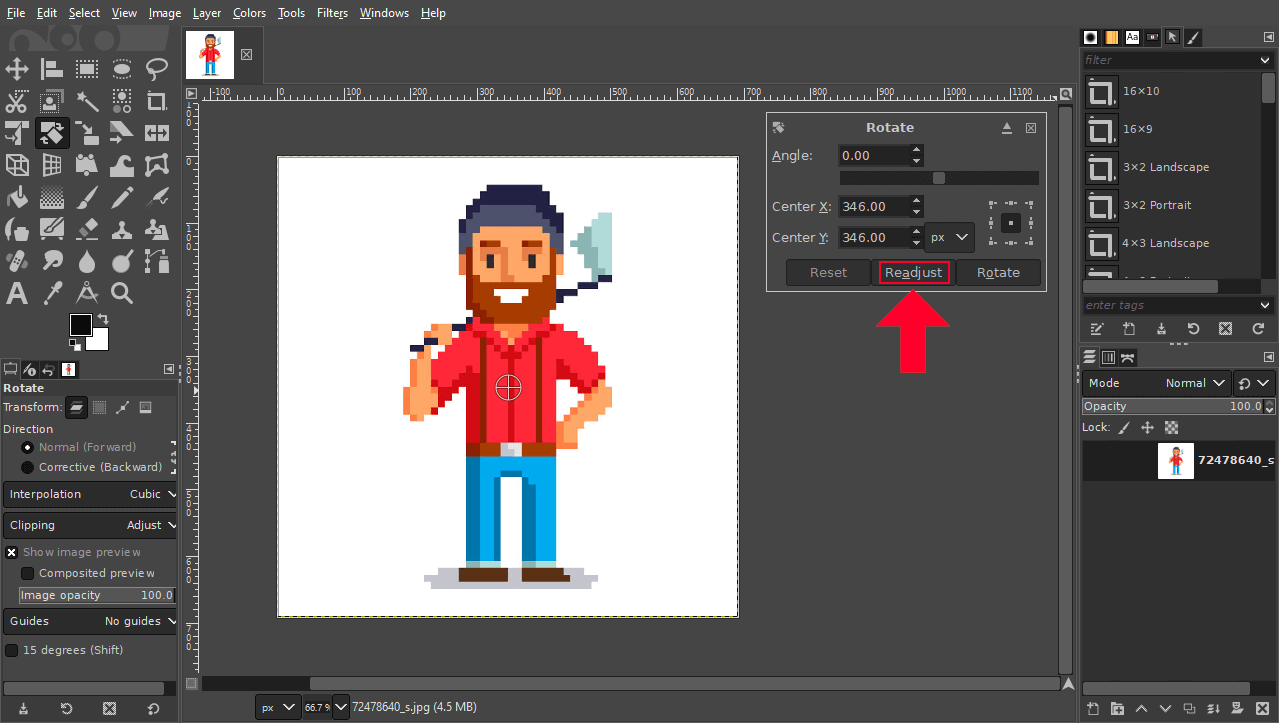
Clicking that button will place the rotation center directly in the middle of the image, as it was previously.
Keep In Mind…
When rotating your images using this method it’s important to be mindful of the fact that this method only allows you to rotate a single layer at a time. If your image only consists of one layer then you don’t need to worry about this, but if you’d like to rotate the entire image then you’ll either have to flatten your layers or utilize option 1 above.
Option 3: Rotate An Image Using Numerical Values (Degrees)
The final method you can use to rotate an image in GIMP also utilizes the Rotate Tool. However, we’ll be utilizing it differently.
Let’s say you need to rotate your image by a specific numerical value. For example, 27 degrees.
You could manually rotate your image by clicking and dragging, as we did in the previous step, until the status indicator reads 27°. However, it may be difficult to land exactly on the number you’d like to rotate your image by. An easier way would be to use the Rotate menu that populates once the Rotate Tool is active.
Access your Rotate Tool (Shift + R). Once you’ve enabled the Rotate Tool, the Rotate menu should populate on your screen:

If the menu doesn’t populate when enabling the tool then try clicking on the image with the tool and then it should appear.
At the top of the menu you will see an input value labeled as Angle. Simply type in the numerical value in which you’d like to rotate your image by and press Enter on your keyboard to apply the changes. You don’t have to type in the degree symbol (°) by the way; the software automatically applies the transformation in degrees.
Change The Rotation Point
In the previous step we touched on how to change the point on the canvas in which the image rotates around. The method used for manually clicking and dragging the crosshair wherever you’d like still applies here as well, but you can also use the Rotate menu to designate a new rotation center:

Clicking either of those box will update the rotation center relative to your image and the canvas. Click on one of them to give it a try, and if you’d like to revert the rotation point back to being in the center of the image then simply click the Readjust button or click on the center box in the grid.
Conclusion
As we’ve gone over in this tutorial, there are numerous ways to rotate an image in GIMP. And depending on exactly what it is you’re trying to do, each method comes with its own caveats and conditions. The method you should choose depends entirely on what exactly you’re trying to accomplish, and hopefully this lesson has shed some light on that for you.
If you have any questions or need clarification on any of the steps taken in this lesson then just leave a comment below.
Learn To Master The SoftwareGain a complete understanding of your favorite design apps with my comprehensive collection of video courses. Each course grants access to our private community where you can ask questions and get help when needed.
|
||||||||||||||||||||||||||||||||