
How To Crop In Procreate | Crop Images And Individual Layers
How To Crop In Procreate | Crop Images And Individual Layers https://logosbynick.com/wp-content/uploads/2022/03/how-to-crop-in-procreate.png 800 470 Nick Saporito https://secure.gravatar.com/avatar/8e31bf392f0ba8850f29a1a2e833cdd020909bfd44613c7e222072c40e031c34?s=96&d=mm&r=gCropping images is one of the most common design tasks you may seek to perform when using design software, and Procreate makes this process simple. In this tutorial we’ll be going over how to crop in Procreate — whether you’re looking to crop your entire image or just a single layer.
In short, you can crop in Procreate by simply access the Crop & Resize feature located in the Actions menu. From there you can manually crop your image by clicking and dragging to define the new boundaries of the image, or you can manually input numerical values if you need your image to be cropped to a specific dimension.
When it comes to cropping individual layers though, unfortunately this is a feature that is absent from Procreate. However, there is a workaround we’ll be exploring that utilizes clipping masks. Let’s get started!
How To Crop In Procreate
The following video tutorial will walk you through the entire process for each, step-by-step:
Continue on for the written tutorial.
Table of ContentsCrop An Entire ImageCrop An Individual Layer |
Crop An Entire Image
Let’s first go over the basics of cropping by using the built-in crop feature to crop your entire image. Then, we’ll go over how to crop a single layer in case you need to do that too.
Manual Cropping
To crop in Procreate we must first open the Actions menu, which is represented as a little gear icon in the top-left corner of the screen. Then, navigate to Canvas and select Crop & Resize:

Use the menu system to access the Crop & Resize menu.
Once selected, the Crop & Resize menu should populate on your screen, and you will be presented with a preview box with grid lines in it that you can use to crop your image:
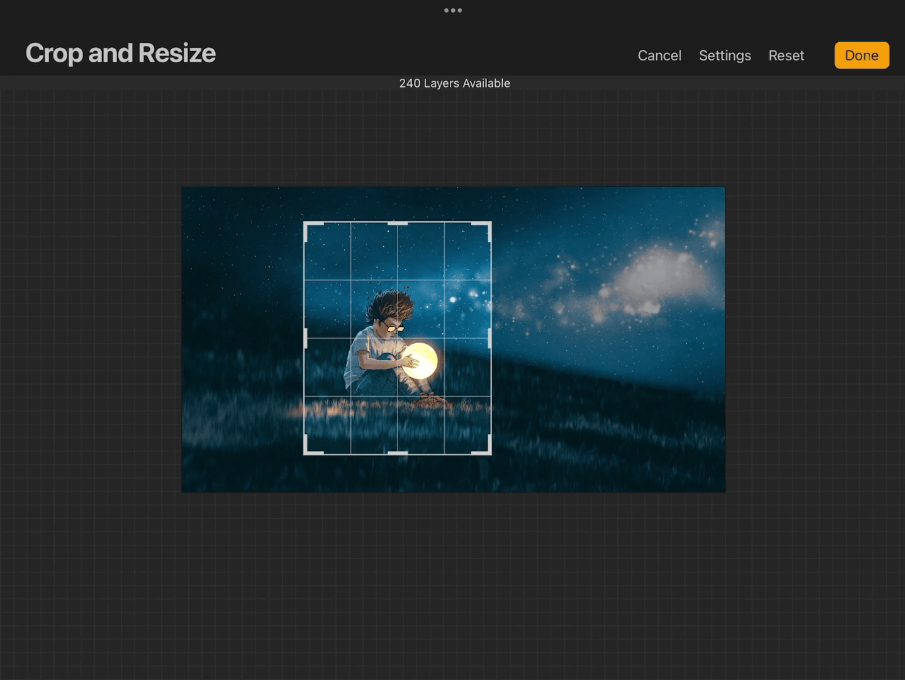
The box with the grid in it represents a preview of the crop to be applied.
You can tap and drag the edges to change the width and height of the crop, or you can use the corners to change both at the same time.
If at any point you’d like to move the position of the crop, simply tap and drag anywhere inside of the grid to move the crop around on your canvas. And if you need to reset the crop to its original size for any reason, simply tap the Reset option near the top-right of the screen.
Once you are satisfied with your crop, you can apply the changes by tapping the yellow Done button in the top-right corner.
How To Lock The Aspect Ratio
Whenever you crop in Procreate by using the Crop & Resize menu, you may notice that the preview box distorts as you resize it. Or in other words, the width and height both change independent of each other.
If you’d like to make it so that both dimension scale proportionately then you’ll have to lock the aspect ratio.
To do this, tap the Settings button at the top of the screen, then tap the chain icon between the width and height input boxes. It should highlight in blue once activated:
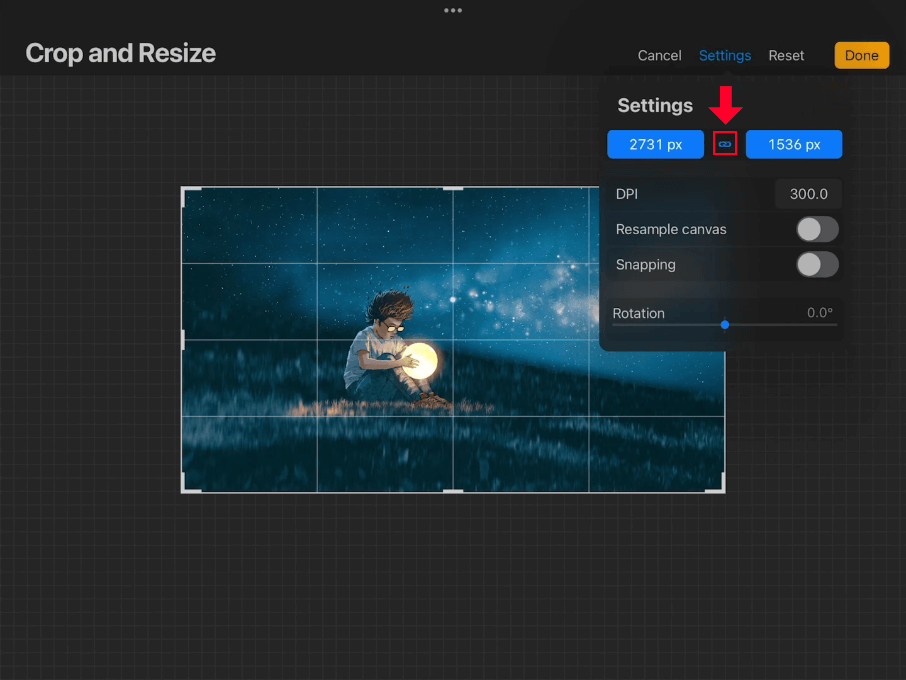
Tapping the chain icon between the width and height input values will preserve the aspect ratio of your image once it is cropped.
Once activated, your crop selection will scale proportionately and the aspect ration of the image will be preserved.
You can disable this feature at any time by tapping the chain icon again to deactivate it.
Crop Using Numerical Values
Let’s say you need to crop your image, but you also need it to be a specific size. Or maybe you’d just like to ensure that your dimensions consist of whole, round numbers. Procreate has you covered.
Tap the Settings button to open the settings menu. At the top of the menu you will see two input boxes — one for the width (on the left,) and one for the height (on the right.)
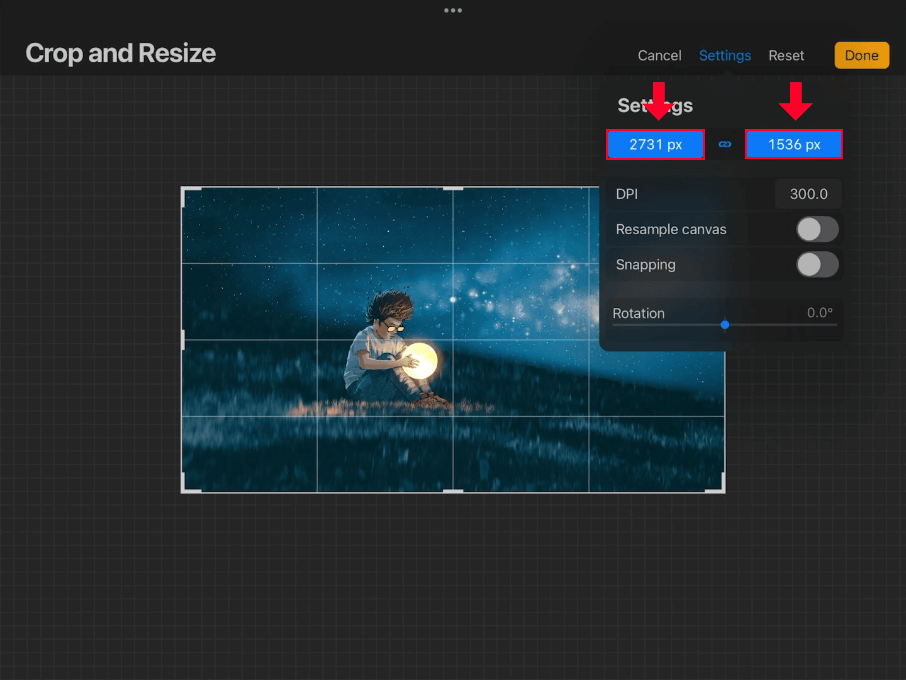
The box on the left represents the width and the box to the right is the height.
These values represent the size of your crop. So if you need to crop your image to be a specific size, simply input the numerical values and tap the settings button again to close out of the menu.
As is the case with manual cropping, you can lock the aspect ratio using the chain icon, and then you can reposition the location of the crop afterwards if needed. Just tap and drag the box to move it.
Crop An Individual Layer
Now that we’ve gone over how to crop an entire image, let’s have a look at how to crop in Procreate on a layer by layer basis.
As mentioned earlier in this lesson, there is no dedicated feature in Procreate from cropping individual layers, so to accomplish this we will create a clipping mask.
Step 1: Add a new layer and create a selection
The first step is to add a new layer to your image using the Layers menu.
Next, use the Selection Tool to create a rectangular selection on your canvas within that new layer:
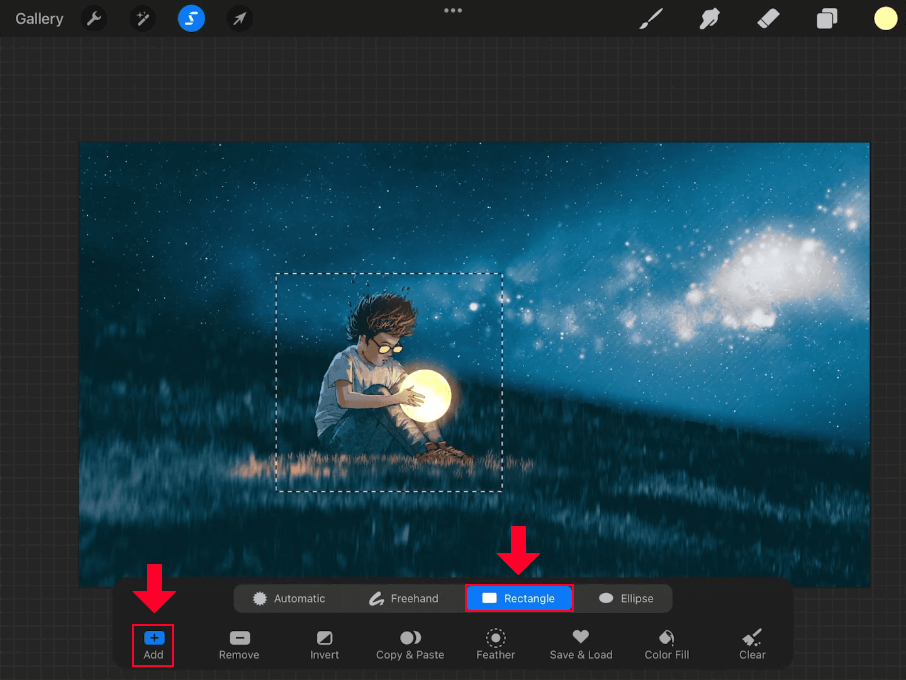
Create a rectangle selection to use for cropping individual layers in Procreate.
This selection will represent the image crop, so make sure to size it accordingly.
Once the selection is created, fill in the selection with whatever color you currently have active. The color doesn’t matter, it’s the existence of the rectangle that matters, and Procreate won’t recognize that rectangle unless it’s filled with something.
You can fill the rectangle by tapping and dragging the color disc into the selection or by tapping the Color Fill button in the menu at the bottom of the screen:
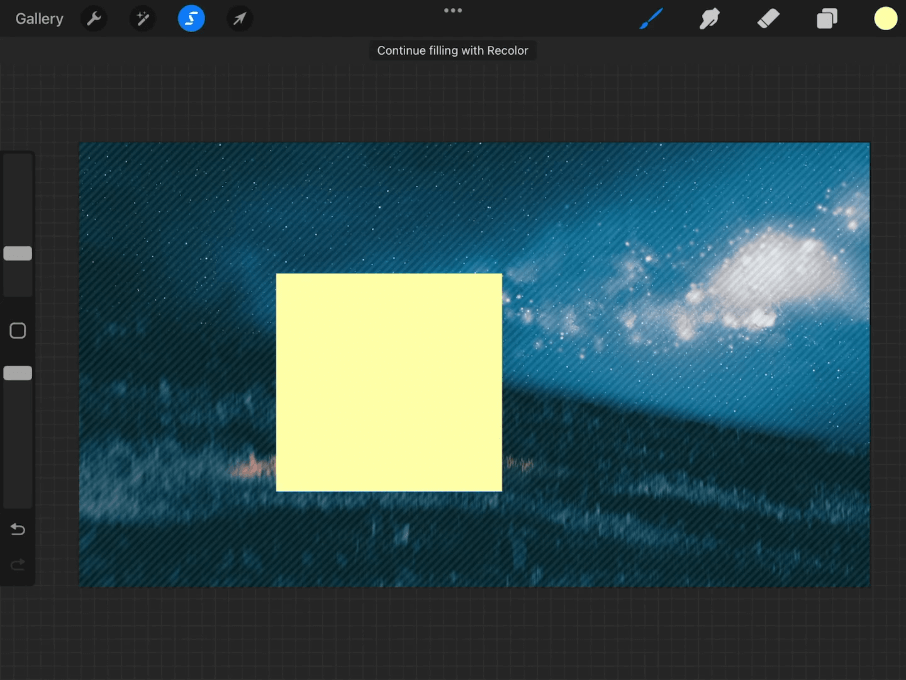
The selection must be filled with a color (any color) in order to be recognized by Procreate as a usable shape,
Step 2: Position the image layer above the new layer and apply it as a clipping mask
Before we can use this newly-created rectangle to crop in Procreate, we must first position the layer with the rectangle on it beneath the image layer. Simply open the Layers menu, hold a tap over the image layer, then drag it above the rectangle layer so that it is directly above it.
Next, tap on the image layer to get the layers submenu, then select Clipping Mask from the menu:
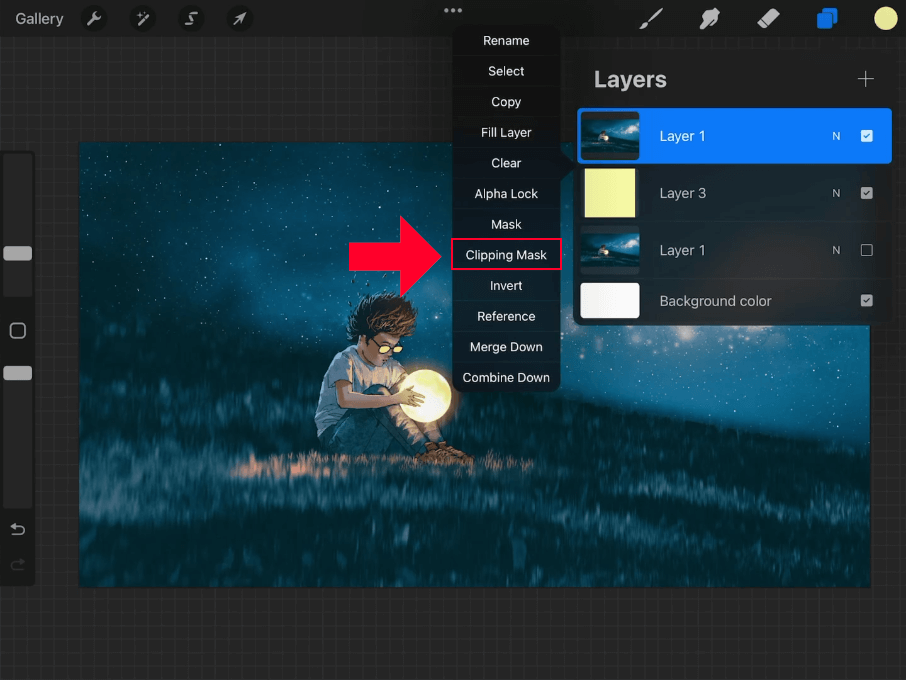
Creating a clipping mask will effectively crop the layer it’s applied to.
If done correctly, you should see that the targeted layer has been cropped, by the image itself remains the same size, as indicated by the white background:

The layer has been cropped by the image/document has retained its size.
Step 3: Make edits if needed
This benefit of using clipping masks to crop in Procreate is that they are completely non-destructive — meaning you can undo them and edit them if needed, and without permanently changing the original image.
This is contrary to how the standard Crop & Resize function operates, which will permanently delete excluded areas from the image once cropped.
To edit your cropped layer retroactively, just open the Layers menu and select the rectangle layer again to activate it. From there you will be able to make various transformations, such as changing the width and height of the rectangle to alter the crop, and moving it around the canvas to change its location.
If at any point you’d like to undo the cropped layer, just open the Layers menu, select the image layer and tap on it again to get the layers submenu, then tap on Clipping Mask again to remove it. If done correctly your layer should revert back to how it was before it was cropped.
Step 4: Finalize the crop
As mentioned earlier, the benefit of using clipping masks to crop images in Procreate is that they’re non-destructive. So once you are finished cropping your layer, you don’t necessarily need to “finalize” it. You can simply save/export your work from there.
That being said, if you’d like to make the layer crop permanent — whether it be for organizational reasons or otherwise — you can do so by opening the Layers menu, tapping on the image layer (the one that is currently serving as a clipping mask,) tap the layer to get the layers submenu, then select Merge Down.
This will merge the image layer and rectangle layer together so that they become one and the clipping mask is finalized.
Conclusion
Knowing how to crop in Procreate is a simple process if you’re just cropping the entire image as a whole. The Crop & Resize tool makes this a breeze. However, if you’d like to crop an individual layer in Procreate then you will need to use clipping masks as a workaround.
It would be cool if the folks at Procreate introduced a crop tool that allows you to quickly crop individual layers (sort of like what Affinity Designer has,) but for now clipping masks work well enough.
If you have any questions or need clarification on any of the steps taken in this lesson just leave a comment below.
Learn To Master The SoftwareGain a complete understanding of your favorite design apps with my comprehensive collection of video courses. Each course grants access to our private community where you can ask questions and get help when needed.
|
||||||||||||||||||||||||||||||||


