
Drawing Straight Lines In Procreate | The Complete Guide
Drawing Straight Lines In Procreate | The Complete Guide https://logosbynick.com/wp-content/uploads/2022/04/straight-lines-procreate.png 800 470 Nick Saporito https://secure.gravatar.com/avatar/8e31bf392f0ba8850f29a1a2e833cdd020909bfd44613c7e222072c40e031c34?s=96&d=mm&r=gWho doesn’t love to draw with Procreate for the iPad? The popular design app makes drawing, sketching, and painting as natural on a touchscreen as it is on paper. Unfortunately though, it is equally difficult to draw straight lines with Procreate as it is with pencil and paper (unless you have a perfectly steady hand, that is.)
Lucky for us, the good folks over at Procreate programmed in a really neat feature that lets you draw perfectly straight lines in Procreate, and without having to lift a finger… literally.
How To Draw Straight Lines In Procreate
The following video tutorial will walk you through the entire process step-by-step:
Continue on for the written tutorial.
Table of Contents |
Draw A Straight Line
Let’s draw a single straight line to get started. To do so, grab the brush tool and select any brush you’d like. For this demonstration I will be using the classic round brush.
In Procreate, the way to draw a straight line is to simply draw it with your hand. However, your natural hand movement will make it so that the line is not perfectly straight:
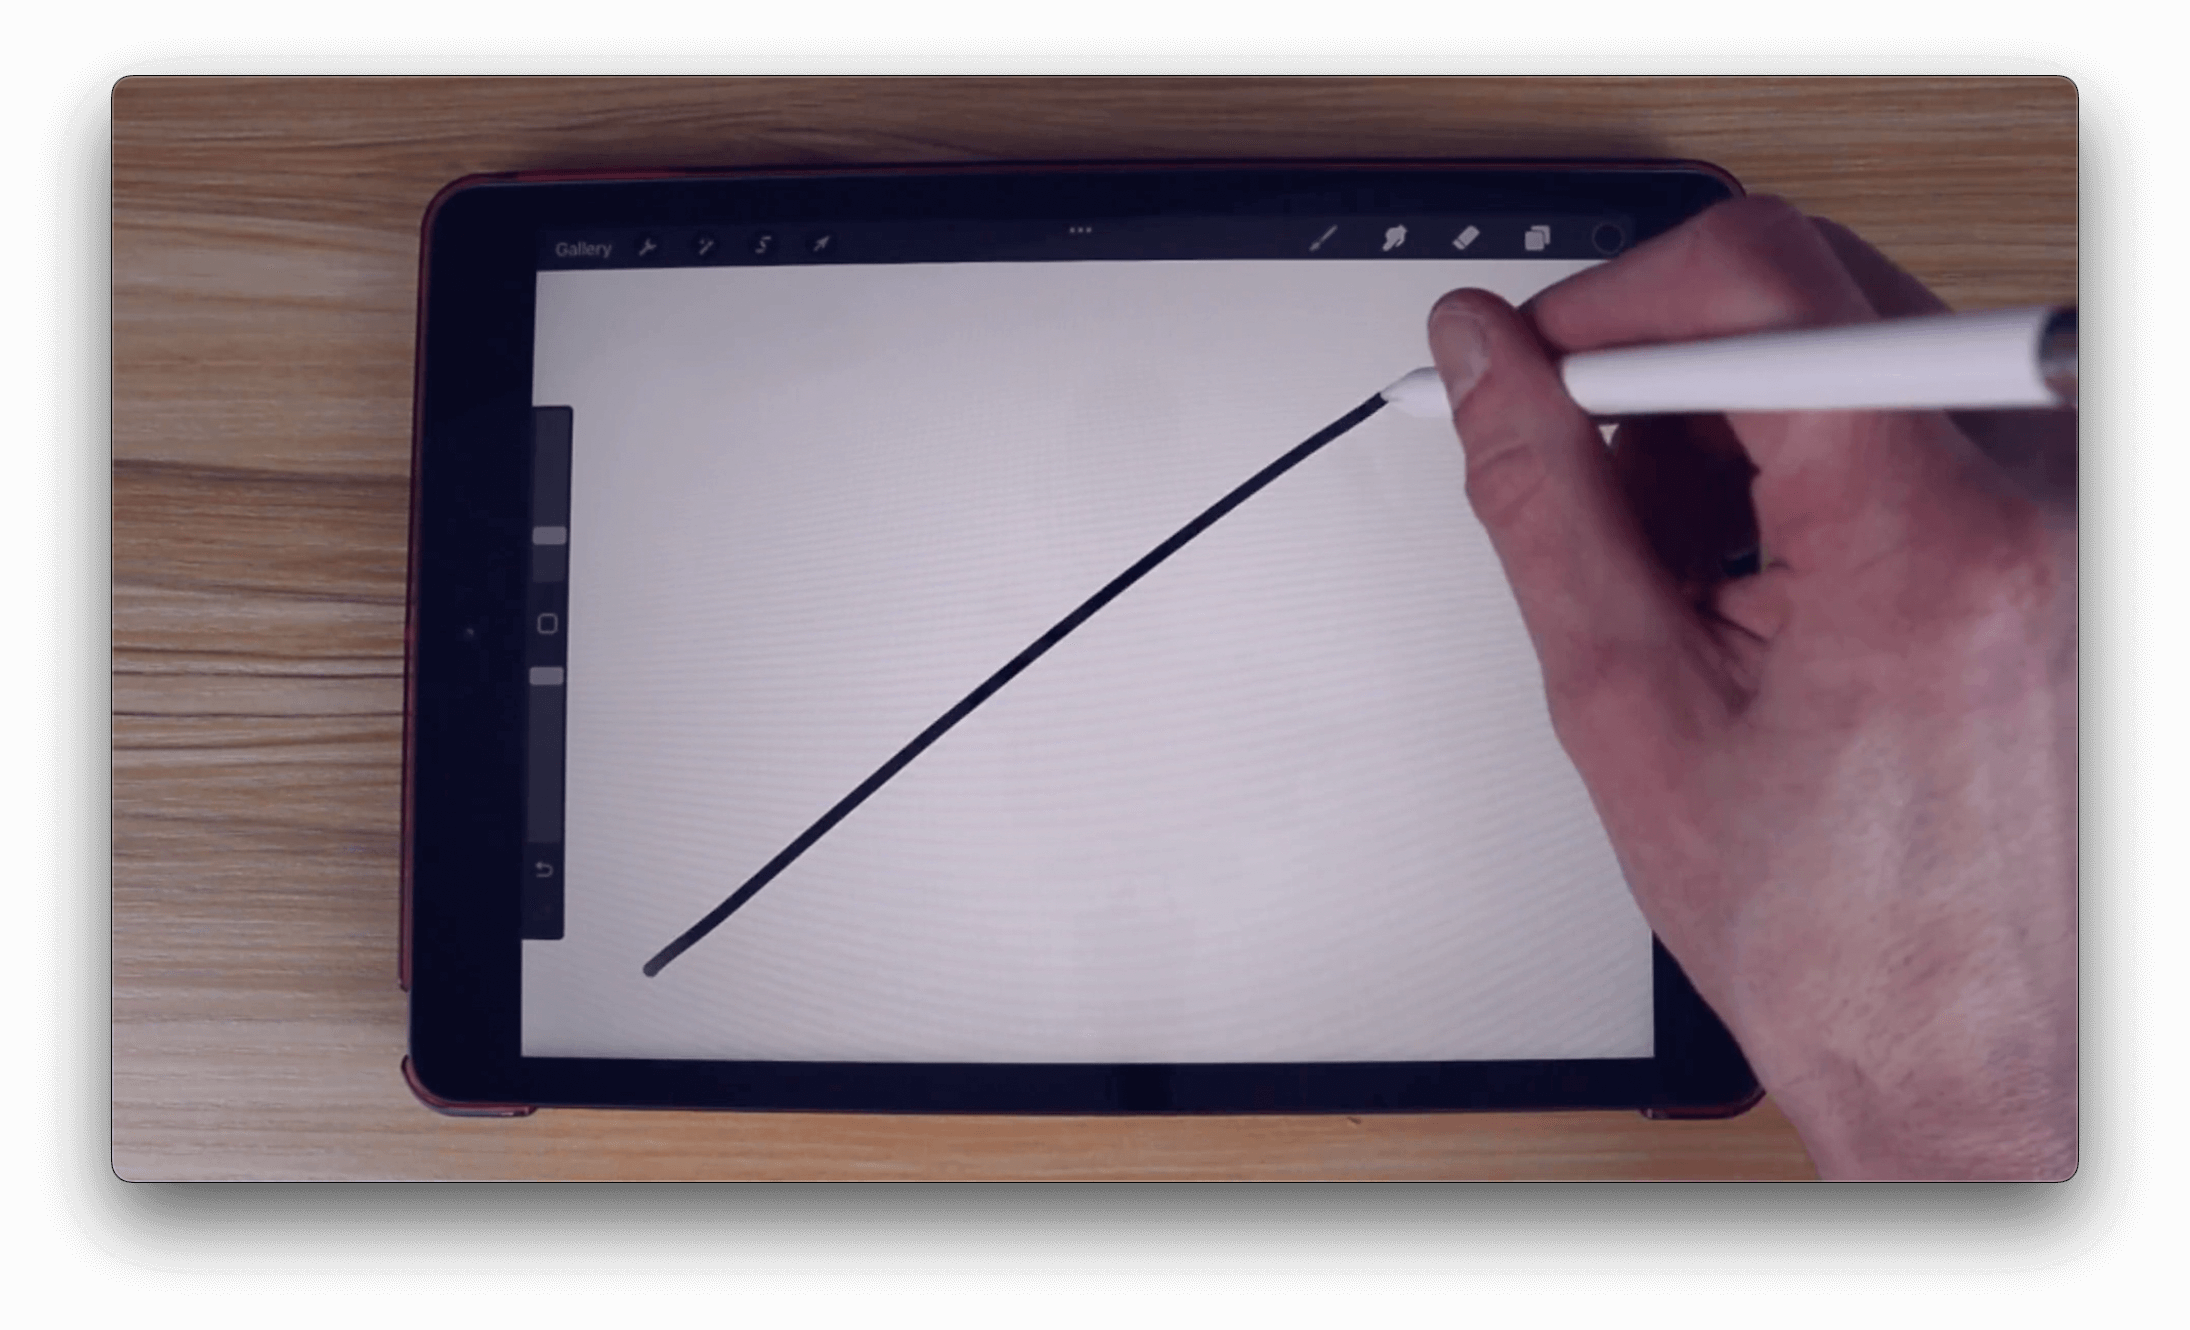
Lines drawn with your natural hand movement are imperfect at first.
In order to make your line into a straight line, you must hold the tap in place once you are finished drawing it. Do not lift your stylus/finger from the screen, and make sure to hold still in the same spot.
If done correctly, your line will automatically become straight:
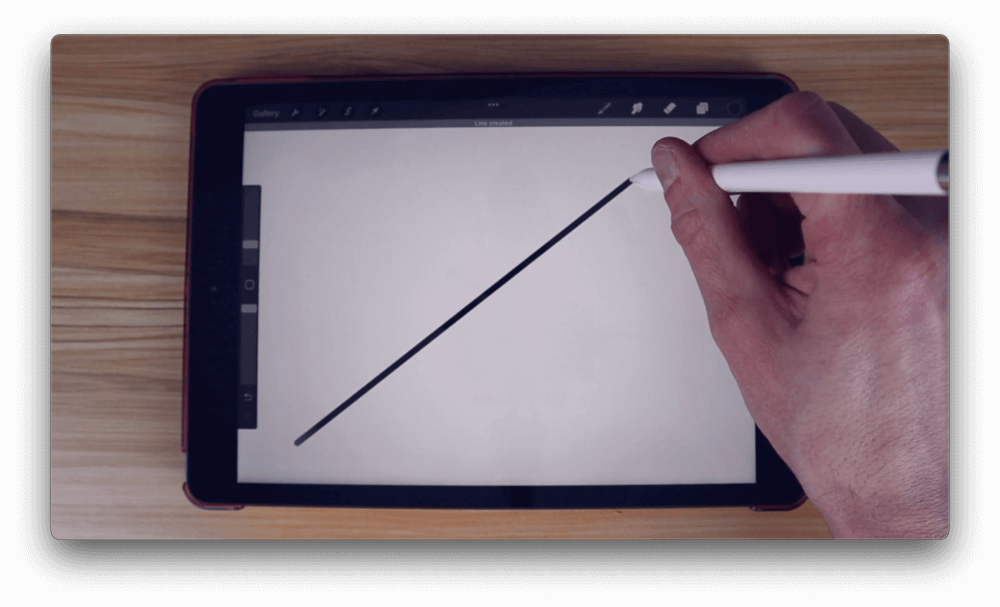
If you hold the tap in place, the line will become auto-straight and a message should appear at the top of the screen that says “Line Created”.
From here you can release the tap to complete your straight line.
If you’d like to rotate the line, swipe across the screen while continuing to hold the tap. The endpoint of the line will follow your hand movement while the starting point remains anchored in place.
Draw Vertical and Horizontal Lines
Now that we’ve gone over how to draw straight lines in Procreate, let’s have a look at how you can draw lines that follow a perfectly vertical or horizontal path.
To draw vertical and/or horizontal lines with Procreate, swipe to draw your line, hold the tap in place once you are finished to convert it into a straight line, then use the index finger on your other hand to hold a tap on the canvas while drawing your line.
If done correctly, the line that you are drawing will be locked into 15 degree increments, and all you have to do is simply draw in the general direction of the axis you’d like your line to follow:
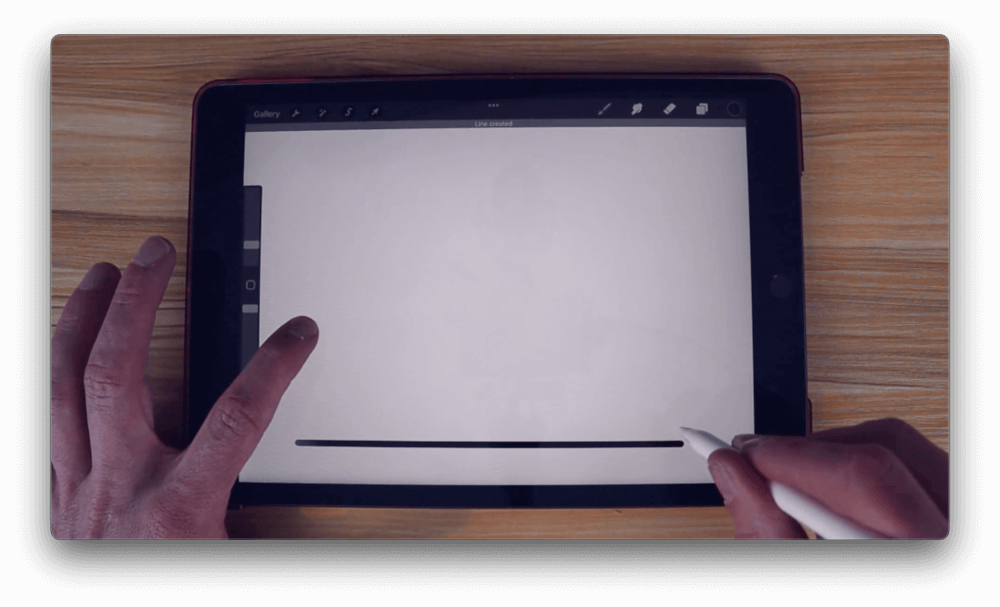
Hold a tap with your index finger from your other hand to lock the lines onto vertical and horizontal paths.
Once you are finished drawing your line you can simply release both taps from the device.
Draw Multiple Straight Lines
Let’s go over how you can draw multiple straight lines in Procreate, or contiguous straight lines as they’re called.
The way to accomplish this is to simply draw your contiguous lines with a brush of your choice, and then hold the tap in place once you are finished in order to make it auto-straight.
For this demonstration I will be drawing a star. Here’s how the rudimentary star looks as it followed my natural hand movement:

The star looks rudimentary when drawn using my natural hand movement.
Now, if I hold the tap in place once I’m finished drawing it, the entire path will become straight lines automatically:
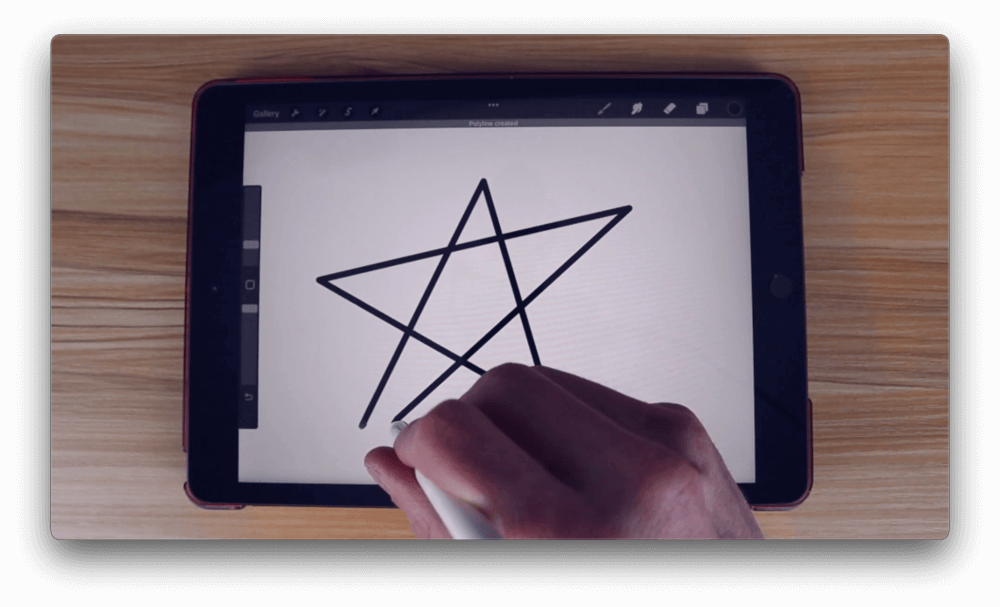
Holding the tap in place at the end will make the edges auto-straight though.
Additionally, the entire shape can be rotated with hand movement by simply continuing to hold the tap in place.
Once you are finished you can complete the line by releasing the tap.
How To Edit Your Straight Lines
Now that we’ve gone over how to draw straight lines, let’s have a look at how you can edit those lines afterwards, in case you aren’t completely satisfied with their placement once drawn.
Once you release your tap from the screen after drawing a straight line, you should see a blue button towards the top of the screen that says Edit Shape or Edit Line:
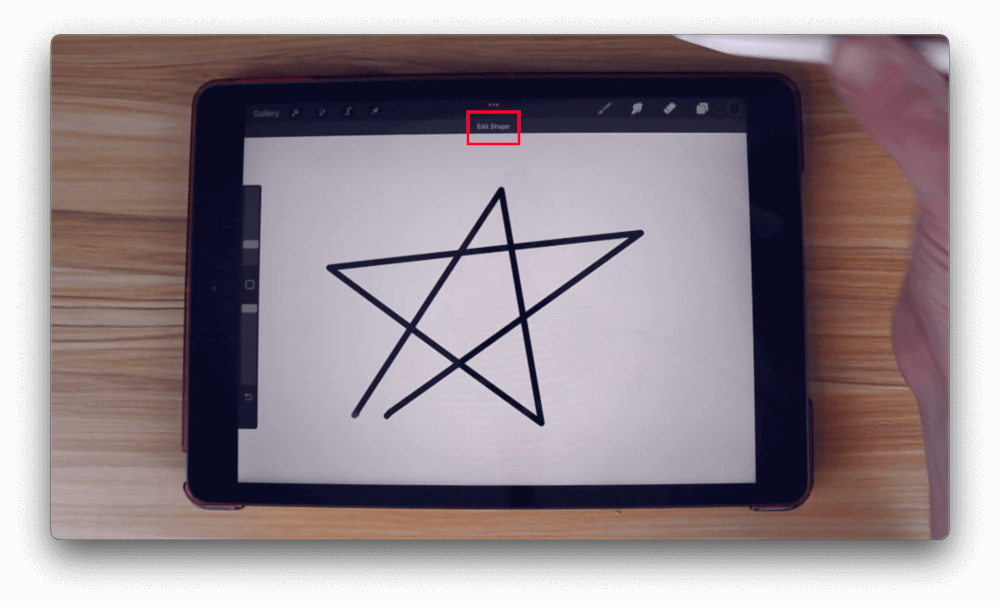
Tap the button that says Edit Line or Edit Shape
Tap that button to edit your lines. They should have anchor points at the endpoints and at the corners, represented as small blue circles:
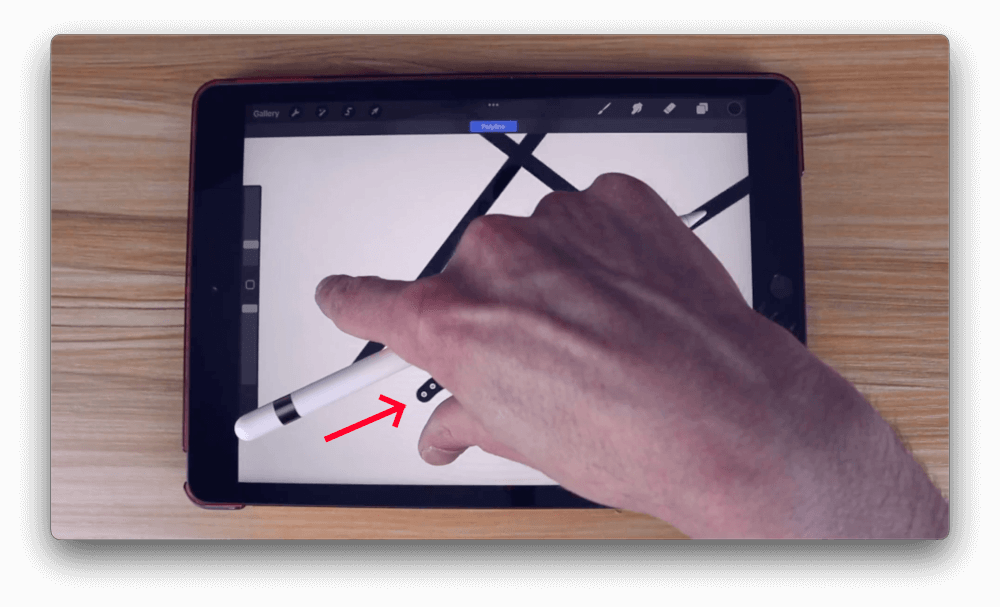
The small blue dots are anchor points that you can move around to edit your lines.
Tapping and swiping on those anchor points will move them across your canvas, allowing you to reposition your line(s) however you please.
Once you are finished you can leave edit mode to finalize the edits, but do keep in mind that once you leave edit mode, the changes will be permanent. There will be no way to edit your lines again after that, so make it count!
Conclusion
One of the incredible things about mobile design apps like Procreate is how brilliantly the features are implemented. Drawing straight lines is Procreate may seem like an impossible task if you aren’t aware of this hidden gem of a trick, but once you are, it’ll be easier to draw straight lines on your iPad than it would be virtually anywhere else. Not even desktop design applications make it this easy!
If you have any questions or need clarification on anything we’ve gone over in this lesson, just leave a comment below.
Learn To Master The SoftwareGain a complete understanding of your favorite design apps with my comprehensive collection of video courses. Each course grants access to our private community where you can ask questions and get help when needed.
|
||||||||||||||||||||||||||||||||


All well and good but swipe what?! No matter what brush I choose I get a multiple line with squares
And lighter versions of the color. I have turned off everything in tools etc. And still get the lines: