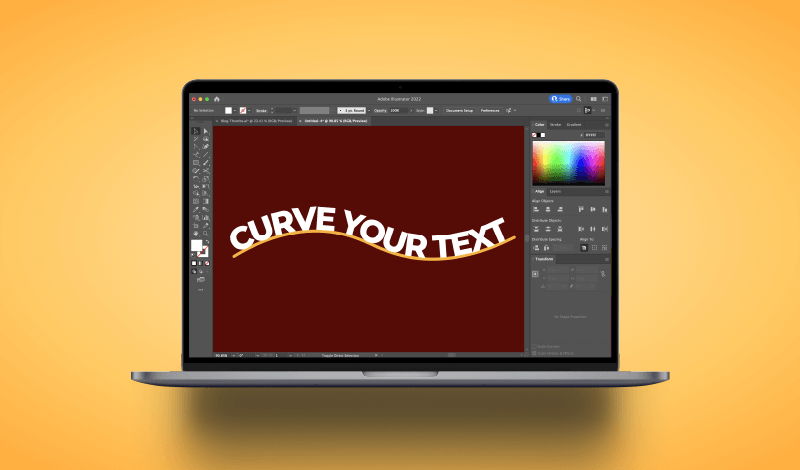
Curve Text In Illustrator With The Type On A Path Tool
Curve Text In Illustrator With The Type On A Path Tool https://logosbynick.com/wp-content/uploads/2022/05/curve-text-illustrator.png 800 470 Nick Saporito https://secure.gravatar.com/avatar/8e31bf392f0ba8850f29a1a2e833cdd020909bfd44613c7e222072c40e031c34?s=96&d=mm&r=gAdobe Illustrator is one of the best applications in existence when it comes to working with text. There are virtually no limitations on what you can do with text in Illustrator. One such example would be creating curved text, or text that flows along a path. This can be done quite easily, and in this tutorial we’ll be going over how you can use the Type On A Path Tool to curve text in Illustrator with just a single click.
In short, the simplest way to curve text in Illustrator is to use the Type On A Path Tool to generate some text along the contours of any object (or “path” as they’re called.) You’ll first need a path to place the text on, though, so in the first path of the lesson we’ll be using the Curvature Tool to create a curve for the text to follow.
Curve Text In Illustrator
The following video tutorial will walk you through the entire process, step-by-step:
Continue on for the written tutorial.
Table of ContentsHow To Curve Text
Editing Curved Text |
How To Curve Text
In this first part of the lesson we will go over how to curve text in Illustrator, then we will go over all of the ways in which you can edit your text.
Step 1: Create a curved line to place the text on using the Curvature Tool
In order to flow text along a path we will first need a path to flow it along. If you already have an object on your canvas — such as a shape on line — that you’d like to flow your text along then skip to step 2. However, it must be a vector path.
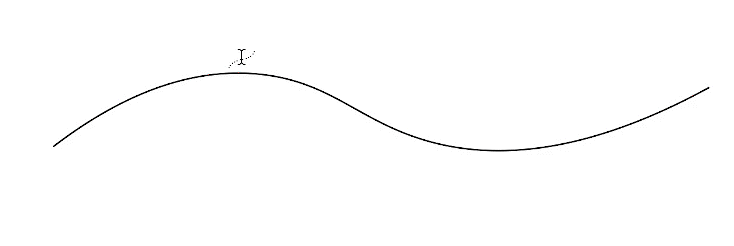
To create a curve to place the text on, grab the Curvature Tool (keyboard shortcut: Shift + ~) and click on the canvas a few times to create some anchor points for the curved line to flow through, then press the Escape key once you are finished to complete the line:

The Curvature Tool is used to create a curved path to place the text along.
Please be aware that this object will no longer be visible once we curve text along it! Illustrator handles this task by taking your curve and making it an invisible wireframe that the text flows along. So if the path that you’re curving your text along is an integral part of your design, be sure to copy it and paste it in place before proceeding to step 2. This way you’ll have another copy to work with.
Step 2: Click on the curved line using the Type On A Path Tool to place text on it
Now that we have our path created and ready to use, let’s curve some text along it.
To do this, grab the Type On A Path Tool. It’s located in the submenu beneath the regular Type Tool (keyboard shortcut: T). If you’re having trouble accessing that submenu then simply hold a click over the Type Tool icon.
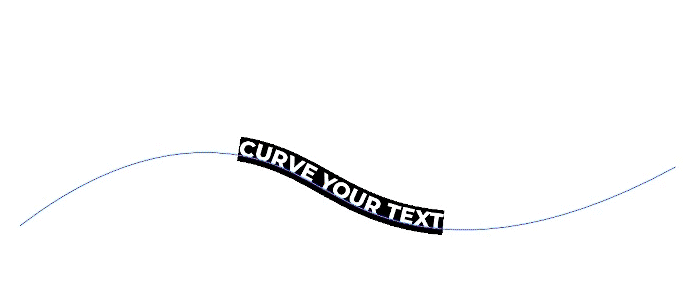
The magic of using the Type On A Path Tool is that it allows you to curve text in Illustrator by simply clicking once a path. Once clicked, some placeholder text will be generated:
The Type On A Path Tool allows you to place text on a curve.
Begin typing your own text to replace the placeholder text with your own input.
Editing Curved Text
Now that we’ve gone over how to curve text, let’s go over all of the ways in which you can edit that text. At this point all you probably have is just some plain looking curvy text. Let’s fix that.
Change the font and size
Let’s navigate over to the regular Type Tool using the toolbox on the side of the screen.
With the Type Tool enabled, you will be able to edit your curved text just as you would any other text object.
If you’d like to change the font, simply triple-click the text to select all of the letters, and with the text highlighted use the font dropdown menu at the top of the screen to choose a new font from your library.
You can also change the size of your text using that same tool settings menu.
TIP: If you’re using a mouse, you can quickly increase and decrease the size of your text by hovering the cursor over the size dropdown and rolling the mouse wheel up and down:
Changing the size of the text using a shortcut.
This works the same if you’re using a trackpad. However, instead of rolling a mouse wheel, simply swipe up and down with two finger.
Change the start and end point
To change the position and orientation of your curved text in Illustrator, grab the Selection Tool (keyboard shortcut: V)
If you do not have your text selected then go ahead and click on it. You will notice a series of thin vertical blue lines and the beginning and end of your curved text:
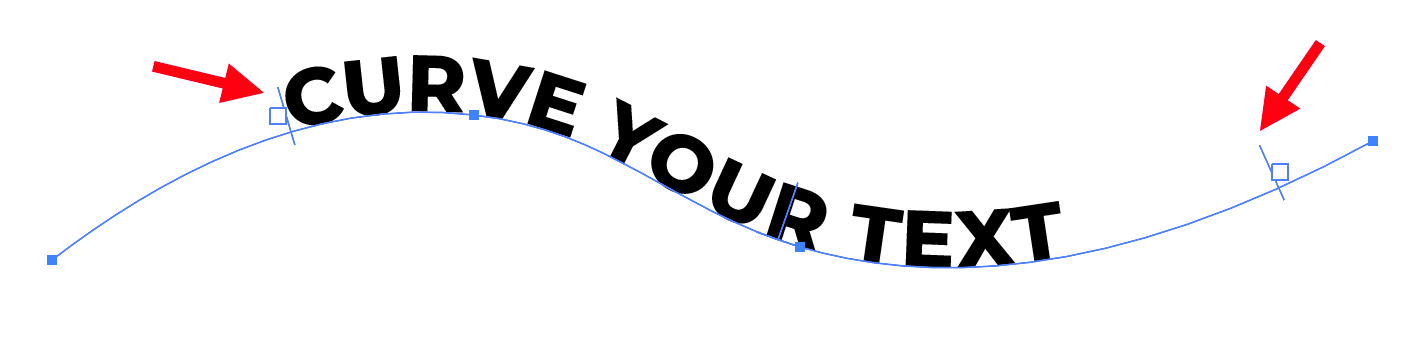
The path handles dictate the start and end points of the text.
These lines represent the start point and end point of the text. You can click and drag them to change their position if necessary:
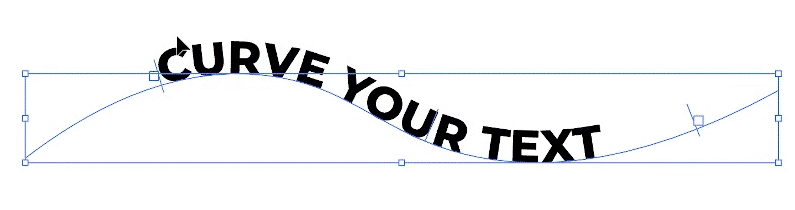
The blue lines at the left and right represent the endpoints of the text.
Once this adjustment is made it will be easier to choose an orientation for your text, such as centering it.
Move the text to a different part of the curve
To move the location of the text along the curved path, select it using the Selection Tool (keyboard shortcut: V). Click and drag the thin blue vertical line in the center to move it around:
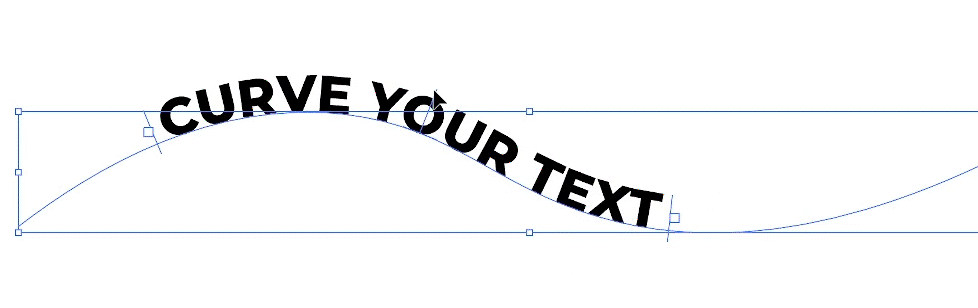
The blue line in the center allows you to move the text along the path.
Reverse the direction of the text
Let’s say you want to curve your text beneath the curve rather than above it.
To do this, select the text with the Selection Tool and use the thin blue vertical line in the center to flip the text over to the other side. Simply click and drag it:
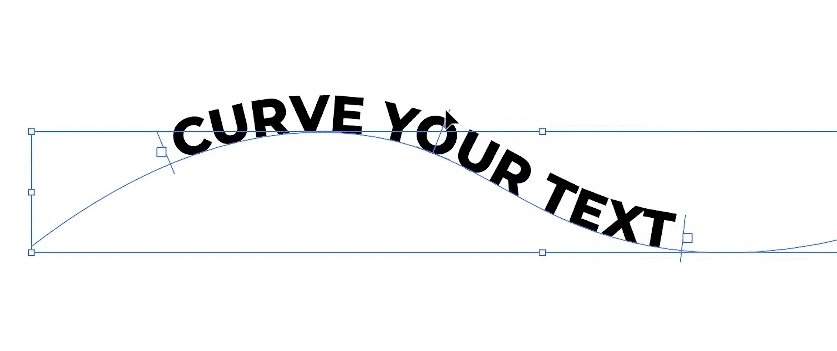
The blue line in the center also allows you to flip you text to the reverse side of the curve.
Change the kerning/spacing between letters
Kerning represents the spacing between letters. Whenever you curve text in Illustrator there is a chance that some letters will end up either spaced too far apart or too close together.
To correct this, grab the Type Tool (keyboard shortcut: T) and click to place the cursor between two of the letters you’d like to correct. Then, hold the Alt key (Option key for Mac users) and use the left arrow key to decrease the space between the letters, and the right arrow key to increase it:
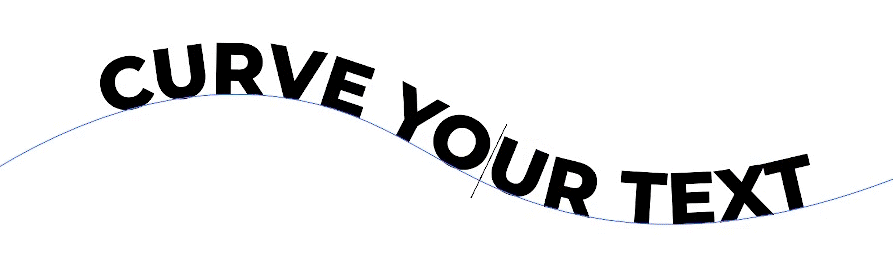
Use the keyboard shortcut to correct the spacing between your letters if needed.
Conclusion
Thanks to some of Illustrator’s advanced features, flowing text along a curve or shape couldn’t be easier. With a path already in place, all it takes is a single click with the right tool.
If you have any questions or need clarification on any of the steps taken in this lesson just leave a comment below.
Learn To Master The SoftwareGain a complete understanding of your favorite design apps with my comprehensive collection of video courses. Each course grants access to our private community where you can ask questions and get help when needed.
|
||||||||||||||||||||||||||||||||


