How To Make A Perspective Grid In Affinity Designer
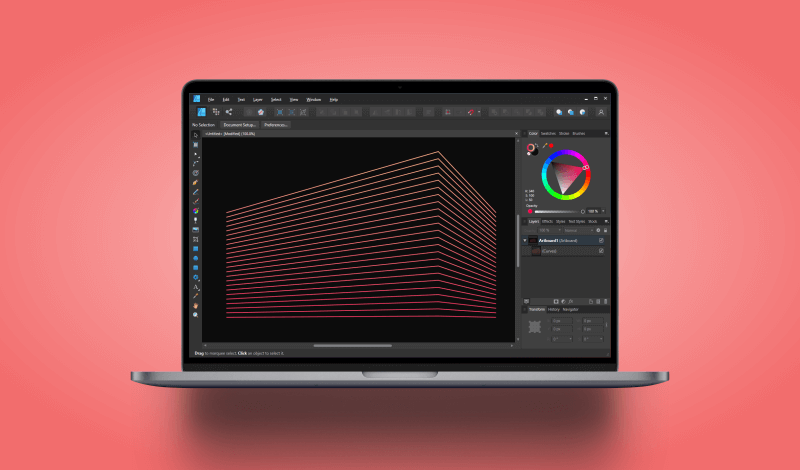
How To Make A Perspective Grid In Affinity Designer https://logosbynick.com/wp-content/uploads/2022/03/affinity-designer-perspective-grid.png 800 470 Nick Saporito Nick Saporito https://secure.gravatar.com/avatar/8e31bf392f0ba8850f29a1a2e833cdd020909bfd44613c7e222072c40e031c34?s=96&d=mm&r=gOne of the more frustrating aspects of working with Affinity Designer is that it lacks the ability to make advanced transformations to paths, such perspective and envelope distortions. This is a point I touched on in my post comparing Designer to Inkscape. That said, there is a workaround we’ll be going over in this tutorial which will allow you to create your own perspective grid in Affinity Designer that you can use as a reference when making perspective drawings.
The downside of this workaround is that it doesn’t allow you to warp objects to fit the perspective grid. Instead, this is more of a guide that you can reference when drawing objects in perspective with the Brush or Pen Tool.
To create it we’ll simply be creating a series of horizontal lines and transforming the endpoint nodes. Let’s dig in!
Make A Perspective Grid In Affinity Designer
The following video tutorial will walk you through my entire workaround process for making a perspective grid in Affinity Designer:
Continue on for the written tutorial.
Table of Contents
|
Step 1: Create a line going across your canvas
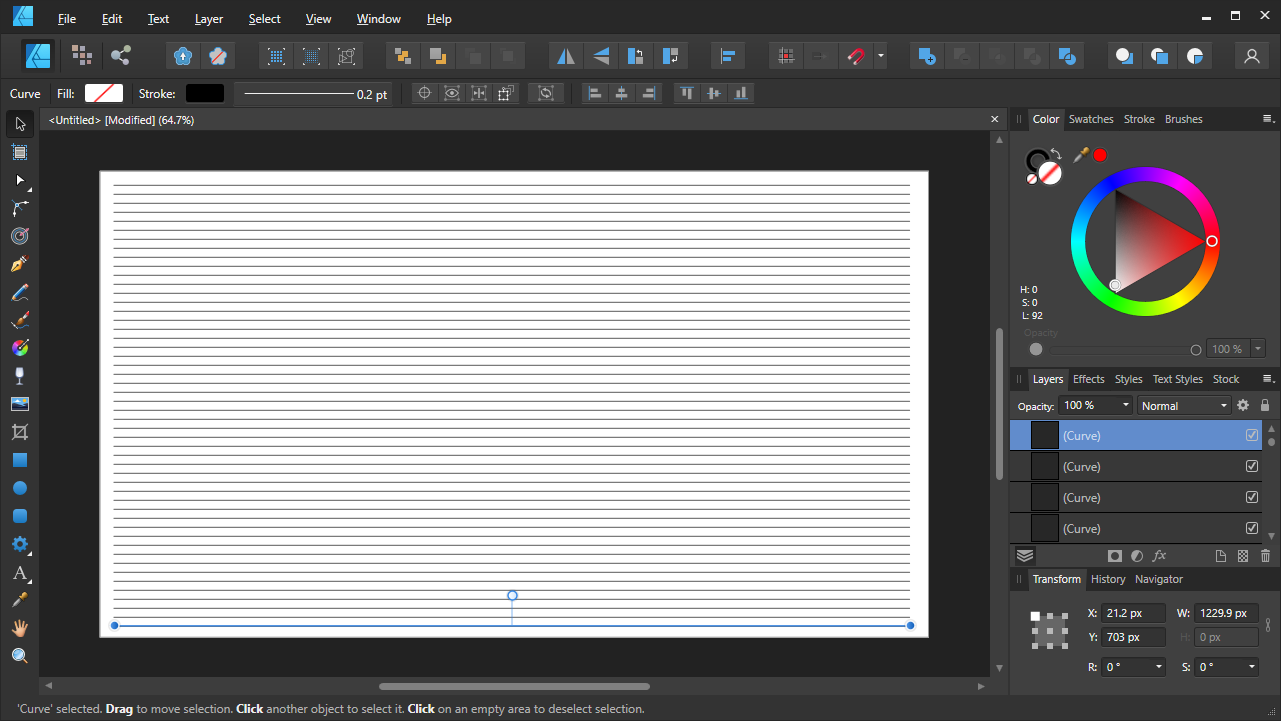
The first step in our quest to make a perspective grid in Affinity Designer is to use the Pen Tool (keyboard shortcut: P) to draw a single, straight, horizontal line going across your canvas:
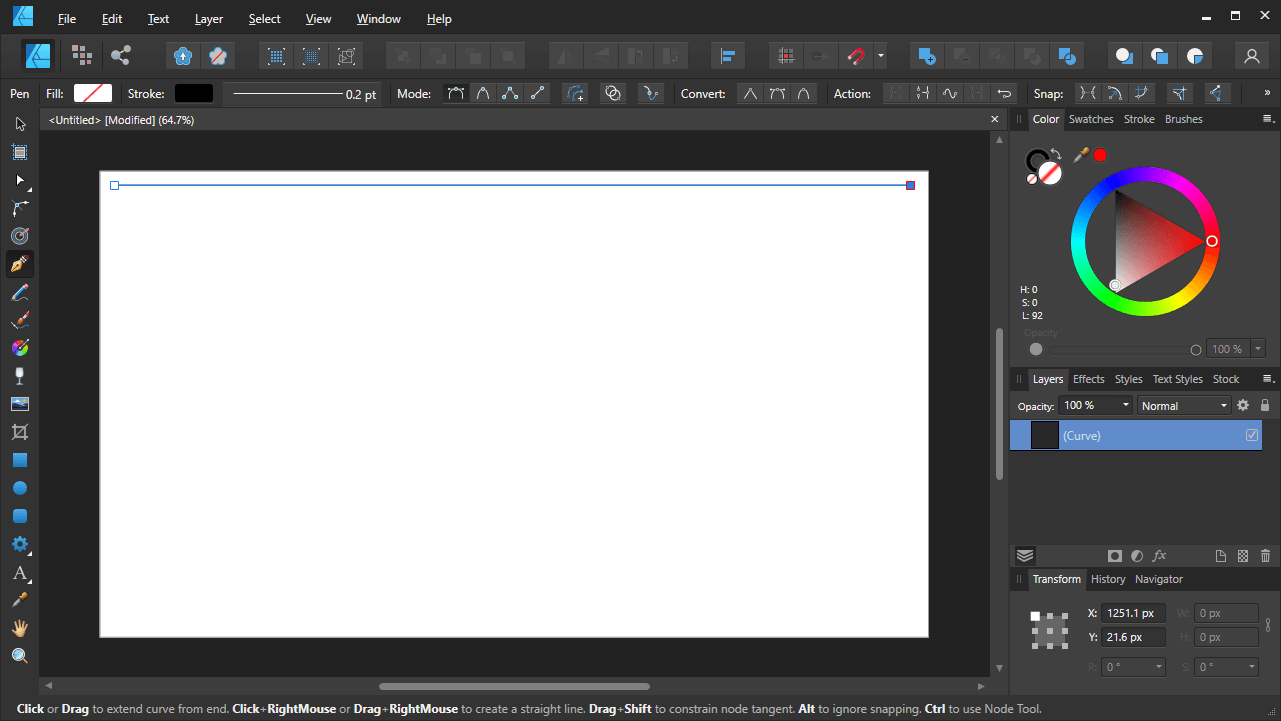
Draw a single line across the canvas. This line will be duplicated and turned into a perspective grid.
Refer to the video tutorial above if you don’t know how to do this.
In short, you simply click once to add a point, then hold the Shift key to move the line straight across your canvas, then click again to create the endpoint of the line.
Step 2: Add a new node in the center of the line
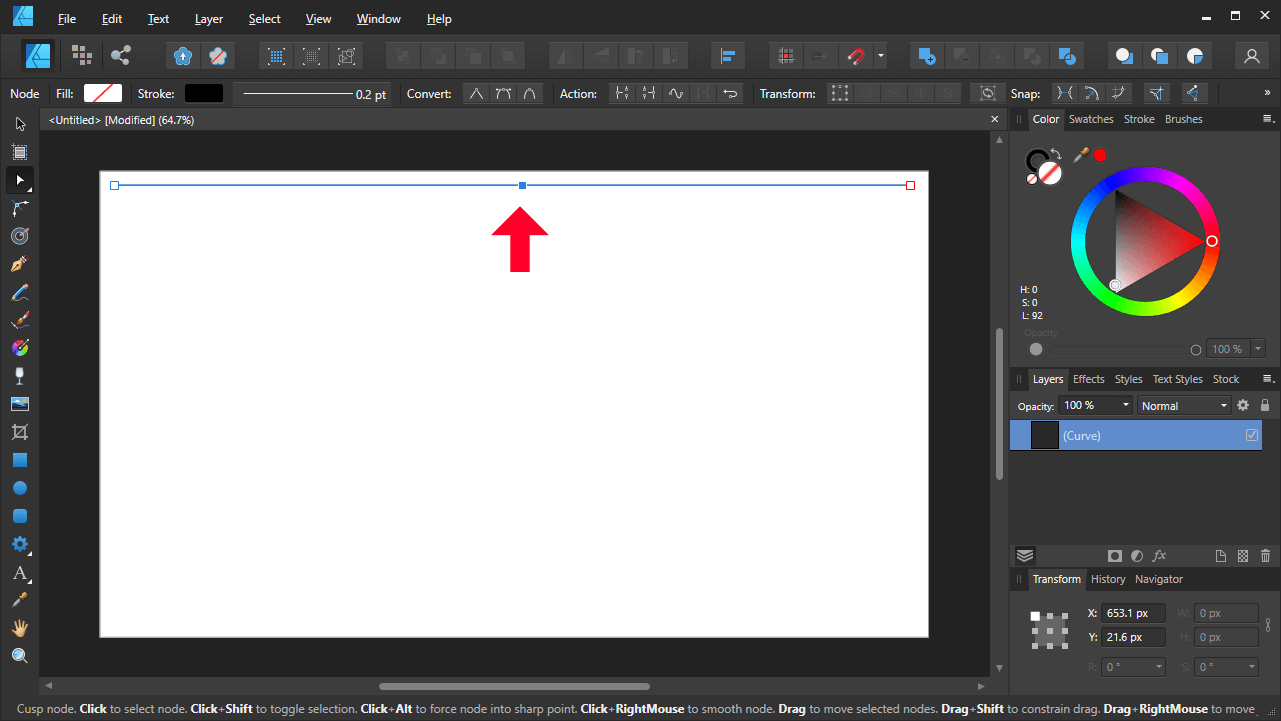
In order for us to use this line in our perspective grid to-be, we’ll have to add a new node in the center of the line.
Grab the Node Tool (keyboard shortcut: A) and click roughly in the center of the line to add a new point:
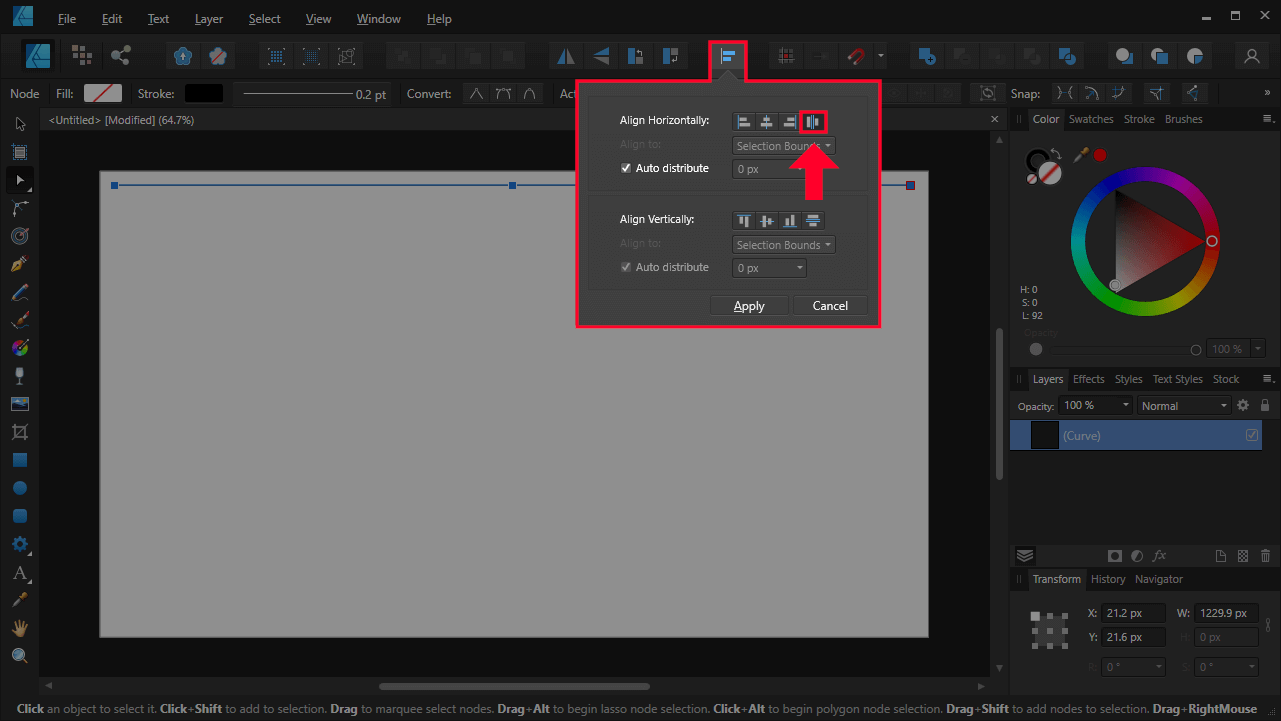
Now we have to ensure that the point is directly in the center of the line. To do this we will be using Alignment menu.
With the Node Tool still enabled, click and drag over all three nodes of the line to select them all, then open the Alignment menu and click the button labeled Space Horizontally when you hover your cursor over it:
This will make it so that the middle node of the line is placed directly in the middle of it.
Step 3: Duplicate the line until it fills the entire height of your workspace
Now we need to make a bunch of copies of this line so we can turn them into a perspective grid.
Grab the Move Tool (keyboard shortcut: V) and click and drag the line down a few steps while holding down the Alt and Shift keys.
This will make a duplicate of the line. Now, before you deselect anything, press Control + J to repeat this process. The result will be a duplicate copy of the line.
Now simply press Control + J repeatedly to create enough copies of the line to fill your entire workspace:
Do not worry if they’re not evenly spaced apart. We will be addressing that in the next step.
Step 4: Merge the lines together
Now we need to merge all of these lines together so that we can transform them as if they were a single object. But first we must ensure that they are evenly spaced apart.
Select all of your lines by pressing Control + A on your keyboard, then navigate back to the alignment menu and click the button that says Space Vertically,
Now that your lines are evenly spaced apart, let’s merge them all together into a single object by navigating to:
Layer > Geometry > Merge Curves
The lines should now behave as a unit rather than a collection of individual lines.
Step 5: Transform the endpoint nodes of the grid to change its perspective
In order to make a perspective grid in Affinity Designer with these lines we will have to transform them. This is where the Node Tool comes in handy yet again.
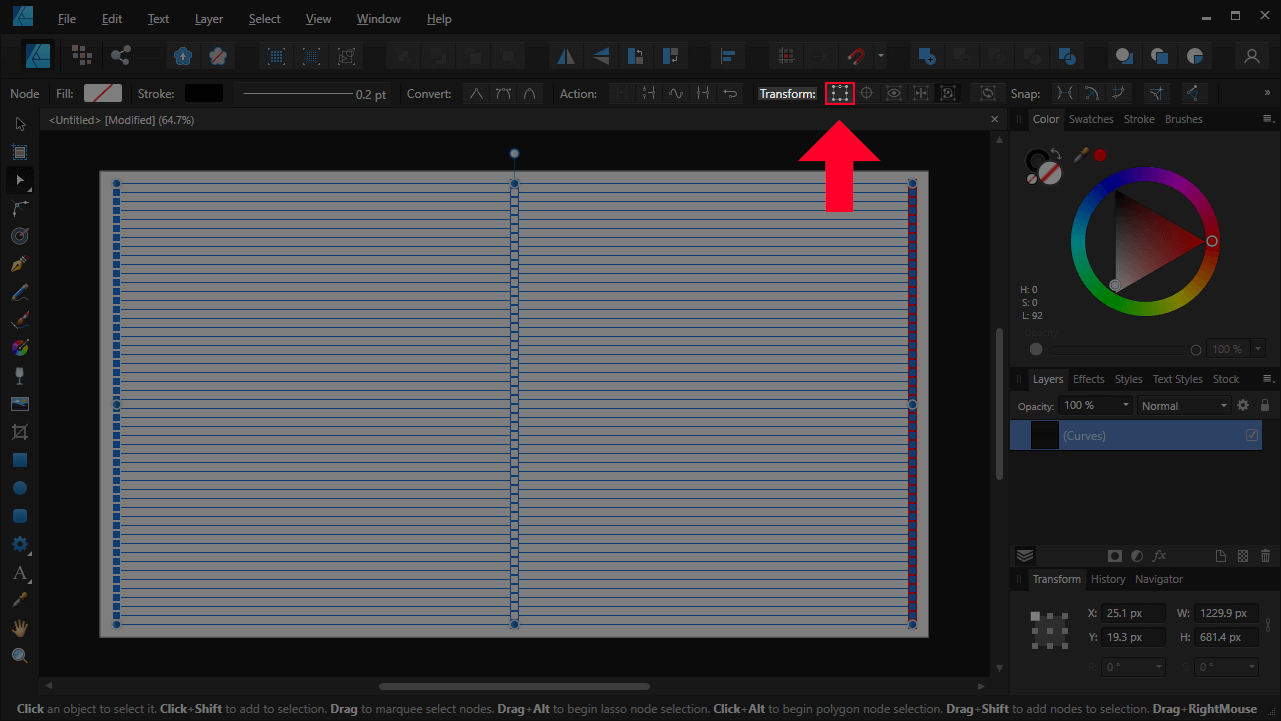
In the tool settings menu of the Node Tool, towards the top of the screen, enable the Transform Mode setting, located just to the right of the Transform label:
Once enabled, transformation handles will populate around any nodes you have selected, allowing you to scale, rotate, and shear them.
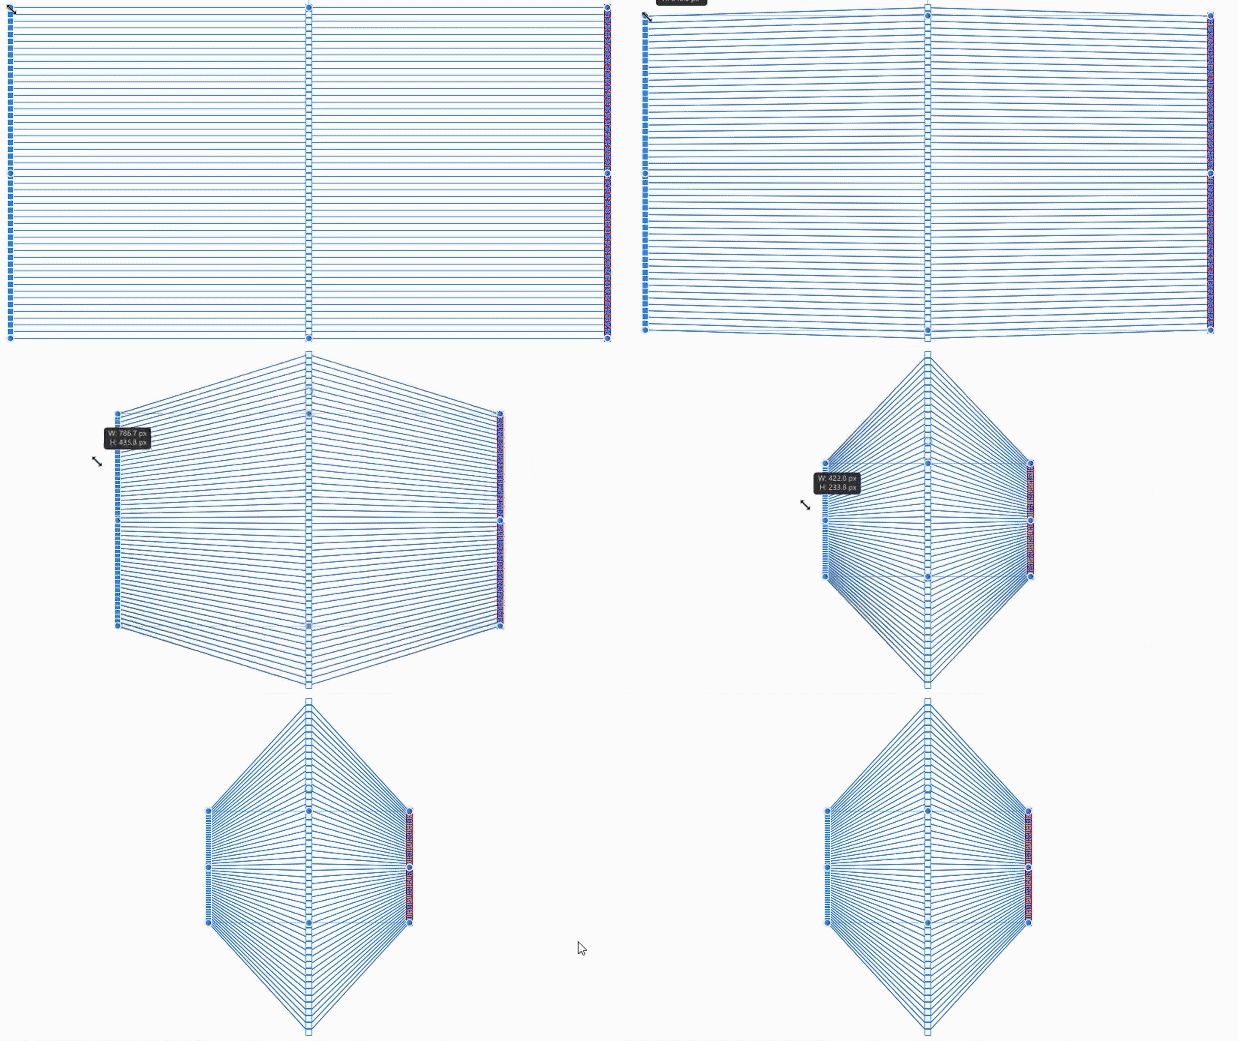
Click on the lines with the Node Tool to select them, then click and drag over all of the nodes on the left-hand side to select them. Then, click and drag over all of the nodes on the right-hand side to select them as well.
Once selected, use the transformation handles (represented as little blue circles) to scale them. Hold the Shift and Control keys on the keyboard to ensure that both sides scale evenly:
This step may be a little tricky if you’re a newcomer to Affinity Designer, so refer to the video tutorial for a demonstration if you find yourself getting stuck here.
Once you are finished, simply release the click. You should now have a perspective grid that you can use as a reference when drawing!
Step 6: Lock the perspective grid layer
This final step in our journey to make a perspective grid in Affinity Designer is optional, but it will certainly help when you’re drawing.
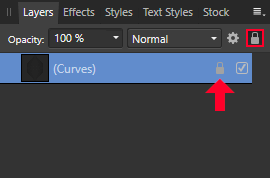
Navigate over to the Layers menu, select the layer with the perspective grid, then click the lock icon to lock the layer:
This will make it so that the grid stays fixed in place and you will not be able to edit it. This is really helpful when drawing over the grid as you may accidentally find yourself clicking on the grid and moving it.
If at any point you’d like to transform the perspective grid again, just unlock the layer.
Conclusion
Not having the ability to work in perspective modes in Affinity Designer is a very unfortunate downside to using the application. Maybe one day they’ll add in this capability, but for now we will have to go the manual route when making a perspective grid in Affinity Designer.
If you have any questions or need clarification on any of the steps taken in this lesson then simply leave a comment below.
Learn To Master The SoftwareGain a complete understanding of your favorite design apps with my comprehensive collection of video courses. Each course grants access to our private community where you can ask questions and get help when needed.
|
||||||||||||||||||||||||||||||||
- Post Tags:
- Affinity
- Posted In:
- Affinity
- Affinity Designer
- Tutorials
Nick Saporito
Hi, I'm Nick— a Philadelphia-based graphic designer with over 10 years of experience. Each year millions of users learn how to use design software to express their creativity using my tutorials here and on YouTube.
All stories by: Nick Saporito



Alexis
Thanks for this very helpful tutorial