How To Use The Color Picker In Affinity Photo for iPad
How To Use The Color Picker In Affinity Photo for iPad https://logosbynick.com/wp-content/uploads/2022/01/affinity-photo-ipad-color-picker.png 800 470 Nick Saporito https://secure.gravatar.com/avatar/8e31bf392f0ba8850f29a1a2e833cdd020909bfd44613c7e222072c40e031c34?s=96&d=mm&r=gGetting used to design software on a mobile device comes with a unique learning curve. Much of the processes and user interface you’re familiar with in desktop design applications doesn’t apply on a mobile device, such as an iPad. One such process would be color picking. In this tutorial we’ll be going over 3 ways in which you can use the color picker in Affinity Photo for the iPad.
In short, there’s three ways in which you can use the color picker in Affinity Photo for the iPad — you can use the dropper tool built into the Color Menu, you can use the dedicated Color Picker Tool, or you can simply hold a tap over the portion of the image you’d like to sample colors from.
The main difference between the two is that the Color Picker Tool provides for more tool settings so you can pick a color with more precision. However, the color menu dropper can be quicker and more efficient if you just want to sample a color from your image real quick. Let’s delve into the details.
Using The Color Picker In Affinity Photo for iPad
The following video tutorial will walk you through the process of sampling colors from your image in Affinity Photo for the iPad:
Continue on for the written instructions.
Table of ContentsOption 1: Use The Color MenuOption 2: Use The Color Picker Tool
Option 3: Hold A Tap Over The Image |
Option 1: Use The Color Menu
The first method we can use for color picking in Affinity Photo for the iPad is to use the dropped tool built into the Color Menu. Let’s go over how this works.
Step 1: Open the color menu
Open the Color Menu by tapping the color disc in the top-right corner of your screen:
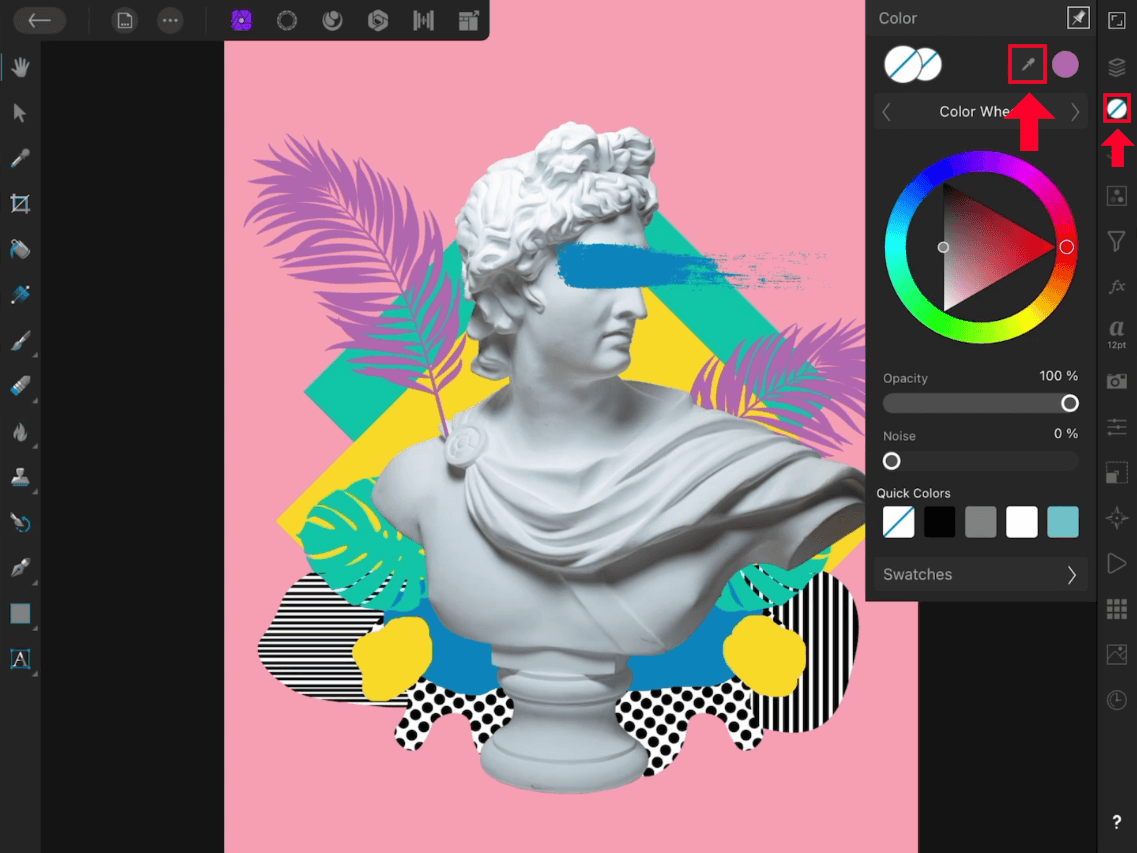
The Color Menu is located in the top-right corner of the screen.
The Color Menu is represented, by default, as a white circle with a blue slash going through it. This is assuming you haven’t previously selected any other colors, that is. If you have, it will be represented by that fill color.
Step 2: Tap and drag the dropper icon onto the image to sample a color
Towards the top-right corner of the Color Menu you should see a small dropper icon (see the screenshot in step 1.)
To sample a color from your image, simply tap and drag that icon onto the area of the image you’d like to sample.
While holding the tap, you should notice the cursor transform into a circle with a white box in the middle and a colored ring going around the outside of it:
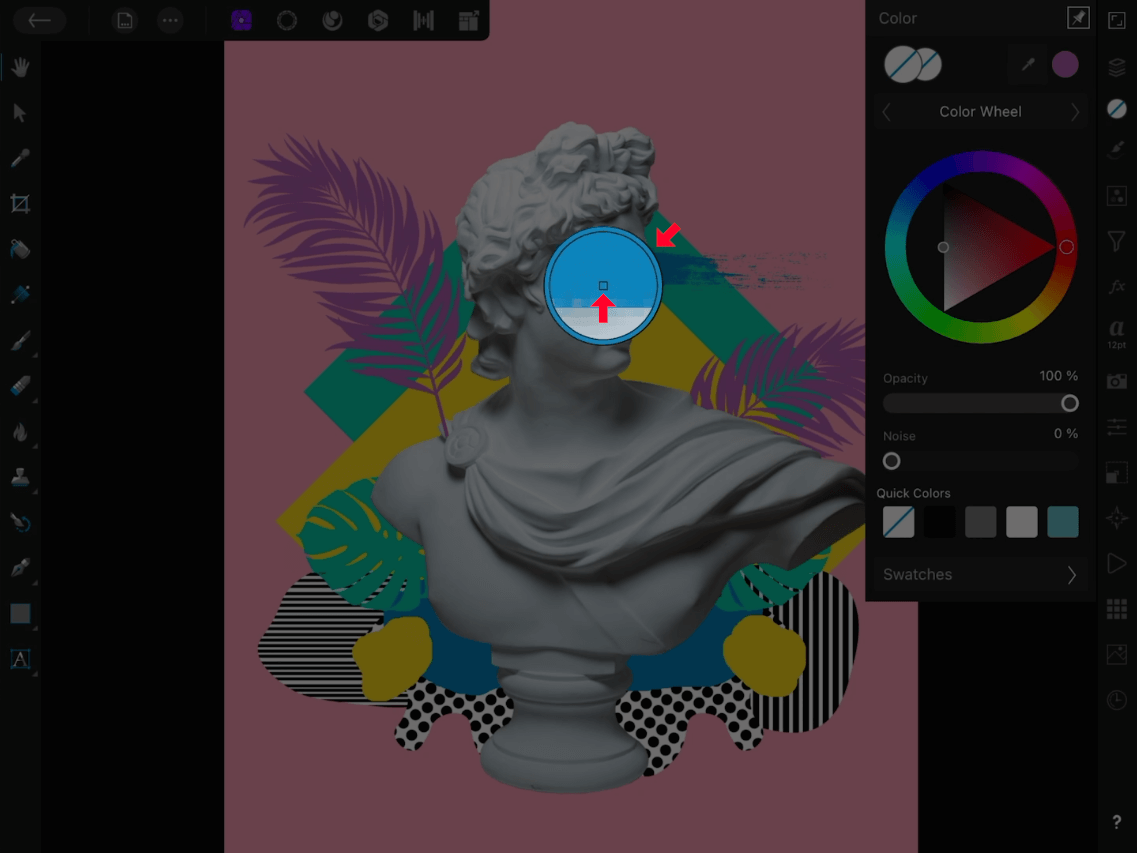
The color picker cursor, depicted above.
The white square represents the location of the pixels you’ll be sampling colors from. The colored ring around the outside represents the selected color. The inside of the circle is a zoomed in preview of the sample area so you can choose your color with more precision.
Once you are satisfied with your selection, simply release the tap and the chosen color should be available for use in the Color Menu:

Once selected, your chosen color will be accessible next to the dropper icon in the Color Menu.
Option 2: Use The Color Picker Tool
Another way in which you can pick colors in Affinity Photo for the iPad is by using the Color Picker Tool.
This is a tool that was designed specifically for sampling colors from your images, and unlike the dropped tool found in the Color Menu, this tool offers more options for fine-tuning your selections.
Step 1: Select the Color Picker Tool
Open the Color Picker Tool by tapping on the dropper icon in the toolbar on the left-hand side of your screen:
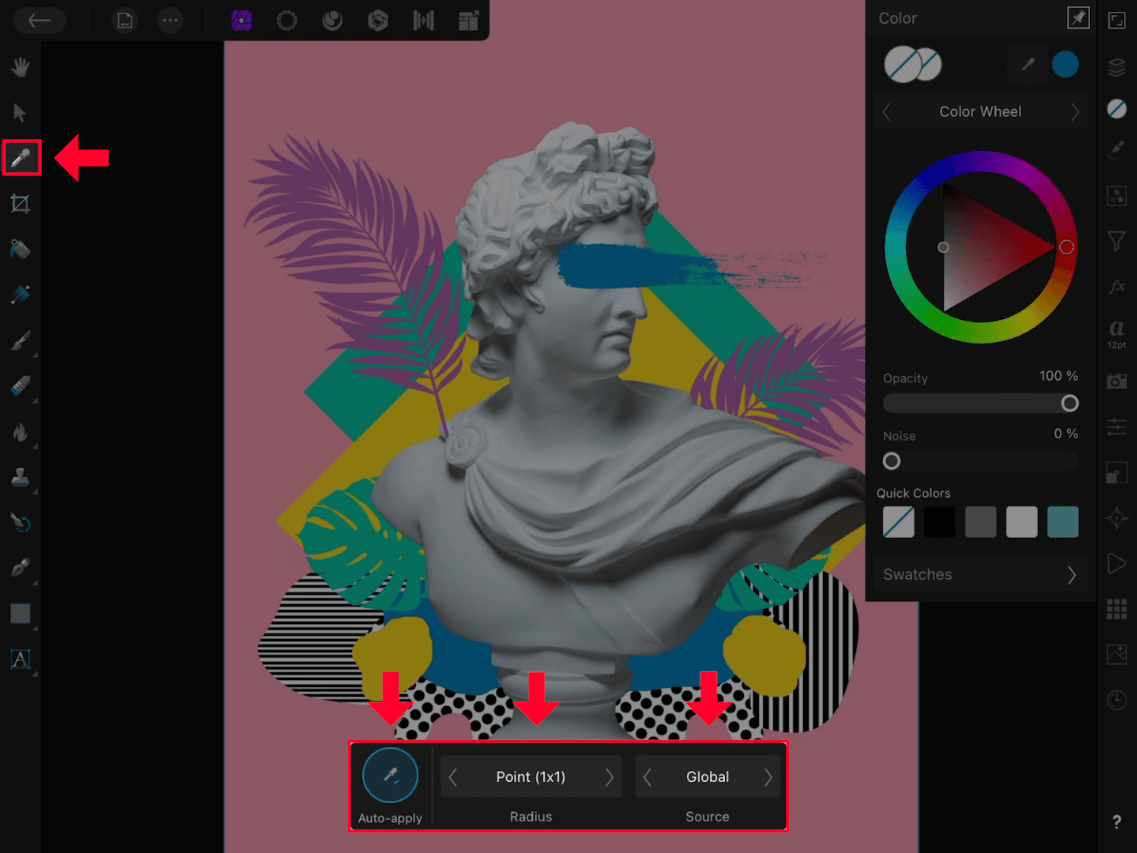
The Dropper Tool location and the tool options, outlined in red above.
Step 2: Input the desired settings
Once opened, you should see a small menu with some tool options towards the bottom of your screen (see screenshot in previous step.)
The tool options are as follows:
Auto Apply
The Auto Apply feature is enabled by default. When enabled it should be highlighted in blue. Tapping on it will disable it and remove the blue highlight.
Leaving this setting on will make it so that the software automatically fills in whatever layer, selection or object you have enabled at the time. Disabling it will make it so that the tool only picks the color and doesn’t apply it elsewhere.
If you’re just looking to pick colors and not auto-fill them to your selection, it is recommended that you disable this setting, otherwise it can cause problems.
Radius
The Radius setting represents the size of the area you’ll be sampling colors from. The options are:
- Point (1×1)
- Average (3×3)
- Average (5×5)
- Average (17×17)
- Average (65×65)
- Average (129×129)
- Average (257×257)
The first setting, Point (1×1), will make it so that you are picking color from a single pixel. Choosing this option will allow you to pick an exact color with precision. However, it requires that you place the pointer directly over your desired color, which may be challenged depending on the composition of your image.
The Average options, when selected, will take an average of the colors being sampled in the size specified. So for example, if you choose Average (5×5), the software will take an average of the colors sampled in a 5×5 (or 25 square pixel) area.
Source
Finally, there is Source, which allows you to dictate where the color sample should be selected from.
The two options to choose from are:
- Current Layer: this will make it so that you can only sample colors from the current layer you have selected
- Global: this will make it so that you can sample colors from anywhere on your image, regardless of layers
If you don’t know which option to choose, or you aren’t yet familiar with how layers work in Affinity software, then it is recommended that you choose Global.
Step 3: Hold a tap over the image to sample a color from it
Once your settings are applied you can now pick colors from your image the same way we did in option 1. Simply hold a tap over the area you’d like to sample from.
As is the case for the dropper tool in the Color Menu, the selector is represented as a zoomed-in circle with a white square in the middle that represents the sample point, and a colored ring around the outside that provides a preview of the chosen color.
Option 3: Hold A Tap Over The Image
The final way in which you can use the color picker in Affinity Photo for the iPad may be the simplest and easiest of them all — simply holding a tap over the image.
Step 1: Hold a tap over the image to sample a color
To pick a color from your image, simply tap once on the canvas and hold the tap until the color picker cursor — same as the color picker in the previous options — populates.
Once you release the tap your chosen color should be active and ready to use in the Color Menu.
It should ne noted though that this method only works when working with certain tools. For example, the paintbrush and shape tools allow you to pick colors by holding a single tap instead of switching between tools. However, other tools, such as the View and Move tools do not allow you to pick colors in this way.
Conclusion
As we’ve gone over in this lesson, there’s no shortage of ways to use the color picker in Affinity Photo for the iPad. The provided options may seem excessive, but all three serve unique purposes, and familiarizing yourself with them can help make your workflow more efficient.
If you have any questions or need clarification on any of the steps taken in this lesson, simply leave a comment below.
Learn To Master The SoftwareGain a complete understanding of your favorite design apps with my comprehensive collection of video courses. Each course grants access to our private community where you can ask questions and get help when needed.
|
||||||||||||||||||||||||||||||||