How To Change An Image’s Color In Procreate for The iPad
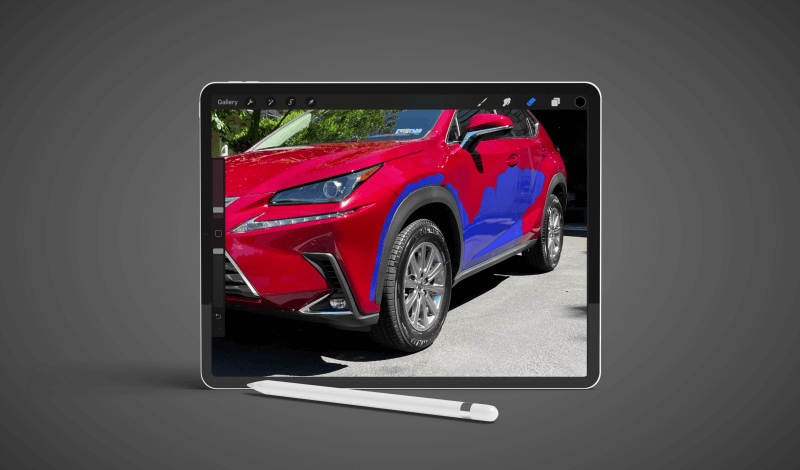
How To Change An Image’s Color In Procreate for The iPad https://logosbynick.com/wp-content/uploads/2021/06/change-image-color-procreate-1.png 800 470 Nick Saporito Nick Saporito https://secure.gravatar.com/avatar/8e31bf392f0ba8850f29a1a2e833cdd020909bfd44613c7e222072c40e031c34?s=96&d=mm&r=gIf you’ve ever wanted to change the color of an object in a photo then today you’re in luck. In this tutorial I’ll be using one of Procreate’s many color adjustment abilities to demonstrate how you can change an image’s color in Procreate for the iPad. By the end of this lesson you will have added an essential photo editing skill to your arsenal.
In short, the way that you can change an image’s color in Procreate is by creating a duplicate copy of the image layer, placing it beneath the original layer, and changing the image’s Hue using the Hue, Saturation & Brightness adjustment. Then, activate the original image layer and manually erase out the color that you’d like to change using the Eraser tool. The adjusted color from the layer below will show through the transparent area of the original image layer, creating a visual effect where the color of the image has been changed.
Change Image Color In Procreate
The following video tutorial will walk you through the process of changing the color of an object in a photo using Procreate for the iPad:
The following is a brief overview of the steps taken in the video tutorial to achieve this effect. For complete step-by-step instructions, it is recommended that you watch the video tutorial. If you’re already proficient with Procreate though, and you just want to see how this is done, then the written instructions below should be sufficient.
Table Of Contents |
Step 1: Create duplicate copies of the image layer
In order to change an image’s color in Procreate, we must first open the image with Procreate and create three copies of the image layer.
Open the Layers menu, slide the image layer to the left and select Duplicate. Repeat this process one more time so that you have three copies of the image layer to work with:

As depicted in the screenshot above, use the Layers menu to turn off the visibility of the top and bottom layers, but leave the visibility of the middle layer enabled.
Make sure you have the middle layer selected (it should be highlighted in blue) and then close out of the Layers menu.
Step 2: Change the Hue of the image layer using the Hue, Saturation & Brightness adjustment
The best way to change an image’s color with Procreate is to use one of its many color adjustment effects.
Tap on the little magic wand icon in the top-left corner of the screen to open the Adjustments menu, and choose Hue, Saturation & Brightness. When prompted to choose between Layer and Pencil, make sure to choose Layer.
At the bottom of the screen you will see a menu divided up into three parts:
- Hue
- Saturation
- Brightness
For this lesson we will be focusing exclusively on the Hue section and leaving the other two properties as they are.
Tap and slide on the Hue slider to change the color of your image until it changes the object in your image to a color of your preference:

Once you are finished simply tap the Adjustments menu icon again to close out of it.
Step 3: Use the Eraser to manually erase the color you’d like changed from the original image
This final step is where the magic happens, but we first need to go back into the Layers menu and turn on the visibility of the top layer so that the original image’s color is visible.
With the top layer selected/enabled, grab the Eraser and start erasing out areas the color you’d like changed in your original image, revealing its new color beneath it:

All you have to so now is erase out the rest of the area and you’re done! That is how you can change an object’s color in Procreate!
Here’s how the finished photo looks:

Once you are finished you can merge the top two layers together. The third layer, on the bottom, is a copy of the original in case you need it. You can also toggle the visibility of the top layer off and on to see how the new color looks compared to the old color.
Tips & Pointers
When erasing the color from your original image there are some tips and pointers that should be kept in mind:
- Be mindful of your eraser brush size, which can be changed using the slider on the left-hand side of the screen.
- For this type of photo editing it is recommended that you use a hard brush. In the tutorial video the brush I used is the Hard Blend brush located in the Airbrushing category of the brushes menu.
- To save time, it is recommended that you erase out the edges of your subject with a small, fine brush first, then erase out the large fill areas with a larger brush afterwards.
Conclusion
Changing an image’s color in Procreate is just another way in which this handy little app allows you to perform essential photo editing tasks. As demonstrated in previous tutorials, you can also use Procreate to delete backgrounds from your images and more. Despite its minimalistic features, there’s no shortage of ways in which you can apply editing magic to your photos in Procreate!
If you have any questions or need clarification on any of the steps taken in this lesson, simply leave a comment below.
Learn To Master The SoftwareGain a complete understanding of your favorite design apps with my comprehensive collection of video courses. Each course grants access to our private community where you can ask questions and get help when needed.
|
||||||||||||||||||||||||||||||||
Nick Saporito
Hi, I'm Nick— a Philadelphia-based graphic designer with over 10 years of experience. Each year millions of users learn how to use design software to express their creativity using my tutorials here and on YouTube.
All stories by: Nick Saporito


Thanks, but Good Lord, why didn’t Procreate simply add a grayscale or monochromatic mode? It’s much easier to export image to my laptop and change to grayscale there or on any photo editor.
Changing the car colour.
This works so well, it’s scary!
Does the eraser read my mind?
How does it know to only erase the red? And, since it seemingly knows not to paint “outside the lines”, why should I bother with a small brush as it seems to work just as well with a large brush? Thanks, Pat.
It depends on the color of the surrounding area. Most of the time you can go past the lines and be alright, but for some shades it won’t work as well.