How To Make A Dotted Line In Illustrator CC 2021
How To Make A Dotted Line In Illustrator CC 2021 https://logosbynick.com/wp-content/uploads/2021/10/make-a-dotted-line-in-illustrator.png 800 470 Nick Saporito https://secure.gravatar.com/avatar/8e31bf392f0ba8850f29a1a2e833cdd020909bfd44613c7e222072c40e031c34?s=96&d=mm&r=gAs an Illustrator user you may occasionally have the need to create dotted lines, whether it be for sketches, key line grids for logos, or whatever other reason. Making a dotted line in Illustrator is simply a matter of drawing a stroke and changing the stroke properties to dashed, but there’s other properties you’ll need to pay attention to if you’d like to adjust your dotted lines further.
In today’s tutorial we’ll be going over the complete process for making dotted lines in Illustrator. The lines created will be true vectors and will follow a path that you’ve drawn with the Pen Tool. The real magic happens in the Stroke menu, where we’ll be changing the properties of a solid line to make it dotted.
Make A Dotted Line In Illustrator
The following video tutorial will walk you through the entire process, step by step. In the first part of the video we go over how to draw dotted lines, then we briefly touch on how to apply a dotted line to an already existing shape:
Continue on for the written instructions.
Table of ContentsCreating Dotted Lines
Working With Dotted Lines |
Creating Dotted Lines
In this first part of the lesson we’ll be going over how to create dotted lines.
Step 1: Draw a stroke with the Pen Tool
In order to make a dotted line in Illustrator we must first draw a regular solid line, and then change the properties of the solid line retroactively.
Grab the Pen Tool (keyboard shortcut: P) and draw a line going across your artboard. Click to add a point, bring the cursor across the screen, then click to add another point on the opposite side. Press Enter to finish the line:
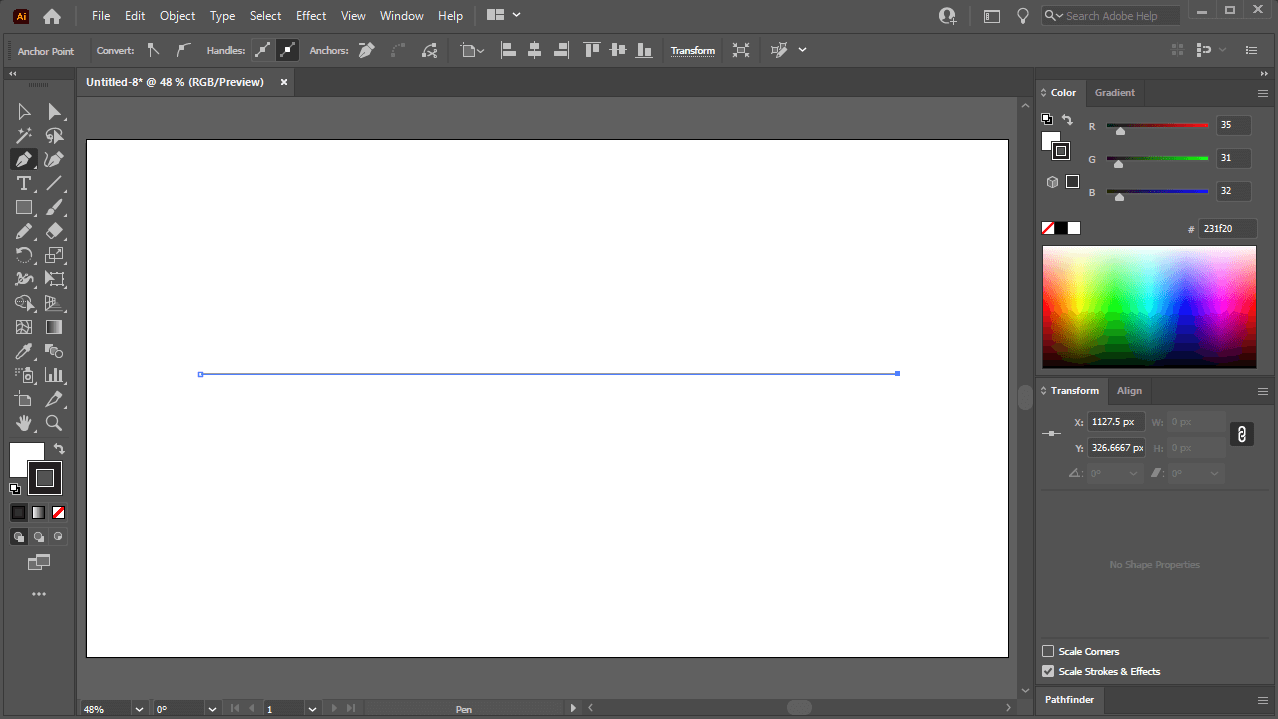
Draw a regular line with the Pen Tool.
Step 2: Open the Stroke menu and show options
Once you have a solid line drawn you can now change the properties of that line from solid to dotted. To do this, however, we will need to open the Stroke menu by navigating to:
Window > Stroke
Once you’ve opened the Stroke menu, it should look something like this:
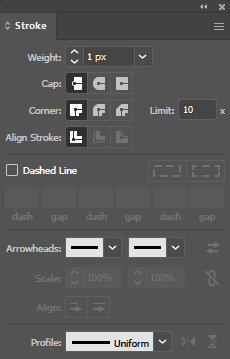
The stroke menu allows you to convert a regular line into a dotted line.
If your stroke menu is missing these details then click the little hamburger-style menu icon in the top-right corner of the menu and select Show Options.
Step 3: Enable the Dashed Line preset in the Stroke Menu
This step is where the magic happens. To make your solid line into a dotted line, select the box that reads Dashed Line. Your solid line will then convert into a dashed line:

You may have to increase the weight of the line to see it better.
You may find it difficult to see the dashes in the line once applied, so increase the stroke Weight in order to see it better.
Step 4: Adjust the stroke weight, dash, and gap setting as needed
Once you’ve converted your solid line into a dashed line, we can then edit the properties further to make it a proper dotted line.
Within the Stroke menu there are 4 settings we’ll need to pay attention to. They are as follows:
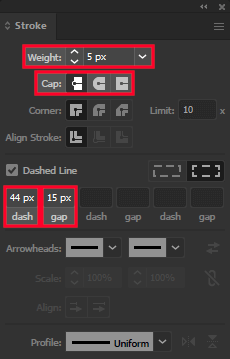
The settings outlined in red above allow you to convert a dashed line into a dotted line.
- Weight: This determines the size of the dots in your dotted line. Increasing it will make the dots bigger, whereas decreasing it will make them smaller.
- Cap: This preset represents the shapes of the corners of your dashes. Since you’re looking to make a dotted line in Illustrator, you’ll want to select the Round Cap option in the middle.
- Dash: This is one of four input boxes that become visible when Dashed Line is enabled, and it dictates the length of your dashes. To make a dotted line, make sure the Dash input is set to 0.
- Gap: Finally, this preset dictates how much space is between each dot. Increasing it will space your dots apart further, whereas decreasing it will bring them closer together.
Adjust the presets above to create a dotted line according to your preferences:
A dotted line, created with strokes.
Tip: Instead of manually entering numerical values into the input boxes, you can simply click on them and roll your mouse wheel up and down to increase and decrease them more quickly.
If you’d like to apply a dotted line to an already existing shape then all you have to do is add a stroke to that shape and repeat steps 2 through 4 to make the stroke into a dotted line.
Working With Dotted Lines
Now that you have the ability to make a dotted line in Illustrator, you may be wondering how you can work with dotted lines further. Let’s go over some common transformations you may wish to make to your dotted lines.
Changing the color of your dotted line
Whenever you make a dotted line in Illustrator it will be black (in most cases) by default.
Seeing as how the dotted line is a stroke, you can change the color of the dotted line by changing its stroke color in the color menu:
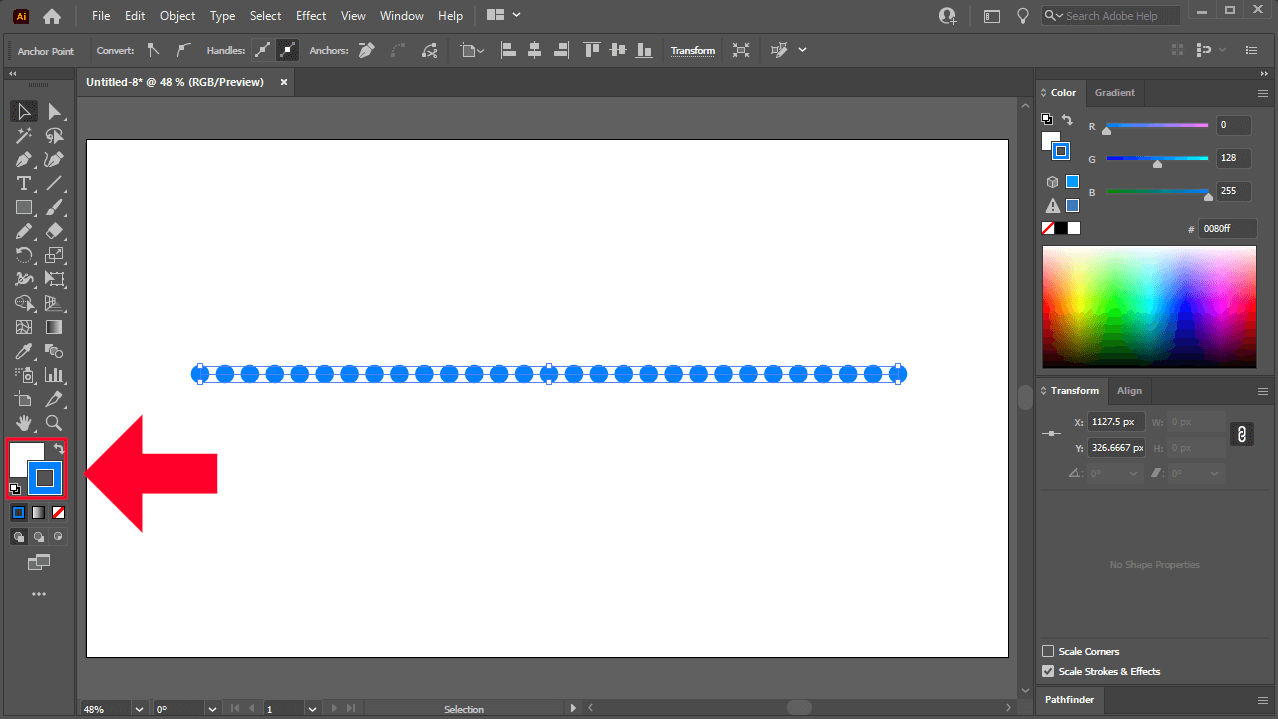
Change the stroke color to change the dotted line’s color.
The dotted line will change to whichever color you apply as the stroke color. The same applies for gradients as well. You can give your dotted line a gradient fill the same way you would for any other stroke object.
Changing the contour of your dotted line
If you’ve followed all of the steps in this lesson so far then your dotted line is probably a straight line as it is. You can add curvature to your dotted line with the Anchor Point Tool (keyboard shortcut: Shift + C) which is located beneath the Pen Tool in the toolbox menu:
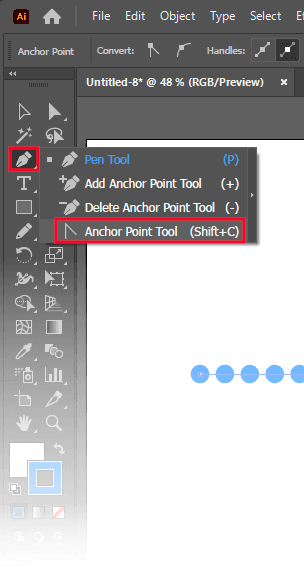
The Anchor Point Tool is nestled beneath the Pen Tool in the toolbox.
With the Anchor Point Tool selected, simply click and drag on your dotted line to bend it:
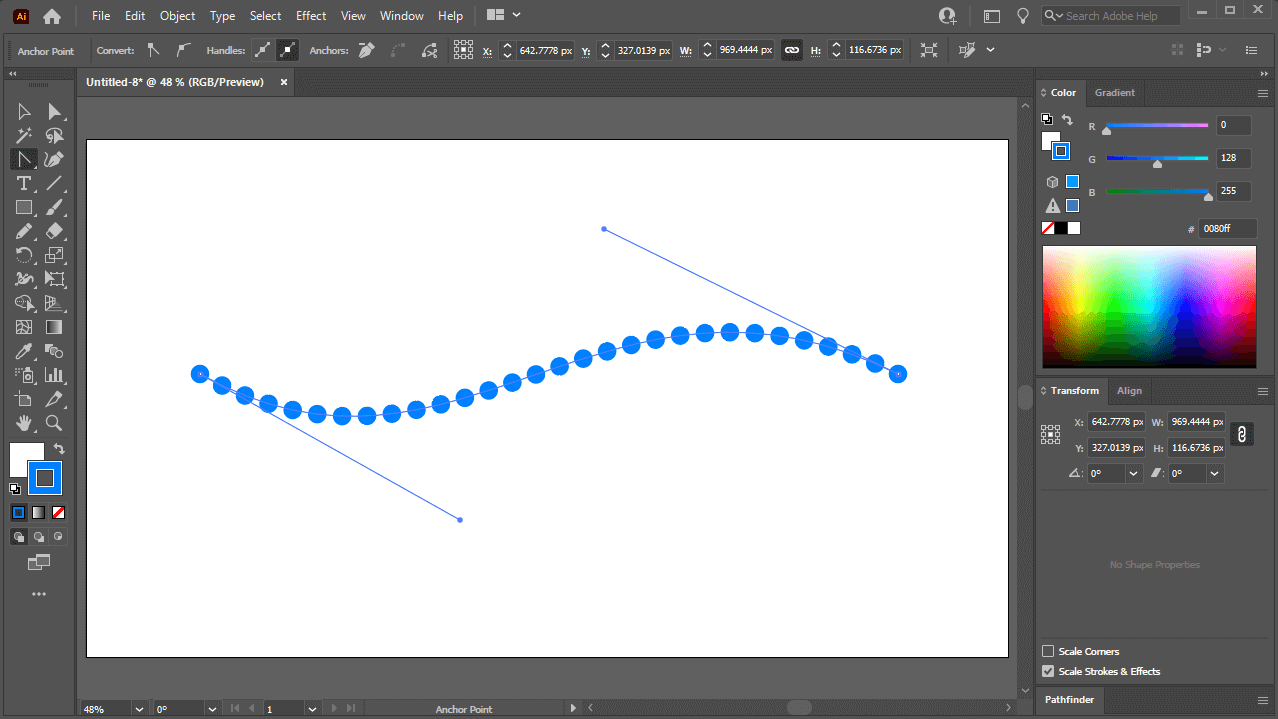
Clicking and dragging the line with the Anchor Point Tool will curve it.
Once bent, there should be handles that activate on each of the anchor points. You can use these handles to curve your dotted line further and with more precision.
Converting your dotted line to a path
Finally, if you’d like to work with your dotted line in more complex illustrations then you may need to convert it from a stroke to a regular path.
To convert your dotted line to a series of individual circles (rather than a stroke,) select it and expand its appearance by navigating to:
Object > Expand Appearance
Then, do a regular expand by navigating to:
Object > Expand
Next, release the compound path by navigating to:
Object > Compound Path > Release
All you have to do now is ungroup the dotted line by pressing Control + Shift + G. You may have to press this several times in order for it to take effect.
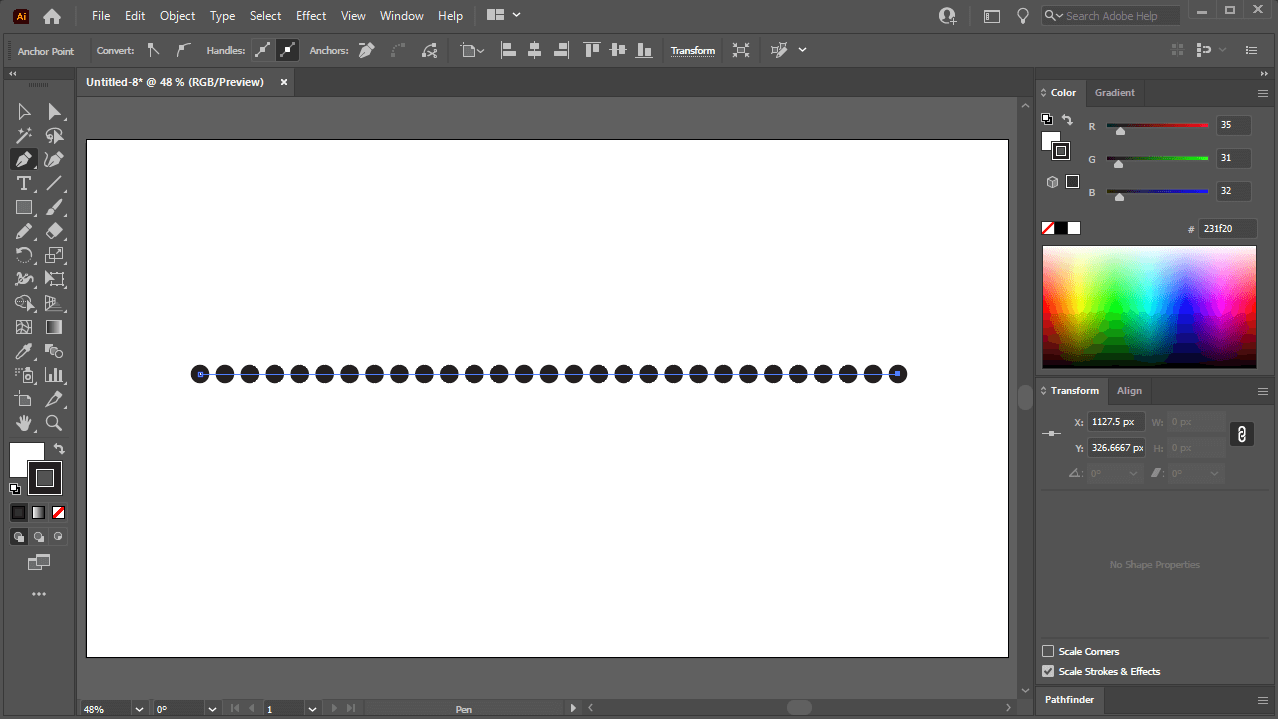
As a result, your dotted line will now be a series of individual circles:
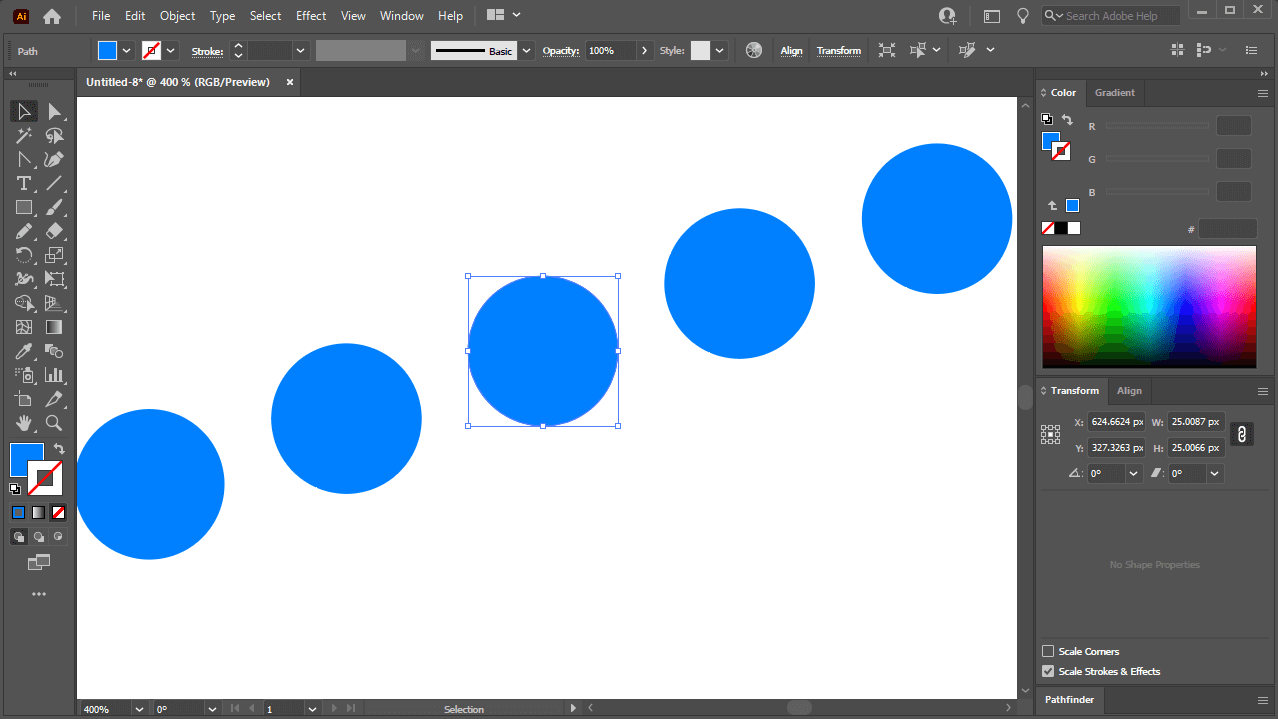
Converting the stroke to a path will make your dotted line into a series of individual circles.
Conclusion
Knowing how to make a dotted line in Illustrator is an exercise in working with paths and strokes. If you’re already familiar with how the Pen Tool works then you’re only a few clicks and tweaks away from drawing dotted lines of any size and style you prefer.
If you have any questions or need clarification on any of the steps taken in this lesson, simply leave a comment below.
Learn To Master The SoftwareGain a complete understanding of your favorite design apps with my comprehensive collection of video courses. Each course grants access to our private community where you can ask questions and get help when needed.
|
||||||||||||||||||||||||||||||||


