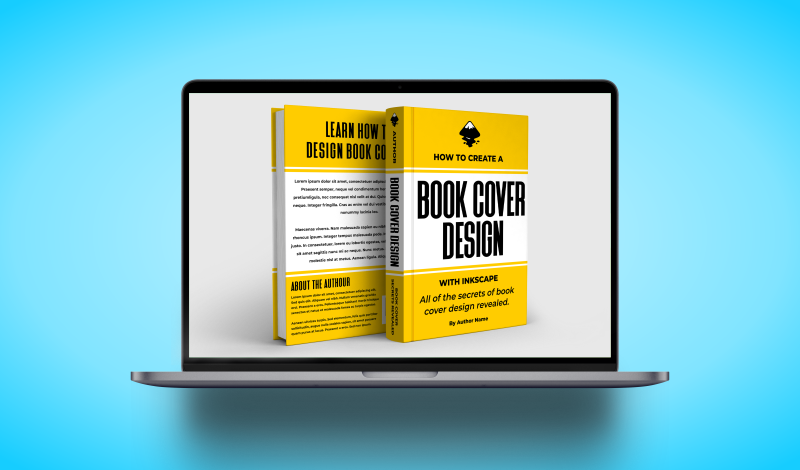
Inkscape Book Cover Design | How To Design A Book Cover For Print
Inkscape Book Cover Design | How To Design A Book Cover For Print https://logosbynick.com/wp-content/uploads/2021/07/inkscape-book-cover-design.png 800 470 Nick Saporito https://secure.gravatar.com/avatar/8e31bf392f0ba8850f29a1a2e833cdd020909bfd44613c7e222072c40e031c34?s=96&d=mm&r=gDon’t let the fact that Inkscape is free and Open Source give you the wrong impression — this application is nothing short of comprehensive, and there’s no shortage of ways in which you can utilize it for real-world design. One such example would be for print design, such as book covers. This Inkscape book cover tutorial will walk you through the entire process of creating book covers for actual, physical books that can be printed and distributed.
In order to create a book cover with Inkscape though you’ll need to download a template from Kindle Direct Publishing, which can be accessed here.
The reason why we’ll be using this template for our Inkscape book cover design is because KDP is the most commonly used print-on-demand service for designing DIY books. Whether you’re designing a book cover for yourself or a client, you’ll most likely be using KDP, so it’s good to be familiar with this platform.
Inkscape Book Cover Design
The following video tutorial will walk you through the entire process for designing a book cover in Inkscape:
The following is just a brief outline of the steps we’ll be taking in this tutorial. Please watch the video tutorial above for complete step-by-step instructions.
Table of Contents |
Step 1: Import the book cover template into Inkscape and prepare the document according to its presets
The first step in our Inkscape book cover design tutorial is to import the PNG file for the Kindle Direct Publishing template onto your canvas and resize the canvas to fit it.
The book cover template comes with bleed lines and safe areas already indicated:
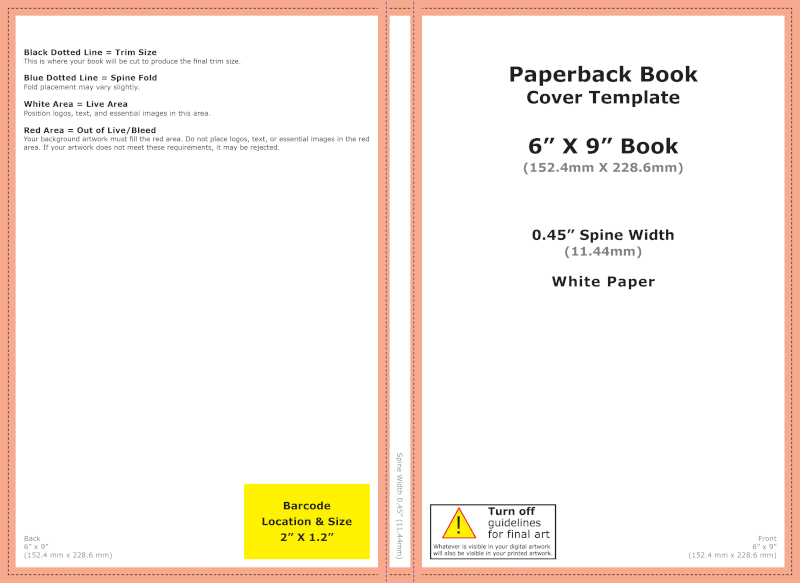
Please note: this is just a web-friendly preview of the design template and not an actual usable template. Make sure to download the template for the book size of your choosing from the Kindle Direct Publishing website.
We’ll need to resize the document to fit this template.
We’ll also be placing this template on its own locked layer and generating guides of our own, using strokes, that will be placed on top of the design as we’re creating it:
Once these lines are generated, we can delete the book cover template and just use the strokes as a reference.
We’ll be working with two layers throughout this tutorial:
- The template layer: this is where the guides will be placed on their own layer, and the layer will be locked so that we don’t accidentally transform it while we’re working
- The contents layer: this is where the contents of the book cover design will be placed
Once the document is arranged according to the template, we can then create a large rectangle that is the same size as the template and place it on the contents layer.
Make the rectangle whatever color you’d like your book cover to be. For this demonstration the book cover is mostly yellow, so I made mine yellow:
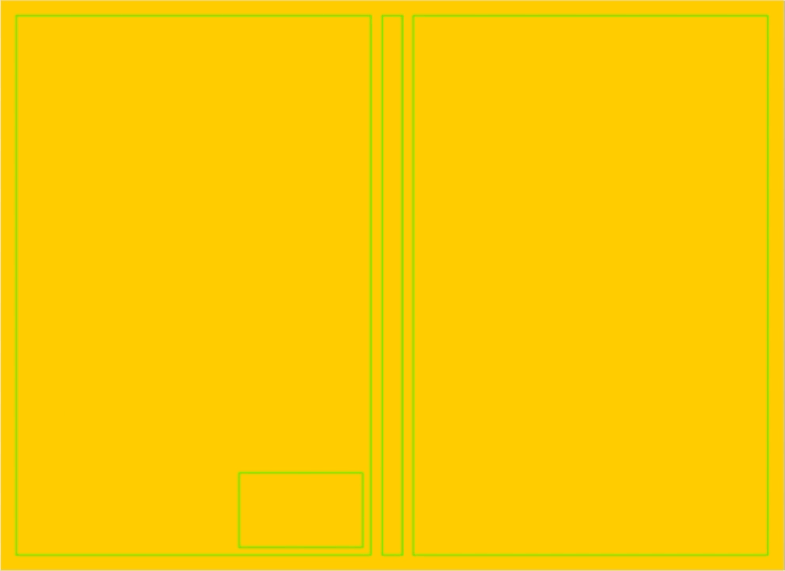
The book cover will be yellow. The green guides are there to let us know where and where not to place content.
Step 2: Designing the front cover
As you may notice, the book cover template is broken down into three separate sections:
- Left side: this represents the back cover of the book
- Middle: this represents the spine of the book
- Right side: this represents the front cover of the book
The finished design will be printed a single unit and wrapped around the book.
The first section of our Inkscape book cover design that we’ll be addressing is the front cover — or the right-hand section of the template:
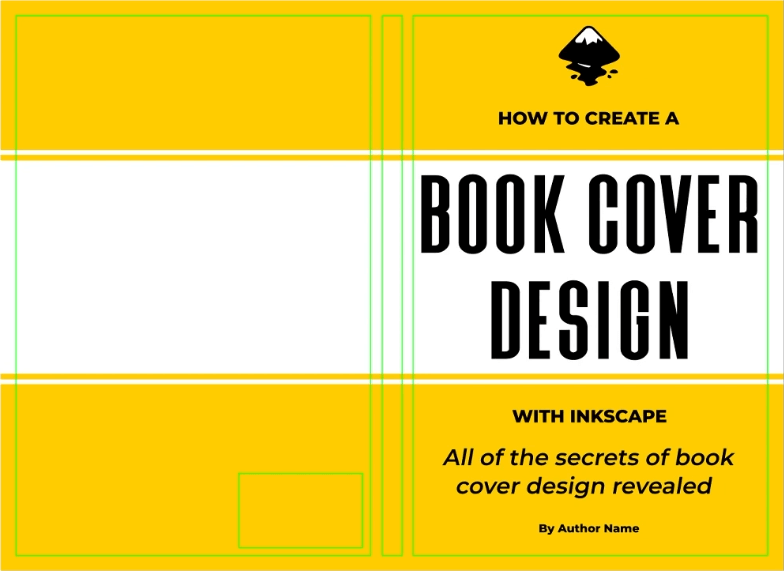
The front cover of the design is located on the right-hand side of the template.
As you can see, the contents of the front cover are kept within the boundaries of the right-hand section.
It is important that the contents of your design — such as text, logos, imagery, and more — are kept away from the guide lines. If your design runs into these safe areas then there is a possibility that Amazon will reject your design.
Step 3: Designing the spine
Once the front cover is completed we will be moving on to the book’s spine:
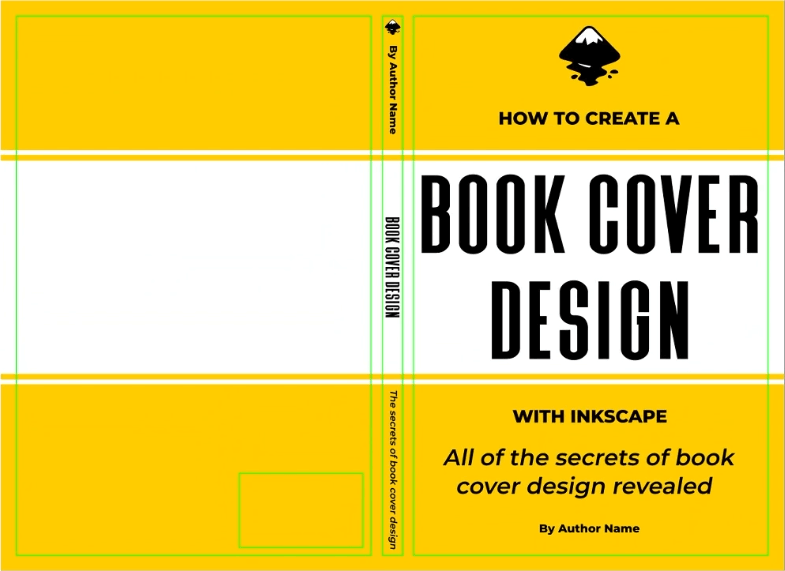
As you can see, the spine consists of the book’s title, the subtext, the author, and a logo that I placed at the top.
In my experience, the spine is the trickiest part of a book cover to design. It’s a tiny, vertical space, and it’s easier than you think to have the contents of your design accidentally run into the safe area.
In fact, of all the times I’ve had my book cover design rejected by Amazon, it was always because of the spine, so make sure to pay special attention to this part.
Step 4: Designing the back cover
The final step in our Inkscape book cover design tutorial is to design the back cover:
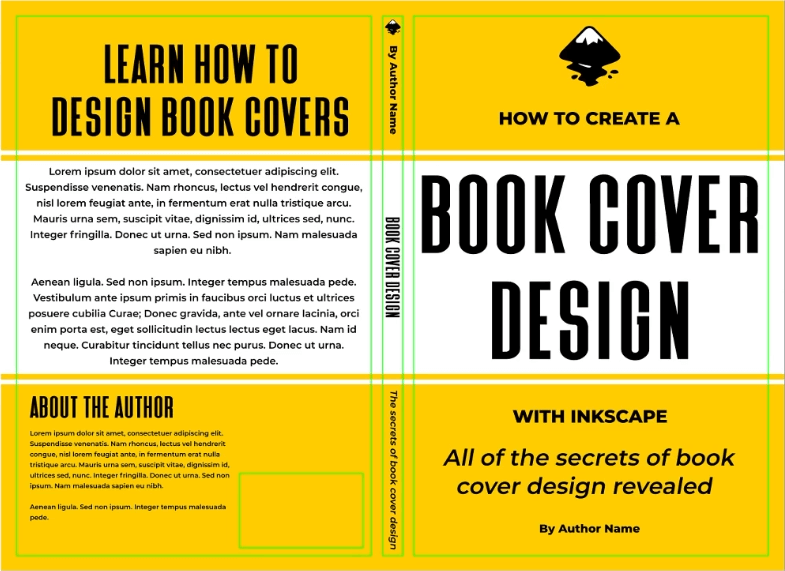
Typically, the back cover will consist of a brief synopsis of the book itself, with the title added and a brief “about the author” section.
It’s important to note that there is a dedicated space of the back cover where the book’s barcode will be placed.
You do not need to generate the barcode. Amazon will handle this on their end, so all you have to do is make sure that this dedicated space remains empty. If the contents of your design run into this space then your design will most likely be rejected.
Step 5: Exporting the finished design for print
Once you’re finished designing your book cover, the next step is to turn off the visibility of the template layer (the one with the guides on it) and export your design in a usable format.
According to the Kindle Direct Publishing website, they require that you upload a PDF document. To save your work as a PDF document, simply navigate to:
File > Save As
Choose a location on your hard drive to save your book cover design to, then choose PDF as the file type.
You book cover design is now complete!
Optional: Convert your document to CMYK
Whenever you’re creating a design for print, it is recommended that the design be created using a CMYK color profile, as opposed to the standard RGB format that we typically use for our digital designs.
The benefit of working with CMYK is that it ensures that you design will look the same in print as it does on your screen. Documents created with an RGB color profile tend to used shades that cannot be reproduced with ink, which is why this format isn’t suitable for printing.
Unfortunately, Inkscape doesn’t have the ability to output document in a CMYK format, but there are several workarounds that you can use that I’ve gone over in this tutorial.
Convert your final PDF document to a CMYK color format using any of the methods outlined in the aforementioned tutorial and you’ll be good to go.
Conclusion
Once you’ve finished creating your Inkscape book cover design you’ll have a tangible piece of design that you created yourself, using a free and Open Source application.
As a graphic designer, I can assure you that there’s no greater feeling than seeing something you’ve created on a screen in real-world, tangible form.
If you have any questions or need clarification for any of the steps taken in this lesson, simply leave a comment below.
Learn To Master The SoftwareGain a complete understanding of your favorite design apps with my comprehensive collection of video courses. Each course grants access to our private community where you can ask questions and get help when needed.
|
||||||||||||||||||||||||||||||||


Hi Nick,
your visual is the 3D mock-up which comes in handy when promoting the book. Do you have a piece where you have the creation of this already covered?
That would make it complete for me. Maybe I find it in the paid membership area?
I am about to sign up, it provides value to me and is super-reasonable in price.
Best.
Andy
Hi Andy, that would be a mockup template. I have a tutorial about how to do that here: https://logosbynick.com/use-psd-mockups-without-photoshop/
If you’re a Photoshop user, use this tutorial instead: https://logosbynick.com/edit-mockups-with-photoshop/
Hi Nick
Thanks for another insightful tutorial. I’ve been getting into logo design these past few months during the pandemic lockdown over here in England and your videos have been superb in motivating myself to try and get better. I signed up for your masterclass and academy series’ and really enjoyed them.
I notice you mentioned Inkscape’s CMYK problem again earlier in this article. I’ve been using the Scribus workaround myself that you included in a video a few years back I think. That works alright for me. But after a bit of reading and fiddling, I’ve learnt how to work in a CMYK colour space within Inkscape, export the file with the CMYK data attached and then import it into Scribus to complete the process – and you don’t have to manually adjust the colours in the latter program. I’m sure you know about this but I’ll mention it anyway! (I read about this somewhere on the internet. It’s not my idea so apologies for not crediting whoever it was that posted this system!)
This works on my Windows 10 setup.
1) With the CMYK profile in the C:\Windows\System32\spool\drivers\color folder, load Inkscape and create a new document.
2) Go to Document Properties, Colour and under Available Colour Profiles, you should see the CMYK profile listed.
3) Select it, save the document, close it, reopen the document and go back to Document Properties, Colour. The CMYK profile should be there in Linked Colour Profiles.
4) Draw an object, select a colour from the bottom of the screen and under the Fill and Stroke dialogue go to the CMS tab.
5) Next to the Fix box, you’ll see a dropdown menu that says “none”. Click on it and the CMYK profile should come up.
6) Select the profile and the C-M-Y-K colour sliders become available.
As long as you select your colours from the CMS tab and ignore the CMYK, HSL and all the other tabs, you will be able to work in that CMYK colour profile.
7) Save the document as an Inkscape SVG as normal and head over to Scribus. When you’ve opened the file in Scribus, go to Edit Colours and you’ll notice that the colours there are CMYK and not RGB.
This way you don’t have to manually alter the colours in the Edit Colours box.
This does work for me. It’s not perfect. The colour sliders in the CMS tab can be a bit choppy and it goes a bit nuts if you try and create linear gradients, which is unfortunate. But for flat colours it works.
If this has been at all helpful I’d be very pleased yet surprised as I hold you in high regard and you’re far better at this stuff than me!
I thought I’d share it anyway.
Thanks again for your work and all the best
David.
Hi David thanks for the input! This method has never worked for me in the past when I tried it, but maybe it’s different now with the newer releases of Inkscape. Glad it’s working for you though!