
How To Add A White Outline In Procreate | Offset Workaround
How To Add A White Outline In Procreate | Offset Workaround https://logosbynick.com/wp-content/uploads/2021/07/add-white-outline-procreate.png 800 470 Nick Saporito https://secure.gravatar.com/avatar/8e31bf392f0ba8850f29a1a2e833cdd020909bfd44613c7e222072c40e031c34?s=96&d=mm&r=gAs a Procreate user, you may find yourself wanting to add white outlines around a subject, sort of like how you would when designing a sticker. This is something that is usually done using strokes and offsets. Although there is no offset feature in the software, you can still add a white outline in Procreate using a simple workaround that we’ll be going over in this tutorial.
Considering that Procreate doesn’t come with the ability to create offsets, we have to create them manually by blurring a duplicate copy of the subject, creating a selection from it, and then filling that selection, on a new layer, with white fill.
Although this is a process that requires several steps, it’s still a relatively simple and quick thing to do once you have the steps down. Let’s dig in.
Add A White Outline In Procreate
The following video tutorial will walk you through the entire process step-by-step:
Continue on for the written instructions.
Step 1: Create a duplicate copy of the layer you’d like to apply the white outline to
For this demonstration I will be adding a white outline to the YouTube logo, which is a PNG image with a transparent background:
This is the example subject I will be applying a white outline to.
In order to add a white outline in Procreate we first need to create a duplicate copy of the layer we’d like to apply it to.
To do so, slide the layer to the left and tap the Duplicate button.
Considering that we’ll be applying a white outline, it would be a good idea to turn off the visibility of your background layer if it is currently white. Or you can make it a different color that the white outline will be visible against.
Step 2: Alpha lock the layer and then fill it with white
Before proceeding any further, make sure you have your fill color set to white.
Once you have white selected as your color, apply an alpha lock to the duplicate layer by tapping on it and selecting Alpha Lock from the menu:
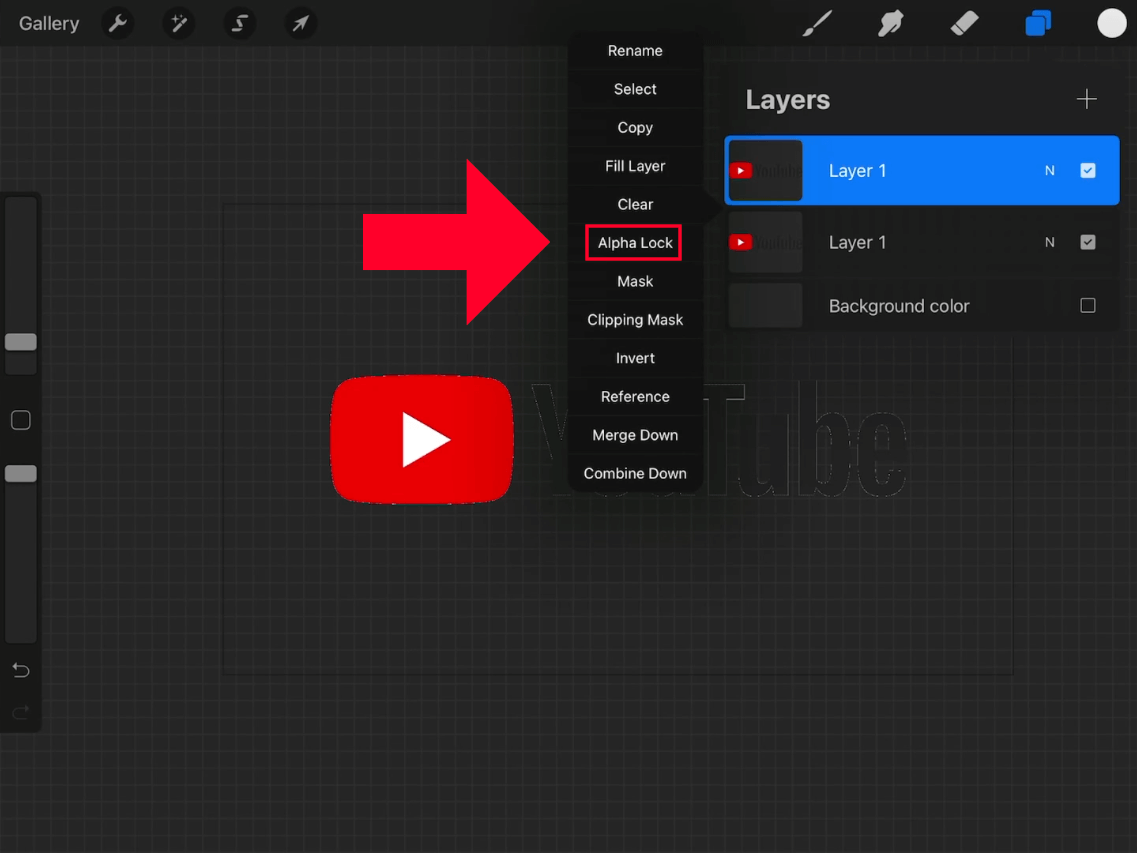
The alpha lock menu item is outlined in red above.
This will make it so that we can fill only the contents of the layer rather than the entire rectangular space that the layer occupies.
With the alpha lock applied, tap on the layer again and this time select Fill Layer.
This will make your duplicated layer white:

You subject will need to be filled with white before proceeding forward.
Once you’ve filled the layer with white, you must now remove the alpha lock by tapping on the layer again and deselecting the Alpha Lock setting.
This step is important because if you leave the alpha lock applied then the Gaussian blur effect that we’ll be applying in the next step will not work.
Step 3: Apply a Gaussian blur to the duplicated layer
Now we’ll be using the Gaussian Blur effect to create the space needed to add a white outline in Procreate.
To do this, tap on the Effects menu and then select Gaussian Blur from the list. When prompted, choose Layer rather than Pencil. This will allows us to blur the entire layer rather than localized areas of it.
Once selected, all you have to do now is tap on your canvas and slide to the right in order to apply a blur.
The amount of blur you should apply will depend entirely on your image and its size. For this demonstration I blurred my layer by 15%.
At this point your blurred layer should look something like this:
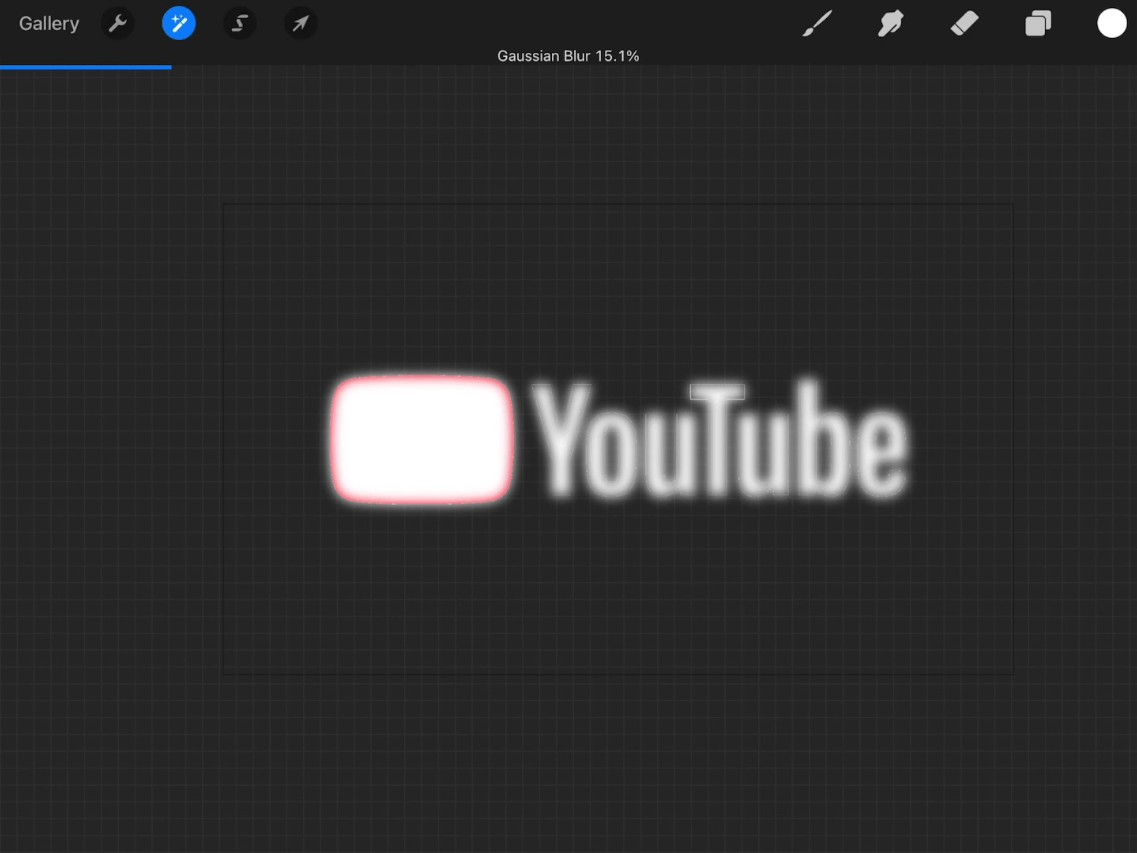
How the layer looks once the Gaussian blur is applied.
The size of the blur will determine the thickness of the white outline you add to your subject, so try to use it as a reference for how big (or small) you’d like your white outline to be.
Step 4: Create an automatic selection around the white layer
Once you’ve finished applying your blur, you must now create a selection from it.
Open the Selection menu, choose Automatic, and then tap on your subject and slide to the right to control the threshold of the selection:
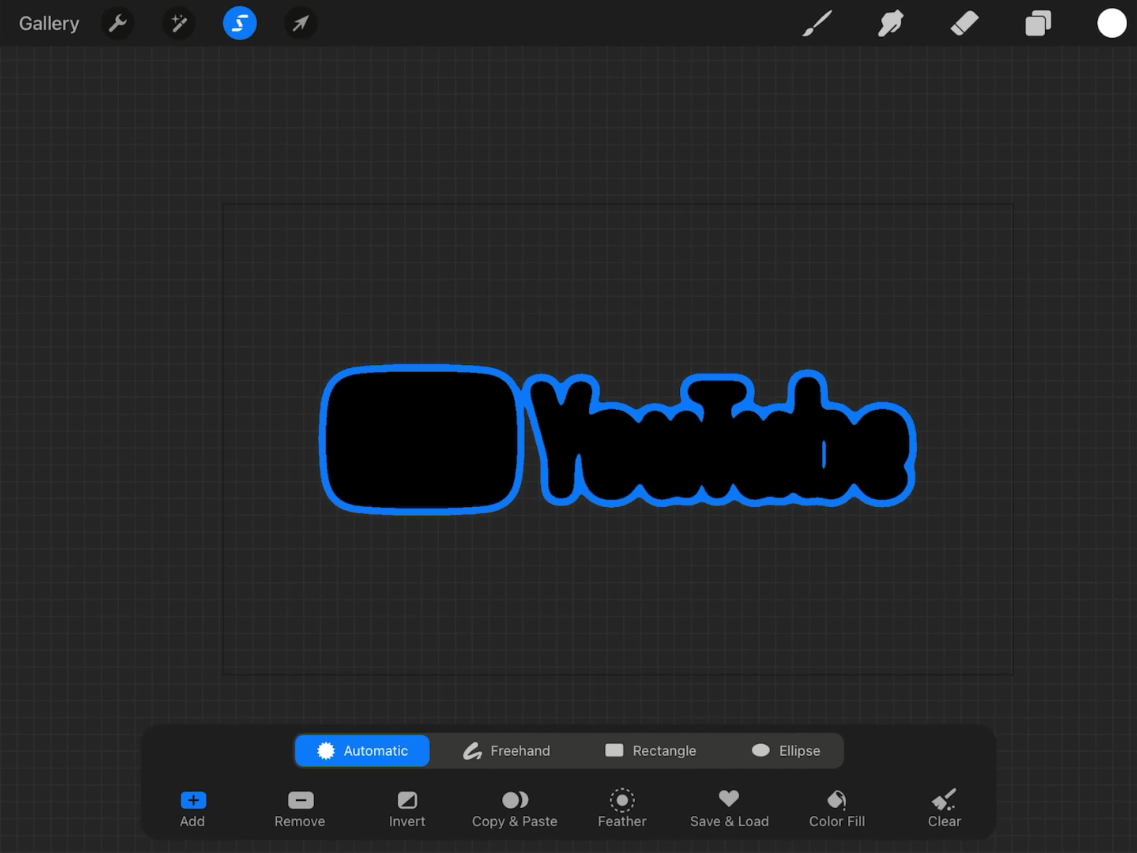
The size of the selection will determine the size of your white outline.
Sliding to the right will increase the threshold of your outline, whereas sliding to the left will decrease it.
The size of your selection will be a direct indicator of the size of your white outline, so make sure to size it according to your preference.
Step 5: Add a new layer beneath the subject layer and fill the selection with white
The final step in our lesson is to simply fill the selection with white. However, there’s a couple of things we need to do first.
The first thing you must do is turn off the visibility of the white layer.
Once turned off, add a new layer, position beneath the subject you’re trying to apply your white outline to, and then tap and drag the white color into the selection.
This will effectively add a white outline around your subject:
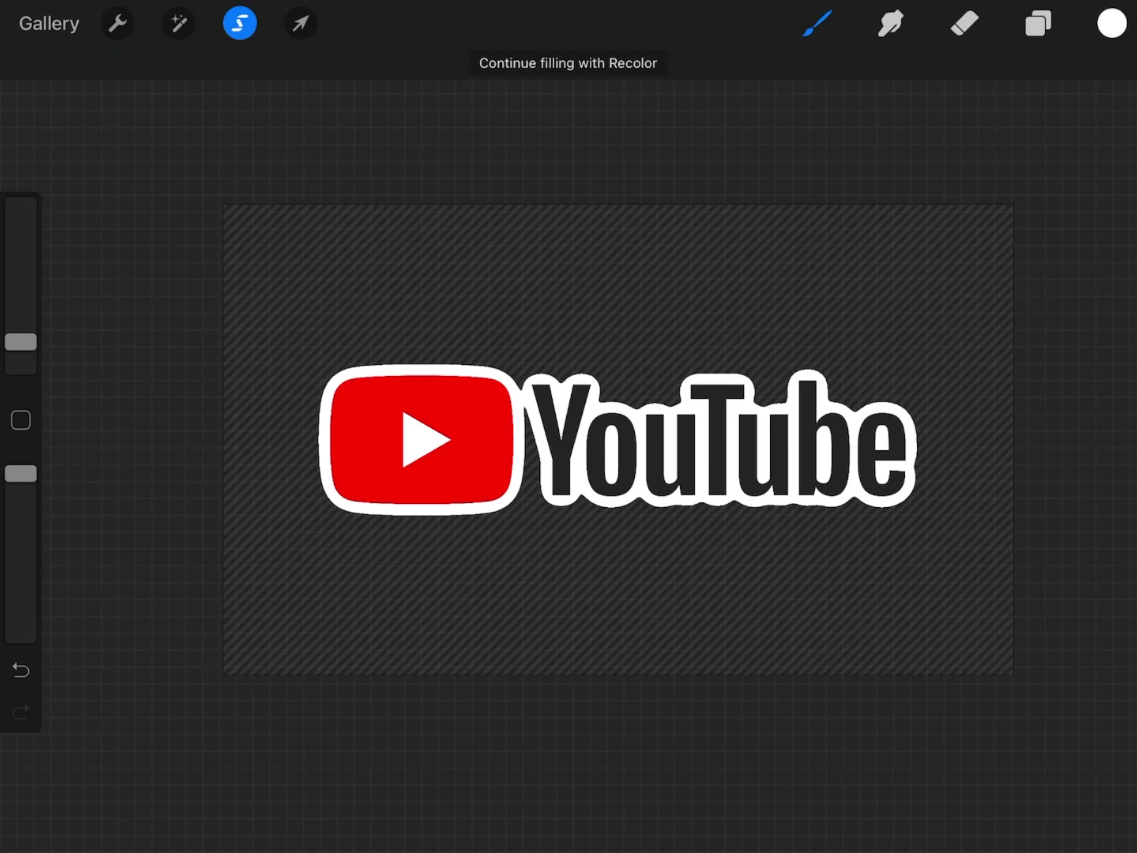
How the white outline looks once applied to your subject.
And with that you are done!
If you want to keep your work neat and organized, you can go ahead and delete the layer that we applied the Gaussian blur to as you won’t be needing it any more.
Conclusion
Using this method to add a white outline in Procreate may not be ideal. The outlines can sometimes be sloppy and inaccurate if the blur threshold is not right, but this is the fastest and easiest method we have for now.
Ideally, Procreate will add an offset feature in the future, or maybe even take a page out of Affinity’s book and allow us to work with strokes.
Of course, you could always add your white outline by manually painting an outline around it, but that would be rather time consuming, and may not produce the cleanest result depending on how steady your hand is.
If you have any questions or need clarification for any of the steps taken in this lesson, simply leave a comment below.
Learn To Master The SoftwareGain a complete understanding of your favorite design apps with my comprehensive collection of video courses. Each course grants access to our private community where you can ask questions and get help when needed.
|
||||||||||||||||||||||||||||||||


