How To Import and Edit SVG Files with Affinity Designer
How To Import and Edit SVG Files with Affinity Designer https://logosbynick.com/wp-content/uploads/2020/10/open-edit-vector-files-affinity.png 800 470 Nick Saporito https://secure.gravatar.com/avatar/8e31bf392f0ba8850f29a1a2e833cdd020909bfd44613c7e222072c40e031c34?s=96&d=mm&r=gIn this tutorial I’ll be demonstrating how you can import and edit SVG files (and other vector formats) with Affinity Designer. This works differently in Affinity than it does in Inkscape and Illustrator because Affinity imports files as embedded documents. Because of this, you won’t be able to edit the vector properties of the file without releasing them to individual layers first, which can be frustrating.
Import SVG Files with Affinity Designer
| To import and edit SVG files with Affinity Designer, place the file onto your canvas by navigating to File > Place, select the object on your canvas, then click the Edit Document button in the toolbar. Then, expand the layer, select all of the individual layers, right-click them, and select Release. |
The video tutorial below will walk you through the process:
If you’ve ever tried to import SVG files with Affinity Designer, you may notice that you’re not able to edit the contents of the document the way you would for any other vector object. For example, things like color fills, strokes, nodes, grouping, and more, simply have no affect on your design. The only thing you may be able to do is scale or rotate the object.
This is rather frustrating because other vector applications, like Inkscape and Illustrator, allow you to alter SVG files that you’ve imported without such restrictions.
Why This Happens
The reason why you may not be able to edit SVG files that you’ve imported into Affinity Designer is because the file has been embedded in your document.
Whenever you import a document into Affinity Designer, the file is embedded. Or in other words, the contents of the document are locked into a single, embedded layer. In order to edit those contents like you would any other vector object, you’ll have to release them from the embedded layer.
This is problem we had to address in my Affinity Designer logo tutorial where we imported a vector file from a stock photo site.
How To Edit Your Files
Follow these steps if you’re trying to edit SVG files that you’ve imported into Affinity Designer. There’s also a short video tutorial at the top of the page where I walk you through each step.
Step1: Open/Import File
To import your SVG file, navigate to File > Place, and locate your file on your hard drive. Once selected, click on your canvas to place it on the artboard.
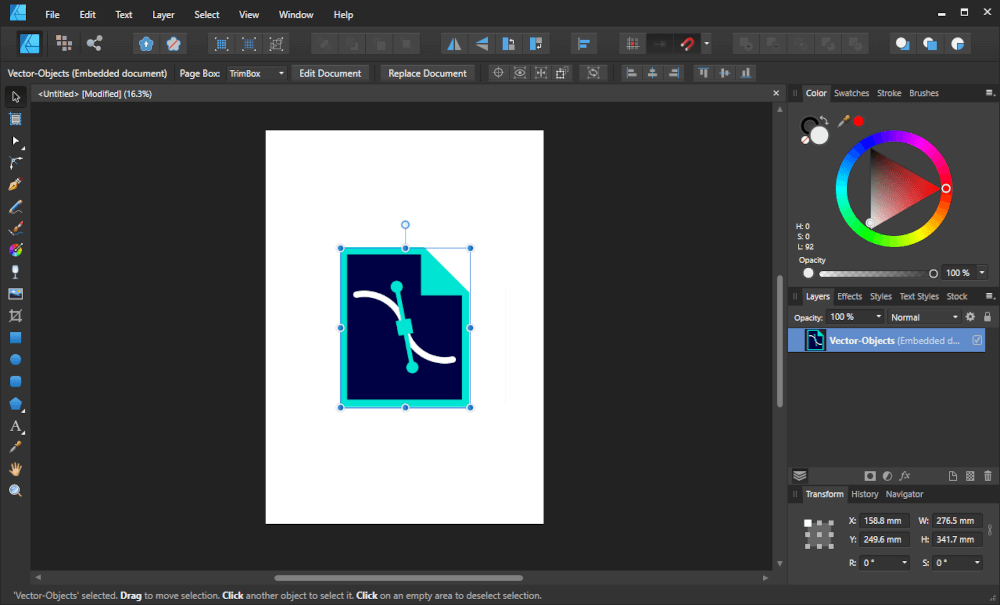
For this demonstration I’ll be using this vector illustration of a file.
At this point you may notice that you aren’t able to edit the properties of the imported document because it is confined to an embedded layer.
Step 2: Edit Document
To release the file from its embedded layer, select it on your canvas using the Select Tool, then click the Edit Document button in the toolbar at the top of your page.
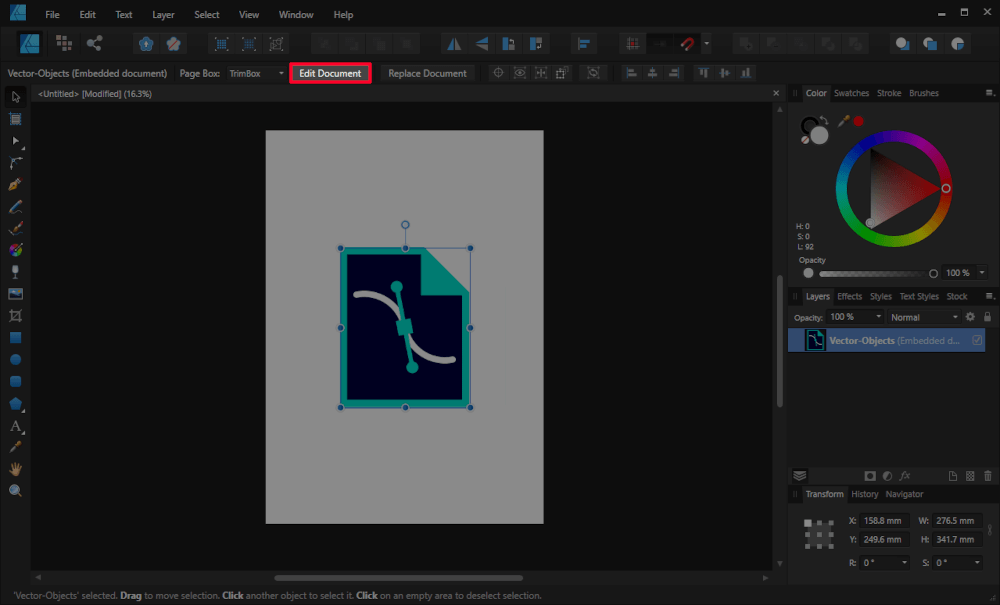
The Edit Document button allows you to open your imported file in a separate tab and alter it further.
If there’s no Edit Document bellow then try ungrouping the object by going to Layer > Ungroup All.
This will open the SVG file in a separate tab.
The imported file will be opened in a separate tab, as indicated in the toolbar just above your canvas.
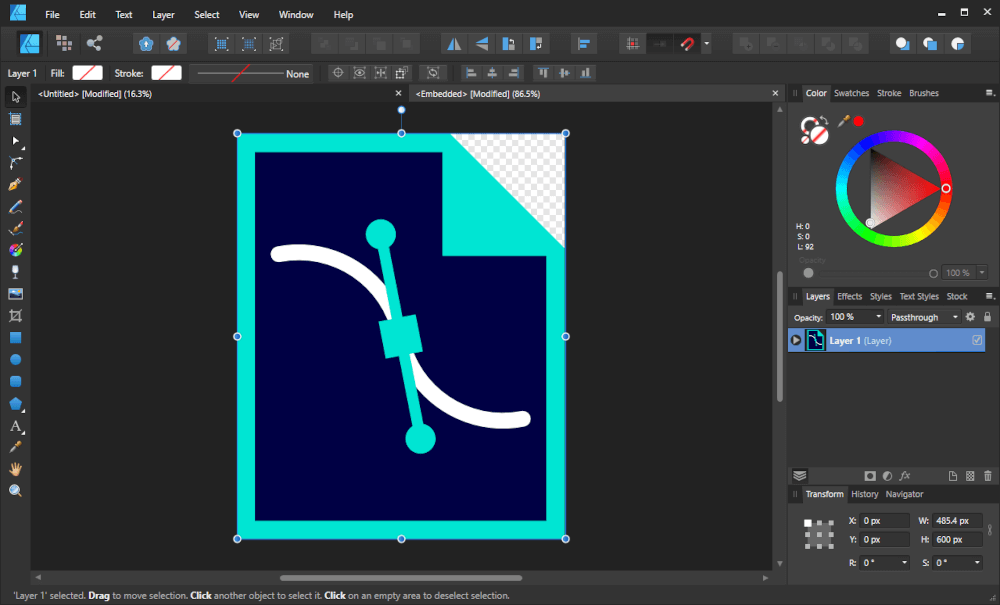
Step 3: Release Layers
Once you’ve opened the document, navigate to the Layers menu and click the little arrow to the left of the layer’s name to expand the layer and reveal all of its sub layers.
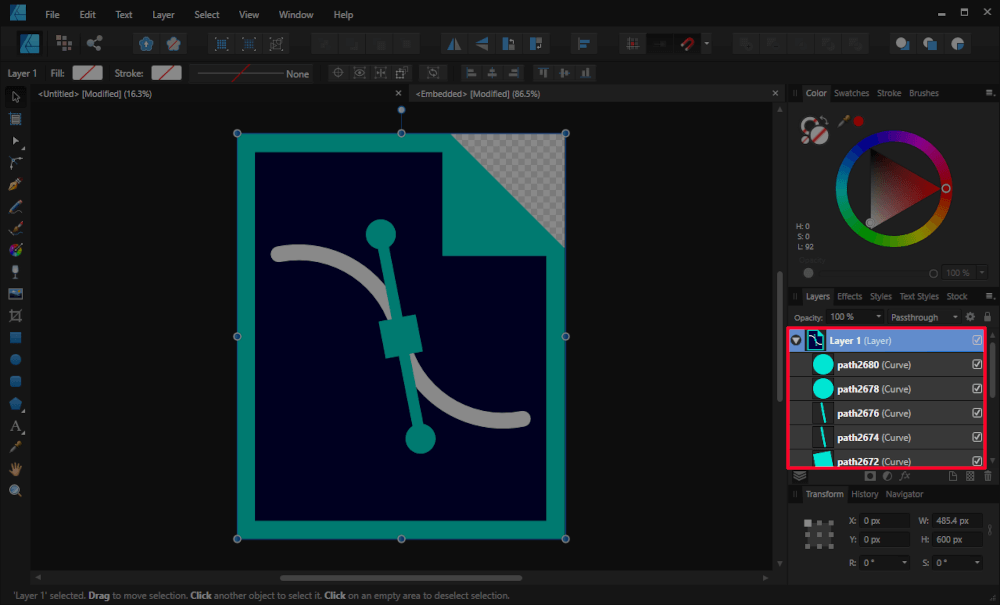
Click the little gray arrow next to the layer’s name to expand it and view the sub layers.
Select all of the individual sub layers by pressing Control + a, then right-click them and select Release.
This will release all of the individual components of the SVG document onto their own designated layers.
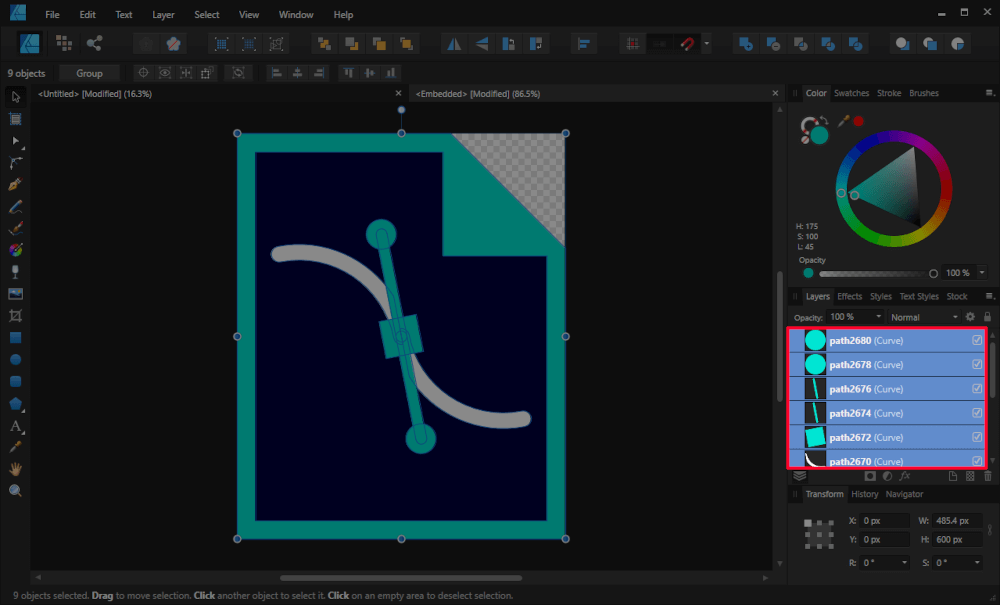
All of the individual layers will be released from the embedded layer.
Step 4: Copy and Paste Layers
Once you’ve released the embedded layer, all you have to do now is select all of the objects with the Select Tool, copy them by pressing Control + c, then navigate back to the document you’d like to import them to, and paste them by pressing Control + v.
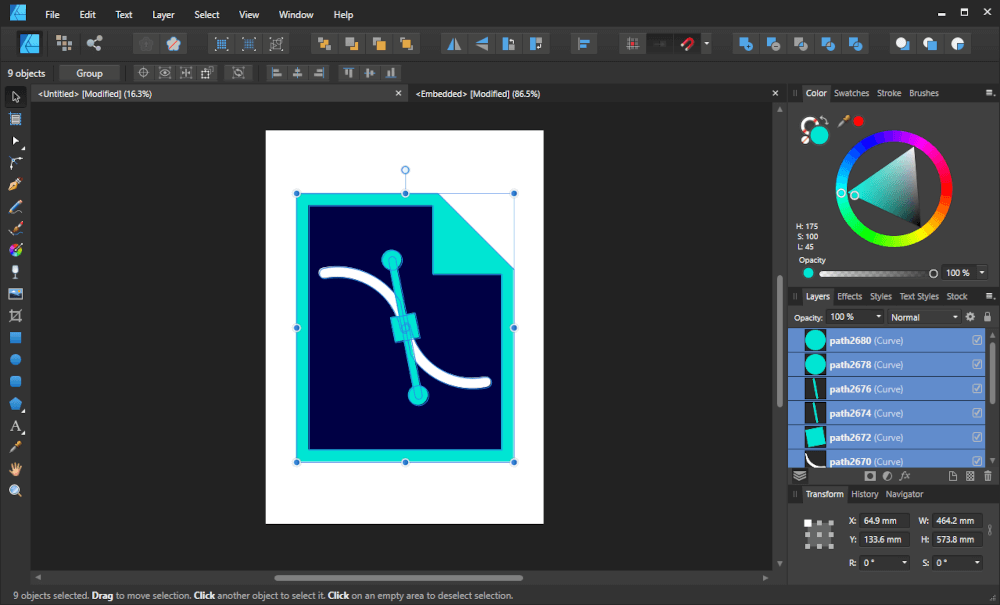
The individual components of the design are now visible, as indicated by the outlines around them.
You can now edit your imported SVG file with Affinity Designer the same way you would for any other vector objects!
Other Common Formats
The steps outlined above are not exclusive to the SVG format. This method will allow you to import and edit a variety of vector formats, including…
- SVG
- EPS
- AI (Adobe Illustrator)
Conclusion
Using Affinity Designer to import and edit vector files may feel inefficient when compared to other vector applications, but it’s still possible with a few extra steps. Although this process may seem like a nuisance at first, it becomes less menacing once you’ve memorized the steps and can execute them without much thought.
If you have any questions, or if any part of these instructions were unclear, feel free to leave a comment below. As always, thanks for visiting!
Learn To Master The SoftwareGain a complete understanding of your favorite design apps with my comprehensive collection of video courses. Each course grants access to our private community where you can ask questions and get help when needed.
|
||||||||||||||||||||||||||||||||


I’ve read all the comments and I don’t have an Edit Document button.
Hi Mitch, try double-clicking the layer with the SVG on it. It should open in a new tab where you can ungroup it, copy everything, and paste it back into your working doc.
I’ll be making an update to this tutorial later this week. This was based on the old version of Designer.
None of the above worked for me. Its an SVG file from pixabay. Firstly I don’t have the edit document button on my toolbar as mentioned in other comments. secondly, if I try your walk around of the go-to layer, the ungroup all button is not highlighted so it cannot be activated. ( yes I have the SVG doc highlighted whilst dong this )
Baffled
Hi Paul, are you sure you have the Move Tool enabled when looking for the Edit Document button? I just checked to confirm and it’s there for me. Is your context bar enabled? Go to View > Show Context Toolbar and enabled it if it’s not.
Hello Nick, Great tutorial. I am working in Affinity Designer V2 and I do not see the edit document button. Any suggestions on why I do not have it on the toolbar and how to edit an SVG file without the edit document button? I also tried double-clicking the thumbnail in the layers menu and that does not work either.
Hi Rod, are you sure you have the move tool enabled? I’m looking at it now on my installation of V2 and the edit document button is there, but only with the move tool enabled.
I’m trying to open a svg file in Affinity Designer created in Inkscape from a line art drawing. The document appeared has a group with only one layer named “curves”. When I do a right click on it, the ungroup option is disabled. All the objects are on that one single layer. I assume that my curves should be divised in different objects in Inkscape before import to get many layers in Affinity Designer but I do not have a clue as how to do it………… I know, I’m a beginner in both Inkscape and Aff Designer.
Hi Louise, did you try using the “Edit Document” button as I did in the tutorial?
I can’t see it Nick !
I would have to see the file to know exactly what’s going on. Sorry I couldn’t help more than that!
No problem Nick. I really appreciated your desire to help.
How do you work with an SVG when using AD for the iPad?
Hi Nick. I’ve recently downloaded Affinity Designer for the sole purpose of converting Inkscape files to a CMYK format. However AD will not open any Inkscape svg’s. I keep getting a “file not supported” error. I’ve tried both opening the files, and placing into an existing document like in your instructions above. I even tried changing the file extension to both .afdesign and .ai. I have saved the files as inkscape svg, plain svg and optimized svg. Affinity designer is not opening any inkscape svg’s. Can you help? Thanks!!
Your file must contain some kind of Inkscape-specific elements (clipping, masking, filters, etc.) that AD doesn’t know how to handle. Try saving it as a PDF instead and see if that opens with AD.
Hello Nick! I’ve tried following your directions on multiple SVG and EPS files, but the “Edit Document” button never appears – only the “Replace Document” button. What am I doing wrong? I’m new to Affinity Designer so I’m probably skipping a simple step, but I just can’t figure it out. Please guide me! Thank you!
Try ungrouping it and seeing if that works.
What about copying a path from Designer and pasting it into a shape layer in After Effects? I able to do this easily with Illustrator, but while Designer allows me to copy a path, nothing happens when I try to paste it into AE.
Try exporting it and then importing it into AE. You may have to export it as a PDF and then change the file name extension to .AI. More info about that here.
Thanks for this article. I’m an Affinity Designer neophyte and this issue had me baffled.
You’re not alone!