How To Change The Canvas Size in Inkscape | 3-Step Tutorial
How To Change The Canvas Size in Inkscape | 3-Step Tutorial https://logosbynick.com/wp-content/uploads/2020/10/change-canvas-size-inkscape.png 800 470 Nick Saporito Nick Saporito https://secure.gravatar.com/avatar/8e31bf392f0ba8850f29a1a2e833cdd020909bfd44613c7e222072c40e031c34?s=96&d=mm&r=gThis tutorial will be a demonstration of how to change the canvas size in Inkscape. In Inkscape, the canvas size can be changed via the Document Properties menu, which allows you to set the size of the canvas according to a predetermined numerical input. You can also fit the canvas to specific objects you have selected.
If you’ve created a design in Inkscape and now you’re ready to save and finalize your work, then chance are you’ll need to change the canvas size to fit whatever it is you’ve designed. This is especially true for things like logo designs, where editable vector copies need to be finalized and delivered to their recipients.
Changing the canvas size is also useful when creating PDF documents. Although Inkscape will save objects outside of the page boundaries in SVG format, only the objects within the page border are saved when it comes to generating PDF files. Because of this, knowing how to change the page size of your document is important.
Change The Canvas Size in Inkscape
| To change the canvas size in Inkscape, open the Document Properties menu by pressing Control + Shift + D on your keyboard. Under the Page tab, navigate to the “Custom Size” section and type in the size you’d like your canvas to be. |
The following is a step-by-step tutorial for how to change the canvas size in Inkscape. There’s also a video demonstration below, but this lesson is simple enough to be conveyed through text.
Changing the size of your canvas in Inkscape breaks down into a simple 3-step process.
Step 1: Open The Document Properties Menu
The first step is to open the Document Properties menu. The Document Properties menu allows you to change various properties of the document you’re currently working in, like the page size, the default unit of measurement, grid lines, the color of the canvas, and so on.
To open the Document Properties menu, navigate to File > Document Properties. Alternatively, you can also press Control + Shift + D on your keyboard.
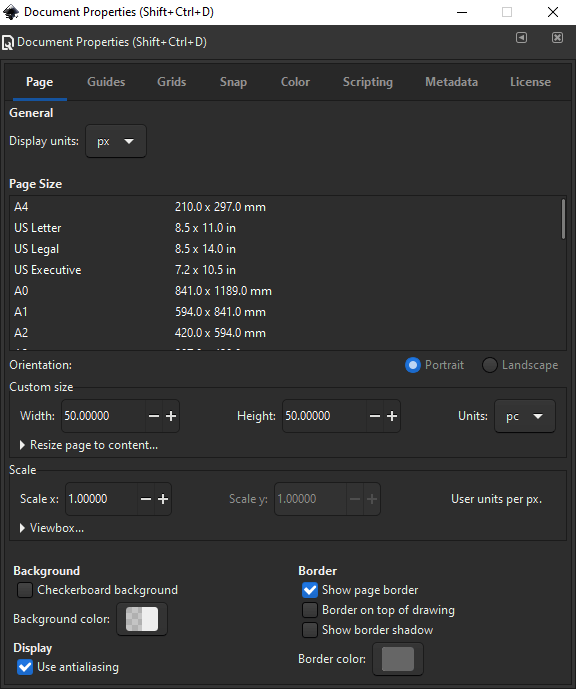
The Document Properties menu allows you to change various attributes of the document you’re working on.
Step 2: Input Your Desired Size
Once you have the Document Properties menu opened, you should be on the Page tab by default, but if not then click on the tab to open that menu.
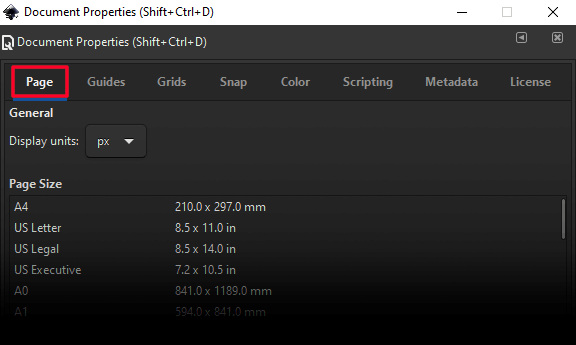
The “Page” tab is where you’ll be able to define the size of the canvas.
Under the Page tab, navigate down to where it says “Custom Size”. This is where you will be able to input the desired size for your canvas.
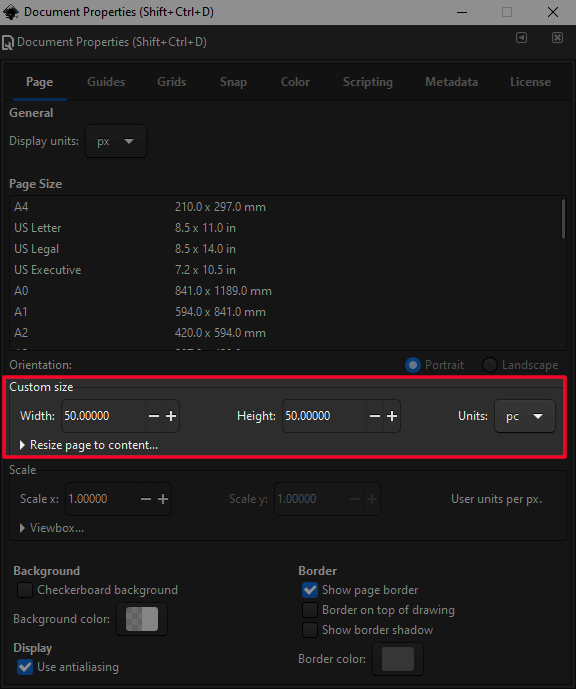
Use the custom size selection to input a desired numerical value for the width and height of your canvas.
You can manually type in whatever size you’d like for both the width and the height, and you can change the default units of measurements as well. The choices of measurement units are as follows…
- Pixels
- Centimeters (cm)
- Millimeters (mm)
- Inches (in)
- Parsec (pc)
- Points (pt)
Add A Bleed/Margin To Your Document
If you’re designing something for print, you can also add a bleed area to your canvas by expanding the menu that reads “Resize page to content…” From there you can manually type in your desired bleed size — or margin — for each edge.
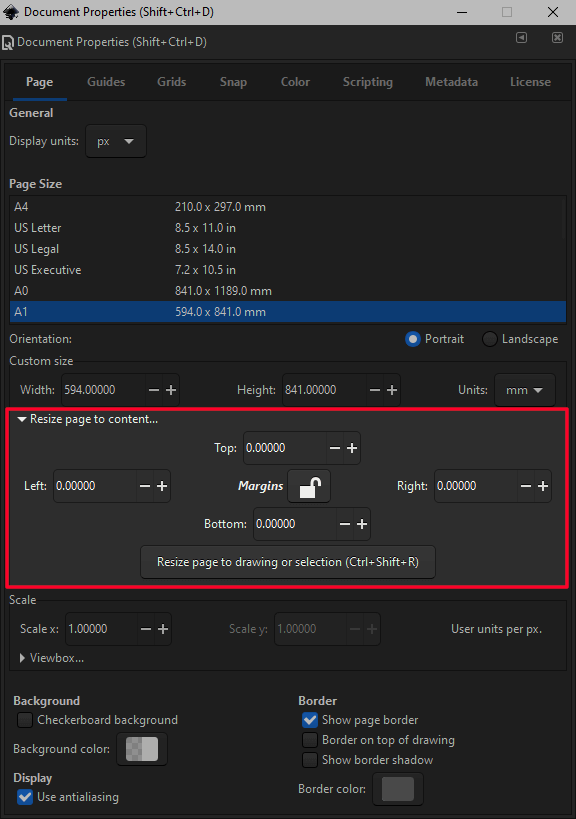
Adding a margin to your document can be useful if you’re designing something for print and it requires a bleed.
Fit The Canvas To An Object
If you’re trying to make your canvas the same size as a specific object or design, simply select your object with the Select Tool and click the button labelled “Resize page to drawing or selection.”
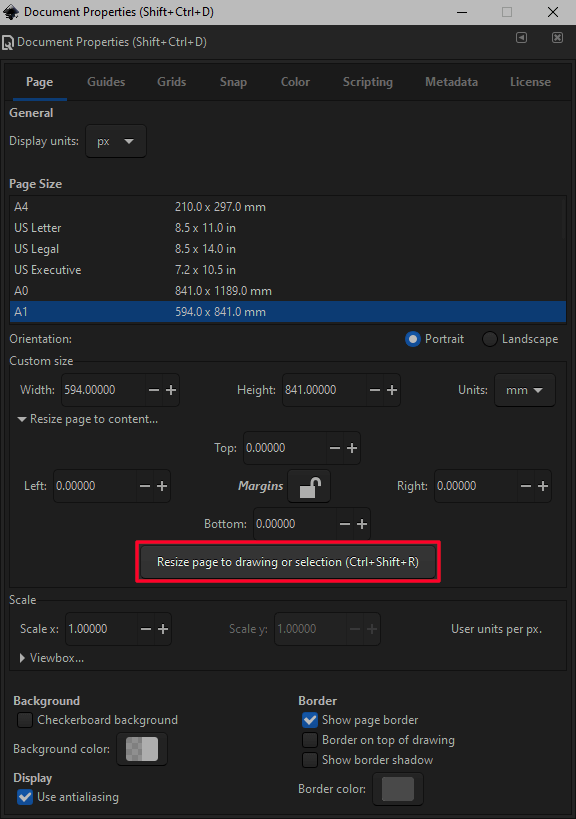
Use this feature to make your canvas fit an object of your choosing.
By default, the canvas size will be changed to the size of the object you have selected, and will be placed around it as well. If you don’t have anything selected, then it will change the canvas size to fit the entirety of everything you’ve created so far in the document.
Step 3: Finalize
Once you’ve defined your canvas size — whether it be by numerical input or fitting it to a specific object — the final step is to simply close out of the Document Properties menu and save your work. Then you are good to go!
Conclusion
That concludes today’s tutorial on changing the canvas size in Inkscape. Knowing how to change the canvas size will allow you to create vector documents based on the contents of your work rather than the page size Inkscape defaults to when launched.
If any part of these instructions were unclear, or if you have any other questions, simply leave a comment below. As always, thanks for visiting!
Learn To Master The SoftwareGain a complete understanding of your favorite design apps with my comprehensive collection of video courses. Each course grants access to our private community where you can ask questions and get help when needed.
|
||||||||||||||||||||||||||||||||
- Post Tags:
- inkscape
- Posted In:
- Inkscape
- Open Source
- Tutorials
Nick Saporito
Hi, I'm Nick— a Philadelphia-based graphic designer with over 10 years of experience. Each year millions of users learn how to use design software to express their creativity using my tutorials here and on YouTube.
All stories by: Nick Saporito


Hello there,
If I choose canvas size 5000 x 5000px , then I save it as an .eps file , then I open in a illustrator I see white default canvas page as a small portion on this big canvas page. How to get rid of this page since I dont see it in the inkscape. Thanks a lot
i have the same problem. Could you help us, Nick?
I don’t know for sure, but if I had to guess I would say it has to do with the DPI of the document. Illustrat’s native DPI is 72, so make sure you’re saving the EPS file at the same size.