How To Change The Background Color In Inkscape
How To Change The Background Color In Inkscape https://logosbynick.com/wp-content/uploads/2023/03/change-background-color-inkscape.png 800 470 Nick Saporito https://secure.gravatar.com/avatar/8e31bf392f0ba8850f29a1a2e833cdd020909bfd44613c7e222072c40e031c34?s=96&d=mm&r=gIn this tutorial we’ll be going over how to change the background color of the canvas and workspace in Inkscape. We’ll also be going over how to save these changes so that they’re applied every time you launch Inkscape.
By default, Inkscape opens with a white canvas (or “page” as it’s called) and a light gray workspace (“desk”). These can both be changed in the Document Properties menu, but the changes will only apply to the document you’re working on. The next time you launch Inkscape you will have a white and dark gray work area again.
Let’s address this in more detail and go over a simple workaround.
Change The Background Color In Inkscape
The following video tutorial will walk you through the entire process in just one minute:
Continue on for a written overview.
How To Change The Color Of The Workspace
How To Make These Changes The Default Setting |
How To Change The Color Of The Workspace
Let’s first have a look at how to change the color of the page and the workspace in Inkscape, then we’ll go over how to save your changes as the default.
Step 1: Check to ensure you’re using version 1.2 or later
Inkscape has undergone many changes over the past few years, so it’s important to ensure that you’re using an up-to-date version, otherwise this tutorial may not be helpful.
To check which version of Inkscape you’re using, go here if you’re a Windows or Linux user:
Help > About Inkscape
If you’re a Mac user then it would be:
Inkscape > About Inkscape
Somewhere on the splash screen you will see a version indicated. Make sure you are using version 1.2 or later. If you’re using an older version than that, go here to update your Inkscape installation.
Step 2: Open the Document Properties menu
The background color settings are located in the Document Properties menu, which can be accessed by navigating to:
File > Document Properties
It can also be accessed by pressing Control + Shift + D (or Command + Shift + D for Mac users.)
Step 3: Change the Page and Desk colors using the menu interface
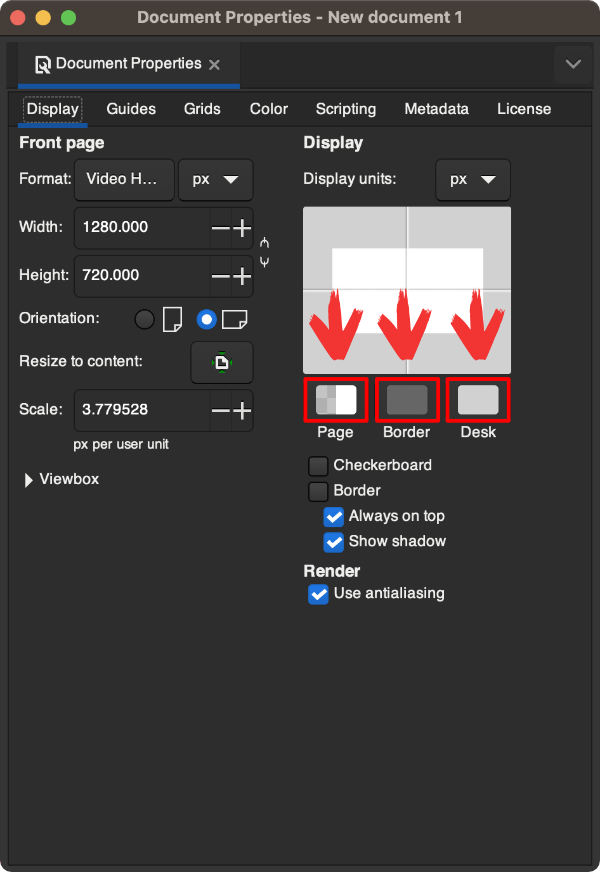
Towards the bottom-right of the Document Properties menu you will see three boxes labeled as follows:
- Page: This represents the color of the document.
- Border: This represents the color of the border around the document.
- Desk: This represents the open workspace around your document.
Click to enlarge.
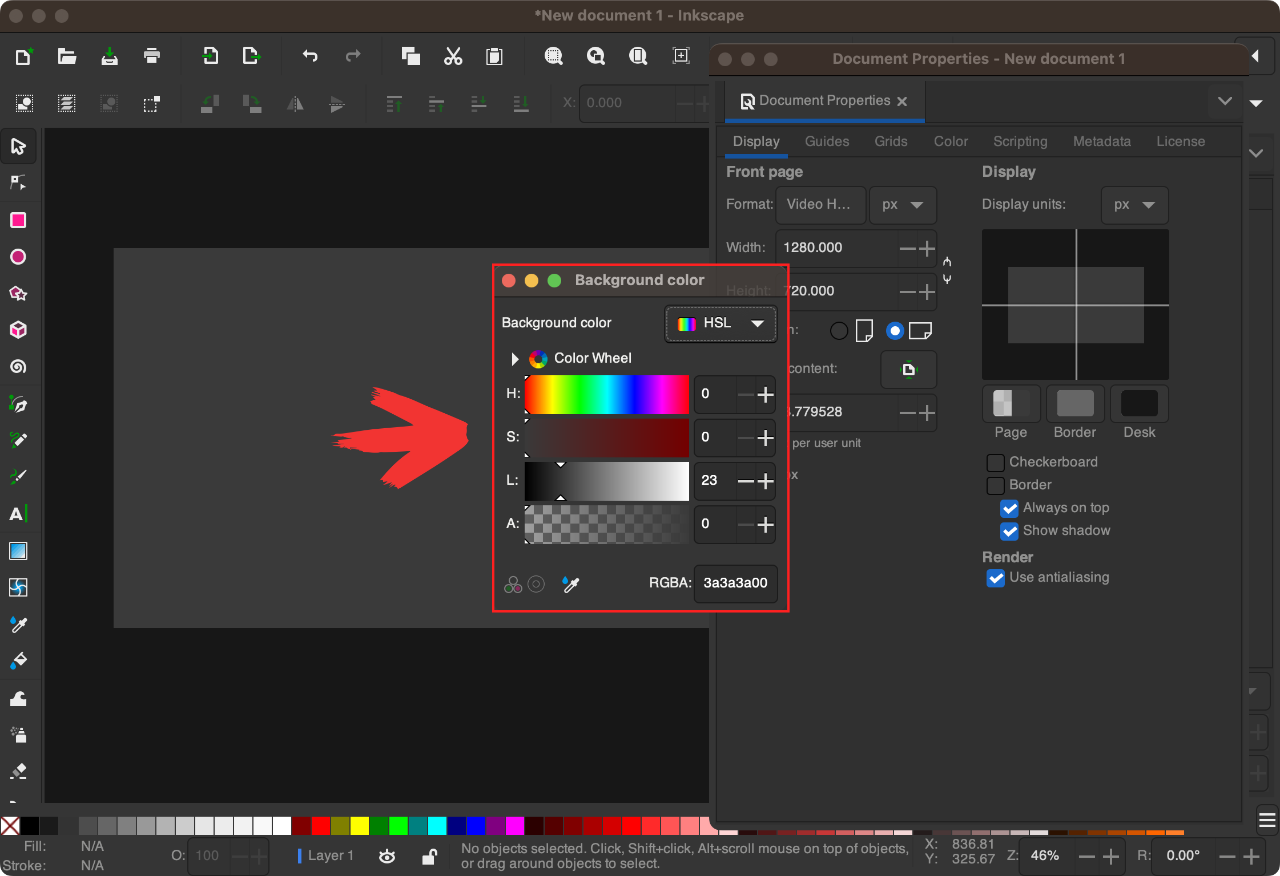
Clicking on either of them will open a color picker menu where you can choose a new color:
Click to enlarge.
Once you are finished, simply close out of the menus. It should be noted that these changes only apply to the document you’re currently working on. Next time you launch Inkscape, it will open with the same background colors as it previously did.
How To Make These Changes The Default Setting
Let’s say you really like these settings and want to use them regularly without having to manually input them each time you launch Inkscape.
Although there is no setting that directly allows you to do this, the Templates feature can be used as a workaround.
Save your document as a template
The templates feature in Inkscape allows you to save your document as the default document that opens each time you open Inkscape, and it can certainly be used to change the default background color in Inkscape.
To do so, navigate to:
File > Save Template
A small menu should open:

Click to enlarge.
Simply input whatever name you’d like for your document and check the box at the bottom of the menu that reads “set as default template“. Click Save to apply the changes.
Inkscape will now launch with these settings in place each time. To test it out, close Inkscape and launch it again.
In Conclusion
Unlike previous versions of Inkscape, the process for changing the default background color is now easier because everything is labeled better and the Document Properties menu has been overhauled to be more organized. Still, it would be great to be able to apply these changes as the default from directly within the menu, without having to save a template.
Either way, it’s a simple process!
Learn To Master The SoftwareGain a complete understanding of your favorite design apps with my comprehensive collection of video courses. Each course grants access to our private community where you can ask questions and get help when needed.
|
||||||||||||||||||||||||||||||||


Nick,
I just went through the steps that you listed to make the default workspace white. That worked as you said it would. However, when I open any existing files, they still open with the light gray workspace. Is there any way I can make all files open with the white workspace? I know I can change each one individually, but I am looking to avoid that.
Thanks,
Bob
Hi Rob, unfortunately once a file is saved with that light gray background there’s no way to change it unless you go in and do it manually. The default workaround I went over in this tutorial is only for new documents. I probably should’ve clarified that.
I would like to change the whole page setup for Inkscape. I want to make the border something other than black. Can’t I just select the color and have it be the color I want. Also the background color and the page color?
Your setup is extremely hard to get the program to do what I want.
Just a plain setup page would be better than all the fuss you require to change the colors of the program.
Just tell me how I can get rid of the black border and that would be one step n the right direction for me.
Hi, I have Inkscape 1.0.1 installed, got the dark theme, but even following your video (I’ve changed background color in older versions) the color won’t change from white.
Hi Maureen, I’m not sure why that would be happening. I’d need more info.
Thank you. I wish everyone offering solutions would do this. The info I need was not buried amongst other info. “Shift Ctrl-D” easy.
hi brother,
I’d like to add two different colours to a text or an object, on both half of the text or object,( two seperate colours, not gradient).
Is there any single click option or editing option available in inkscape?
Except splitting the object or text into two, and providing them different colours.
The only way would be to make them separate objects. An object can only have 1 fill property.
Awesome tutorial.
What I usually do is just create the background like you did and click on Object properties and then lock the object. That way you cannot accidentally click on it or move. Once you are done designing, you can unlock and then delete.
Good idea!