
10 Hidden Features in GIMP That Will Surely Improve Your Workflow
10 Hidden Features in GIMP That Will Surely Improve Your Workflow https://logosbynick.com/wp-content/uploads/2020/06/gimp-secrets.png 800 470 Nick Saporito https://secure.gravatar.com/avatar/8e31bf392f0ba8850f29a1a2e833cdd020909bfd44613c7e222072c40e031c34?s=96&d=mm&r=gGIMP is a photo editing powerhouse that allows you to manipulate your images in virtually any way possible, and for a free piece of software, the amount of features it has to offer is really quite impressive. In the following video I’ll be going over 10 of the more obscure features that you may not know about, and once you do know about them, it’ll surely improve your workflow:
Continue on for the written list.
10 Hidden Features in GIMP
Some of my favorite hidden features in GIMP are as follows…
- Creating layers from selections
- Exporting paths to SVG format
- Creating rounded rectangles
- Transforming paths
- Toggling menu visibility
- Converting selections to paths
- Creating dotted lines
- Compressing file sizes
- Flowing text along a path
- Editing and exporting animated GIFs
1. Create a new layer from a selection
Let’s say you want to cut out a piece of an image and move it to its own layer. You can do that by creating a selection over the area you’d like to extract, using any number of tools, then right-click your selection and navigate to Select > Float.
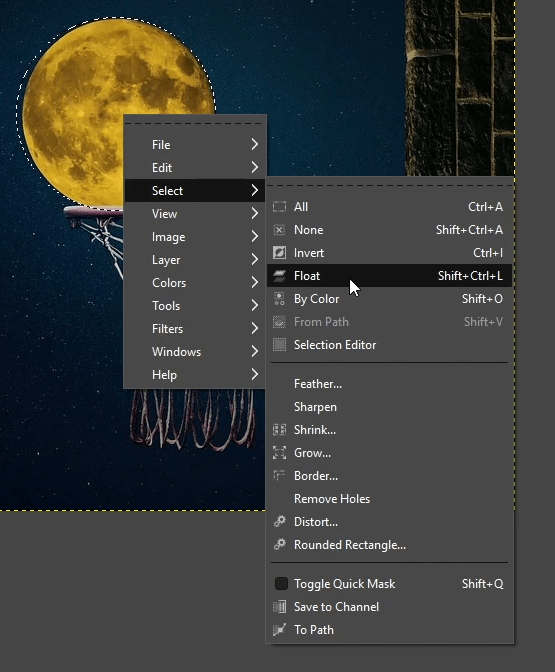
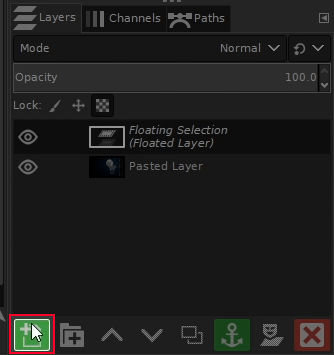
This will move the selection to a floating layer. Simply click the green icon labeled “Create a new layer” and it will add that selection to a new layer of its own.
2. Export paths to SVG format
The Paths Tool in GIMP is excellent for creating selections with exact precision, but one thing you may not have known is that you can export your paths, as vectors, in SVG format, and then work on them later on in a vector graphics application like Inkscape or Adobe Illustrator.
To do so, navigate to your Paths menu, locate the path that you’d like to export, then right-click it and navigate to Export.
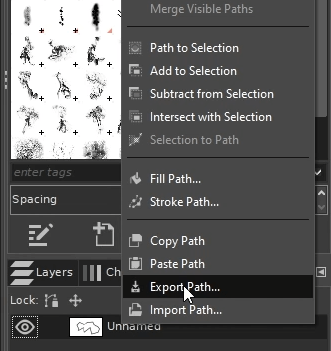
When naming your file make sure to manually add the .SVG extension, otherwise Windows won’t recognize the file format. Then, you should be able to open that file with Inkscape and work on it the same way you would any other vector path.
3. Give rectangles rounded and concave corners
When using the Rectangle Select tool in GIMP, the rectangles you generate will automatically have squared corners. You may already know that you can give your rectangles rounded corners by ticking the Rounded Corners box in the tool settings. Then, you can adjust the radius of those rounded corners as well.
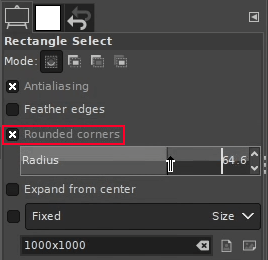
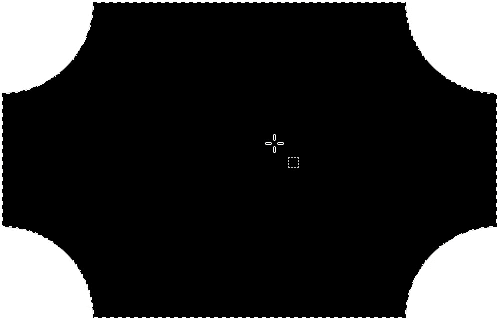
One thing you may not have known though is that you can give that rectangle a concave corner where the rounded edges flow inward rather than outward. To do that, simply right-click on your selection and navigate to Select > Rounded Rectangle, and tick the box that says Concave.
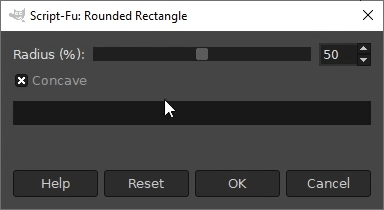
You can manually adjust the Radius slider beforehand if you’d like. Then, once you’re finished, click OK and your rectangle will now have concave corners.
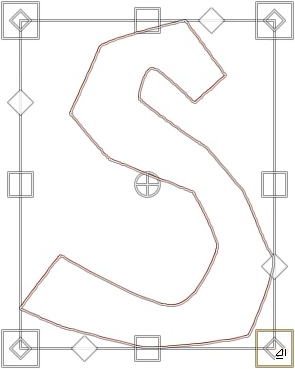
4. Transform paths
The Unified Transform tool allows you to scale, rotate, shear, and alter the perspective of the images you’re working on. It also allows you transform paths though, which is a really powerful and useful feature.
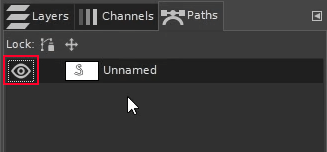
To transform your paths, first, navigate to the Paths menu and click the eyeball icon to make your path visible on the canvas. It should be indicated by a red outline.
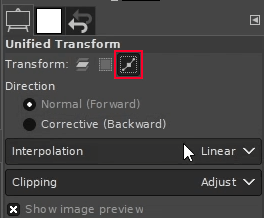
Then, grab your Unified Transform tool, and in the Transform setting at the top of the menu, click the icon on the right labeled Path. This will make it so that the tool only functions on paths and not the image itself.
All you have to do now is click on your path and you’ll be able to transform it the same way you would for any other image.
Just make sure to change the setting back to Layer once you’re finished, otherwise it’s easy to forget that you left it on Paths last time you used it. I’ve made that mistake more times than I care to admit myself.
5. Toggle Menu Visibility
Another feature you may find to be really useful in GIMP is having the ability to temporarily toggle the visibility of your tool menus off and on. This can be done by simply pressing Tab on your keyboard.
Once toggled, all you’ll be left with is the application toolbar at the top of the page and the rulers on the X and Y axis of your canvas.
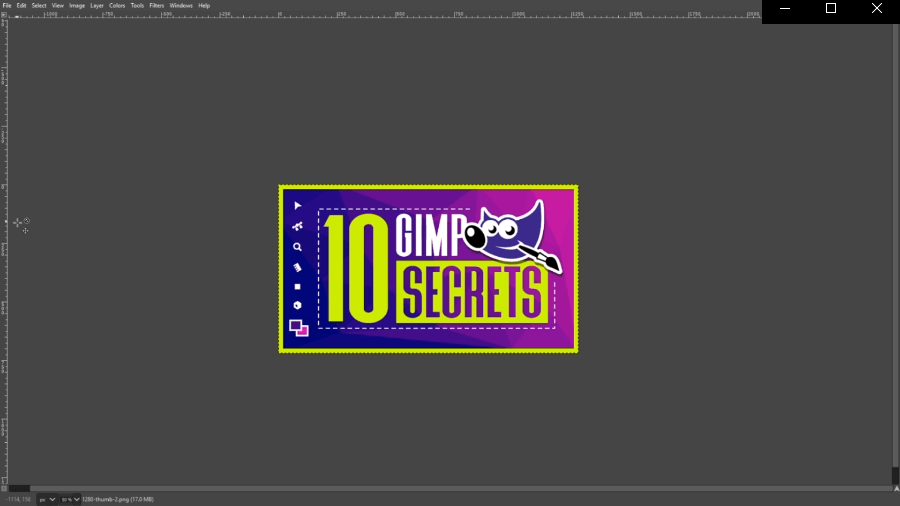
To get your menus back, all you have to do is press Tab on the keyboard again.
This feature can really come in handy when you’re working on some kind of large sketch or painting where you’re not constantly switching back and forth between tools. It’s also good if you already have all of your keyboard shortcuts memorized and would rather not have those menus taking up screen space.
6. Convert selections to a path
Another handy feature in GIMP is having the ability to convert your selections to paths.
Let’s say you create a selection on your image using the Select By Color tool. You can correct any imperfections in that selection by going to the Select menu and clicking on To Path.
You can now navigate to the Paths menu, turn on the visibility of your newly-created path, and then you can make whatever adjustments you’d like using the Paths tool.

Once you’re finished, you can create a new selection with it by pressing Enter on your keyboard.
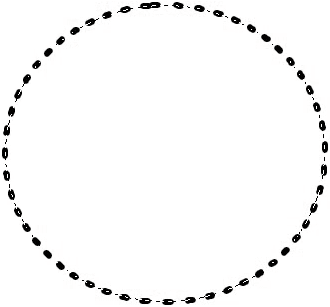
7. Create dotted lines around a selection
Within the Edit menu there’s a feature that allows you to add a stroke around a path. If you expand the Line Style options within the Stroke Selection menu, you’ll see a variety of different dash presets to choose from, including dotted lines, dashed lines, and a combination of both dotted and dashed lines. You can even adjust other properties of the lines, like the spacing between dashes, the Miter limit, and the cap style.
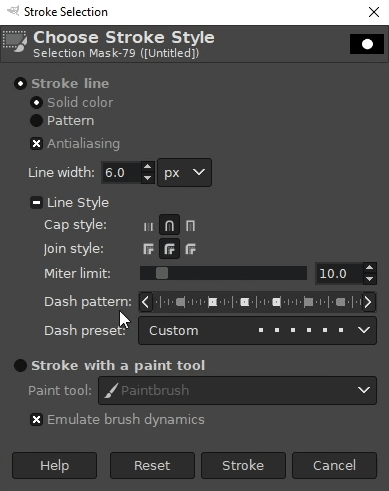
Once your properties are set, go ahead and click Stroke, and a dotted line will be generated around your selection.
8. Compress file size
When creating images for the web it’s important to be mindful of your file sizes. Images with large file sizes take up a lot of disk space and can slow down your website, leading to a poor user experience for those with slower internet connections.
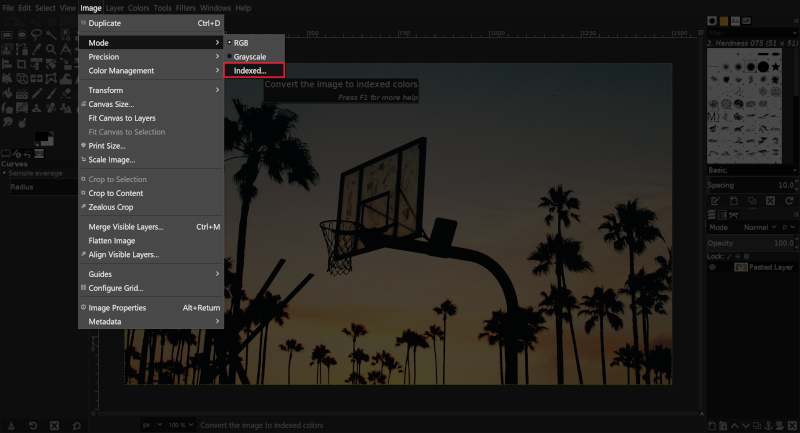
GIMP allows you to compress the file size of your images by up to 70%. To do so, go to Image > Mode, and select Index.
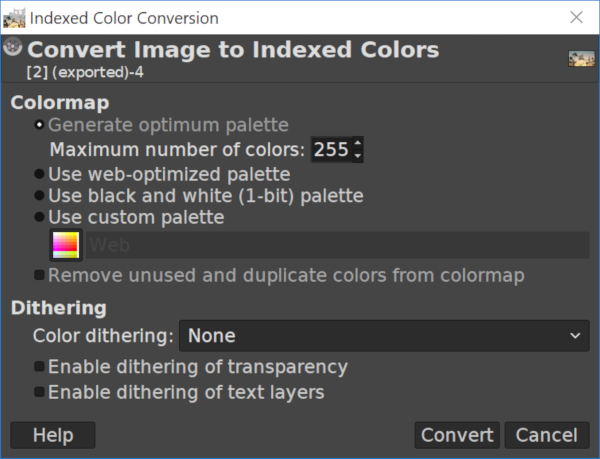
This will bring up the Indexed Color Conversion menu. Choose “Generate optimum palette” and make sure the maximum number of colors is set to 255, then click Convert.
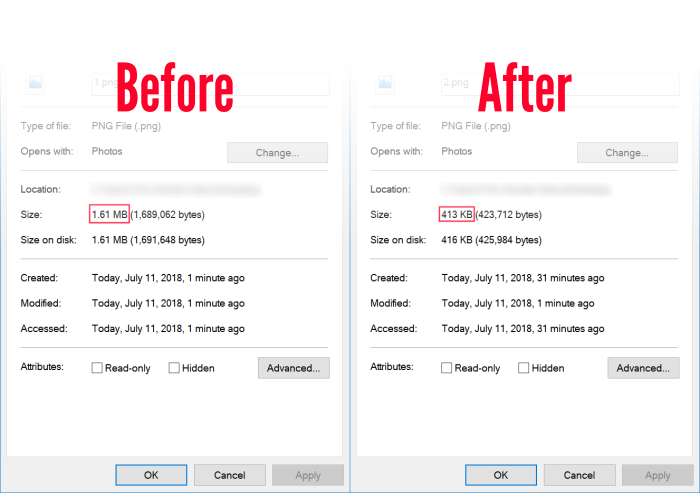
As you can see, I was able to reduce the size of this example image by nearly 70%!
I do have to warn you though that whenever you reduce the file size of an image, you are doing so at the expense of image quality, so make sure to save a high resolution copy before doing so!
9. Flow text along a path
GIMP makes it easy to take your text and flow it along a path. To do so, first, create a path on your document and then generate some text.
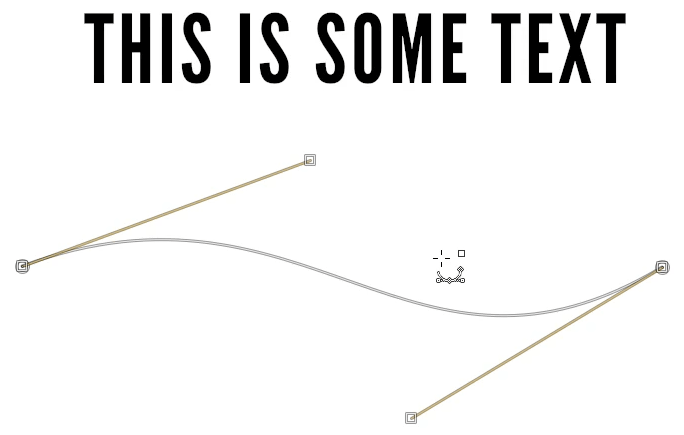
All you have to do now is right-click the text layer and select Apply Text To Path. This will create a new path with your text flowing along the contours of that path.

Simply navigate to your Paths menu, right-click your text path, and click on Path To Selection. You can now fill your text in with whatever colors or patterns you’d like.
10. Edit & export animated GIFs
The final trick I’ll be sharing with you today is having the ability to edit and export animated GIFs with GIMP.
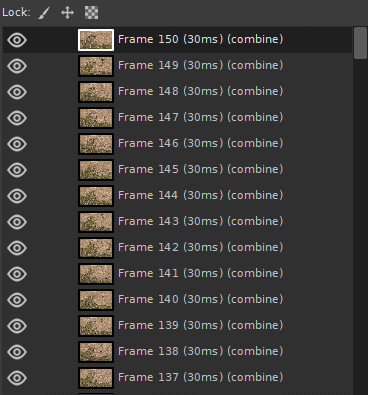
When you open your GIF file in GIMP, you’ll notice that each frame has been separated and placed on its own layer.
You can now make basic modifications to your GIF, like cropping it, resizing it, flipping and rotating it, and changing the color mode.
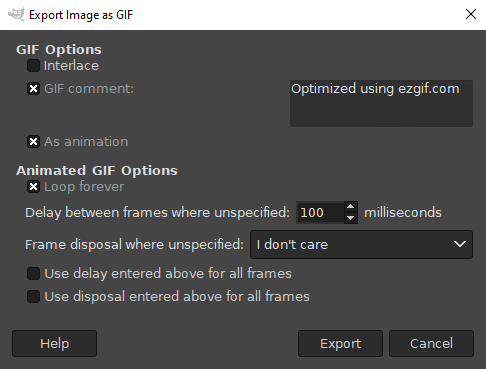
Once you’re finished, you can export your GIF by navigating to File > Export As, and choosing GIF from the extensions list. Once you’re in the GIMP export menu, make sure to tick the box that says “As animation” before exporting.
This feature can also be used to design your own animated GIFs. All you have to do is place each individual frame on its own layer and then export it as an animated GIF.
Conclusion
That should do it for today’s post about some of my favorite hidden features in GIMP. Leave a comment below to let me know if you knew of any of these features already, and if you have any features you’d like to share yourself. And finally, a special thanks to Davies Media Design for the inspiration for this video. Check out his post to find more hidden tricks in GIMP.
As always, thanks for watching!
Learn To Master The SoftwareGain a complete understanding of your favorite design apps with my comprehensive collection of video courses. Each course grants access to our private community where you can ask questions and get help when needed.
|
||||||||||||||||||||||||||||||||


Thanks a lot for this great tutorial.