
How To Create Vector Halftones with Adobe Illustrator
How To Create Vector Halftones with Adobe Illustrator https://logosbynick.com/wp-content/uploads/2020/09/vector-halftones-illustrator.png 800 470 Nick Saporito https://secure.gravatar.com/avatar/8e31bf392f0ba8850f29a1a2e833cdd020909bfd44613c7e222072c40e031c34?s=96&d=mm&r=gIn this tutorial I’ll be demonstrating how you can create vector halftones using Adobe Illustrator. We’ll be using the built-in effect that allows you to create raster halftone patterns, then vectorizing them with the Image Trace feature.
This was taken from a tutorial I recently created for YouTube where I demonstrate how to create a comic book style logo with Illustrator. One of the steps was to create a halftone pattern for the background of the logo. You can watch the video tutorial for that below if you’d like! It’s similar to a past tutorial where I demonstrated how to do the same for Inkscape.
Create Vector Halftones with Adobe Illustrator
The first step to create vector halftones with Adobe Illustrator is to create a rectangle on your page and fill it with a black and white gradient. It can be any style of gradient you’d like — linear, radial, etc. — as long as it’s black and white.

For this demonstration I’ll be using a rectangle with a linear gradient of white to black.
Next, we’ll be using the Color Halftone effect in Illustrator to generate a raster halftone pattern using the gradient as a reference. This is originally a Photoshop filter, but it has been included in Illustrator as well.
To use the Color Halftone filter, select your object and navigate to Effect > Pixelate > Color Halftone.
This will bring up the color halftone menu.
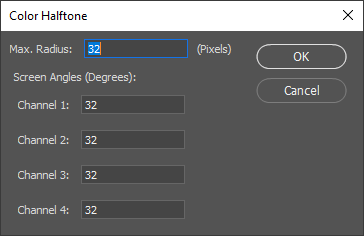
For this demonstration I used a value of 32 across the board.
Set all of the values in the menu to 32 and press OK. Your gradient will then become a halftone.
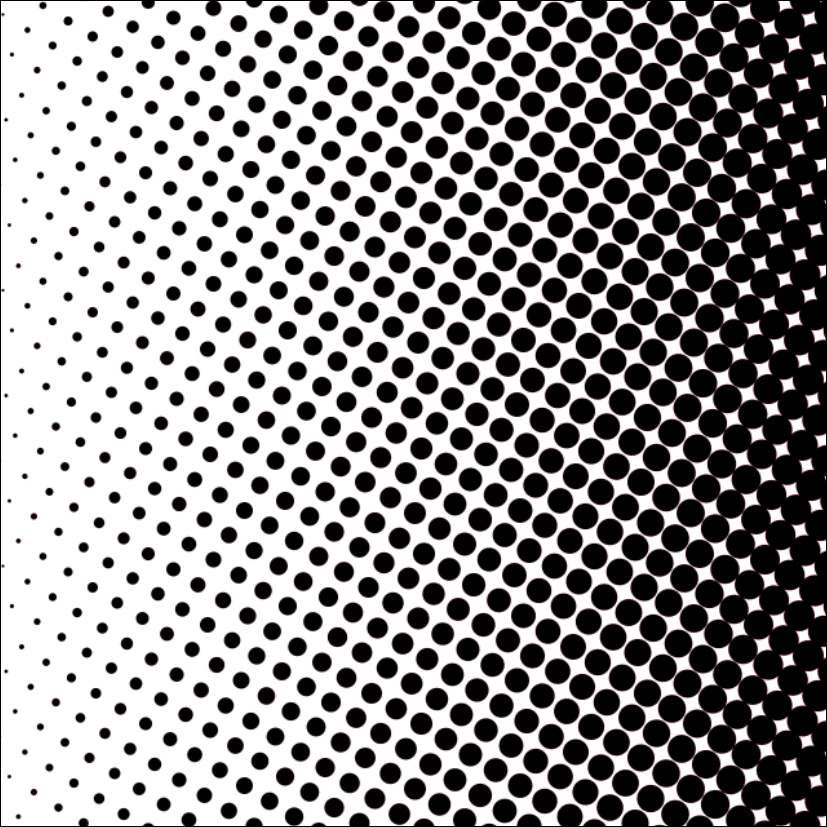
The problem with this sort of pattern is that it’s a raster image that’s made of pixels, as you can see by zooming in on it.
The filter create raster halftones
To create vector halftones with Adobe Illustrator, we’ll have to trace over the rasterized image using the Image Trace feature.
Select the image and navigate to Object > Expand Appearance. Then, navigate to Object > Image Trace > Make and Expand.
This will create a vector tracing of your halftone pattern.
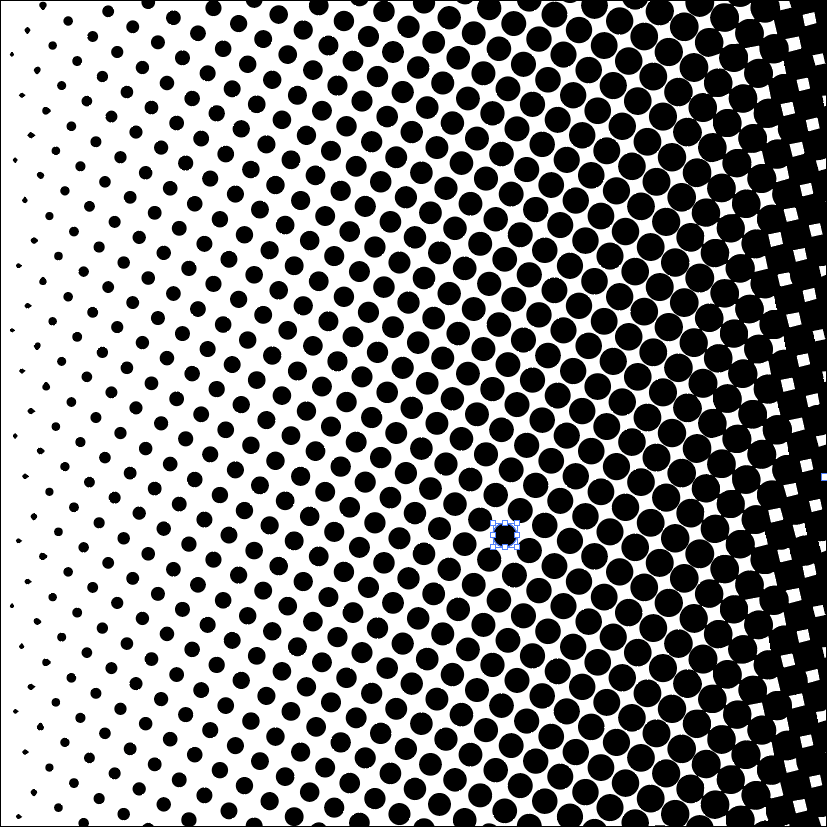
Simply ungroup the object to edit your halftone pattern in individual pieces.
It may not be noticeable upon first sight, but if you zoom in your will see that the pattern is indeed a vector.
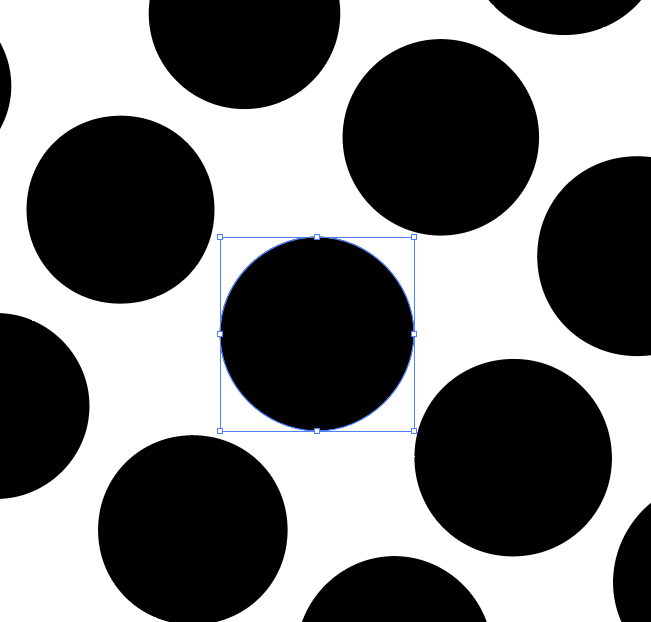
Zoom in to confirm that the pattern is indeed a vector.
Conclusion
That is how you can create vector halftones with Adobe Illustrator! It’s just a matter of using the built-in filter to generate a raster pattern, then tracing over it with the Image Trace feature to convert it to vectors.
If any part of this lesson is unclear just a leave a comment below. And be sure to check out the comic style logo tutorial at the top of the page. As always, thanks for watching!
Learn To Master The SoftwareGain a complete understanding of your favorite design apps with my comprehensive collection of video courses. Each course grants access to our private community where you can ask questions and get help when needed.
|
||||||||||||||||||||||||||||||||


You might also like


4 comments
-
-
Nick Saporito
Yes, I have several tutorials about that if you search this site or the YouTube channel.
-
-
Yabsra Alem
Hey Nick,
Can you show us how to create abstract background with Adobe Illustrator. Just like you did on inkscaoe using Voronoi Diagram.Yabsra
-
Patrick Lacas
In your How To Create Vector Halftones with Adobe Illustrator, can something similar be acheuved in Inkscape ?