Change The Artboard Color In Illustrator | 2-Step Shortcut
Change The Artboard Color In Illustrator | 2-Step Shortcut https://logosbynick.com/wp-content/uploads/2021/03/change-artboard-color-illustrator.png 800 470 Nick Saporito https://secure.gravatar.com/avatar/8e31bf392f0ba8850f29a1a2e833cdd020909bfd44613c7e222072c40e031c34?s=96&d=mm&r=gBy default, Adobe Illustrator opens with a white artboard. Technically the artboard is transparent, but white is what’s used to indicate the space that the artboard represents. What if you want to use a color other than white though? In this tutorial I’ll be demonstrating how to change the artboard color in Illustrator, which simply requires changing the Document Setup.
Working with a white background can be frustrating at times, especially when you’re designing something like a logo or icons, and you need to see how the designs will look in lighter shades when placed against a dark background. Of course, you could always pull the object you’re designing away from the artboard to see how it looks against the dark gray background, but what if you need to see how it looks on a different color backdrop?
In this instance there are two options:
- Create a rectangle in the color you’d like your background to be and then place your object on top of it, or…
- Change the artboard color in Illustrator
Speaking from experience, the first option can be tedious and cumbersome, and also unnecessary. In most cases you will be better off changing the color of the artboard to accommodate your design needs because it’s a rather quick and simple process.
Change The Artboard Color in Illustrator
| To change the artboard color in Illustrator, open the Document Setup menu by pressing Alt + Control + P, then tick the box labeled, “Simulate Color Paper” and change the color of the checkerboard grid to whatever color you’d like your artboard to be. |
Unfortunately there is no way to directly change the color of the artboard in Illustrator, but there is a workaround that allows us to produce the same result, which we will be exploring in this lesson. And the benefit of using this workaround is that you don’t necessarily need to create a new document. You can apply this to any document you currently have opened.
Watch the following video tutorial for a complete walkthrough of the entire process:
For the written instructions, continue on.
Step 1: Open The Document Setup Menu
In order for us to pursue this workaround we will need to access the Document Setup menu. To do so, press Alt + Control + P on your keyboard, or navigate to File > Document Setup using the toolbar menu.
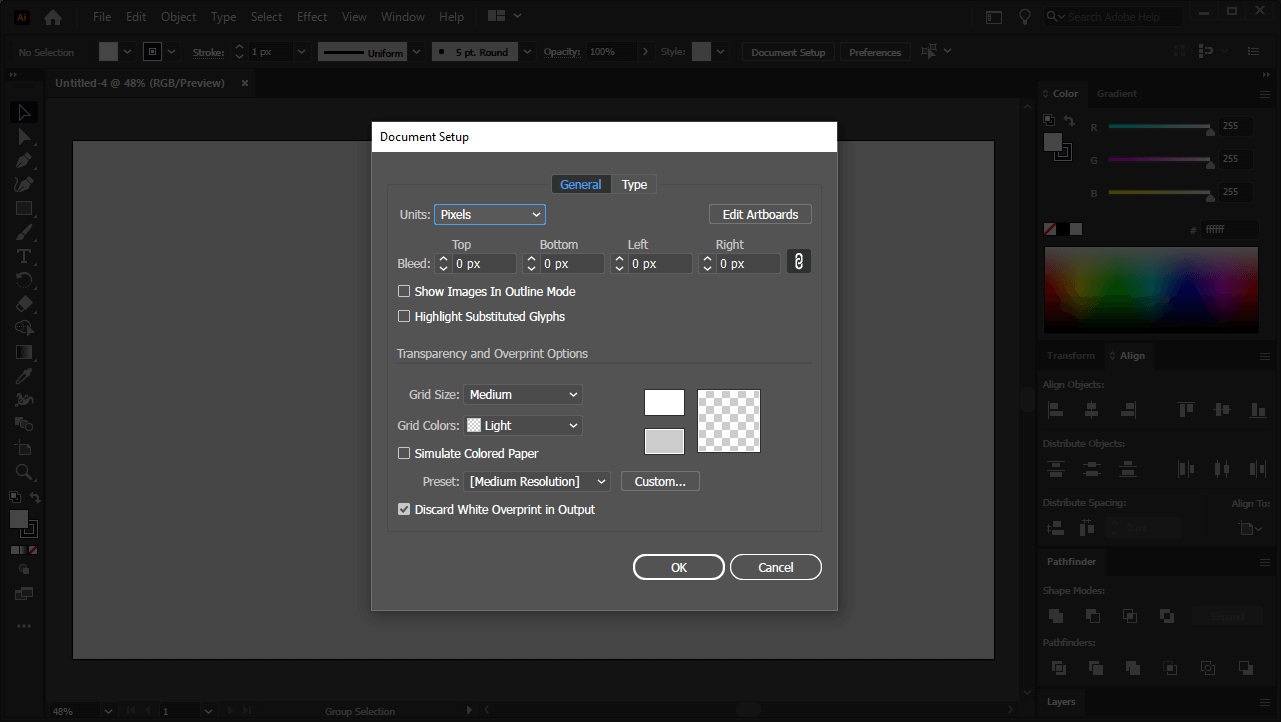
The Document Setup menu is a small menu that allows you to alter certain properties of your document, such as your preferred units of measurement, document bleed size (if any), and whether or not you’d like to apply an opacity checkerboard to your artboard.
Step 2: Change The Grid Color
Once you’re in the Document Setup menu, all you have to do is tweak two of the settings.
First, tick the box that reads “Simulate Color Paper” and make sure the preset beneath it is set to [Medium Resolution].
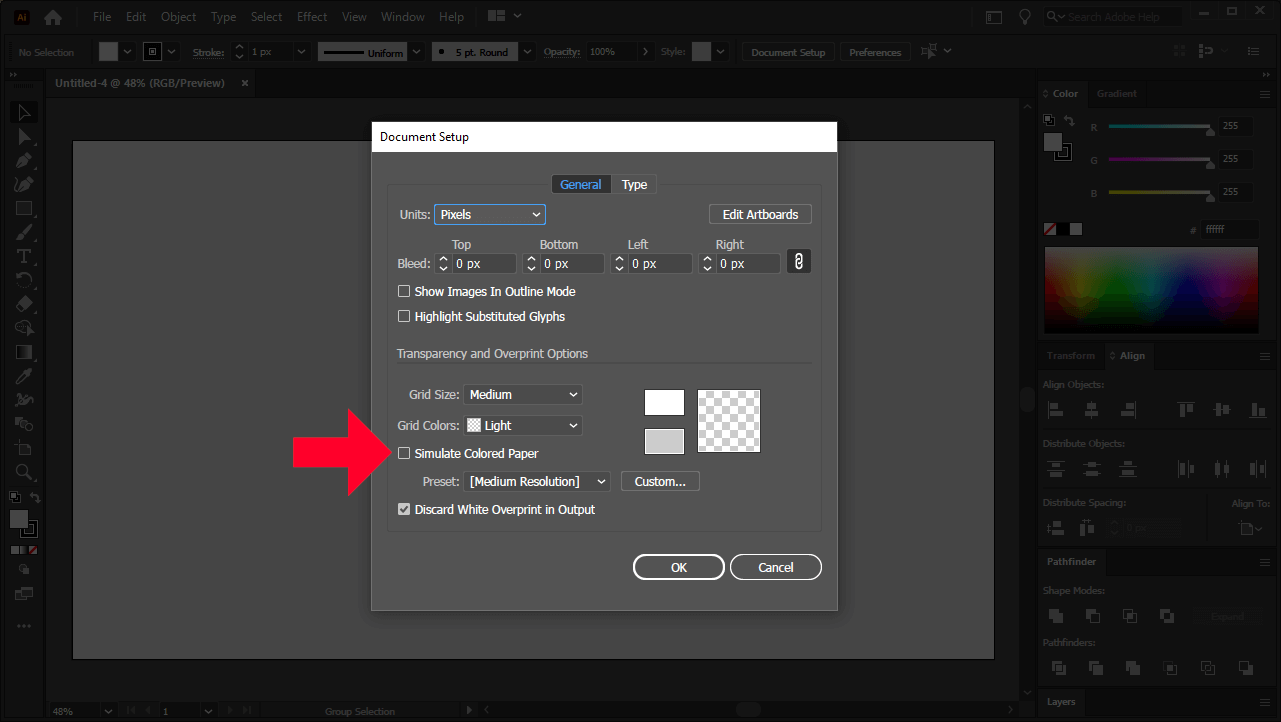
This simulation of color paper is what will allow you to change the artboard color in Illustrator to whatever you want.
Once that is enabled, simply click on the top color stripe, next to the checkerboard grid, and set that to whatever color you’d like your artboard to be.
The location of the stripe:
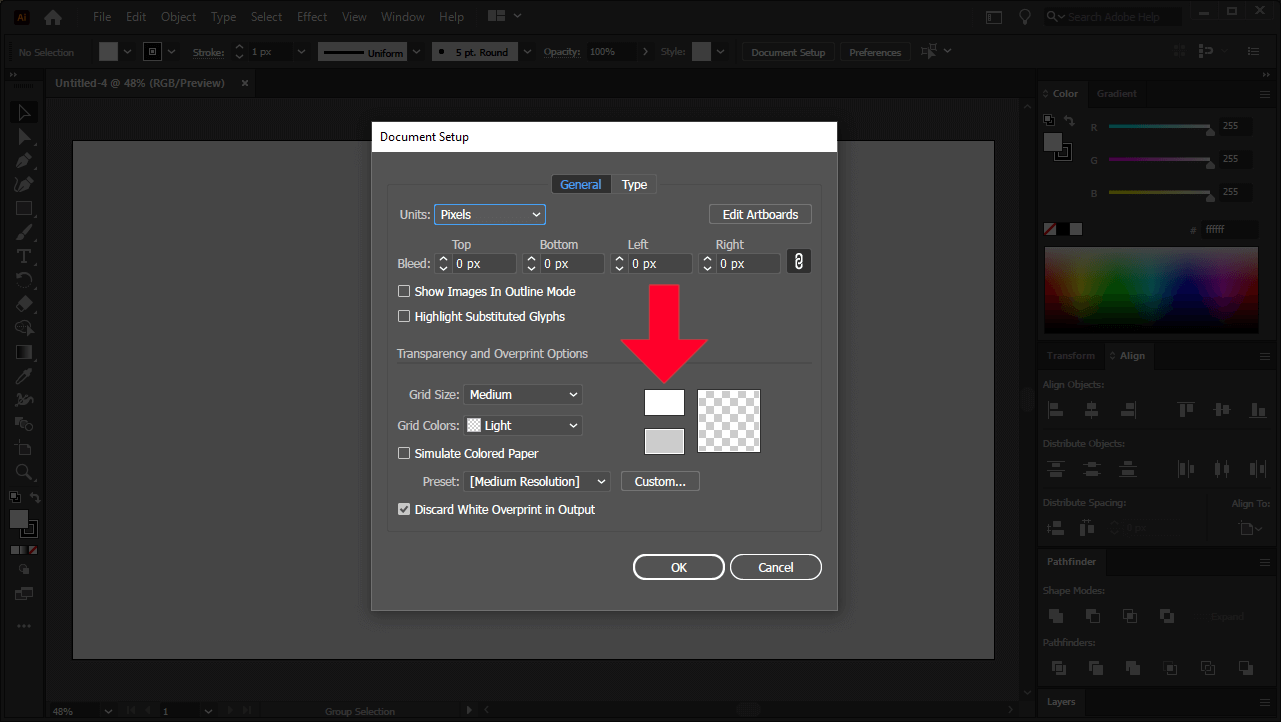
Once you click on the stripe you will be prompted to choose a color. This will be the color that your artboard is filled with.
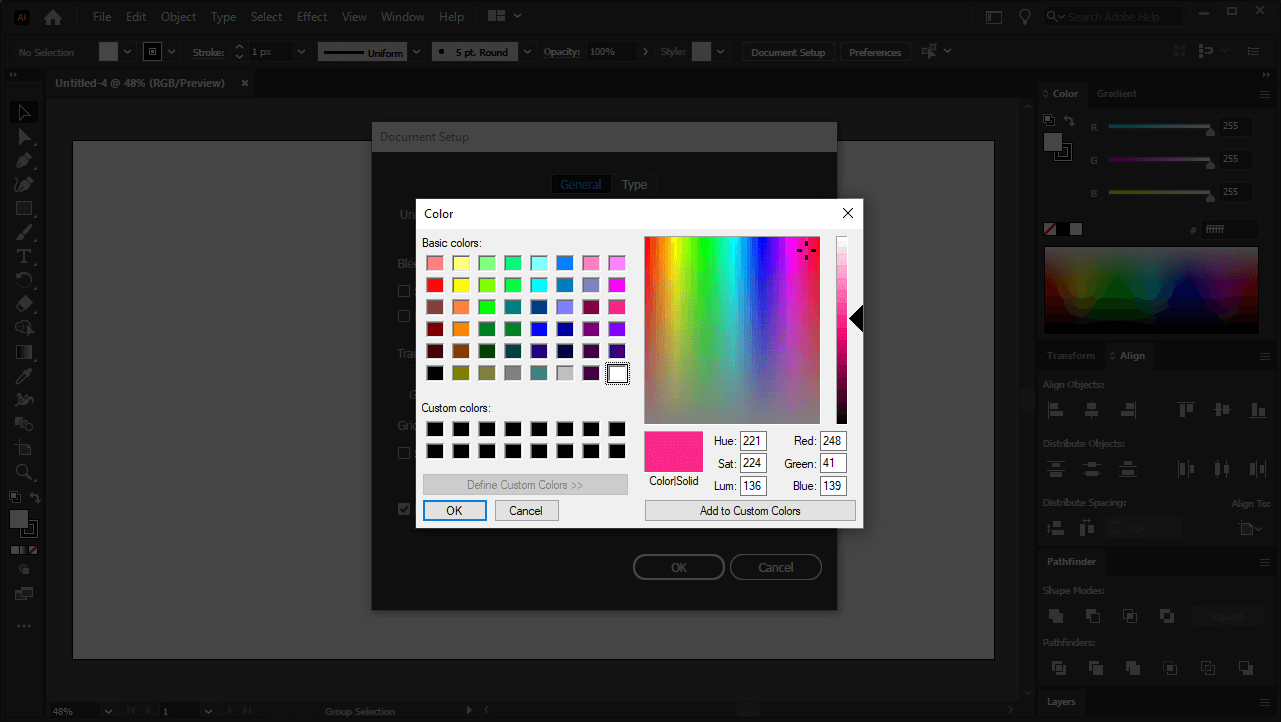
Unfortunately there is no way to specify a HEX color code, so you’ll need either the RGB or the HSL values for your shade if you have something particular in mind. Otherwise you can just choose a color manually using the interface.
Once you’ve chosen your color, click OK in the color menu, and then OK in the Document Setup menu to save your changes and close out of it.
Your artboard should now reflect the color you’ve chosen to fill it with:
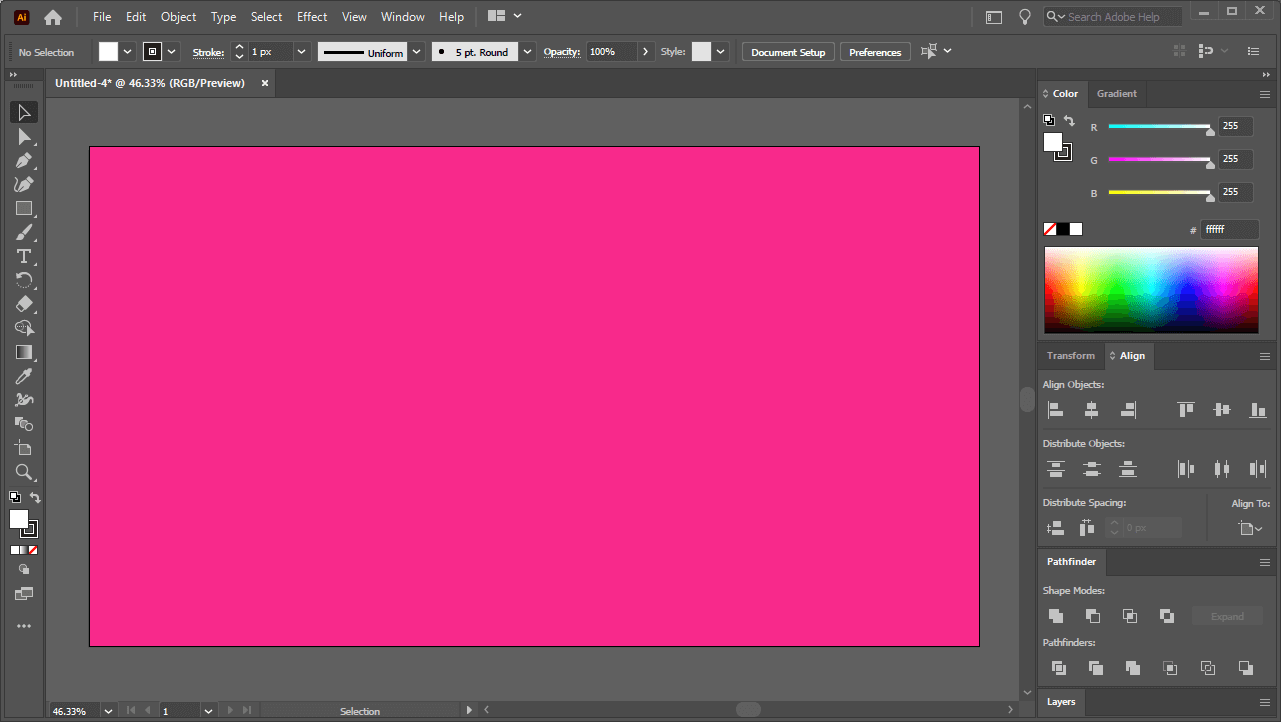
If your computer is anything like mine then chances are that the color of your artboard has remained white despite setting a different color. This is merely a screen rendering problem though. All you have to do is zoom in and out real quick to reset it, and your changed artboard color should become visible.
To zoom in and out, hold Alt and roll up and down on the mouse wheel.
Reset The Artboard Color
If at any point you’d like to reset the artboard color so that you can return to a regular white fill, simply navigate back to the Document Setup menu and deselect the “Simulate Color Paper” box, and click OK to save and close out.
Tips and Precautions
Whenever you change the artboard color in Illustrator there are a few things that should be kept in mind.
For one, much like changing the canvas color in Inkscape, you’re not actually changing the color of any of your design work or the document itself. All you’re changing is the appearance of the artboard within your workspace.
This means that if you export your artboard as a PNG document then, much like when the artboard is white, the fill color will not be reflected in your exported design. Or in other words, exporting a graphic to PNG will still result in the document having a transparent background, regardless of your artboard’s color.
If you’d like to export the artboard color along with your graphic then you’d have to manually create a rectangle and fill it with the color you’d like to use, and then position it beneath your graphic.
Conclusion
Although it’s good that Illustrator provides a way for you to change the color of the artboard, it would be nice if it were labeled in a more direct way. Users shouldn’t have to tinker around with random settings and seek workarounds for a feature that’s pretty standard in alternatives like Inkscape and Affinity Designer. Hopefully this will change in the future.
If you have any questions or if any part of this lesson was unclear then simply leave a comment below. As always, thanks for visiting!
Learn To Master The SoftwareGain a complete understanding of your favorite design apps with my comprehensive collection of video courses. Each course grants access to our private community where you can ask questions and get help when needed.
|
||||||||||||||||||||||||||||||||


THANK YOU !!!
No more drawing shapes, sending to back and locking!!!
thank you for the tip! simple and easy to understand. I also appreciate that I didn’t have to scroll through a full tutorial just to find the info I was looking for!