Add Fonts To Affinity Designer – Windows, Mac and iPad
Add Fonts To Affinity Designer – Windows, Mac and iPad https://logosbynick.com/wp-content/uploads/2021/03/add-fonts-to-affinity-designer.png 800 470 Nick Saporito https://secure.gravatar.com/avatar/8e31bf392f0ba8850f29a1a2e833cdd020909bfd44613c7e222072c40e031c34?s=96&d=mm&r=gIf you really want to harness the power of Affinity Designer’s features and maximize your creativity, then you’re going to need to use third-party fonts once in a while. The right fonts can enhance your designer and help communicate your message more effectively. In this lesson I’ll be going over how you can easily add fonts to Affinity Designer, whether you’re using Windows, Mac, or an iPad.
In short, the way that you add fonts to Affinity Designer is by installing them on your operating system. Fonts themselves aren’t actually stored in Affinity Designer. Affinity simply references the fonts installed on your device and then indexes them in the software.
Installing fonts to your device so you can use them with Affinity Designer is a simple process, but it differs slightly depending on your OS and the type of device. Let’s dig in.
Add Fonts To Affinity Designer
| To add fonts to Affinity Designer, open the font file and click the button that reads “Install”. Your font will then be ready for use in Affinity Designer. |
Step 1: Download A Font
Before we can install fonts we first need a font to install. If you need help finding some fonts then be sure to check out some of these suggestions:
- FontSquirrel: A collection of fonts that are free for personal use and commercial use.
- Dafont: A collection of fonts that are mostly free for personal use only.
- Creative Market: Premium fonts that cost money but are much cheaper than your typical font shop.
Regardless of the font you choose, make sure to check the license for permissions. Fonts come with different legal ramifications depending on who owns the copyright. You can read more about copyright and fonts here.
Step 2: Install Your Font
Once you’ve downloaded your font, locate it on your hard drive and open one of the files. It will end with either the .ttf or .otf extensions. Your font will most likely be bundled in a ZIP folder.
If there’s multiple files with these extensions then just pick any one for now. This means that your font came with different variations (bold, italic, heavy, light, etc.) You will have to install each of these variations individually.
Installing Fonts On Windows Devices
For Windows users, once you open the font file, look for a button at the top of the page that says Install.
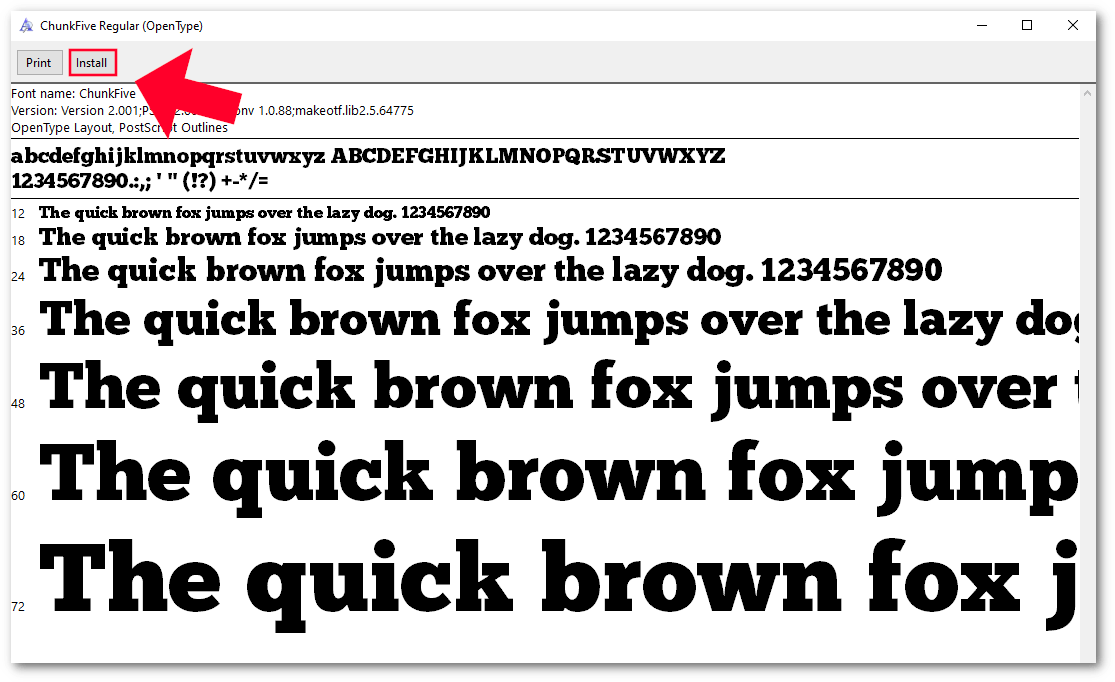
The install button is located to the top-right of the window. Alternatively, you can simply right-click the font file and select “Install for all users.”
Clicking that button will install your font onto your operating system, meaning it can then be used in Affinity Designer. And best of all, unlike other applications, you won’t have to restart Affinity! The font should populate in the software immediately.
Installing Fonts On A MacBook or iMac
If you’re using a MacBook or an iMac then you can add fonts to Affinity Designer by simply installing them on your system.
Locate the font file in your Downloads folder:
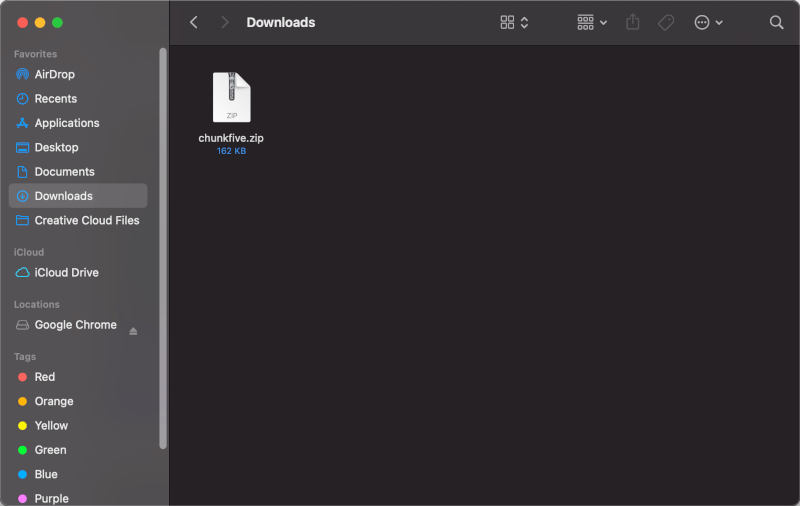
Your downloaded font will likely be in .zip format and located in your Downloads folder.
Open the zipped folder and look for a file that ends with .ttf or .otf, and then open that file.
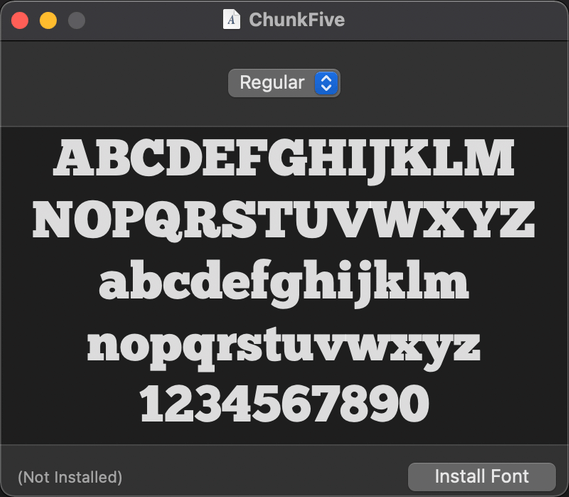
The Install Font button is located at the bottom-right of the window.
Simply click the Install Font button to install the font on your device and then it should be ready to use with Affinity Designer.
Installing Fonts On An iPad
If you’re using Affinity Designer with an iPad and want to install fonts then the process is slightly different.
Much like the other operating systems, you’ll have to install the font on the device in order to use it in Affinity Designer. However, fonts are not installed the same way on an iPad as they are on other desktop devices, and for several reasons.
For one, Apple prefers that fonts be downloaded from the app store. This could mean that your font choices are limited, and it could also mean that your favorite third-party fonts aren’t available for download. This can be particularly frustrating if you’ve purchased a premium font and want to use it in Affinity Designer. Luckily, there is a workaround.
To install fonts on an iPad that aren’t in the app store, you’ll first have to download a font installer from the app store, and then use that app to install your fonts. This can be done using an app like iFont. Check this tutorial on using iFont to add fonts to your iPad if you need assistance.
Once you’ve installed your font it will be ready for use with Affinity Designer.
Step 3: Locate Your Font In Affinity Designer
Once your font is installed on your device, simply open Affinity Designer, grab the Artistic Text tool, and look for your font. Fonts are indexed in alphabetical order:
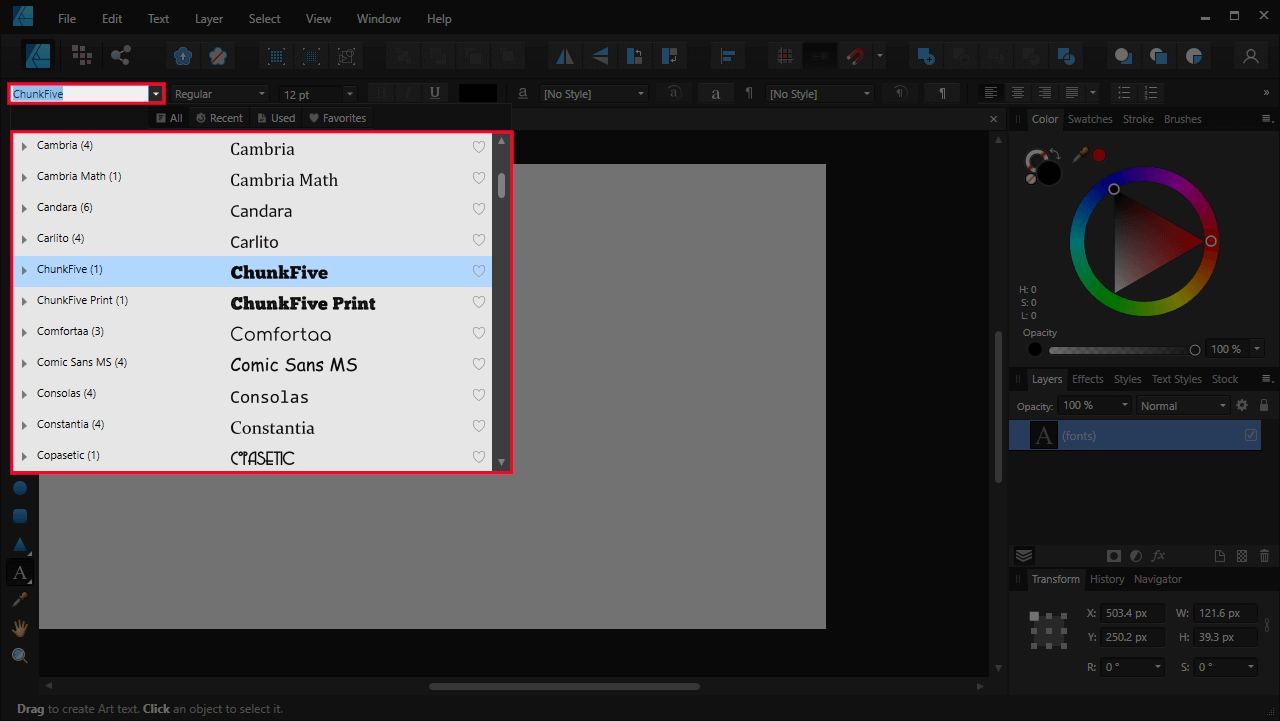
The font populated in the font library without having to restart Affinity Designer!
If you already have Affinity Designer opened then there is no need to restart it. The fonts library will update in real time.
Conclusion
As previously mentioned, you technically cannot add fonts to Affinity Designer. Instead, you add them to your device, and then Affinity will reference the installed fonts in use.
This is beneficial because it means that once your fonts are installed, you’re not limited to just Affinity Designer. You can also use your fonts in other applications, whether it be for graphic design, desktop publishing, video editing, or anything else for that matter.
The advantage of using Affinity Designer is that the fonts library updates in real time. This is a refreshing change when compared to alternatives like Inkscape, which requires you to restart the application before the newly-installed font populates, or Illustrator, which has been know to have its share of quirks thanks to TypeKit.
If you have any questions or if any part of this lesson was unclear simple leave a comment below. As always, thanks for visiting!
Learn To Master The SoftwareGain a complete understanding of your favorite design apps with my comprehensive collection of video courses. Each course grants access to our private community where you can ask questions and get help when needed.
|
||||||||||||||||||||||||||||||||


I’m thinking of buying Affinity as my current InDesign is getting expensive in my retired years. What are the main advantages (apart from cost) and disadvantages to converting?
I haven’t used InDesign much, so I can’t really say how it stacks up to any of the Affinity products.
I was able to add fonts before on my iPad using affinity design and iPad, why has this changed?
“Much like the other operating systems, you’ll have to install the font on the device in order to use it in Affinity Designer. However, fonts are not installed the same way on an iPad as they are on other desktop devices, and for several reasons.”
You do not have to install a font on your Apple iPad to use it in Affinity Designer. Affinity Designer for iPad supports importing fonts into the application itself from the “Fonts” submenu of the settings menu, provided the font is stored as a file that can be accessed by Designer.
Thanks for sharing!