How To Make A Transparent Gradient In Procreate For iPad
How To Make A Transparent Gradient In Procreate For iPad https://logosbynick.com/wp-content/uploads/2022/10/transparent-gradient-procreate.png 800 470 Nick Saporito https://secure.gravatar.com/avatar/8e31bf392f0ba8850f29a1a2e833cdd020909bfd44613c7e222072c40e031c34?s=96&d=mm&r=gIn this tutorial we’ll be going over how to use Procreate to apply a gradual transition to transparency. This is otherwise known as a transparent gradient, or an opacity mask. There’s no specific feature built into Procreate that allows you to create transparent gradients though, so we’ll have to do so manually. In this tutorial we’ll be using simulated gradients and layer masks to create a transparent gradient in Procreate.
In short, the secret to making a transparent gradient mask in Procreate is to simply apply a layer mask to the subject layer, and then use shades of black and white to dictate transparent and opaque areas of the image. For this demonstration we will use a simulated gradient from white to black. Let’s have a closer look.
Create A Transparent Gradient In Procreate
The following video tutorial will walk you through the entire process, step by step:
Continue on for a brief written overview of the steps taken in the video tutorial.
Table of Contents
|
Step 1: Add a new layer and fill it with white
The first thing we’re going to do is add a new layer to the image and fill it entirely with white.
Open your Layers menu and tap the small plus (+) icon in the top-right corner of the menu to apply a new layer. Then, change your fill color to white and swipe and drag the color disc onto your screen to fill the layer with white:
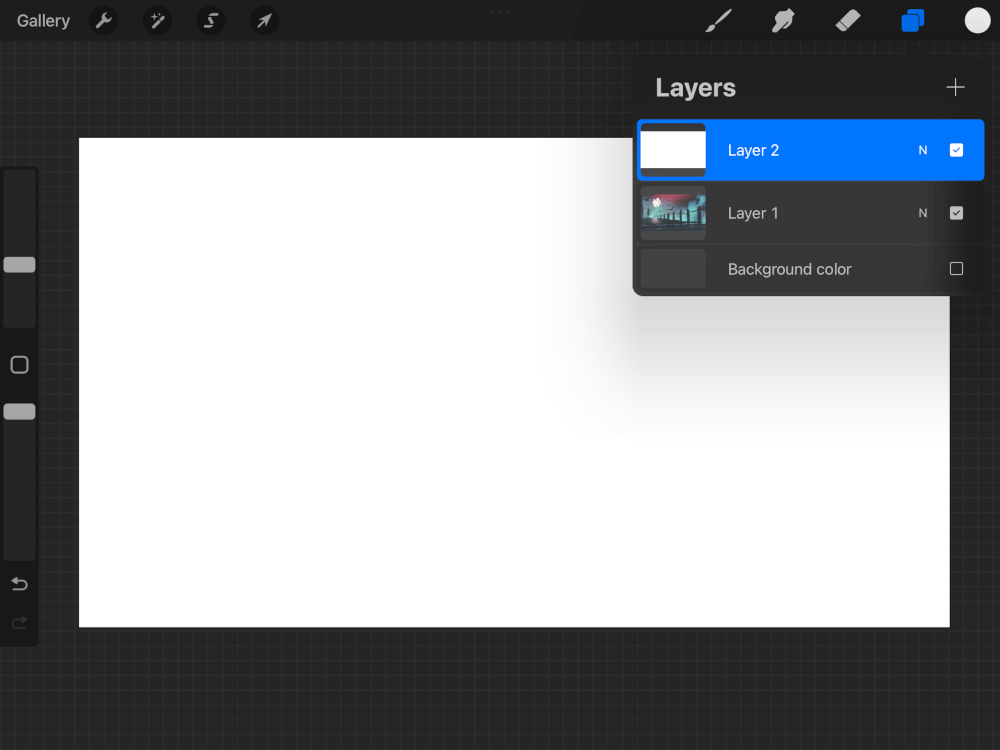
Add a new layer and fill it with white.
Make sure the new layer is positioned directly above the subject layer in the stacking order. This will be the case by default if you had your subject layer selected when adding the new layer.
Step 2: Add another layer and fill it with black
Next, we’ll repeat the previous step, only we’ll fill this new layer with black:
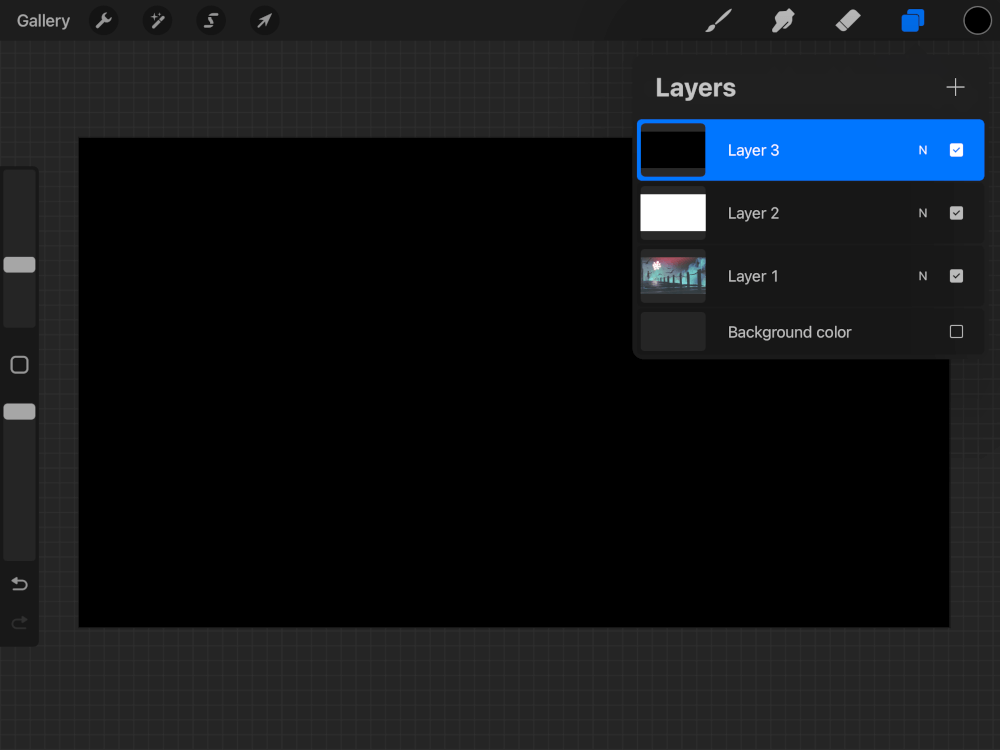
Add another layer and fill it with black.
Make sure this new layer is positioned directly above the white layer we just created.
Step 3: Move the black layer halfway off of the page
Now we’re going to move the black layer halfway off of the page so that the left half of the screen is white and the right half is black:

Move the black layer halfway off of the page.
To do this, open the Transform tool and enable Snapping. Then, swipe and drag the black layer towards the right-hand side of the page until it snaps in place evenly.
The reason we are working with black and white is because of the nature of layer masks. The white areas of the layer will represent opacity, whereas the black areas will represent transparency.
Step 4: Apply a Gaussian Blur to the black layer
Now we must apply a Gaussian Blur to the black layer so that we can simulate a gradient from white to black.
With the black layer selected, open the Adjustments menu and choose Gaussian Blur. Swipe across your screen to the right to apply the blur. The further right you swipe, the more intense the blur will be:
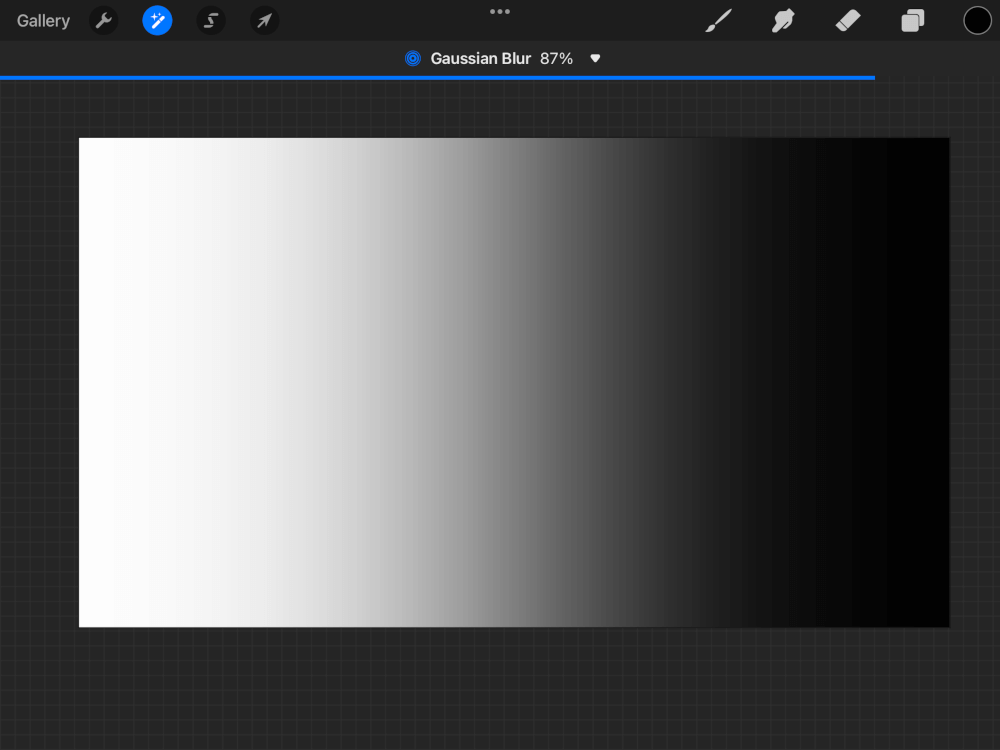
Apply a Gaussian Blur to the black layer.
Use discretion when determining how much of a blur to apply. A greater blur will result in a smoother transition from opaque to transparent, whereas a slight blur will make the transition more defined.
Step 5: Merge the white and black layers together
Next we will combine the white and black layers together into a single layer so we can apply it as a layer mask.
Open the Layers menu and tap on the black layer to select it. Then, tap the layer again to open the layer options menu and select Merge Down from the list:
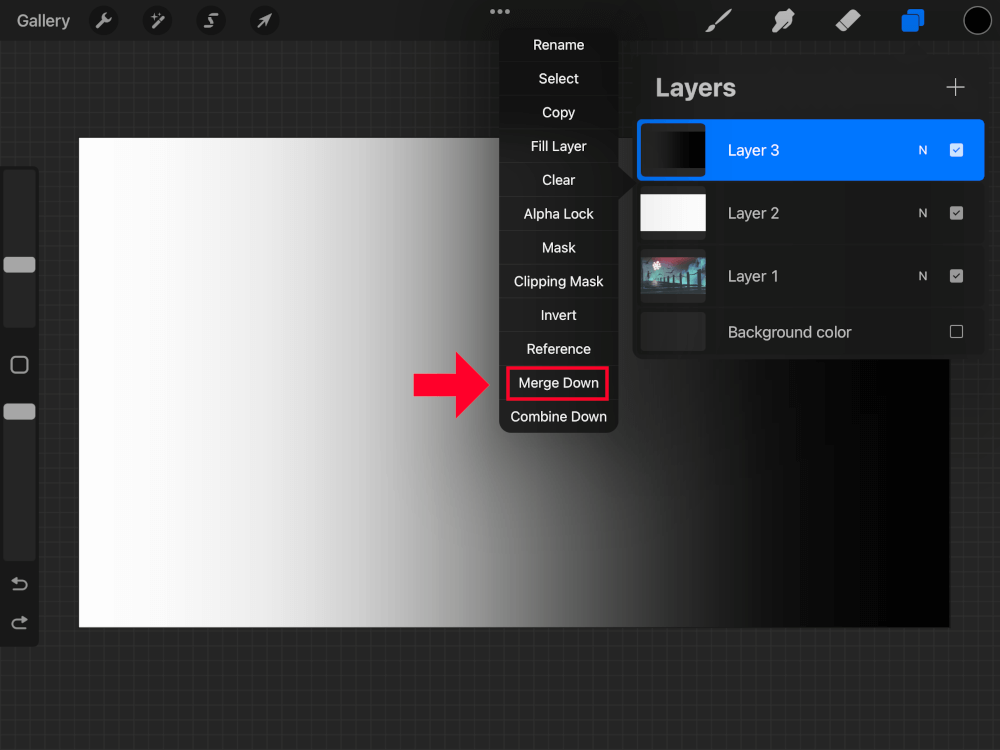
Merge the black and white layers together.
This will combine the two layers together into one, resulting in a gradient from white to black.
Step 6: Copy the merge layer and paste it onto the subject layer as a mask
All we have to do now to finish creating our transparent gradient in Procreate is copy the gradient layer and paste it onto our subject layer as a mask.
Open the Layers menu, select the gradient layer, and tap on it to populate the layer options menu. Select Copy. Then turn off the visibility of the layer by unchecking the box next to the layer’s label/name.
Now, select the layer you’d like to apply the transparent gradient to, tap it to populate the layer options menu, and select Mask from the list.
Navigate over to the Actions menu, represented as a small wrench icon in the top-left corner of your screen, and select Paste.
If followed correctly, the copied gradient will be pasted as a layer mask, effectively creating a transparent gradient effect:

How the transparent gradient looks once applied.
The best part? It’s completely non-destructive, meaning you can undo the gradient at any time. All you have to do is open the Layers menu and toggle off the visibility of the mask layer by unchecking the box next to its label.
Conclusion
Creating a transparent gradient mask in Procreate is a rather complicated process that involves a lot of steps. This is because Procreate doesn’t come with some of the more advanced features you normally see in desktop-based design apps. That said, with a little bit layer trickery we can simulate the effect as needed. Let’s hope this becomes a dedicated feature one day though.
If you have any questions or need clarification on any of the steps taken in this lesson just leave a comment below.
Learn To Master The SoftwareGain a complete understanding of your favorite design apps with my comprehensive collection of video courses. Each course grants access to our private community where you can ask questions and get help when needed.
|
||||||||||||||||||||||||||||||||


