How To Subtract Shapes In Adobe Illustrator
How To Subtract Shapes In Adobe Illustrator https://logosbynick.com/wp-content/uploads/2022/10/subtract-shapes-illustrator.png 800 470 Nick Saporito https://secure.gravatar.com/avatar/8e31bf392f0ba8850f29a1a2e833cdd020909bfd44613c7e222072c40e031c34?s=96&d=mm&r=gA big part of vector design is using shapes to create new shapes. One such example would be subtracting one shape from another so that it results in negative space in the subtracted area. Thankfully, Illustrator makes this a simple process. In this tutorial we’ll be going over how to use the Pathfinder tool to subtract shapes in Adobe Illustrator.
In short, there’s various ways to subtract shapes in Adobe Illustrator, but the quickest and simplest method would be via the Pathfinder menu— a tool that allows you to perform Boolean operations with selected objects. Boolean operations are an essential function in graphic designer. They allow you to create new shapes based on how other shapes interact with each other. Let’s have a closer look.
Subtract Shapes In Adobe Illustrator
The following video tutorial will walk you through the entire process in less than 2 minutes:
Continue on for the written instructions.
Table of Contents |
Step 1: Ensure that the shape you’d like to subtract is positioned above the other
Before we can subtract shapes in Adobe Illustrator, we must first ensure that the shape we’d like to subtract is positioned on top of the shape it’s going to be subtract from.
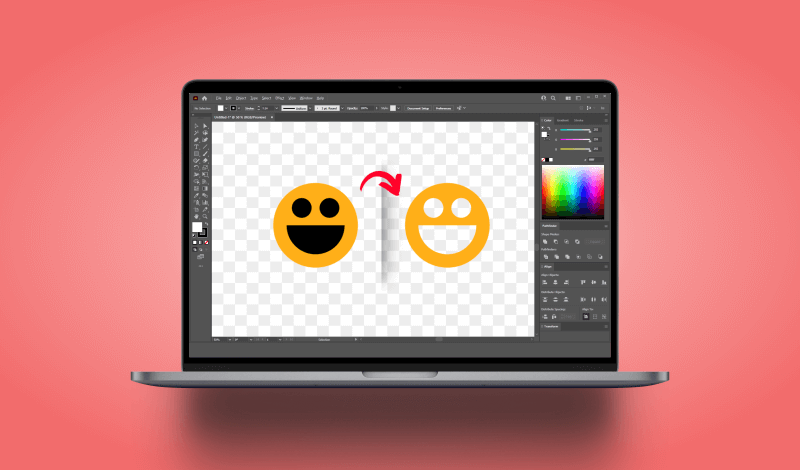
The way shape subtraction works in Illustrator is that the object on top is subtracted from the object on the bottom:

The subtraction order dictates that the top object is subtracted from the bottom object.
If your shape needs to be moved to the top, you can do so by clicking on it to select it, then right-clicking it and selecting:
Arrange > Bring Forward
Alternatively, you can use the keyboard shortcut, which is Control + ].
This will bring the object up one step. You may have to repeat this process several times if there are other objects positioned above it.
You can also select Bring To Front as well (keyboard shortcut: Control + Shift + ]) which will raise the object above every other object in the stacking order.
Step 2: Select both shapes at the same time by holding Shift and clicking them
Next we must select both objects at the same time so that Illustrator knows which objects to subtract.
Click on one of the objects to select it. Then, hold the Shift key and click on the other object to select it as well. You should see blue bounding boxes around each object, which indicates that you have them selected.
Alternatively, you can select multiple object by simply clicking and dragging a selection through them. Bear in mind though that any other objects you touch with the selection will also be selected, so be sure to only click and drag through the shapes you’d like to subtract.
Step 3: Open the Pathfinder menu
Now we will access the Pathfinder menu. This is the tool that allows you to perform Boolean operations in Illustrator, such as shape subtraction.
To access it, navigate to:
Window > Pathfinder
The menu looks something like this:
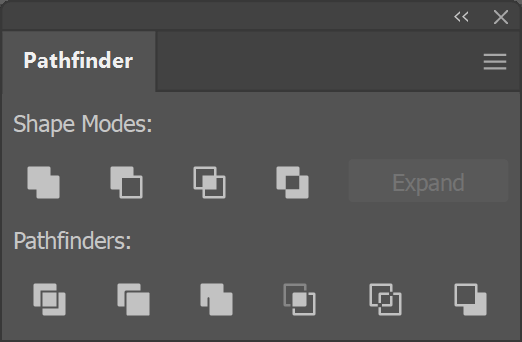
The Pathfinder menu allows you to perform Boolean operations (such as subtraction) in Illustrator.
Step 4: Click the button that reads Minus Front when you hover your cursor over it
With the Pathfinder menu now opened, you can subtract your shapes by navigating to the area labeled Shape Modes and click the button that reads Minus Front if you hover your cursor over it:
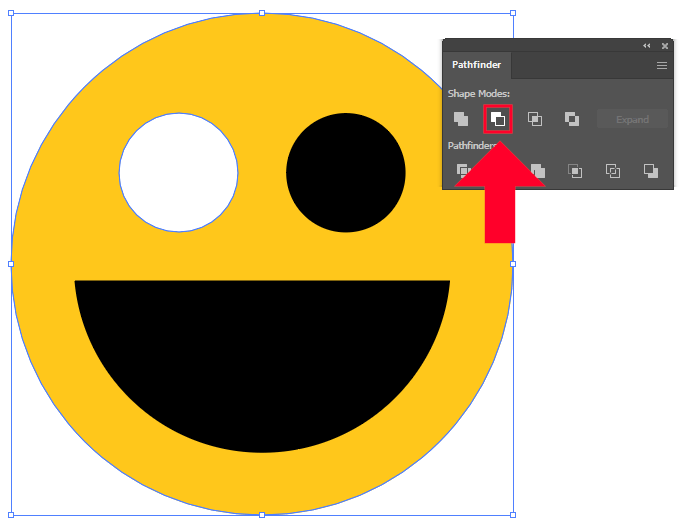
Clicking the Minus Front button will subtract the shapes.
If done correctly, the bottom object will effectively be subtracted by the top object:

The subtraction results in an area of negative space on the target object in the shape of the object that was subtracted.
Conclusion
As previously mentioned, there’s various ways to subtract shapes in Illustrator. For example, a more advanced method would be to use the Shape Builder Tool. The Pathfinder, however, is the easiest to understand if you’re new to Illustrator. And it produces the same result regardless.
If you have any questions or need clarification on any of the steps taken in this lesson then feel free to leave a comment below.
Learn To Master The SoftwareGain a complete understanding of your favorite design apps with my comprehensive collection of video courses. Each course grants access to our private community where you can ask questions and get help when needed.
|
||||||||||||||||||||||||||||||||


