
How To Offset A Path In Affinity Designer
How To Offset A Path In Affinity Designer https://logosbynick.com/wp-content/uploads/2022/10/offset-path-affinity-designer.png 800 470 Nick Saporito https://secure.gravatar.com/avatar/8e31bf392f0ba8850f29a1a2e833cdd020909bfd44613c7e222072c40e031c34?s=96&d=mm&r=gPath offsetting is an essential function when it comes to vector design. It allows you to resize objects by adding or removing an equal amount of surface area around an object, which differs from scaling. Simply adding to an object’s width and height does not produce the same result as offsetting. In this tutorial we’ll be going over how to offset a path in Affinity Designer. This is accomplished with the help of the Contour Tool.
In short, all you have to do to offset a path in Affinity Designer is access the handy Contour Tool and click and drag the handle at the top of the selected object to increase or decrease its offset. Let’s examine in further detail.
Offset A Path In Affinity Designer
The following video tutorial goes over the complete process, step-by-step:
Continue on for the written instructions.
Table of ContentsOffset A Path
Offset Properties |
Offset A Path
Let’s first go over the workings of path offsetting, then we’ll have a look at some of the properties you can change.
Step 1: Select the object you’d like to offset
To offset a path in Affinity Designer we must first ensure that we have the path selected. Click on the object using the Move Tool (keyboard shortcut: V) to select it. You will know it’s selected once you see a blue bounding box and transformation handles around it.
Step 2: Access the Contour Tool
Path offsetting is accomplished using the Contour Tool— a tool dedicated to path offsetting.
With your object selected, access the Contour Tool in the tools menu to the left of your screen, or by pressing the letter O on your keyboard:
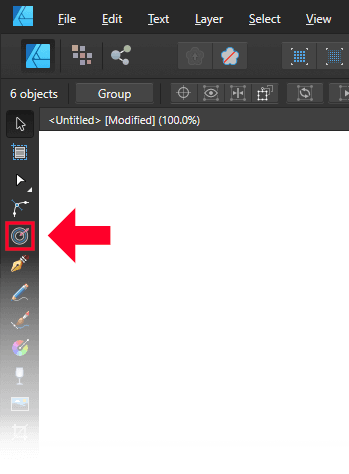
The Contour Tool is a dedicated tool for path offsetting.
Step 3: Click and drag the handle at the object to change its offset
With the Contour Tool enabled, you should see a vertical transformation handle located at the center-top of your object:
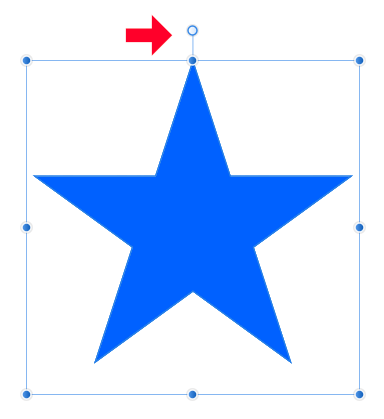
The handle at the top of the object allows you to offset the path.
Clicking and dragging this handle allows you to offset the path. Moving it to the right increases the offset, whereas moving it to the left decreases it:

Drag the handle left and right to increase and decrease the offset.
Step 4: Finalize the changes by clicking Bake Appearance
You will need to finalize the changes once you are finished offsetting your path. As of right now, Affinity Designer does not recognize the object as a path that can be edited in some of the ways you normally would.
For example, you would not be able to edit the anchor points of the path, such as you would to do something like joining curves, in the object’s current state. You will first need to “bake” its appearance.
To do so, simply click the Bake Appearance button in the tool settings menu of the Contour Tool:
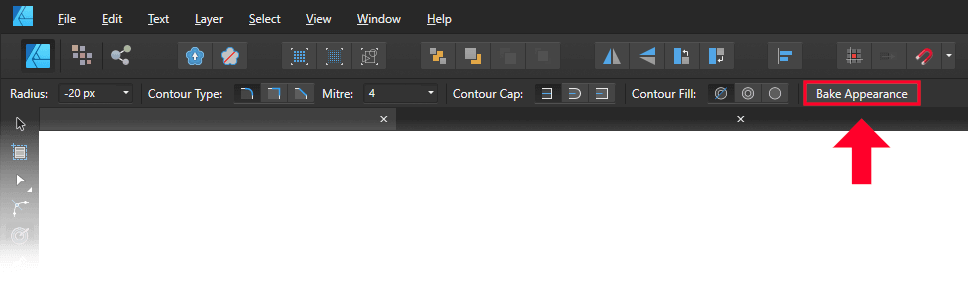
Click the Bake Appearance button to finalize the changes and convert the offset into a path.
Once applied, your offset path will be finalized with updated nodes/anchor points. Bear in mind though that these changes are final. You will have to create a new offset if you’d like to go back and edit it at any point.
Offset Properties
Now that you know the basics of offsetting a path in Affinity Designer, let’s have a look at some of the properties that can be changed when working with them. These properties can be located in the tool settings menu, towards the top of your screen, whenever you have the Contour Tool enabled:
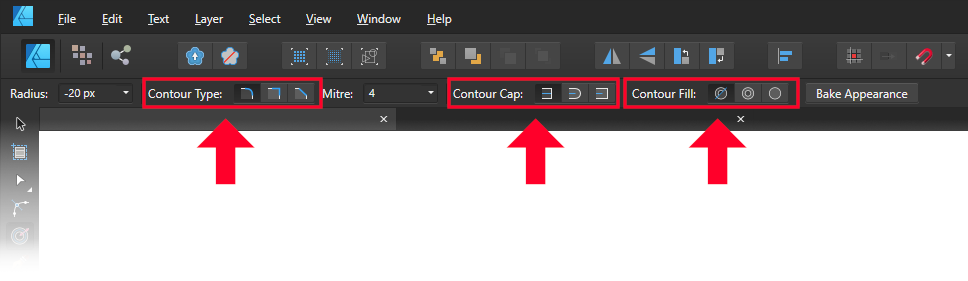
The three main components of the Contour Tool we’ll be going over include the Contour Type, Cap, and Fill.
Change Corner Styles
You may notice that when offsetting your path, the corners of the offset are automatically rounded. That is because of the Contour Tool’s default settings.
There are 3 types of corners you can apply to your offset:
- Round: The default setting for the Contour Tool is for the offset to have rounded corners. This setting is enabled by default.
- Miter: This setting will make the corners of your offset sharp. Be sure to toggle this setting if you’d offsetting an object with pointed/sharp corners.
- Bevel: This setting makes it so that your corners are squared, giving them a cut-off appearance.
Here’s a diagram depicting how each style looks:

Three corner styles to choose from, depicted above.
You can toggle through these styles using the tool setting menu at the top of the screen. It is labeled as Contour Type.
Change Cap Styles
Within the tool settings menu you will see a section labeled Contour Caps. This setting allows you to change the style of a path’s endpoints.
There are 3 types of contour caps to work with:
- None: This is the default setting. When enabled, the endpoints of your path will not have the offset applied.
- Round: This setting applies a rounded cap to the endpoints of your path.
- Square: This setting applied a squared cap to the endpoints of your path.
A depiction of each style:
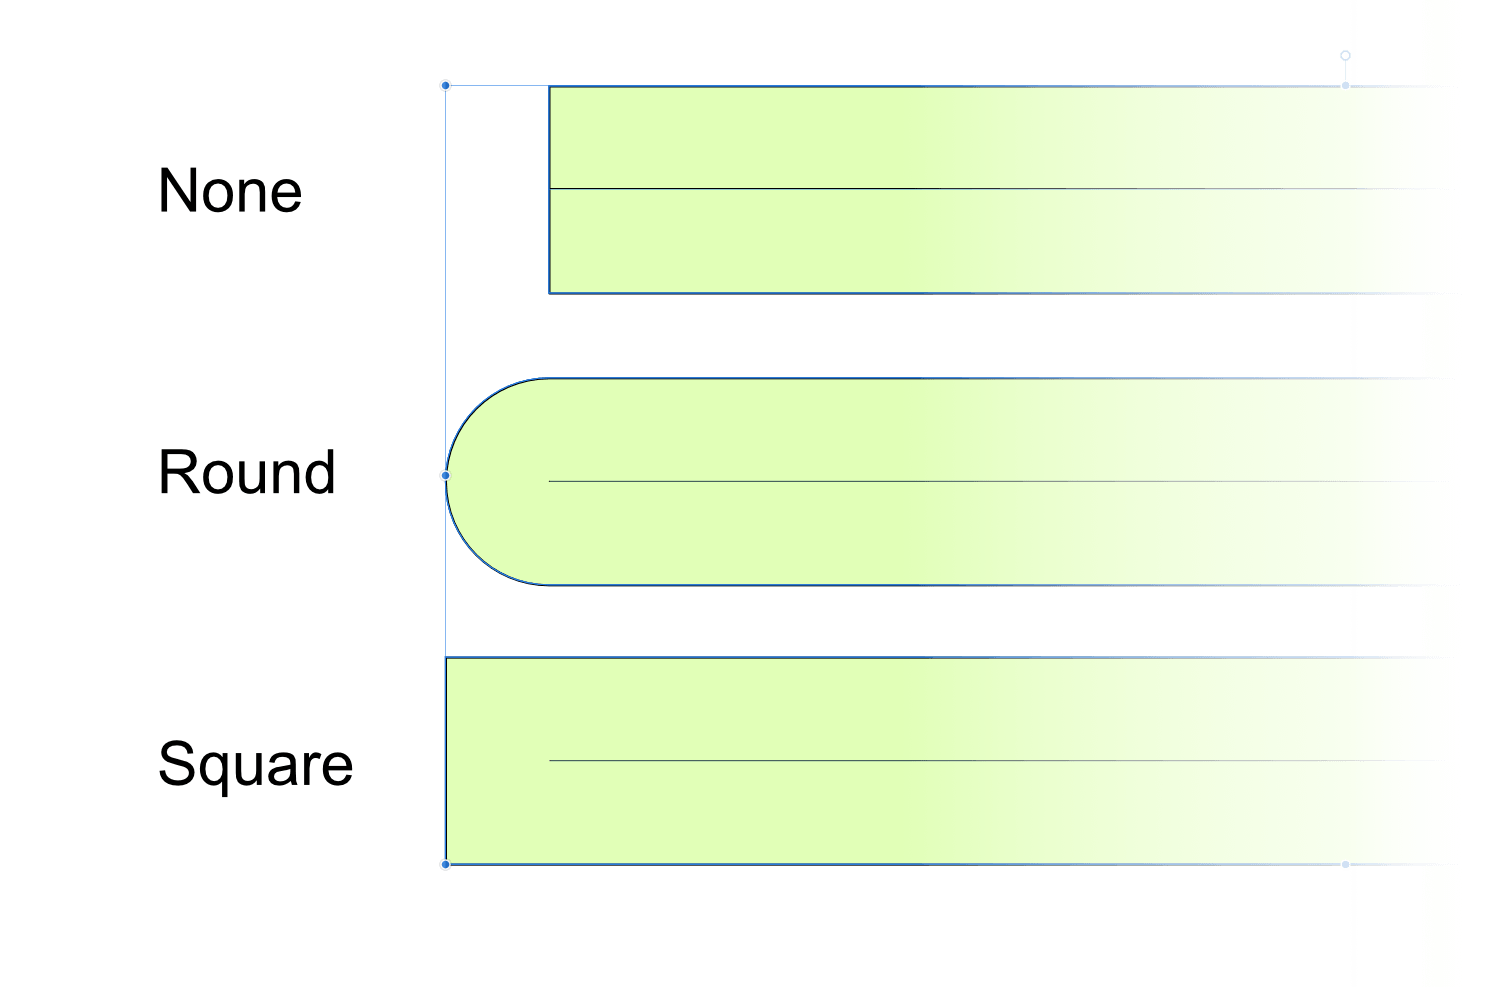
The three types of cap styles include none, round, and square (depicted above.)
Add Or Remove A Fill
The final setting we’ll be looking at in the Contour Tool menu allows you to remove the fill from your path so that the offset, and only the offset, remains.
By default, offsets are usually rendered in addition to the path. That’s because the Auto Closed option, under the Contour Fill section, is enabled by default. If you were to choose Force Open instead, the path’s fill will be removed and only the offset will remain:

With this setting you can choose to remove the fill from your offset path.
Conclusion
Thanks to the handy Contour Tool, it’s easier to offset a path in Affinity Designer than it is in any other vector application. Illustrator requires that you navigate through a messy menu system and Inkscape requires it to be added as a path effect. Only in Affinity Designer do you have a dedicated tool for offsetting that is only a keyboard shortcut away.
If you have any questions or need clarification on any of the steps taken in this lesson, simply leave a comment below.
Learn To Master The SoftwareGain a complete understanding of your favorite design apps with my comprehensive collection of video courses. Each course grants access to our private community where you can ask questions and get help when needed.
|
||||||||||||||||||||||||||||||||


OK you can disregard that issue… I figured out that for some reason, if it’s grouped objects, it doesn’t work and does what I described. But if I ungroup the objects and make them a compound path, it works properly. Of course that’s not stated anywhere, so I guess it’s a bug.
It was arched lettering that I converted to paths that I was working with.
That makes sense. Tools like this are only supposed to work on individual paths, and groups are just multiple paths that function as a unit for the sake of basic transformations, like scaling and moving.
OK, I’m using 2.5.5 and every time I click “Bake Appearance” it turns into a bunch of invisible dots/outlines but no fill. I’ve tried it a dozen times with different contour settings, same result. This must be a newer version than what you are showing. Any help would be appreciated. Trying to migrate from Illustrator and this is really a nightmare.
When I am using the contour tool and I go to bake appearance – the smooth corners turn jagged – I’ve been trying to use this as a cut contour line – but it becomes to sharp and not smooth. How do I fix it?
That’s odd. Try this instead of Bake Appearance: go to Layer > Convert to Curves.
Same thing… the corners become jagged steps.. even if I apply a stroke and expand the stroke… I just cannot seem to figure it out.
So I have tried it both ways – I’ve also tried it with strokes, and in the corners it gives me a jagged edge not a smooth corner..
Have you updated to the latest version? I just tried it myself and it’s working as expected. Running version 2.5.3.
Hello Nick! Love your work, respect your time and patience.
I want to create a Alfonse Mucha style drawing.
As is often the case in his work the main objects are outlined and then have an offset outline around them.
i create the drawing with each object having a single strike of a similar color.
Then, I grouped them and tried applying an expanded stroke. Next I tried using the contour to.
Is there a better way to do this?
Not that I’m aware of. That’s how I’d probably approach it too.