
How To Join Curves In Affinity Designer
How To Join Curves In Affinity Designer https://logosbynick.com/wp-content/uploads/2022/02/affinity-designer-join-curves.png 800 470 Nick Saporito https://secure.gravatar.com/avatar/8e31bf392f0ba8850f29a1a2e833cdd020909bfd44613c7e222072c40e031c34?s=96&d=mm&r=gLet’s say you’re working with a couple of objects in Affinity Designer. Both of them are paths with defined stroke properties, and you want to combine them together. This is a pretty common task when working with vectors, and Affinity Designer makes it as easy as any other application. In this lesson we’ll be going over how to join curves in Affinity Designer so that two separate paths can become a single path.
In short, the way to join curves in Affinity Designer is to use the Node Tool to select the two nodes you’d like to join together, then click Join Curves button in the tool settings menu towards the top of the screen.
Let’s have a closer look.
Join Curves In Affinity Designer
This is a rather simple process, but if you’re new to the software then you may need more detailed instructions. The following video tutorial will walk you through the entire process in less than 2 minutes:
Let’s go over this step-by-step…
Table of Contents |
Step 1: Select both objects
The first thing you must do before you can join curves in Affinity Designer is make sure that you have the two objects you’d like to join selected.
Use the Move Tool (keyboard shortcut: V) to select both objects:
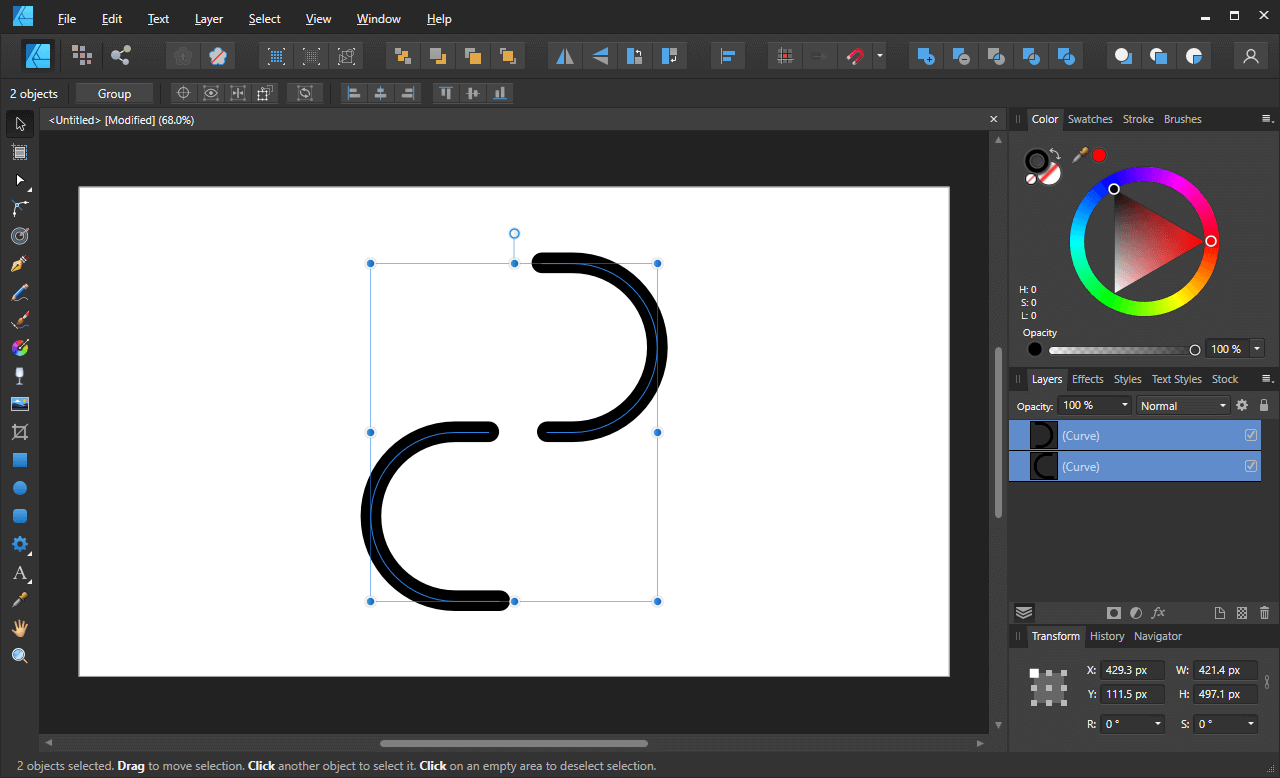
A bounding box will populate around the objects you have selected.
You can select multiple objects by holding the Shift key while clicking on them, or by clicking and dragging a selection around them.
Step 2: Grab the Node Tool and select two nodes to join
The tool that we’ll be using to join the two separate curves together is the Node Tool, which can be accessed in the tool menu on the left-hand side of your screen:
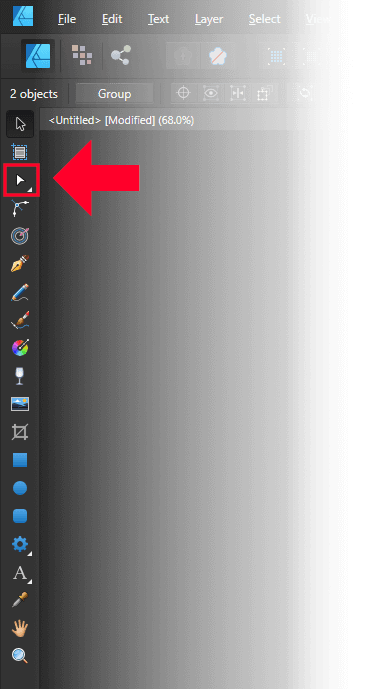
The Nodes Tool icon is depicted as a small white arrow.
Alternatively, you can use the keyboard shortcut, which is the letter A.
With the Node Tool enabled, select the two nodes on each object that you’d like to join together:
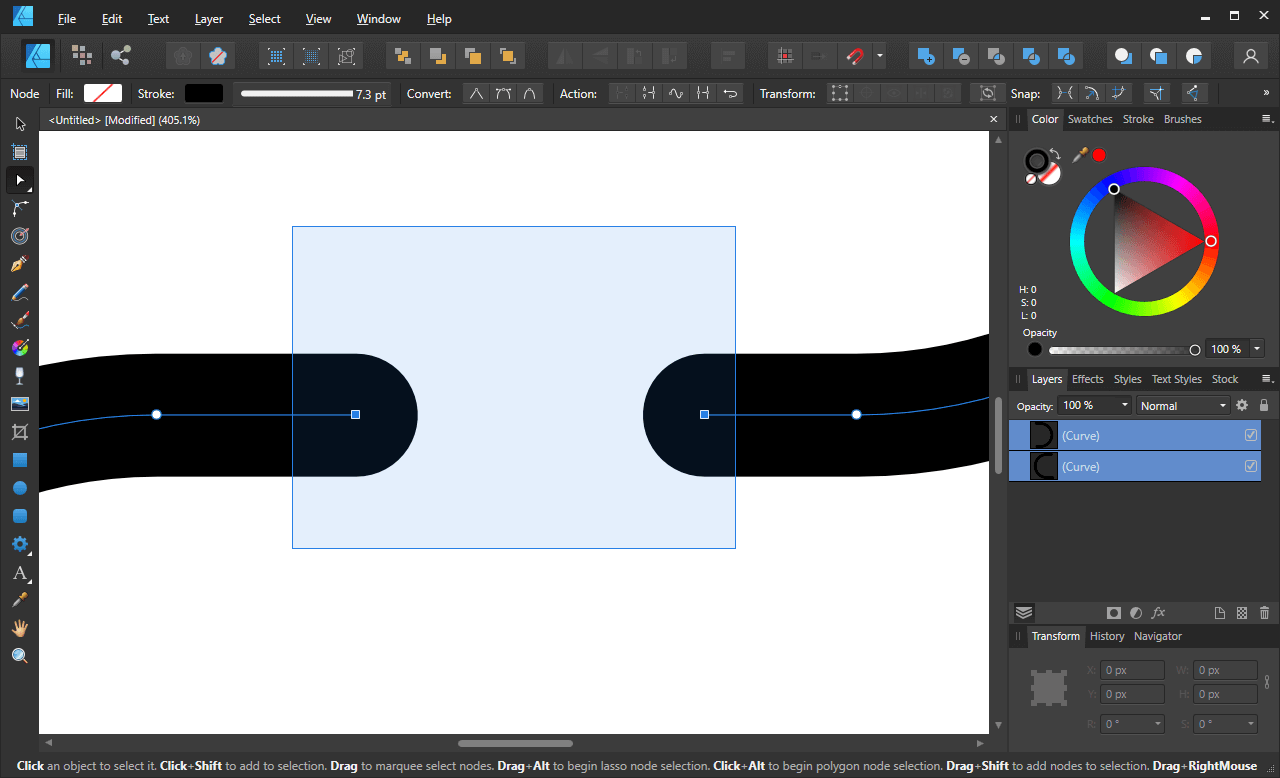
This is the point where the curves will be joined. Do not worry if there is a gap between them — it will be filled in automatically.
As is the case with selecting multiple objects, you can select multiple nodes by:
- Holding the Shift key while clicking on them, or…
- Clicking and dragging to create a selection around them
You can verify that you have the correct nodes selected by their fill color. Selected nodes will be blue in color.
Step 3: Click the Join Curves button in the tool settings menu
All you have to do now to join the curves together is click the Join Curves button in the tool settings menu towards the top of your screen:
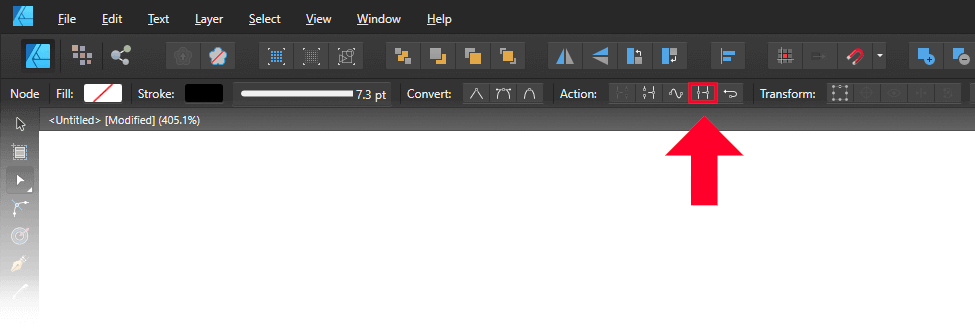
It’s the second button from the right. If you hover your cursor over each button, a label will populate telling you what they do.
Once you click that button, the two nodes will be joined, and what was once two separate curves is now a single, combined curve:

How the object looks after the curves are joined.
What’s more, the software automatically filled in the gap between the two nodes with a straight line.
If you need that line to be curved, or to follow a specific contour, then you can do so clicking and dragging the line to curve it, and by using the adjustment handles to adjust it further.
Conclusion
This is one of those areas where having experience working with other vector applications in the past comes in handy, as the workflow used to join curves in Affinity Designer is pretty consistent. If you know how to do this sort of thing with Inkscape or Illustrator, then you pretty much already know how to do so with Designer. It’s just a matter of locating the tool and the proper setting.
If you have any questions or need clarification on anything covered in this tutorial then leave a comment below.
Learn To Master The SoftwareGain a complete understanding of your favorite design apps with my comprehensive collection of video courses. Each course grants access to our private community where you can ask questions and get help when needed.
|
||||||||||||||||||||||||||||||||


Thanks for the help!
You’re welcome!
This was a great explanation!
What about when you want to join a node from the middle of a path? Or tack a path onto an already existing closed path? Thanks!
I need help on this too! Is there any advice adding a joining point from a closed path?
I would need to see a specific example but you can click anywhere on a path with the nodes tool to add a new node, then select the node and break the path at that point.