How To Round Corners In Adobe Illustrator
How To Round Corners In Adobe Illustrator https://logosbynick.com/wp-content/uploads/2021/02/illustrator-round-corners.png 800 470 Nick Saporito https://secure.gravatar.com/avatar/8e31bf392f0ba8850f29a1a2e833cdd020909bfd44613c7e222072c40e031c34?s=96&d=mm&r=gWhen crafting designs that require granular alterations — such as you would with logos and icons — you’re going to need to know how to make simple edits to the structure of a design, like rounding the corners. To round corners in Adobe Illustrator all we have to do is grab the Direct Selection tool and drag the Live Corner Widgets on the object. This is a rather simple concept that I’ll be demonstrating in this tutorial.
After completing this tutorial, you’ll be equipped with everything you need to know to round all of the corners, individual corners, multiple corners, change the corner type, and set a numerical value for the radius of a rounded corner. I’ll also be addressing what to do if you can’t round corners in Adobe Illustrator because the Live Corner Widgets aren’t populating.
Round Corners In Adobe Illustrator
| To round corners in Adobe Illustrator, select the object, grab the Direct Selection Tool, then look for the Live Corner Widgets; represented by circular handles near the corners of the design. Moving these handles will round the corners of your object. |
In this tutorial we’ll be making good use of the Direct Selection Tool, which is a staple when making such granular alterations to the structural properties of an object. The Direct Selection Tool allows you to change the type and position of the anchor points of an object (sort of like the points you would create when using the Pen Tool.)
Feel free to reference the following video tutorial for a more immersive learning experience. However, watching the video is not necessary. Each step is laid out in the written tutorial below.
Contents
- How to round all of the corners
- How to round a single corner
- How to round multiple corners
- How to set the corner radius
- How to change the corner type
- What to do if you can’t round the corners
How To Round All Of The Corners
To round corners in Adobe Illustrator, the first step is to select your object. For this demonstration I will be using a letter A, but you can use whichever shape you’d like.
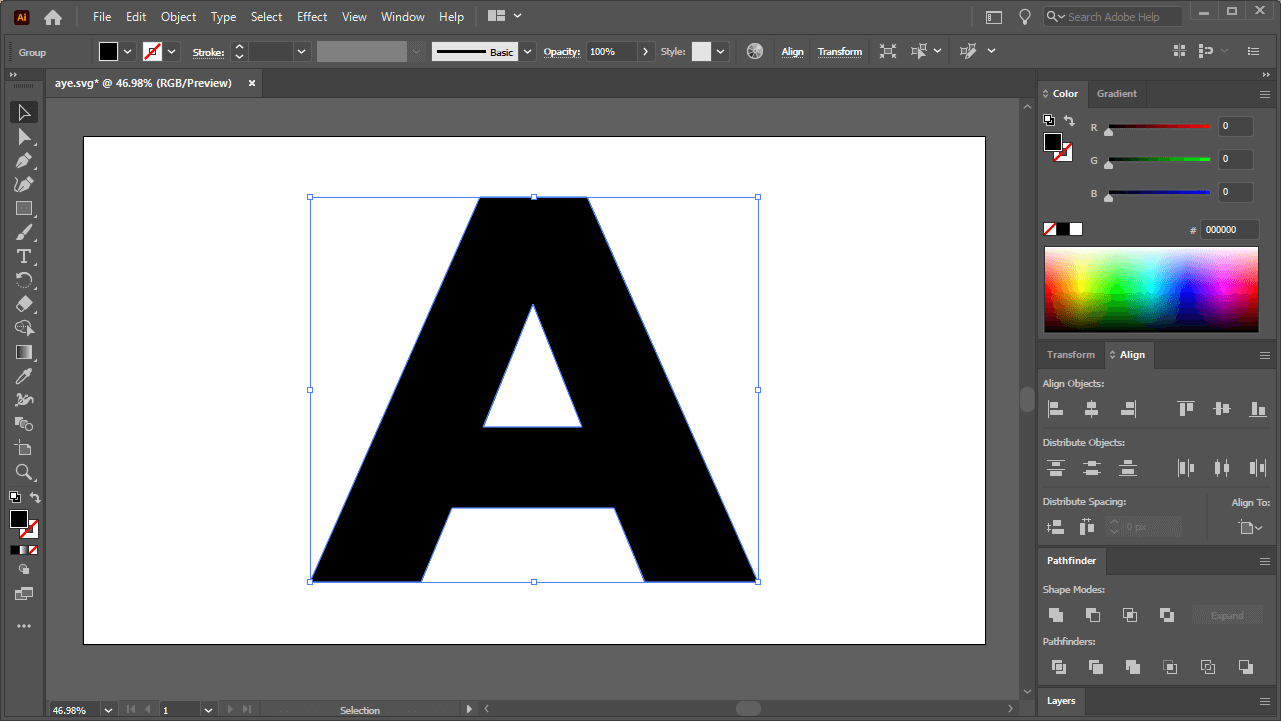
If you’re using a letter like I am in this lesson, make sure to create outlines from it first by selecting it and navigating to Type > Create Outlines.
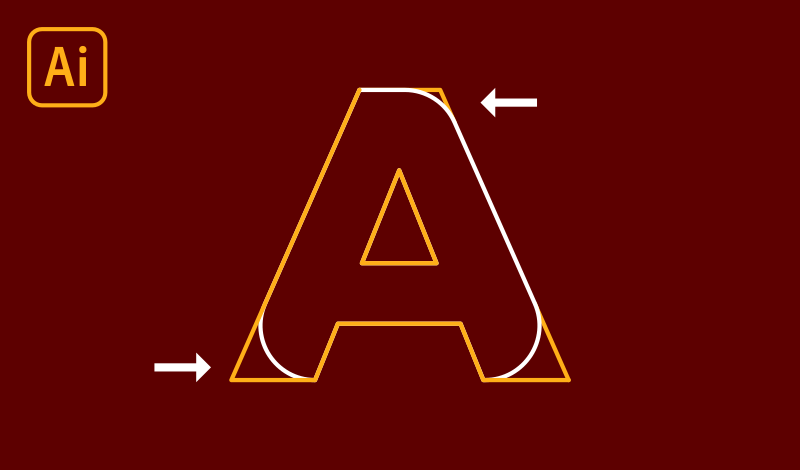
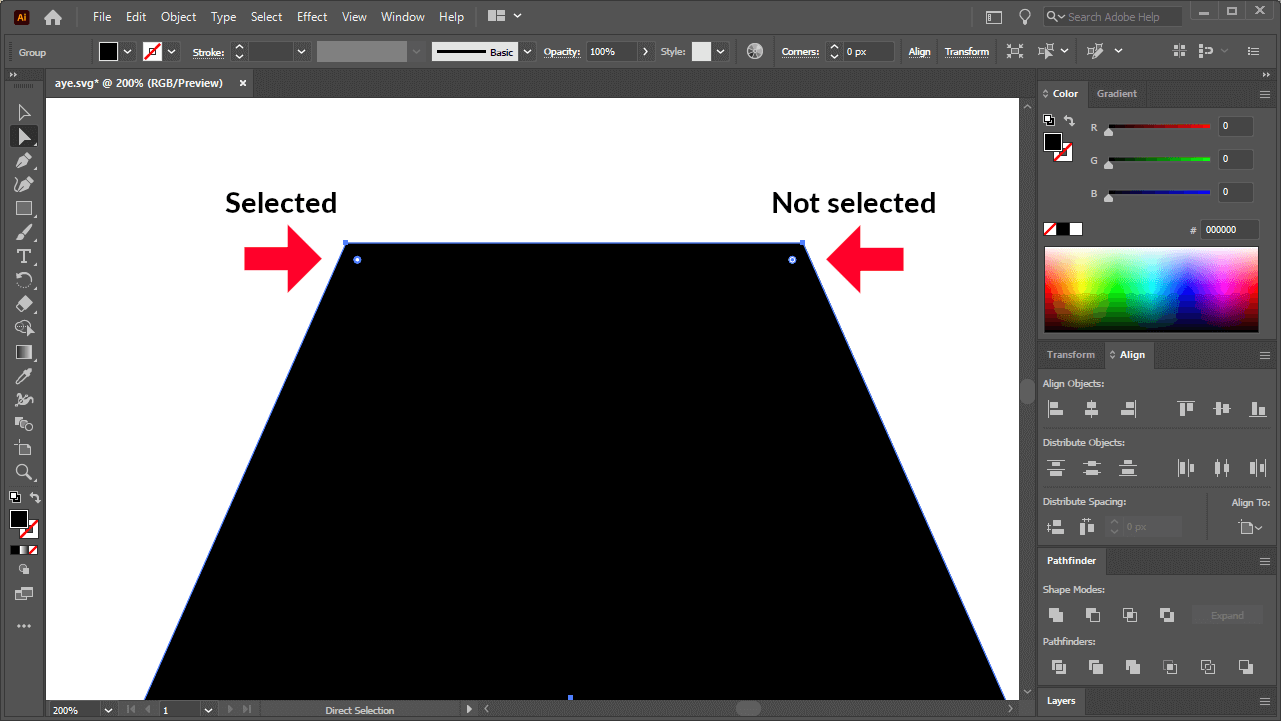
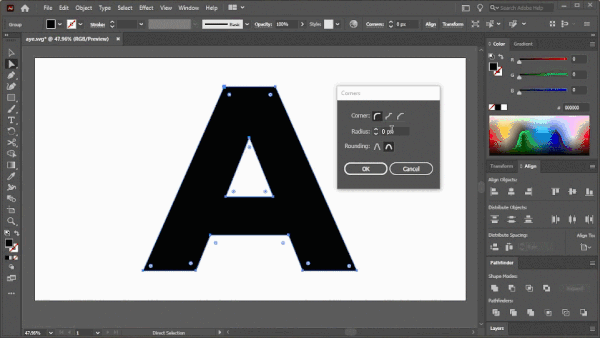
With your object selected, grab the Direct Selection Tool (keyboard shortcut: A) and look for the little circular handles on the inside of your design. They should be near the corners and represented as a little white circle with a little blue dot inside of them:
Live Corners Widgets are located near the inner and outer edges of the corners.
These are called Live Corner Widgets, and they allow you to alter the corners of your object in real time.
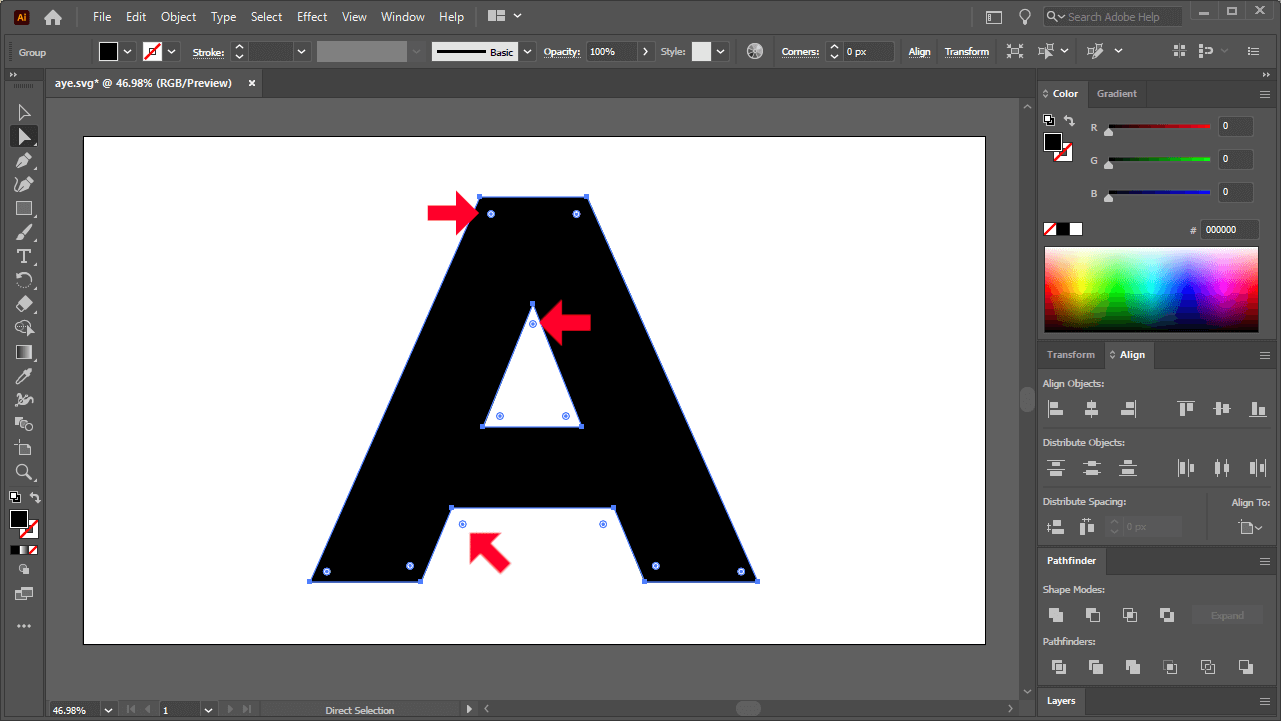
To round the corners, click and drag one of the Live Corner Widgets:
Click and dragging the widgets will round the corners of the selected object.
When done correctly, this should round all of the corners of your object.
How To Round A Single Corner
Let’s say you just want to round a single corner of your object rather than the entire object.
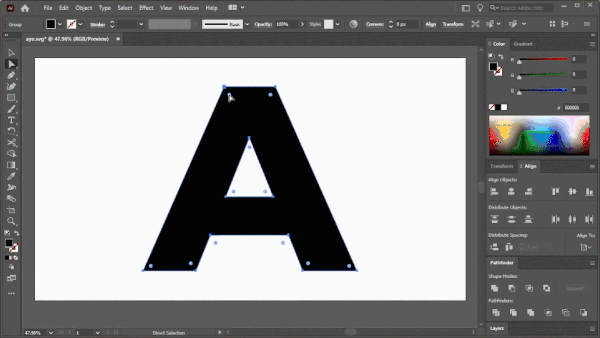
To do this, before clicking and dragging the widget, make sure to click on it once to select just that widget.
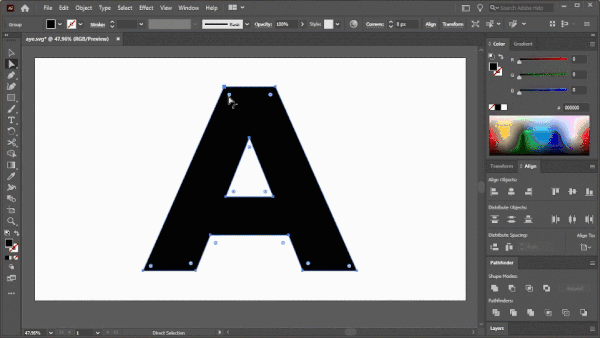
When done correctly, only that widget should be selected. You’ll know that’s the case when the selected widget is now depicted as a small white circle with a blue outline around it, which differs slightly from the other widgets:
The display indicator for a selected widget is only slightly different than the deselected widgets.
Now you can click and drag that widget alone to round that individual corner:
Make sure you only have one widget selected if you want to isolate a single corner to round.
How To Round Multiple Corners
Although you may not want to round all of the corners of an object at once, let’s say you want to round multiple corners.
This can be done the same way you would for rounding a single corner: click the corresponding widget to select it, and then hold Shift on your keyboard and click the other widgets associated with the other corners you’d like to round.
Once selected, simply click and drag on any one of the selected widgets to round multiple corners at once:
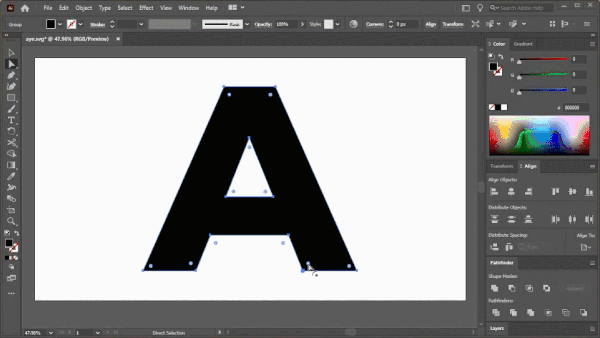
You can Shift-click multiple widgets to round them all at once.
This will ensure that all of the desired corners and rounded uniformly.
To To Set The Corner Radius
Now, let’s say you want to give your object a rounded corner, but you have a need for precision and want to choose a numerical value for that corner. This can be done by changing the corner radius in Adobe Illustrator.
To change the corner radius, first select the widgets associated with the corner(s) you’d like to round (whether it be one, some, or all of the corners) then double-click on one of the Live Corner Widgets to bring up the Corners menu:
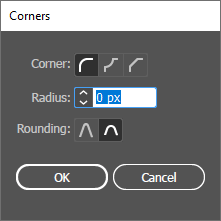
The Corners menu allows you to change various properties of your corners.
The Corners menu allows you to adjust various properties of a corner, including:
- Corner type: make the corner round, inverted round, or a chamfer.
- Radius: a numerical input that allows you to specify a precise value for the radius of your rounded corner
- Rounding: this allows you to specify whether to round a corner in based on a circular shape, or to preserve the angle of the corner.
The corner radius represents the distance between the Live Corner Widget and the edge of the corner. Increasing the radius will make the corner more rounded, whereas decreasing it will reduce the roundedness:
You can change the corner radius using the Corners menu.
You can either manually type in a numerical value for the corner radius, or you can hover your cursor over the input box and roll up and down on your mouse wheel to increase and decrease the radius respectively.
How To Change The Corner Type
Finally, if you want to make your corners take a different shape — like an inverted circle, or a flat edge for example — this can also be done using the Corners menu.
Double-click on one of the Live Corner Widgets to open the Corners menu, then use the user interface to choose the type of corner you’d like to apply.
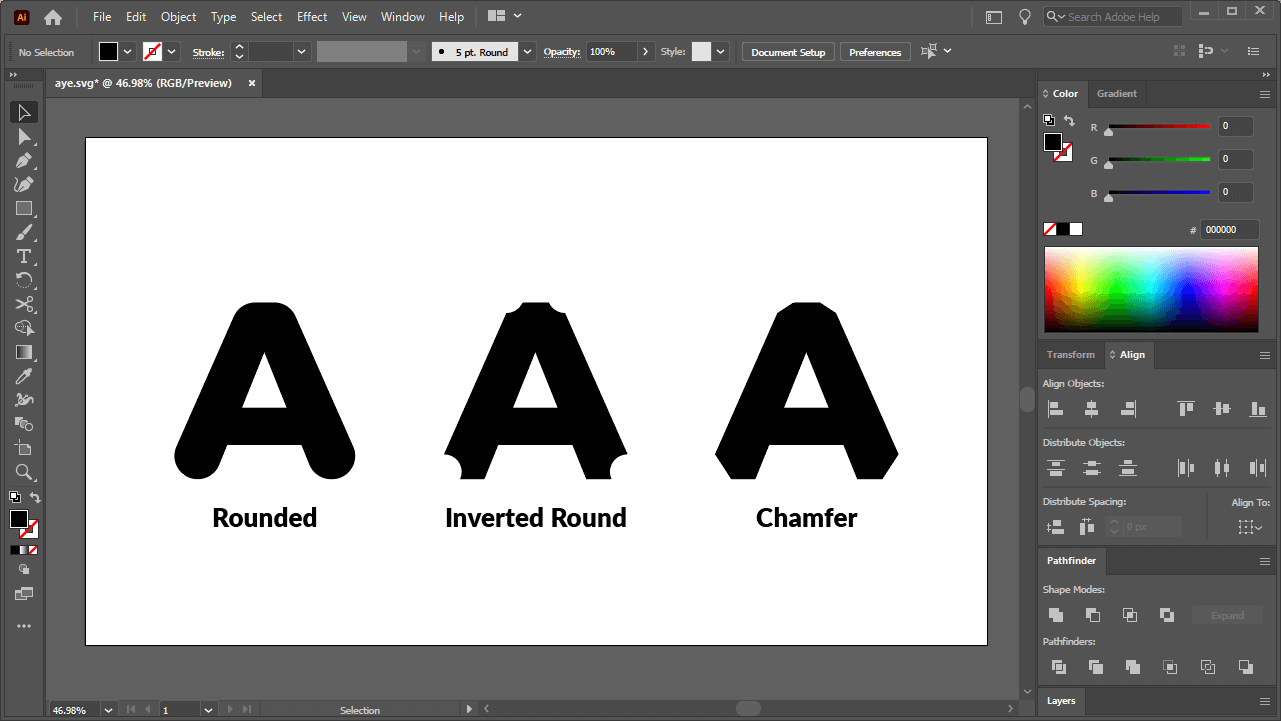
The various different corner types are as depicted above.
Click OK once you’re finished to apply the change.
What To Do If You Can’t Round The Corners
Sometimes you may run into an issue where you can’t round corners in Adobe Illustrator because the Live Corner Widgets are missing.
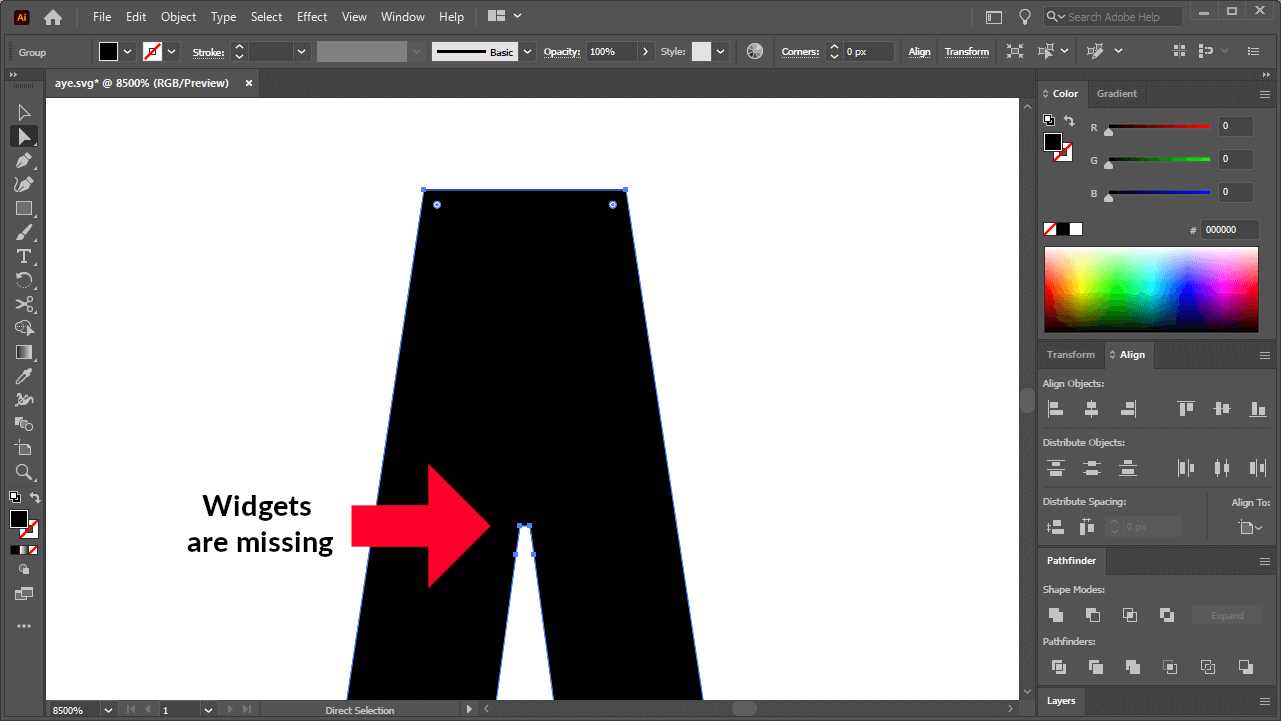
Sometimes your widgets will be missing if your object is too small.
If there are no widgets present near one of your corners, first make sure that the anchor point is indeed a corner by selecting it with the Direct Selection Tool and click the icon in the tool settings menu that reads “convert selected anchor points to corner” when you hover your cursor over it.
If you still cannot round the corners of your object, then it’s probably because the object is tool small. Try enlarging your object as much as you can, and then see if the widgets reappear.
For whatever reason, Illustrator will occasionally fail to display a corner widget if the object is too small. Enlarging it should make them visible again. Just make sure to scale your object back down to its original size once you’re finished (assuming you want to preserve that original size.)
Conclusion
Knowing how to round corners in Adobe Illustrator is an invaluable skill to have in your toolbox because it’ll allow you to make some really granular alterations to your designs. The more you understand about making these fine adjustments, the less restrictions you’ll have on your creativity.
Other applications make this process more cumbersome than it needs to be in my opinion. For example, doing the same with Inkscape requires a live path effect that wasn’t added to the software until a 2020 update. And Affinity Designer has an entire tool dedicated to transforming corner types, whereas Illustrator nestled it conveniently within one of its established tools, making the process more streamlined and efficient.
If you have any questions or if any part of these instructions were unclear, simply leave a comment below. As always, thanks for visiting!
Learn To Master The SoftwareGain a complete understanding of your favorite design apps with my comprehensive collection of video courses. Each course grants access to our private community where you can ask questions and get help when needed.
|
||||||||||||||||||||||||||||||||


Miranda
Hi Nick – really useful and clearly explained tutorial. You got me out of a pickle 😂