How To Rotate Around A Point In Adobe Illustrator
How To Rotate Around A Point In Adobe Illustrator https://logosbynick.com/wp-content/uploads/2023/06/rotate-around-a-point-illustrator.webp 1000 587 Nick Saporito https://secure.gravatar.com/avatar/8e31bf392f0ba8850f29a1a2e833cdd020909bfd44613c7e222072c40e031c34?s=96&d=mm&r=gIn this tutorial we’ll be having a look at how you can rotate an object around a point using Adobe Illustrator. By default, Illustrator rotates objects around their center point. If you want to manually change the rotation point then we’ll have to use a dedicated tool for that.
As you may already know, in Illustrator you can rotate objects by using the Selection Tool. The problem with using this tool though is that it only rotates objects around their center point. Using the Rotate Tool instead allows us to choose the axis of rotation. Let’s have a look.
Rotate Around A Point In Illustrator
The video tutorial below will walk you through the entire process in just 2 minutes:
Continue on for a step-by-step breakdown.
Table of Contents |
Step 1: Select the object that you’d like to rotate using the Selection Tool
To rotate an object around a point in Illustrator we must first select the object using the Selection Tool.
Simply click on your object to select it. You will know it’s selected when you see the blue bounding box around it.
Step 2: Grab the Rotate Tool and move the blue crosshair to the location you’d like to rotate around
With the object selected, grab the Rotate Tool (keyboard shortcut: R) and locate the small blue crosshair in the center of the object:
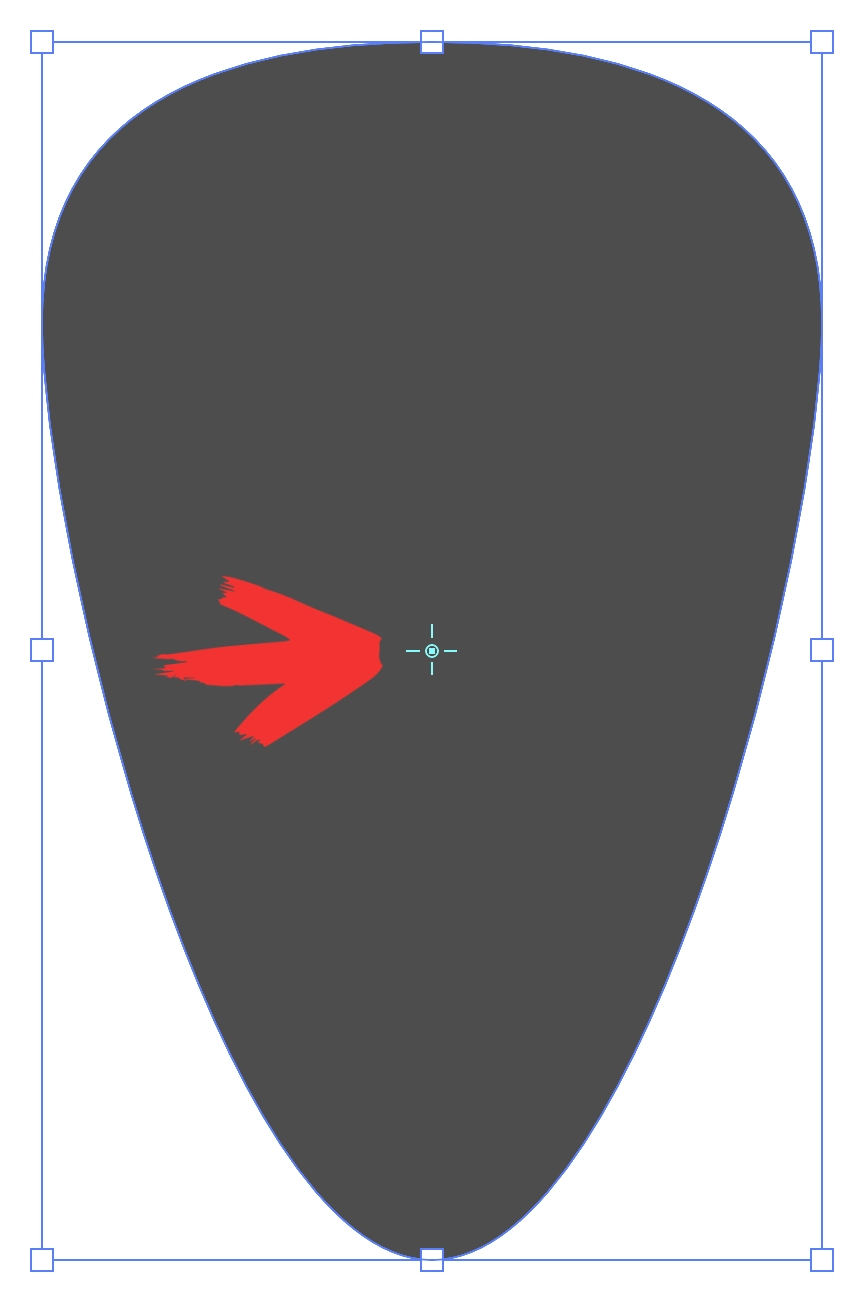
The blue crosshair represents the rotation center of the object. It can be moved by clicking and dragging (click to enlarge.)
This represents the rotation center of the object and serves as the axis that the object will rotate around. Click and drag the crosshair to the location that you’d like to rotate your object around:

Click to enlarge.
Step 3: Click and drag outside of the object to rotate your object
Once placed, all you have to do to rotate your object is simply click and drag somewhere outside of the shape and the object will rotate around the designated rotation point:
The object will rotate around wherever you place the point.
Holding the Shift key while doing so will lock the rotation onto 45 degree steps:
Holding Shift allows you to rotate in 45 degree increments.
Tip: Holding the Alt key in addition will allow you to make copies of the object as you rotate it.
And if you want to rotate your object by inputting a specific numerical value, all you have to do is hold the Alt key (Option if using Mac) while clicking and dragging the rotation center. Once placed, a menu will populate allowing you to input a numerical value of your choosing:

The rotate menu lets you rotate your object by a specific numerical value.
You can also use the blue handle within the menu to rotate the object manually.
How To Reset The Rotation Center In Illustrator
As it turns out, there’s no way to directly reset the rotation point of an object once it’s placed. To reset it you must deselect the object, deselect the Rotate Tool, and once you select everything again it will be placed in its original center point.
In Conclusion
Rotating objects around a point in Illustrator is a simple enough process once you know how to use the Rotate Tool, but compared to other applications which have this feature built into the regular Select Tool, this approach feels a bit cumbersome and dated. Ideally there wouldn’t be a need for a dedicated tool.
Learn To Master The SoftwareGain a complete understanding of your favorite design apps with my comprehensive collection of video courses. Each course grants access to our private community where you can ask questions and get help when needed.
|
||||||||||||||||||||||||||||||||


