How To Resize An Image with Procreate & Why It’s A Hidden Feature
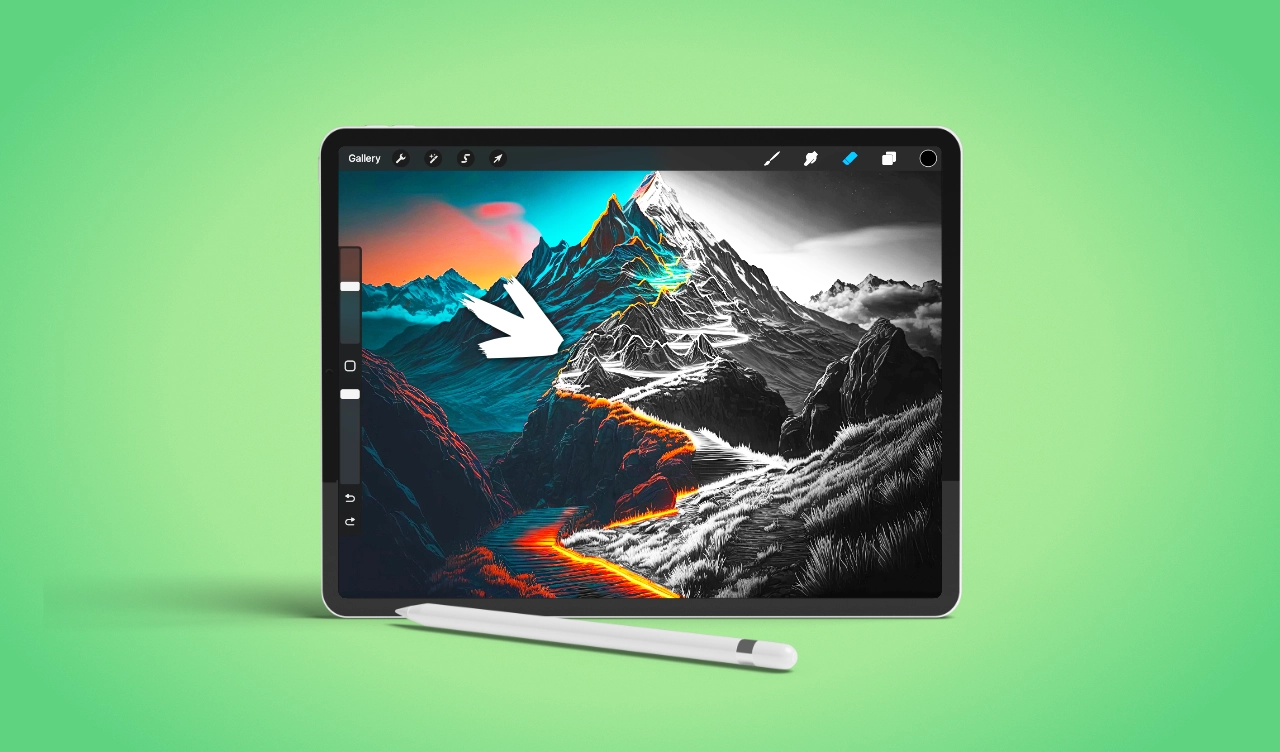
How To Resize An Image with Procreate & Why It’s A Hidden Feature https://logosbynick.com/wp-content/uploads/2021/07/resize-image-in-procreate.png 800 470 Nick Saporito Nick Saporito https://secure.gravatar.com/avatar/8e31bf392f0ba8850f29a1a2e833cdd020909bfd44613c7e222072c40e031c34?s=96&d=mm&r=gThere’s no shortage of ways in which you can make common edits to your images using Procreate. One such way that you can alter an image is by resizing it. However, being able to resize an image with Procreate may be confusing at first. This is because it’s lumped in with another feature and given a different name. In this tutorial I’ll be offering some clarity and guiding you through the process.
In short, the way that you can resize an image with Procreate is by opening the Actions menu, then navigating to Canvas and selecting Crop and Resize. From here you will have to open the settings and enable the Resample canvas option, which will allow you to resize your image.
This can (understandably) be confusing — especially if you’re coming from a background of using other design applications. In Procreate, the ability to resize an image is, for whatever reason, lumped in with the cropping feature. Not only that, but it’s given a name that can be unfamiliar to the average casual user. Let’s examine this further.
Resize An Image with Procreate
To resize an image with Procreate, tap the wrench icon to open the “Actions” menu. Then, tap on “Canvas” and select “Crop and resize”. From there, open the “Settings” menu, enable the “Resample canvas” option, and enter a numerical value for the width and/or height of your image.
The following video tutorial will walk you through the entire process in less than 2 minutes:
Continue on for the written instructions.
Table of Contents |
Step 1: Open your image in a new document
In order to resize an image with Procreate we’ll first need an image to resize, so go ahead and open your image in a new document.
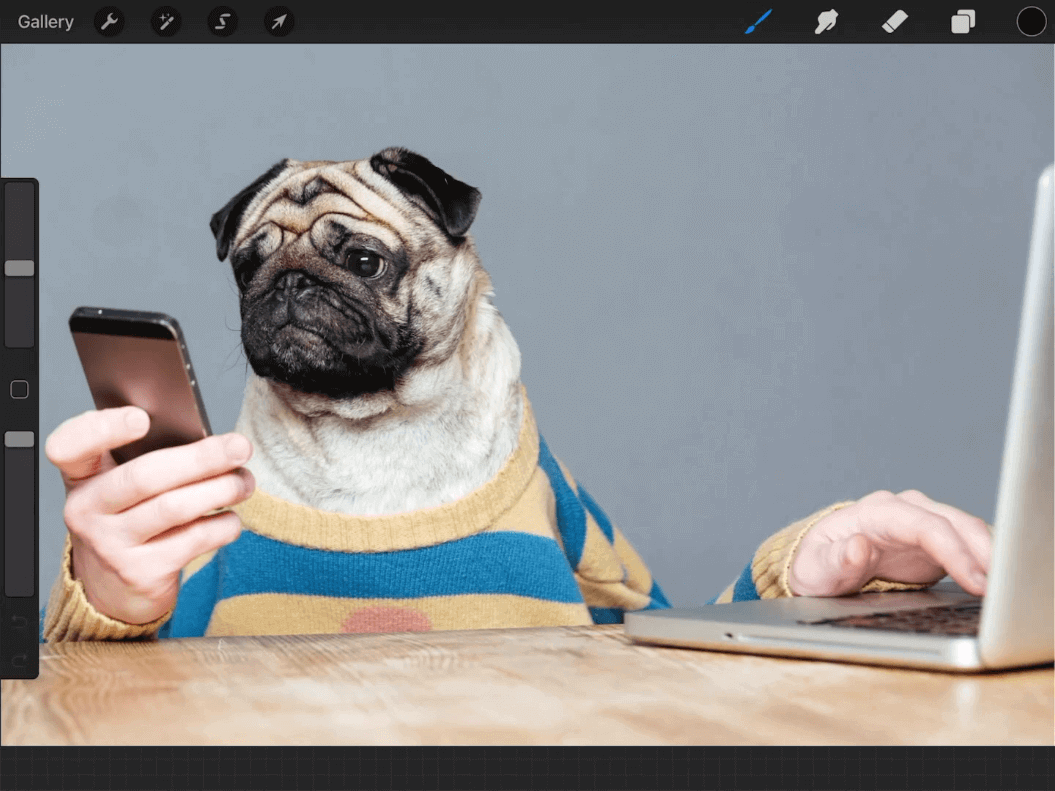
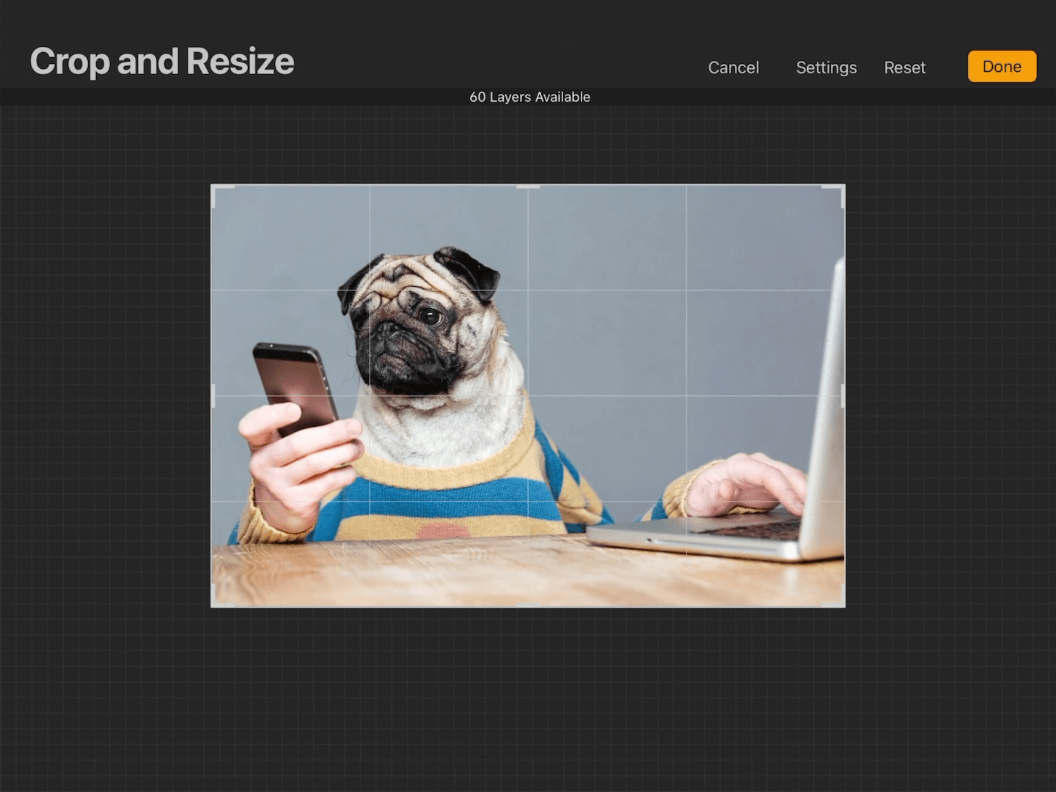
For this demonstration I will be resizing the following example image:
It is recommended that you do this in a dedicated document. Due to the nature of how image scaling works in Procreate, if you try resizing an image with other elements present, those elements will be resized as well.
Step 2: Navigate to the “Crop and Resize” menu
Next, we’ll need to open the Crop and Resize menu.
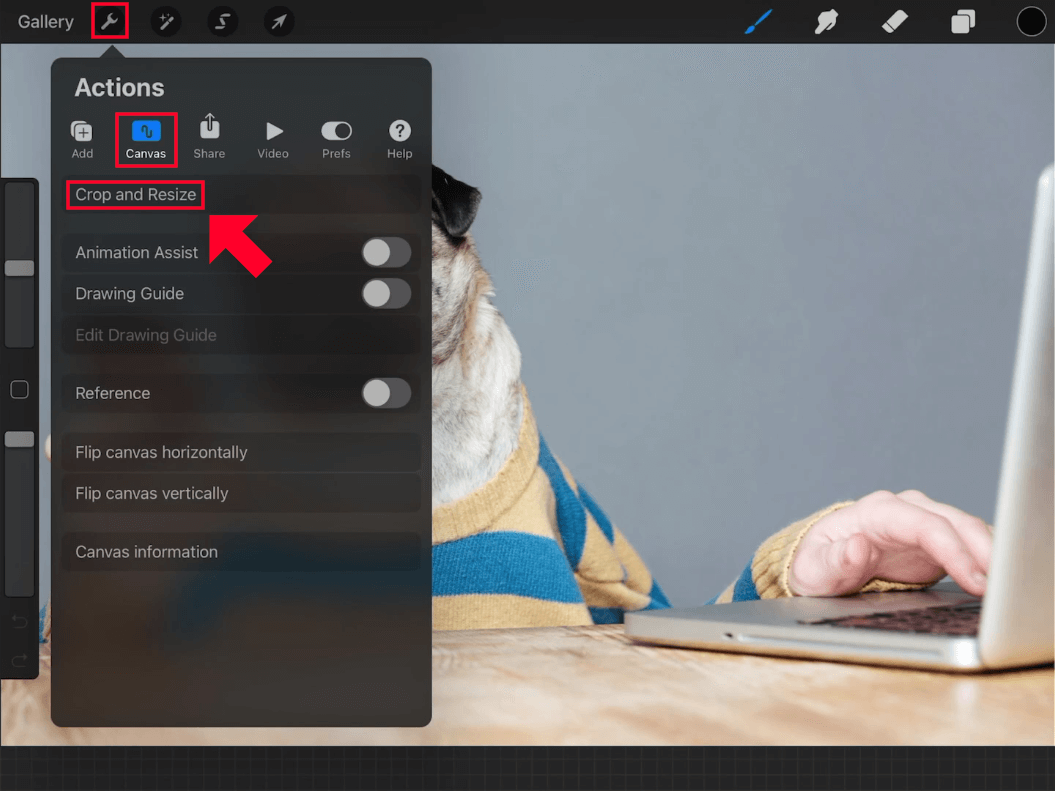
To locate it, tap on the wrench icon in the top-left corner of your screen to open up the Actions menu. Then, tap on Canvas (just below the “Actions” label) and select Crop and Resize, which should be the first item in the list:
This will open up the Crop and Resize menu:
The Crop and Resize menu allows you to crop your image first and foremost, by changing the size of the canvas. However, it also allows you to resize your image by changing the size of the canvas as well as the contents of your canvas.
Step 3: Open the “Settings” menu and enable “Resample canvas”
This is where things get a little tricky, as “resize” isn’t labeled as such in this tool.
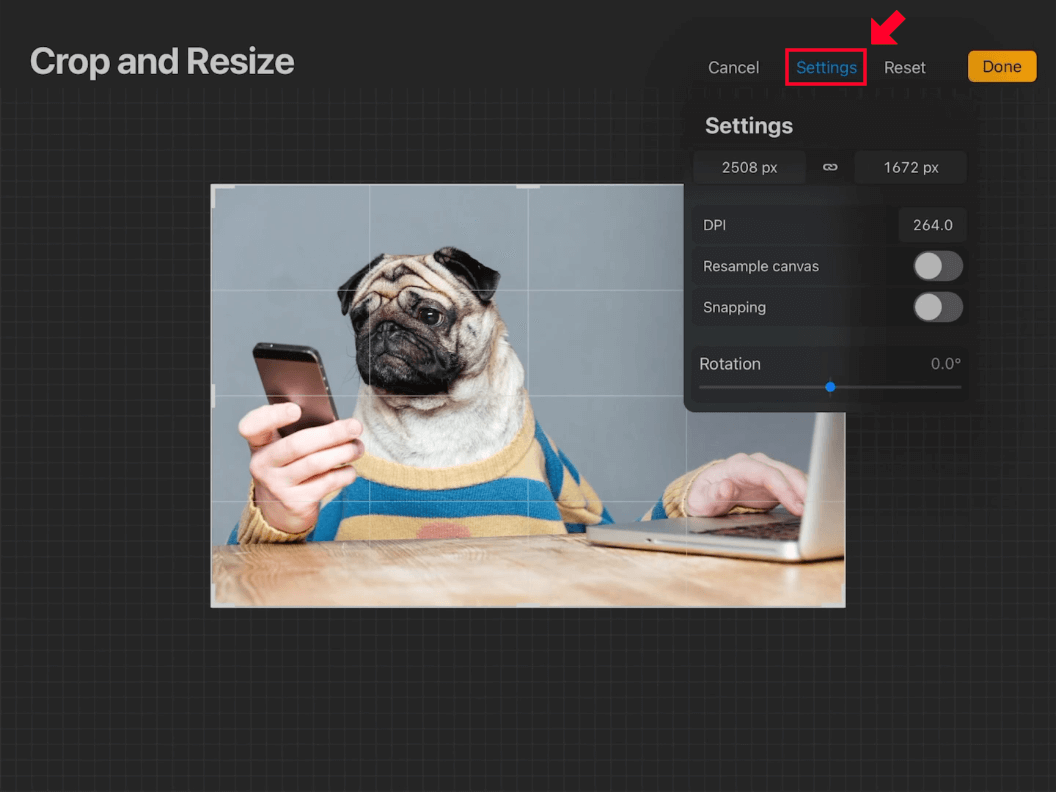
Open the Settings menu by tapping on the label located at the top-right corner of the Crop and Resize menu:
The Settings menu contains the following controls:
- Width & height: Represented by the two numerical values at the top of the list; left and right respectively
- DPI: Stands for “dots per inch”. This is mostly important when it comes to printing documents and can be disregarded for this lesson.
- Resample canvas: This is what allows you to resize an image with Procreate. This must be enabled in order to resize your image along with the canvas.
- Snapping: Will make it so the edges of your canvas will snap to the contents of your document when cropping an image.
- Rotation: Allows you to rotate your image.
Make sure to enable the Resample canvas setting. This will allow you to resize your image.
Once enabled, you should notice that the width and height fields turn blue and the lock icon between them is enabled, meaning the aspect ratio of your image will be preserved.
If you want to distort your image when resizing it, unfortunately you will not be able to do so using this feature. For this sort of thing you’ll have to use the Selection tool to distort your image, and then change the canvas size to accommodate it afterwards.
Step 4: Enter a numerical value to resize your image by
This is where the magic happens!
To resize your image, simply tap on the width or height numerical values in order to change them. You will be prompted to choose a numerical value to resize your image by:
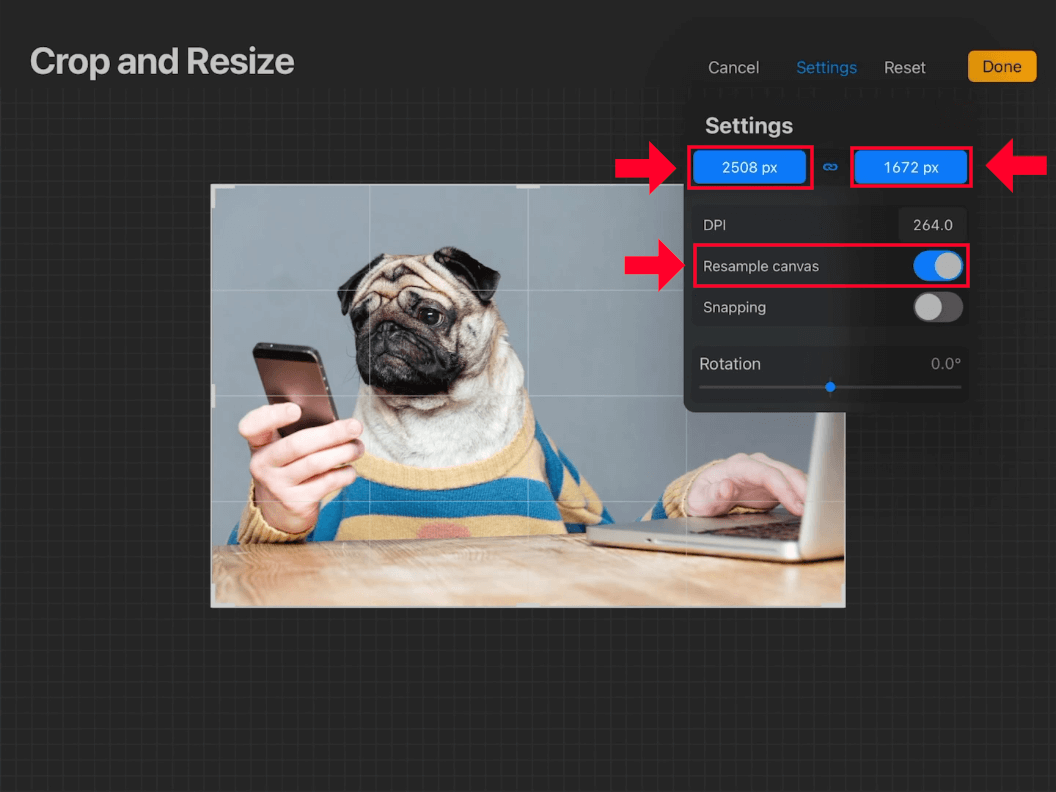
To resize your image, enable Resample canvas and change the width and height values, indicated in red above.
By default, the unit of measurement will be pixels. If you’d like to resize your image using a different unit of measurement, you can do so using the options in the menu that populates when inputting the new width/height values.
Units of measurement to choose from include:
- Millimeters
- Centimeters
- Inches
- Pixels
Once you have entered a numerical value, tap the Done button to apply your changes.
Both the width and the height will change in accordance with each other in order to preserve the aspect ratio, and your image will be resized.
Step 5: Export your resized image
If you’re trying to resize an image with Procreate then chances are it’s because you’d like to use that image elsewhere. As of right now the resized image only exists on your Procreate canvas, so let’s save it to a usable format.
To save your resized image, you’ll need to export it. To do so, navigate back to the Actions menu, select Share, and under the “Share Image” section look for a file format to export your work in.
Considering that you are working with an image here, you’ll most likely want to go with JPEG if it’s a photo, and PNG if the photo contains any areas of transparency you’d like to preserve.
Once you’ve chosen your format you are finished! Your resized image is now ready for use.
Conclusion
Knowing how to resize an image with Procreate can seem confusing at first, but it’s not nearly as complicated as it may appear. The biggest challenge is locating the feature, as it is labeled with “resample” rather than “resize”. It would be helpful if this feature were labeled a little more clearly, as is the case with the mobile version of Affinity Photo, but hopefully this tutorial has guided you in the right direction.
If you have any questions or need clarification for any of the steps in this lesson, simply leave a comment below.
Disclaimer: this website does not track you, serve ads, or contain affiliate links.
Learn To Master The SoftwareGain a complete understanding of your favorite design apps with my comprehensive collection of video courses. Each course grants access to our private community where you can ask questions and get help when needed.
|
||||||||||||||||||||||||||||||||
Nick Saporito
Hi, I'm Nick— a Philadelphia-based graphic designer with over 10 years of experience. Each year millions of users learn how to use design software to express their creativity using my tutorials here and on YouTube.
All stories by: Nick SaporitoYou might also like
12 comments
-
-
Nick Saporito
Hi Margriet, it’s easier is that’s a more familiar workflow for you.
-
-
-
Andy
Really helpful, useful and concise, just what I needed! Many thanks for taking the time to produce these great resources.
-
jayne
This article gave me a start and I tried to resize 3 diff times – initially it was cutting of an inch or so of the RH side of image – finally I figured out that if I also reduced the DPI proportionate to the size reduction, it would reduce the entire image. Also, in this instance it provided me more layers which is what I needed to accomplish.
-
Matt
But how to resize the image freely, ie; without the aspect lock, but still use resample?
-
Logos By Nick
You just have to disable the aspect ratio lock icon.
-
-
Drax
This was sooooo helpful that I’m going to go check out your Illustrator Explainer Series right now!
-
-
antonyia
II just started using the procreate app that I download it and I am on crab and spice and I’m doing everything the tutorial says and the numbers come up on the side but there is no inches centimeters or pixel decided to choose from… What can I do to create exhaust into inches I am following every direction I have read and it’s not working? Thank you ever so much
-
Logos By Nick
Try typing in “in” for inches or “cm” for centimeters after inputting the numerical values.
-
-




Margriet Pronk
Hi Nick,
I copy the canvas. Make a new document with the desired measurements, dpi and color profile and paste the image.
Isn’t that much easier, or do I miss anything?