
How To Easily Remove A White Background with Inkscape
How To Easily Remove A White Background with Inkscape https://logosbynick.com/wp-content/uploads/2021/04/remove-white-background-inkscape-1.png 800 470 Nick Saporito https://secure.gravatar.com/avatar/8e31bf392f0ba8850f29a1a2e833cdd020909bfd44613c7e222072c40e031c34?s=96&d=mm&r=gAs we’ve gone over in previous tutorials, there’s various different ways to remove the background of an image with Inkscape. However, these methods often require tedious manual tracing. If you want to remove a white background with Inkscape though, there’s a handy little trick you can deploy to extract your subject from its white background in mere seconds!
In this tutorial I’ll be demonstrating how you can easily remove a white background with Inkscape, without any manual tracing whatsoever. To accomplish this we will be using the Trace Bitmap feature to create a quick auto tracing of your subject, and then using that tracing as a clipping path for your image.
The best part? This method is complete non-destructive, meaning you can easily add your background back to the image if you’d like.
Remove A White Background with Inkscape
| To remove a white background with Inkscape, create a vector tracing of your image using the Trace Bitmap feature. Then, use the tracing to create a clipping path with your image. |
Before proceeding, it should be noted that this lesson will teach you how to remove a white background from a rasterized image. This includes images in PNG or JPG format. If you’re working with a vector file (svg, eps, pdf and ai formats,) then this method will not work.
The following video tutorial will walk you through the process of deleting a white background to transparent with Inkscape:
Continue reading for the written instructions.
Step 1: Open Your Image with Inkscape
To remove a white background with Inkscape we first need an image to work with. For this demonstration I will be using the following logo design as an example:
In this demonstration I will be deleting the white background to transparent.
This esports logo is in PNG format and was created with Inkscape for a tutorial I made last year. You can learn how to recreate it yourself here.
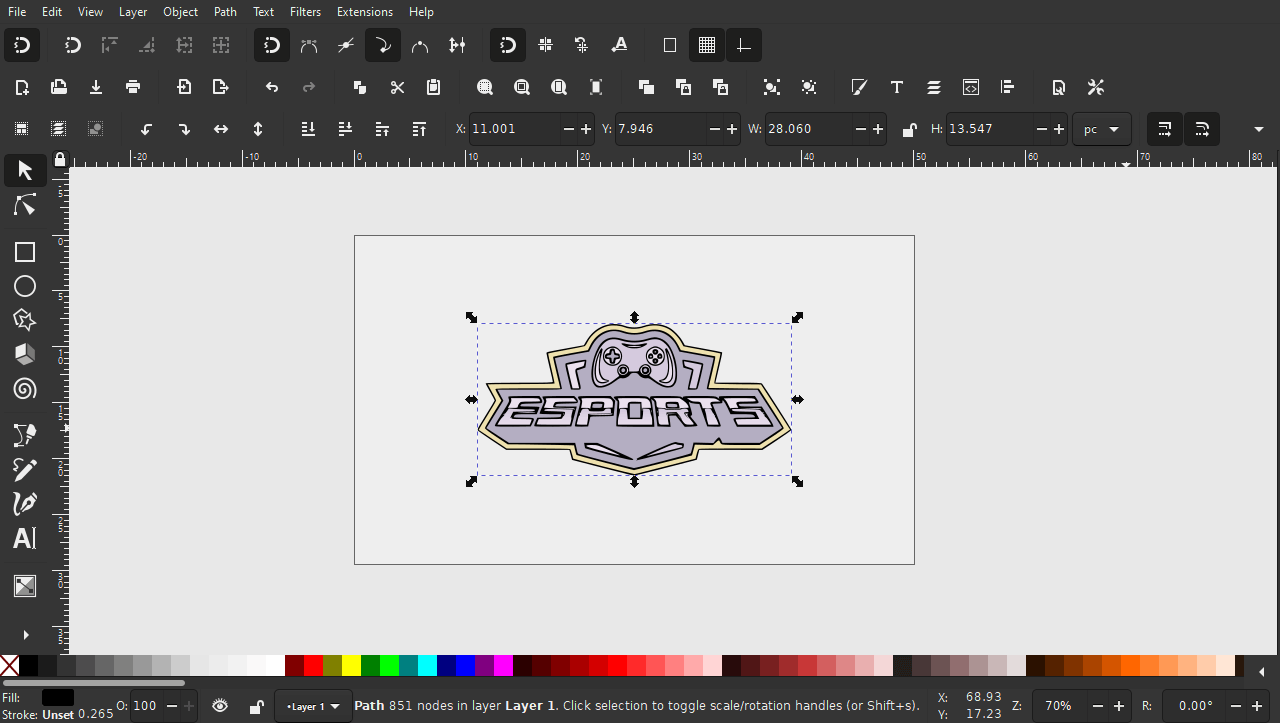
Once opened with Inkscape, it should look something like this:
Click to enlarge.
As you can see, I darkened the canvas a bit in order to distinguish it from the white background of the image. This step is unnecessary and purely for demonstrative purposes, but you can do the same if you’d like (instructions here.)
Step 2: Create A Tracing Of Your Image
Now that we have our image opened, it’s time to create a vector tracing over the subject of the image so that we can extract it from the white background.
Under normal circumstances, this is done manually using the Bezier Pen. However, since we’re working with an image that has a white background, we don’t need to go through all that trouble. The stark contract between the subject and the background means that we can use the Trace Bitmap feature to create a quick auto tracing.
To do so, select your image and open the Trace Bitmap menu by navigating to Path > Trace Bitmap or by pressing Shift + Alt + B on your keyboard:

Trace Bitmap opens as a floating menu.
Make sure you have Single Scan enabled (it should be enabled by default,) and choose Edge Detection from the dropdown menu right beneath it. Then, click Update to generate a preview of your tracing:
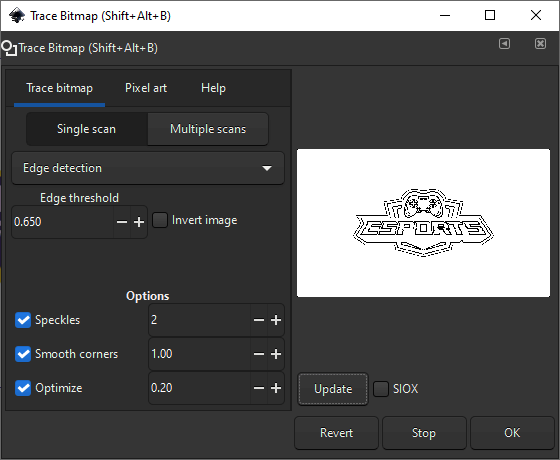
The Edge Detection setting will automatically determine where the edges of your subject are using its own algorithm. Normally this setting gives mixed results, but since we’re removing a white background, there should be enough contrast for the algorithm to make an accurate tracing. If your tracing isn’t accurate then it would be a good idea to try some different settings. Every image will be different after all.
Click OK to generate your vector tracing:
The tracing will be placed over the image as a new object.
In my example above I have turned down the opacity of the image so that you can see the tracing better. This is purely for demonstrative purposes and not at all a necessary step.
Now that we have our tracing, we need to fill the tracing in so that it is completely solid. There are several ways to do this, but the easiest way would be to simply navigate to Path > Break Apart. This will break your tracing down into a series of individual filled objects:
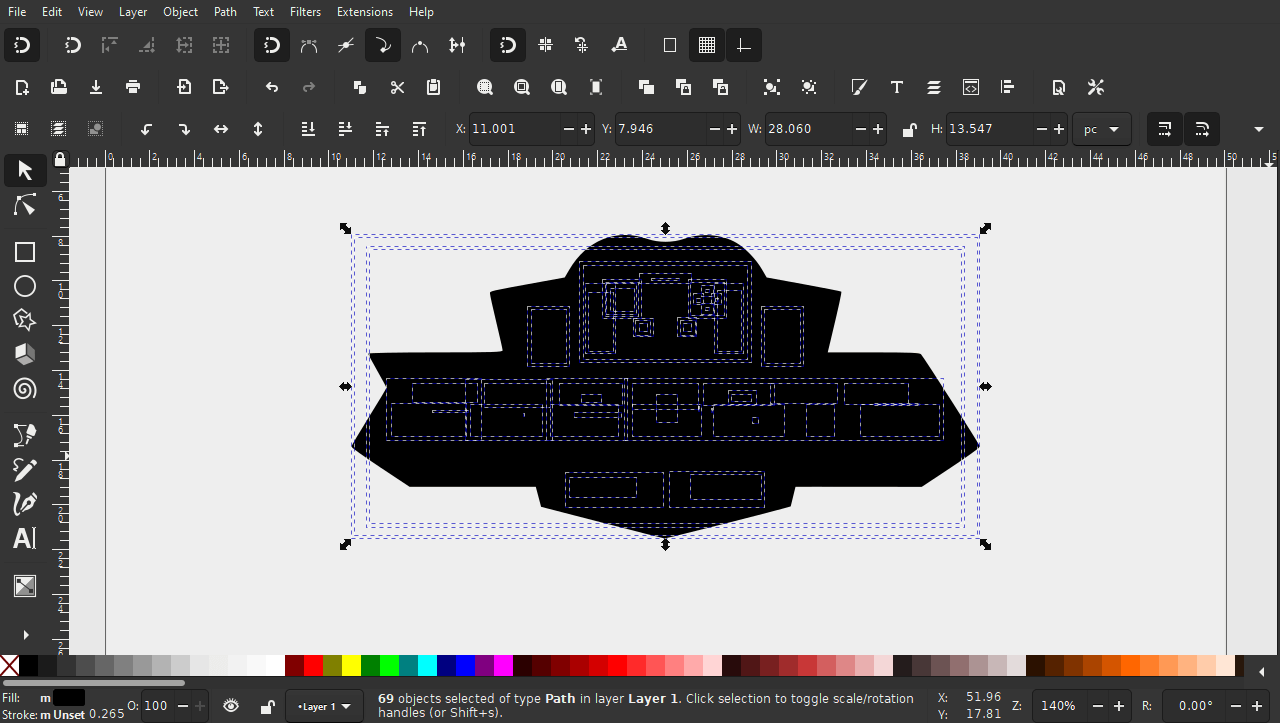
Breaking your tracing apart with separate it into a series of filled-in objects.
Now we just need to group everything together into a single object, which can be done by navigating to Object > Group.
You should now have a single silhouette-like object that accurately traces over the subject of your image:

Step 3: Delete The White Background By Creating A Clipping Path
In order to remove a white background with Inkscape, we’ll need to take our tracing and use it to create a clipping path with our image.
In short, a clipping path is when you make an image take the shape of another object. It’s kind of like using a cookie cutter. The cookie cutter is used to cut out a portion of the dough, so that you can make a cookie in the shape of the cutter. In this example, the cookie cutter is the vector tracing, and the image would be the dough.
To create our clipping path, we’ll simply select both the tracing and the image as the same time, then navigate to Object > Clip > Set. This will effectively remove the white background from your image:

As you can see, I made the canvas a darker color so you can better see how the image looks with the white background removed.
How To Revert Back To A White Background
One of the benefits of working with clipping paths is that they are non-destructive, meaning you can easily undo them at any time.
To revert your image back to having a white background, simply select it and navigate to Object > Clip > Release. This will release the vector tracing from its clipping path, which will essentially take you back in time to where you were in step 2.
Precautions
Using this method to delete a white background to transparent with Inkscape won’t always yield perfect results. Here’s a few tips you should keep in mind:
- The crop likely won’t be perfect. If you zoom in on the subject after removing the background, you may notice a faint white border going around your subject. This can be remedied by releasing the clipping path and adjusting the size of the tracing’s edges using Dynamic Offset (keyboard shortcut: Control + J) to bring them in a bit.
- When you break apart your initial tracing, there is a possibility that it doesn’t fill in the way it did with my example. If this is the case for you, then you’ll have to fill in the tracing manually. This can be done with the Bucket Fill Tool or the Bezier Pen.
- Finally, it should be noted that although Inkscape allows you to work with raster imagery in some capacity, it is not the ideal tool for deleting backgrounds from images. If possible, it is highly advised that you use a raster editor like GIMP to delete backgrounds from your images. Seeing as how GIMP is designed to work with photos, it’s equipped with more of the tools and features needed to delete backgrounds with ease.
Conclusion
Despite the fact that Inkscape is meant for working with vector graphics, it still has some handy features built-in that allow you to easily remove a white background from an image. Inkscape may not be the ideal tool for this sort of task, but that doesn’t mean it isn’t capable if you’re in a bind and need to quickly remove a background from your image.
If you have any questions, or if any part of these instructions were unclear, simply leave a comment below.
Learn To Master The SoftwareGain a complete understanding of your favorite design apps with my comprehensive collection of video courses. Each course grants access to our private community where you can ask questions and get help when needed.
|
||||||||||||||||||||||||||||||||


Thanks for sharing this wonderful tutorial. I would like to ask how to remove the white background from this image.
That image is simple enough that I would actually trace over it with vectors (basic shapes and the Pen Tool). The method taught in this tutorial (trace bitmap) works well for this too though.
I’ve done all the steps you’ve provided. I’m having trouble getting this complete. Seems like its not removing the background at all.
Hi Tasha, are you sure it’s not just appearing that way because of the white canvas? Did you try changing the canvas color to see if it shows through the cropped area?
First, great teacher! I was able to get the white away from the logo we made, but I have a name in cursive that I don’t know how to get the white background away from the interior of the ‘e’ and ‘o’
Hi Nadine, for that you’d have to remove that space from the clipping object before setting it. I would personally use the pen tool to manually trace a shape over the negative space areas of those letters, then select them both and do a Path > Difference
Many thanks for this great tutorial!
I wonder how to do the same transformation for a round SVG logo…
Thanks in advance for any advice.
If it’s an SVG file then you shouldn’t have to use this technique. You can probably just select the white background and delete it (although you may have to ungroup the image first if it’s grouped.)