The Easiest Way To Outline Text In Photoshop CC 2021
The Easiest Way To Outline Text In Photoshop CC 2021 https://logosbynick.com/wp-content/uploads/2021/09/outline-text-in-photoshop.png 800 470 Nick Saporito https://secure.gravatar.com/avatar/8e31bf392f0ba8850f29a1a2e833cdd020909bfd44613c7e222072c40e031c34?s=96&d=mm&r=gOne of the most common uses for Photoshop is working with text, whether it be to create posters, edit images, or even just create unique typography designs. One way you may want to stylize your text is by adding an outline around it, which we’ll be going over in today’s tutorial. The quickest way to outline text in Photoshop is to apply a stroke to it using the Blending Options menu, which we’ll be going over in full detail shortly.
Outlining text in Photoshop requires a fundamentally different approach than what you’d normally do in a vector-based application, such as Illustrator or Affinity Designer. To do this in Photoshop we will have to apply a stroke around the text, which is a pretty common approach regardless of the software, but the way this works in Photoshop is through adjustment layers and layer effects. Let’s elaborate.
How To Outline Text In Photoshop
The following video tutorial will walk you through the entire process, step-by-step, and in less than 4 minutes:
Continue on for the written instructions.
Table of ContentsOutline Text
Working With Strokes |
Outlining Text
In this first section of the lesson we’ll be going over how to apply an outline around your text and adjust its properties, such as size, style and color.
Step 1: Generate some text on your canvas
To get us started we will first need to apply some text to the canvas. If you already have some text in place than you can skip to step #2.
Grab the Text Tool and click on the canvas to apply some text:
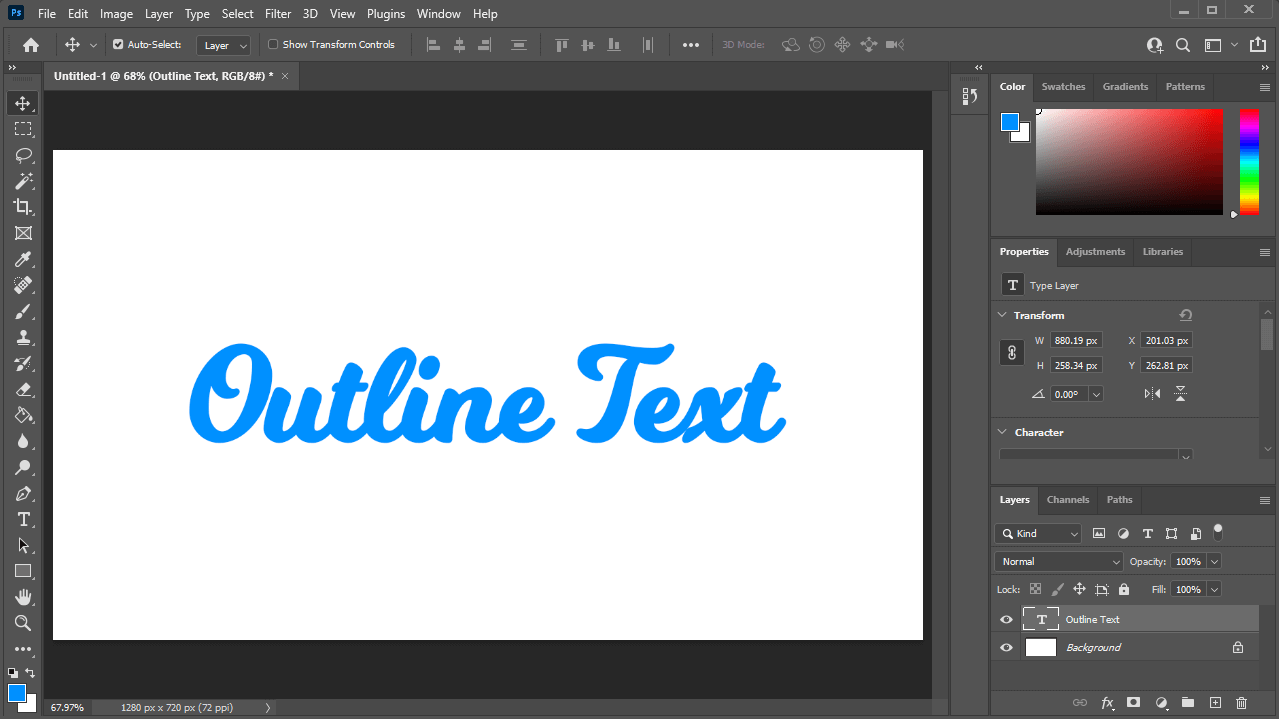
Click to enlarge
You can change the font, style, size and color of your text using the tool options menu towards the top of your screen. Please refer to the video tutorial above if you need more help with this.
Step 2: Apply a stroke to the text using the Blending Options menu
Once you have your text in place, all you have to do to apply an outline around it is add a stroke layer effect.
If you look towards the bottom-right of your screen you should see the Layers menu. Within the layers menu you should see a dedicated layer for your text:
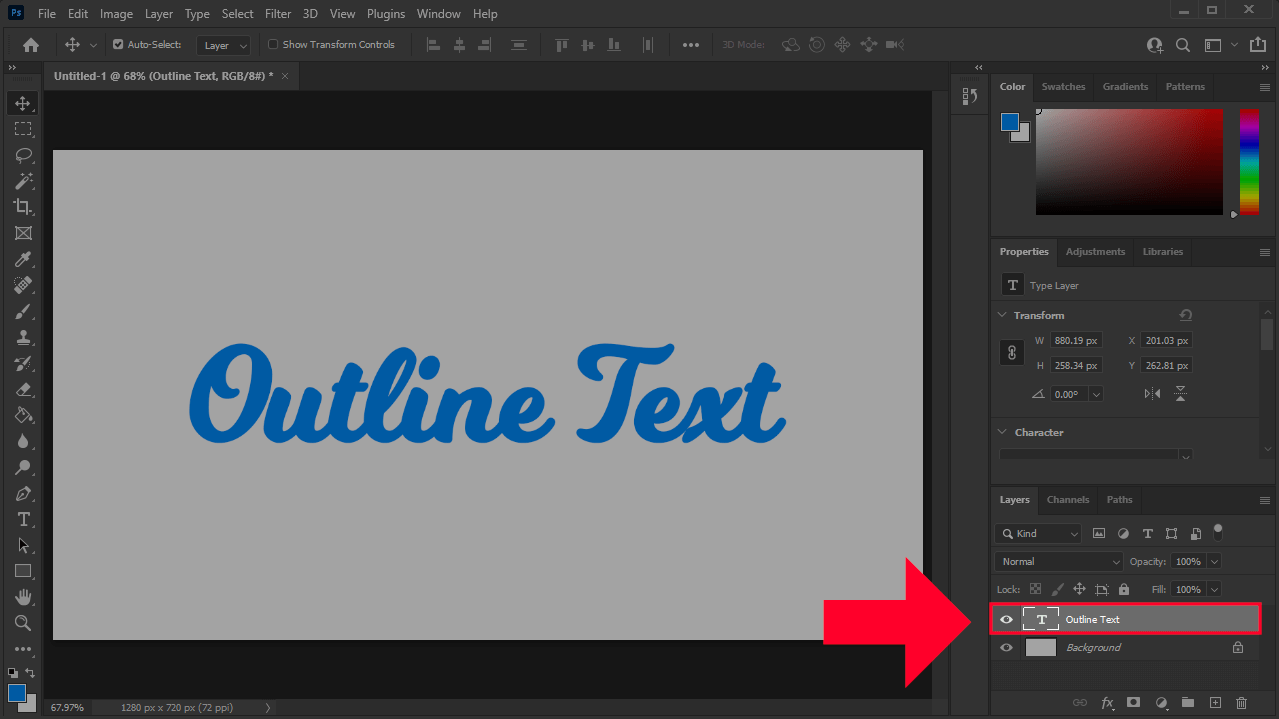
The text item will have its own layer in the Layers menu, outlined in red above.
Right-click on the menu and select Blending Options. This will open up the following menu:
Selecting the Stroke option on the left will allow you to apply an outline to your text.
All you need to do to outline text in Photoshop is select the Stroke option from the list in the Blending Options menu, located on the left-hand side:
How your text looks once the stroke is applied.
“Stroke” is another term for outline. Once applied, you should see a default outline around your text that we will be editing further in the next step.
Step 3: Edit the properties of your outline
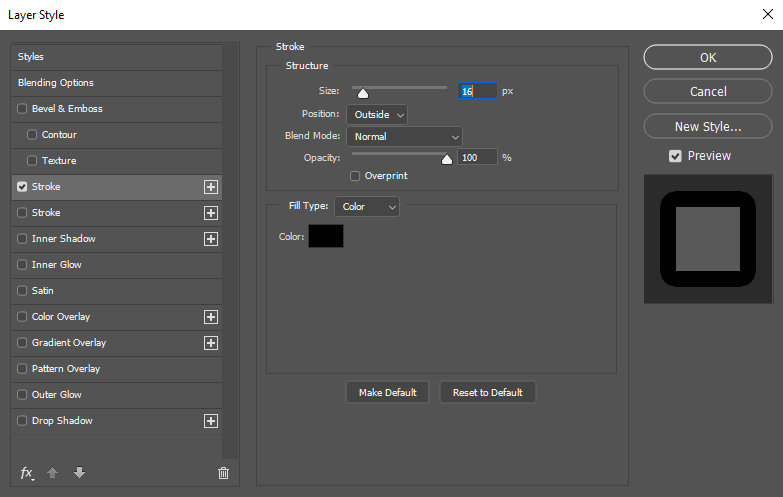
Once you’ve selected the Stroke option, you should be prompted with settings that you can alter:
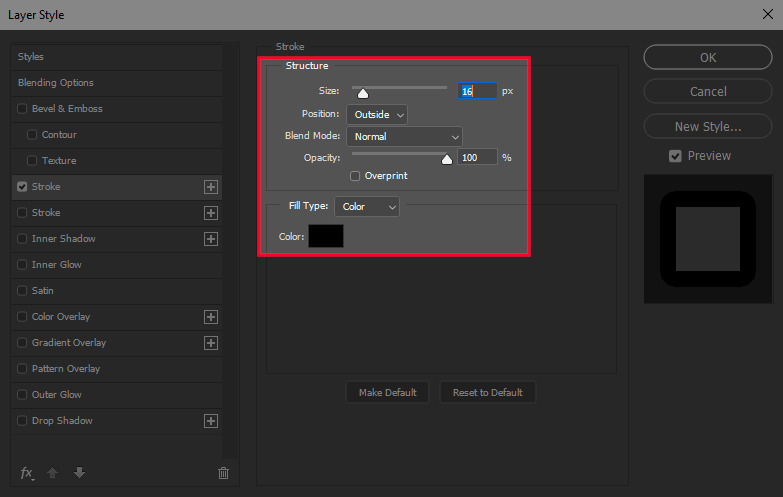
The stroke properties are outlined above in red.
This menu will allow you to dictate the properties of the outline around your text. They are as follows:
- Size: This slider allows you to change the size of the outline around your text in increments of pixels (px). Sliding it to the right will increase its size, whereas sliding it to the left will decrease it.
- Blend Mode: This setting allows you to change the blend mode of your stroke/outline. Since the goal is to simply outline text in Photoshop, we will be leaving this on the normal setting.
- Opacity: If you’d like, you can make your outline partially transparent using this setting. Keeping it at 100% will leave it fully opaque.
- Fill Type: By default, your stroke/outline will be filled with a solid color. However, if you’d like to fill it with a gradient or pattern you can do so using this setting.
- Color: Clicking on the color stripe will open the color picker menu, where you’ll be able to choose the color of the outline around your text.
Within the Stroke menu you will also see a setting labeled as Position. There are three options to choose from:
- Outside: This will apply the outline around the outside edges of your text without filling any of the inside.
- Inside: This will apply the outline only around the inside edges of your text, without any of it spilling out.
- Center: This option combines the previous two options. When chosen, half of the outline will be applied to the outer edge of your text and the other half will be applied to the inside edge.
Refer to the diagram below for an illustration of the three Position options:
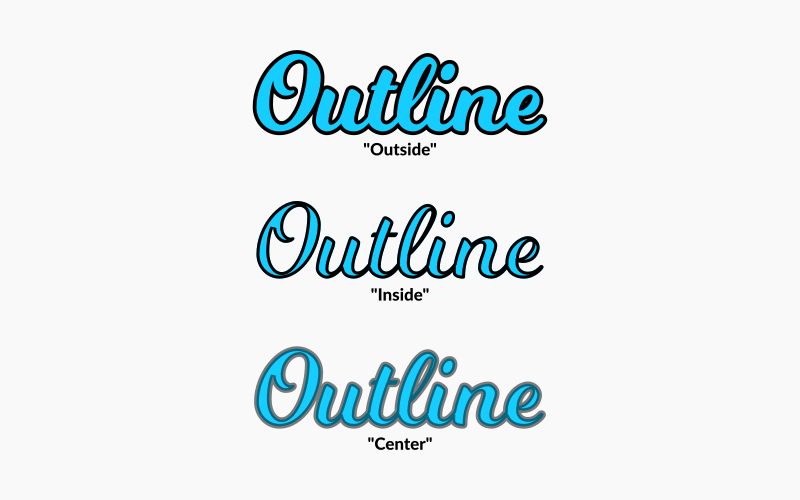
The various different stroke positions that you can choose from.
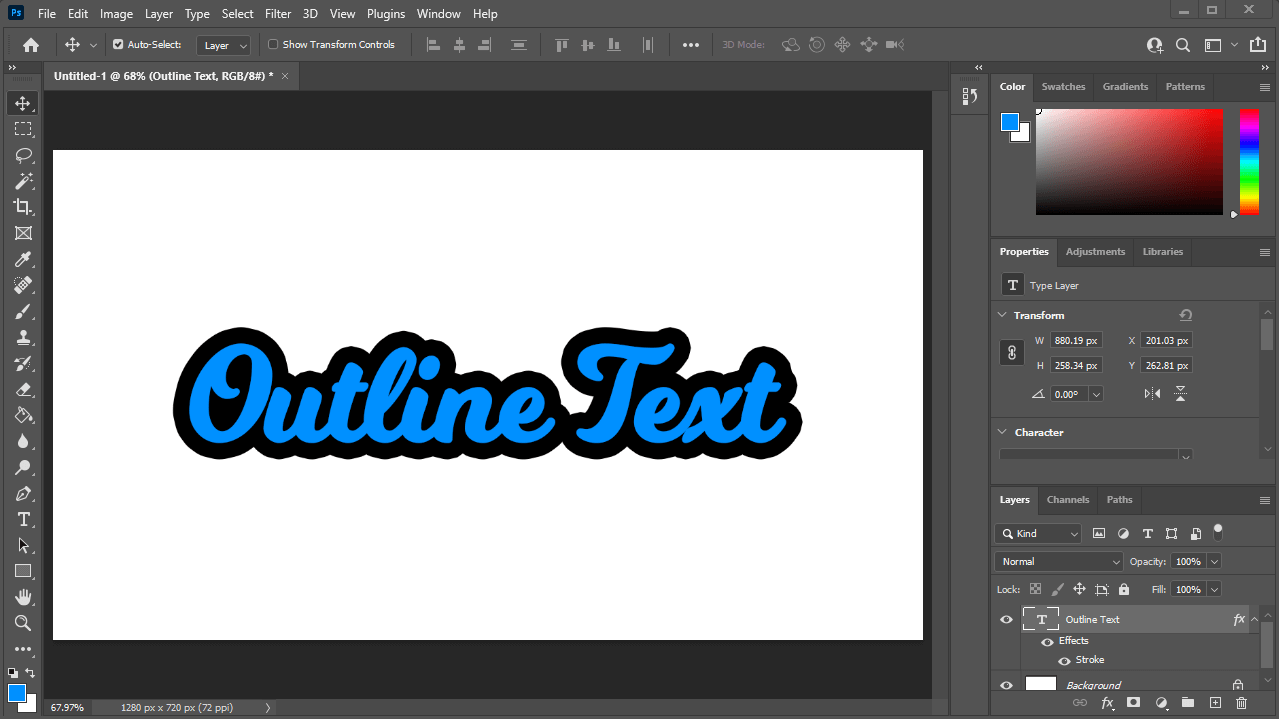
Go ahead and choose a color, size and style for your text outline and click the OK button when you are finished to apply the changes.
Working With Strokes
Now that we’ve gone over how to outline text in Photoshop, let’s go over some of the various ways you may wish to work with your outlines (otherwise known as strokes) further.
How to edit the outline after it’s been applied
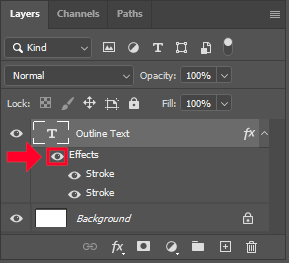
Once you have applied a stroke to your text in Photoshop, you will notice that a new adjustment layer has been added to the text layer:
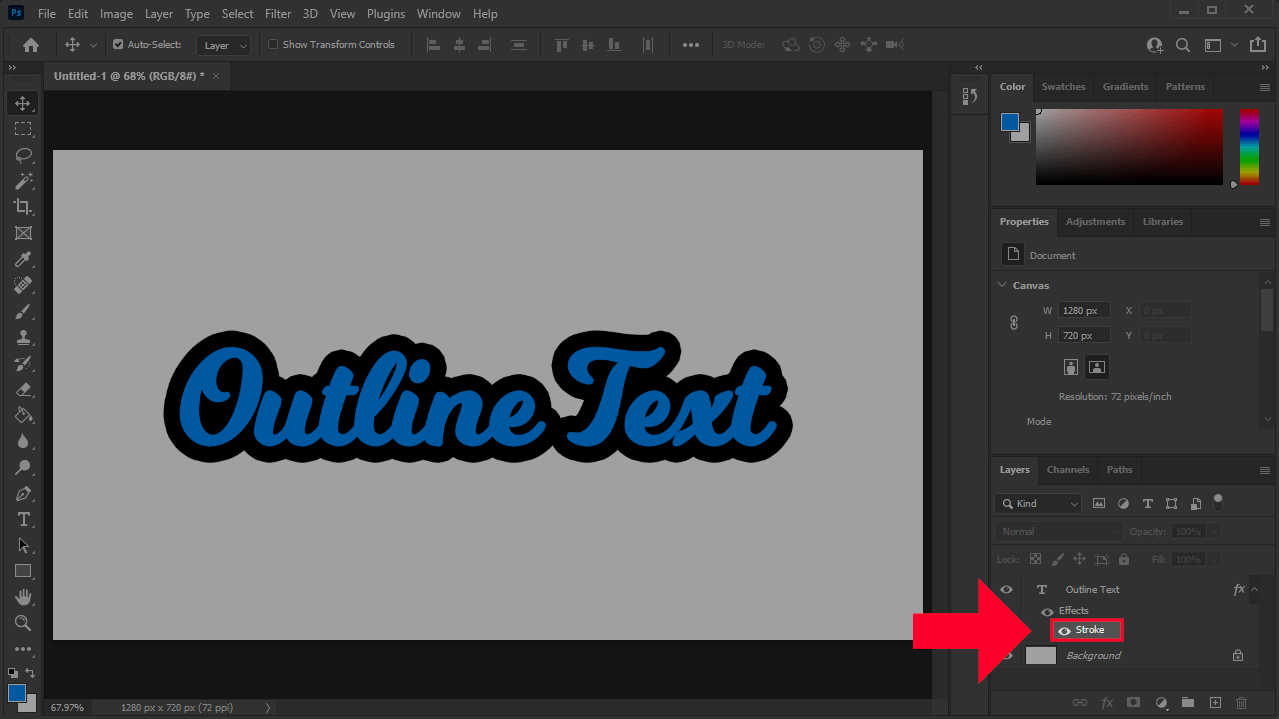
A new layer effect will be added to the text layer as a sublayer.
If you wish to edit the stroke around your text later on, you can simply double-click on the adjustment layer that reads “stroke” and the Blending Options menu will populate again, allowing you to edit the stroke properties.
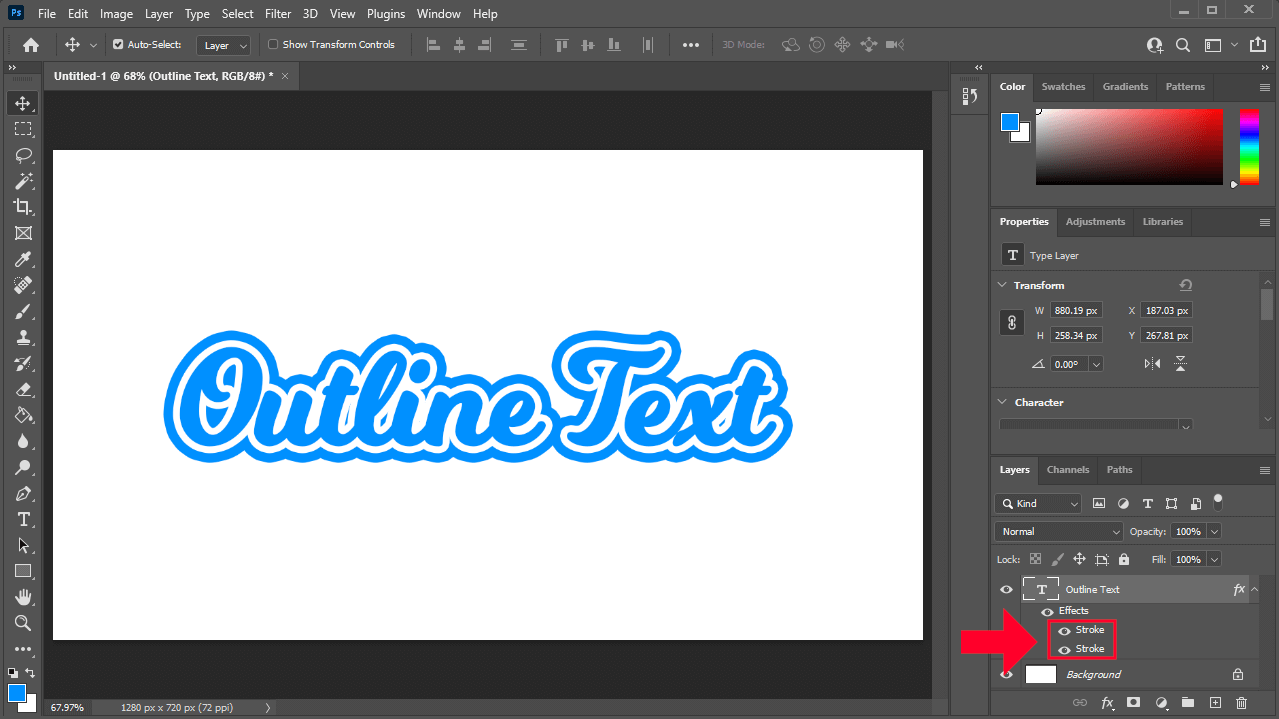
How to apply multiple outlines to text
The process used to outline text in Photoshop can be repeated to add multiple outlines around your text. This may be useful if you’d like to add some padding between the text and the outline, as I did in the thumbnail design.
To do so, simply right-click on your text layer again and select Blending Options from the menu. Repeat all of the steps outlined earlier in the lesson, and your new stroke will be applied on top of the first stroke you created:
TIP: Making the new outline the same color as your canvas background will create the appearance of padding between the text and the outline.
As was the case for the first stroke you created, an effects layer will be added as a sublayer for the text in the Layers menu, in addition to the original stroke layer.
How to delete the outline from your text
Finally, you may be wondering how to delete a stroke in Photoshop if you no longer want the outline around your text. This is a rather simple task, and there’s two ways you can approach it:
Option 1: Remove the outline by turning off its visibility
You can remove the outline from your text by turning off the visibility of the effects layer.
To do this, look for the little eyeball icon to the left of the layer’s name/label:
Clicking the eyeball icon next to the layer will turn off the visibility of the layer.
Clicking on the icon will turn off the visibility of the effects layer, thereby removing the outline from your text.
The benefit of using this approach is that it’s temporary and can be undone at a later point if you desire. Simply click the eyeball icon again to turn the visibility of the outline back on.
Option 2: Delete the layer effect altogether
If you’re positive that you will not want this outline back later on and want it gone for good, it can be deleted with relative ease.
To remove a stroke in Photoshop, select its effect layer and click the trash can icon in the bottom-right corner of the menu:
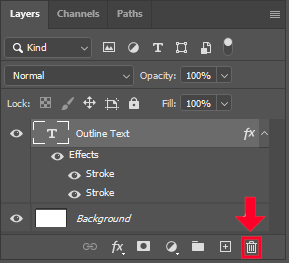
You can delete the effects layer permanently by selecting it and click the trash can icon outlined in red above.
This will delete the stroke, thereby removing the outline from your text.
Conclusion
Using layer effects is certainly not the only to outline text in Photoshop. You could also create a selecting around the text, grow the selection, then fill it with whatever you’d like. However, using layer effects via the Blending Options menu is quicker, easier, and it provides you with more options for stylizing your outline as well.
If you have any questions or need clarification on any of the steps taken in this lesson simply leave a comment below.
Learn To Master The SoftwareGain a complete understanding of your favorite design apps with my comprehensive collection of video courses. Each course grants access to our private community where you can ask questions and get help when needed.
|
||||||||||||||||||||||||||||||||