
How To Change An Image’s Color In Affinity Photo
How To Change An Image’s Color In Affinity Photo https://logosbynick.com/wp-content/uploads/2021/09/affinity-photo-change-color2.png 800 470 Nick Saporito https://secure.gravatar.com/avatar/8e31bf392f0ba8850f29a1a2e833cdd020909bfd44613c7e222072c40e031c34?s=96&d=mm&r=gIn today’s tutorial we’ll be going over a workflow for changing the color of an object in an image using Affinity Photo. This could come in handy if you have multiple color varieties of a product you’d like to sell (like t shirts or phone cases for example) and you’d like to produce images of each variety without having to photograph them.
Best of all, this approach is completely non-destructive, meaning it can easily be undone later on if need be. You can even alter the color changes after you’ve made them if you’d like:
The color changes can be altered retroactively.
In short, the approach we’ll use to change an image’s color in Affinity Photo is to add a Recolor adjustment layer, apply an empty layer mask to that layer, and then paint in the color changes with a white paint brush. Let’s dig in!
Change An Image’s Color In Affinity Photo
The following video tutorial will walk you through the entire process step-by-step:
Below is a brief summary of the steps we’ll be taking in this lesson. Intermediate to advanced users should be able to get the gist of it from these written instructions, but everyone else should refer to the video tutorial above for a complete explanation.
Table of ContentsChange An Image’s Color
Editing Your Changes |
Change An Image’s Color
In this first part of the lesson we will be going over the steps taken to make these color changes.
Step 1: Open your image and unlock the image layer
In order to change an image’s color in Affinity Photo we first must open the image by navigating to:
File > Open
Select the image from your hard drive that you’d like to work with, then click on the lock icon next to the image’s name in the Layers menu:
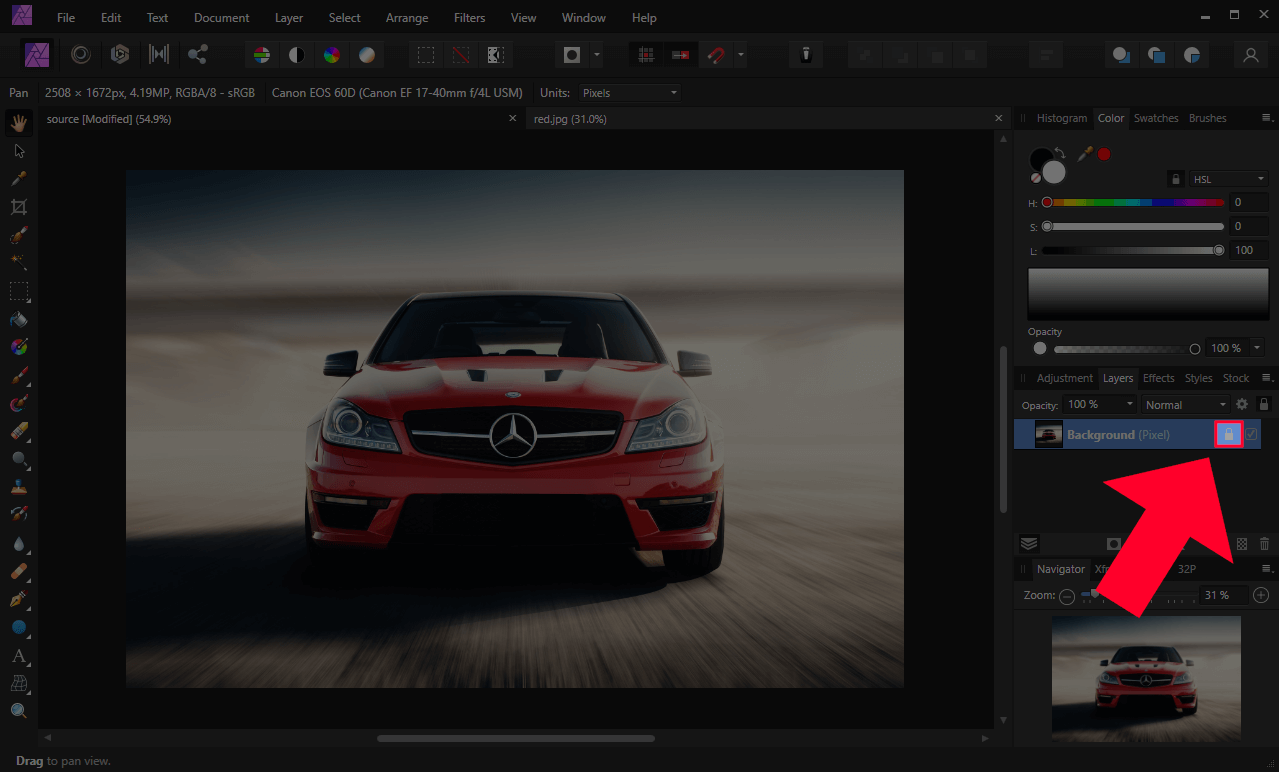
Unlocking the layer allows you to make changes to its contents (or the image.) Click to enlarge.
This will unlock the layer, allowing you to make changes to the image.
Step 2: Add a Recolor adjustment layer and choose your new color using the Hue slider
Now it’s time to add a new adjustment layer in order to change the color of the image.
Adjustment layers allow you to make changes to an image’s appearance without actually changing the image. It’s kind of like wearing glasses. The lenses allow you to see better without changing your actual eyesight. Think of adjustment layers as lenses that are placed over the image.
Add a Recolor adjustment later by navigating to:
Layer > New Adjustment Layer > Recolor
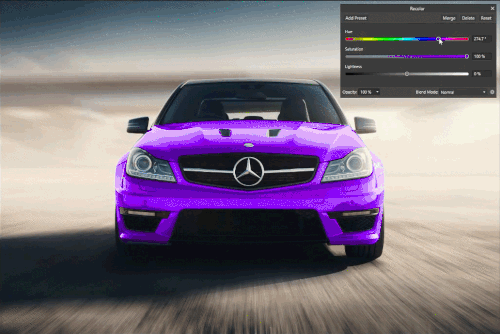
A menu should populate, allowing you to change the color of the image. Use the Hue slider to choose a color of your liking:
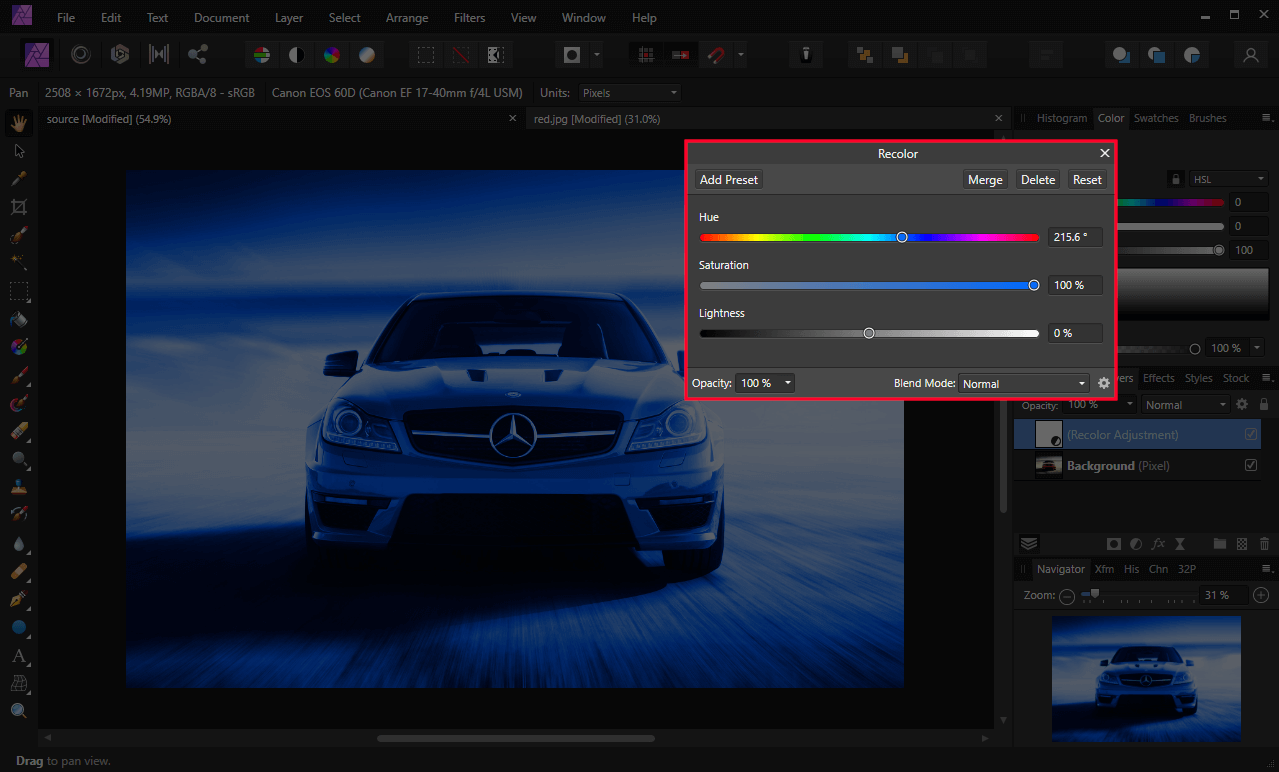
Use the Hue slider to recolor the image to a shade of your choosing. The image’s color will change accordingly.
You may notice that the color of the entire image changes, not just the color of the subject in your image. That’s okay, we’ll be addressing that in the next step.
Step 3: Add an Empty Layer Mask to the adjustment layer and paint in the key areas with a white brush
Whenever you change an image’s color in Affinity Photo you’ll have to find a way to isolate the subject of your image so that the color changes will only be applied to that localized area.
There’s many different ways to do this, but in this lesson we’ll be using layer masks — a non-destructive way of determining which areas of a layer will be transparent or visible.
Let’s add an empty layer mask to the adjustment layer by navigating to:
Layer > New Empty Mask Layer
If done correctly, your entire image should go back to its original color.
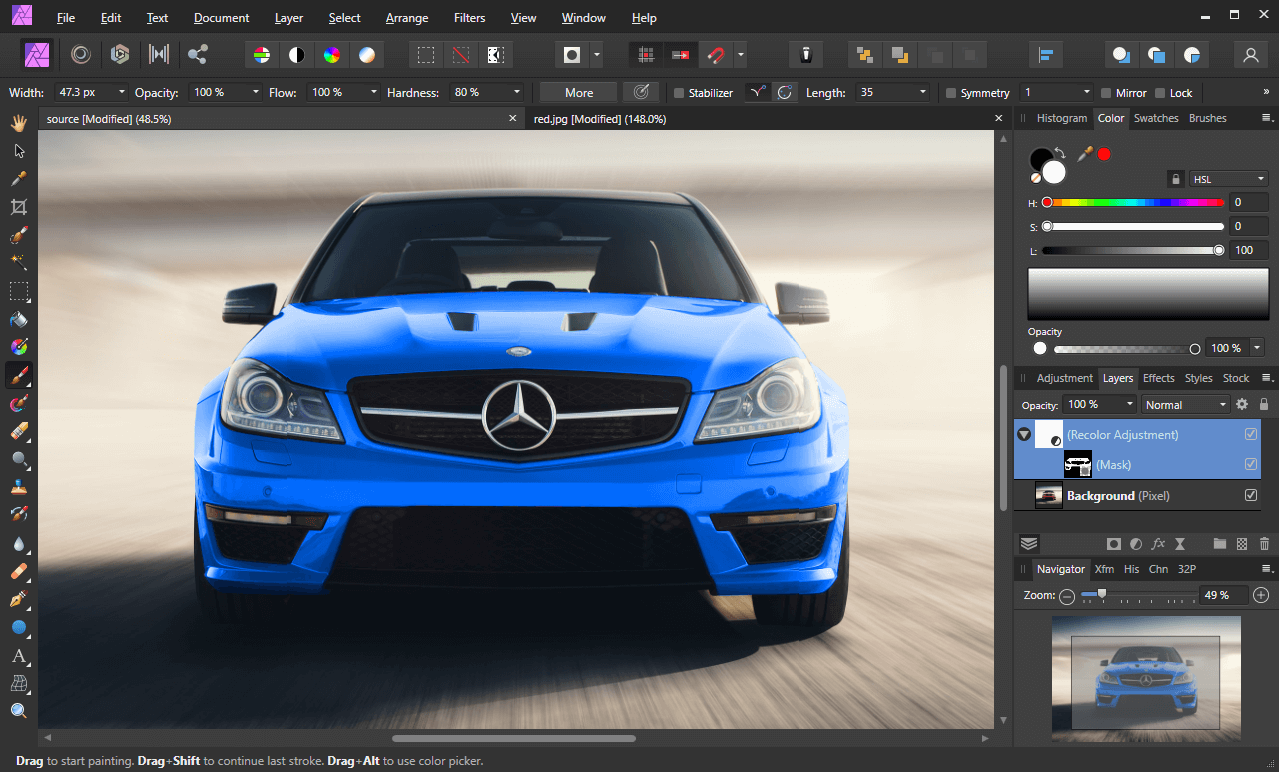
All we have to do now to change the image’s color is grab the Paint Brush Tool (keyboard shortcut: B) and select the color white from the Color tab on the upper-right of the screen. Start painting in the parts of your image that you’d like to change the color of using the brush.
As you paint, you’ll notice that the color of the subject in your image will change:

Painting over the layer mask with a white brush will reveal the recolored image.
Tips & Pointers
Before continuing on to paint in the entire subject, here are a few tips and pointers to keep in mind:
- You can change the size of your brush using the left and right bracket keys on your keyboard.
- It is recommended that you use a small, fine brush and paint around the edges of the subject first, then use a larger brush to quickly fill in the remainder afterwards.
- You can quickly zoom in and out of your workspace by holding Control and rolling up and down on the mouse wheel.
- You can quickly navigate around your workspace by pressing down the mouse wheel and moving the mouse.
Keeping these pointers in mind, finish painting in your subject:
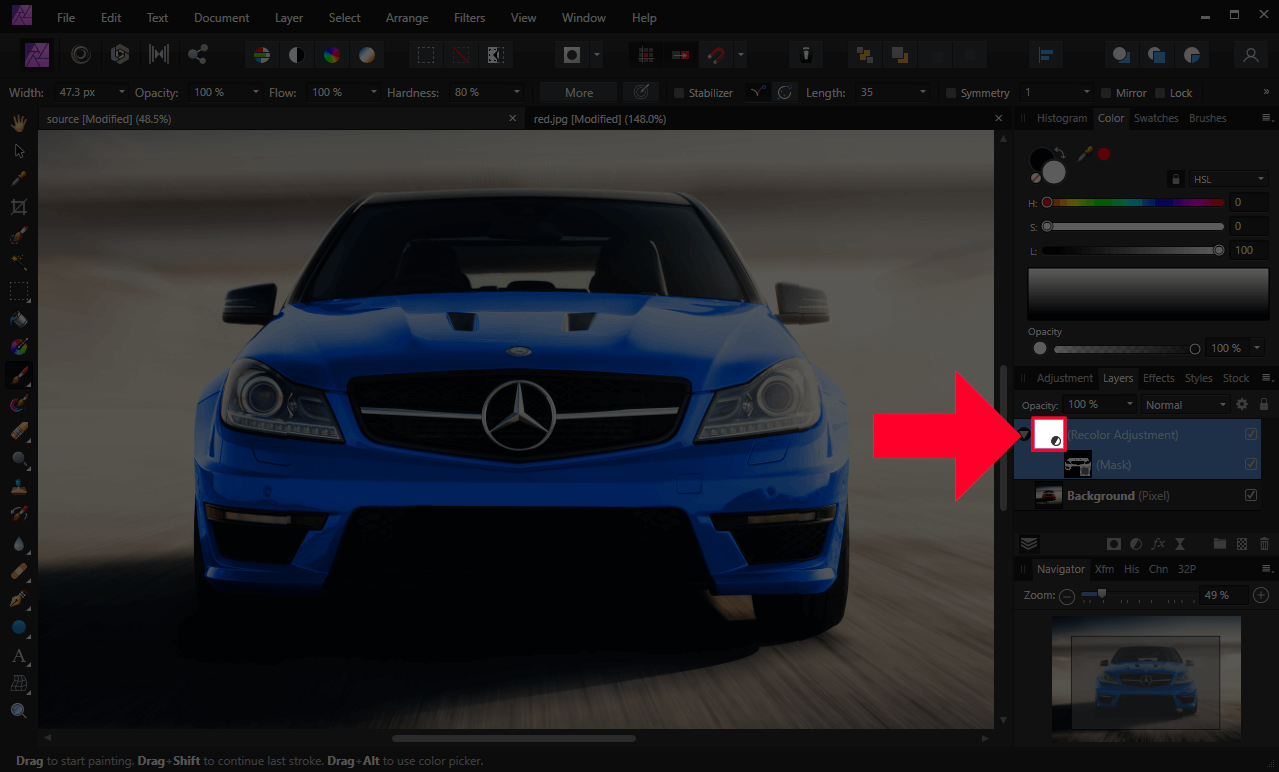
How the image looks with the color of the car changed from red to blue.
And you’re done! That’s how you can easily change an image’s color in Affinity Photo.
Editing Your Changes
Once you’re finished changing the colors of your image, you may be wondering if it’s possible to edit and/or undo these changes retroactively. You’re in luck! Let’s address how to do this.
How to revert back to the original color
One of the benefits of working with adjustment layers is that it’s a completely non-destructive way of editing images, meaning you can undo your changes at any point.
To do this, simply untick the visibility box of the Recolor Adjustment layer in the Layers menu:
You can undo the color change by turning off the visibility of the adjustment layer.
This will turn off the visibility of the adjustment layer and the layer mask simultaneously, reverting your image back to its original colors.
Ticking this box again will turn the visibility back on, which will reapply your previous color changes.
How to switch to a different color
Let’s say you change the color of your image in Affinity Photo, then later on you realize that you don’t like this color and would like to try on a different shade instead.
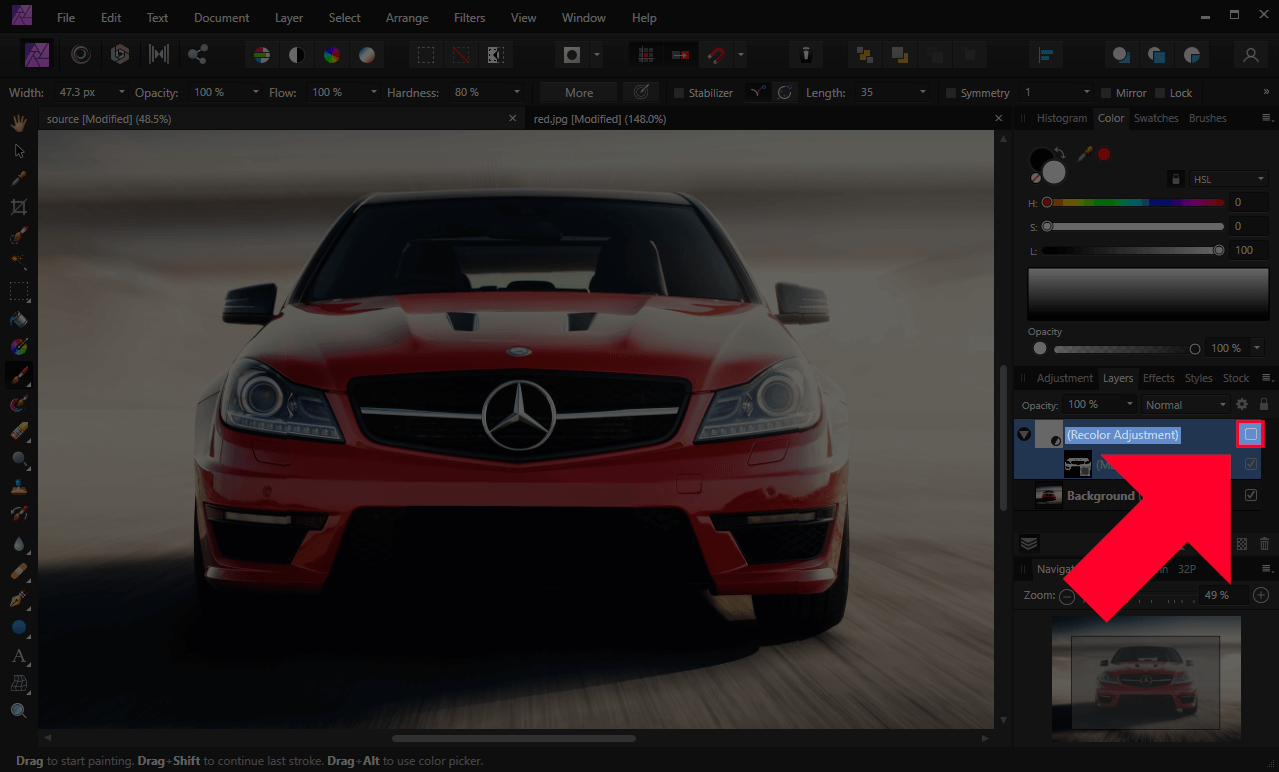
Does this mean that you have to repeat the entire process? Nope! Simply double-click the white box/thumbnail preview of the Recolor Adjustment layer in the Layers menu:
You can choose a different color for your color change by double-clicking the white box indicated above.
The Recolor menu should populate again, allowing you to choose a different color with the Hue slider.
Once you are finished you can simply close out of the menu.
Conclusion
There’s many different ways that you can change an image’s color in Affinity Photo. For example, instead of using layer masks, you could use the Selection Brush to sample a selection of the image to change the color of, then recolor that selection only. However, I feel that the method used in this lesson is the most complete approach as it provides more granular control over the sample area that you’ll create and it offers the most non-destructive benefits.
If you have any questions, or if any part of this lesson was unclear, simply leave a comment below!
Learn To Master The SoftwareGain a complete understanding of your favorite design apps with my comprehensive collection of video courses. Each course grants access to our private community where you can ask questions and get help when needed.
|
||||||||||||||||||||||||||||||||


Thanks, perfect little tutorial!
Thanks, great explanation and it worked perfectly.