
The Quickest Way To Crop An Image With GIMP
The Quickest Way To Crop An Image With GIMP https://logosbynick.com/wp-content/uploads/2021/09/gimp-crop-image.png 800 470 Nick Saporito https://secure.gravatar.com/avatar/8e31bf392f0ba8850f29a1a2e833cdd020909bfd44613c7e222072c40e031c34?s=96&d=mm&r=gCropping photos is a routine edit not just for graphic designers, but for casual users as well. Thankfully, GIMP makes this as simple and easy to do as any other software on the market. In this tutorial we’ll be going over how to crop an image with GIMP. This is done by simply creating a selection with the Crop Tool. Not only that, but we’ll be going over all of the settings and features that this handy tool has to offer.
In short, the way to crop an image with GIMP is to simply grab the Crop Tool (keyboard shortcut: Shift + C) and click and drag to create a selection around the area of the image that you’d like to crop.
You can adjust your crop afterwards using the handles on the sides and corners of your selection, reposition the crop by clicking and dragging it, then simply press Enter to apply the changes when you’re done. Let’s dig in to the details!
Crop An Image With Gimp
The following video tutorial will walk you through the entire process in less than two minutes:
Continue on to the written tutorial if you’d like a more in-depth explanation.
Table of ContentsCropping An Image with GIMPCrop Tool Settings Explained |
Cropping An Image with GIMP
In this first part of the lesson we’ll be going over two different ways to crop an image with GIMP. One way is by manually creating a selection, and the other way is by inputting a predetermined numerical values.
Feel free to skip to the method of your preference if you’d like.
How to manually crop an image
Let’s go over how to crop an image manually by creating a freehand selection.
Before you can crop an image with GIMP it is recommended that you open your image rather than copy & pasting it into a new document.
To do this, navigate to:
File > Open
Locate the image you’d like to crop on your hard and select it to open it in GIMP.
GIMP comes with a dedicated tool for cropping images, called the Crop Tool. You can locate it in your toolbox on the left-hand side of your screen, or you can access it by pressing Control + C on your keyboard:

The Crop Tool can be located in the toolbox to the left of the screen (outlined in red above) or by pressing Shift + C.
With the Crop Tool selected, click and drag over your image to create a selection of the area you’d like to crop. This will generate a rectangular box with the excluded areas shaded out:
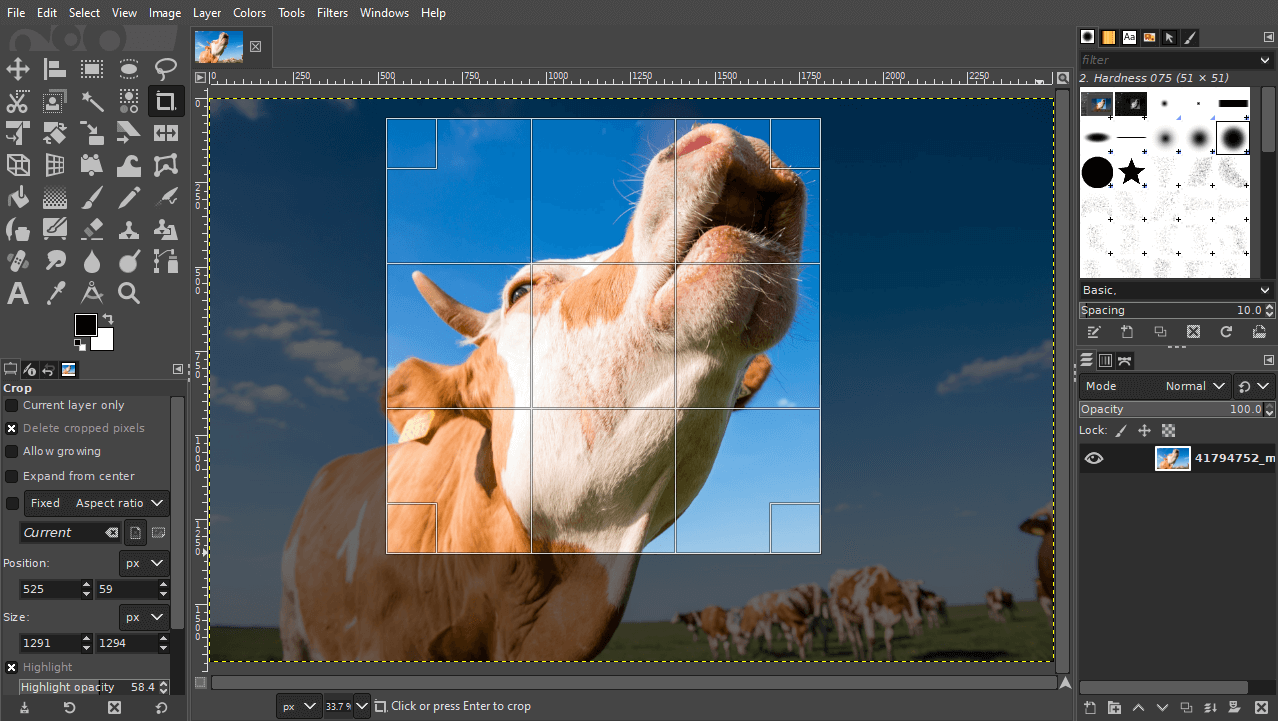
The crop selection indicates the area of the image that will be cropped.
The box represents the area of your image that will be cropped. You can edit the size and location of the crop using the handles on the sides and in the corners:

You can change the size of the crop using the handles on the sides and corners.
Tips:
- The handles on the left and right sides allow you to change the width of the crop
- The handles on the top and bottom allow you to change the height of the crop
- The handles in the corners allow you to change the width and height simultaneously
You can also move the position of your crop by simply clicking and dragging it:

You can move the location of the crop by clicking and dragging on it.
When you are satisfied with the size and location of your crop, simply press the Enter key on your keyboard to apply the changes. You image will then by cropped according to the selection you’ve created:
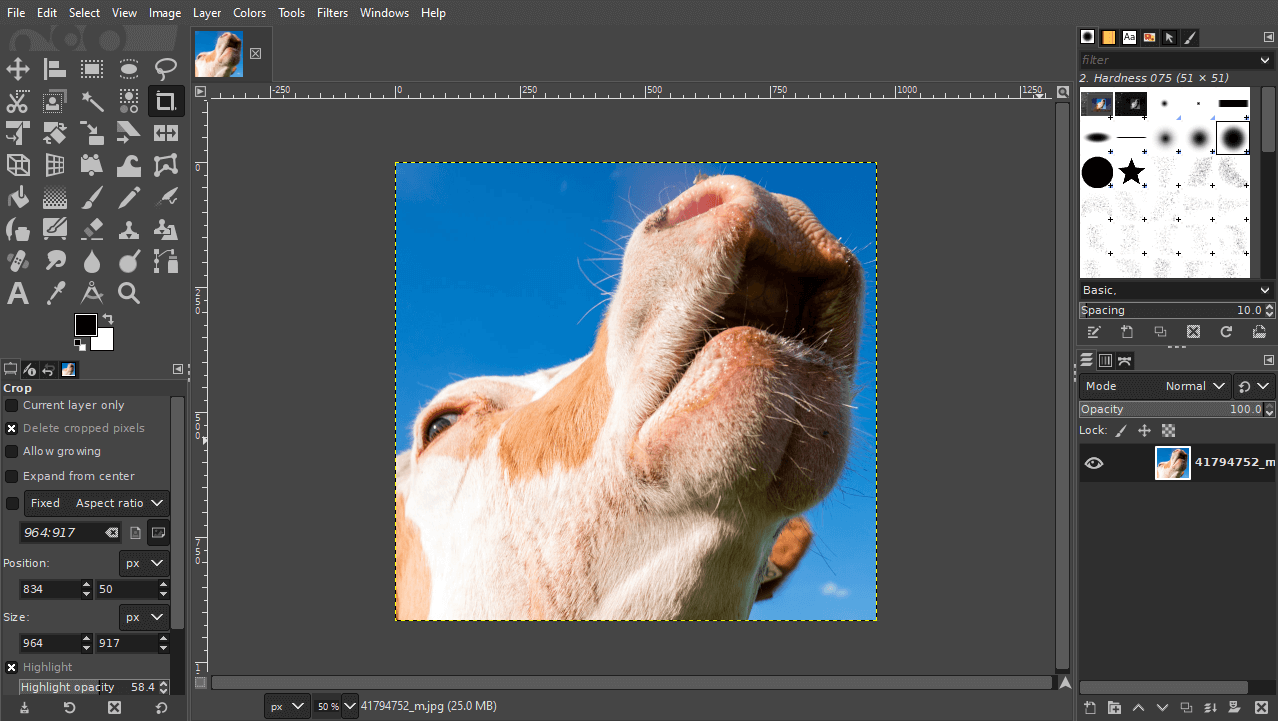
You can apply your crop by pressing Enter on your keyboard.
How to crop an image based on numerical values
Let’s say you’d like to crop your image using a predetermined numerical value. This can be done using the Tool Options menu on the bottom-left side of your screen:
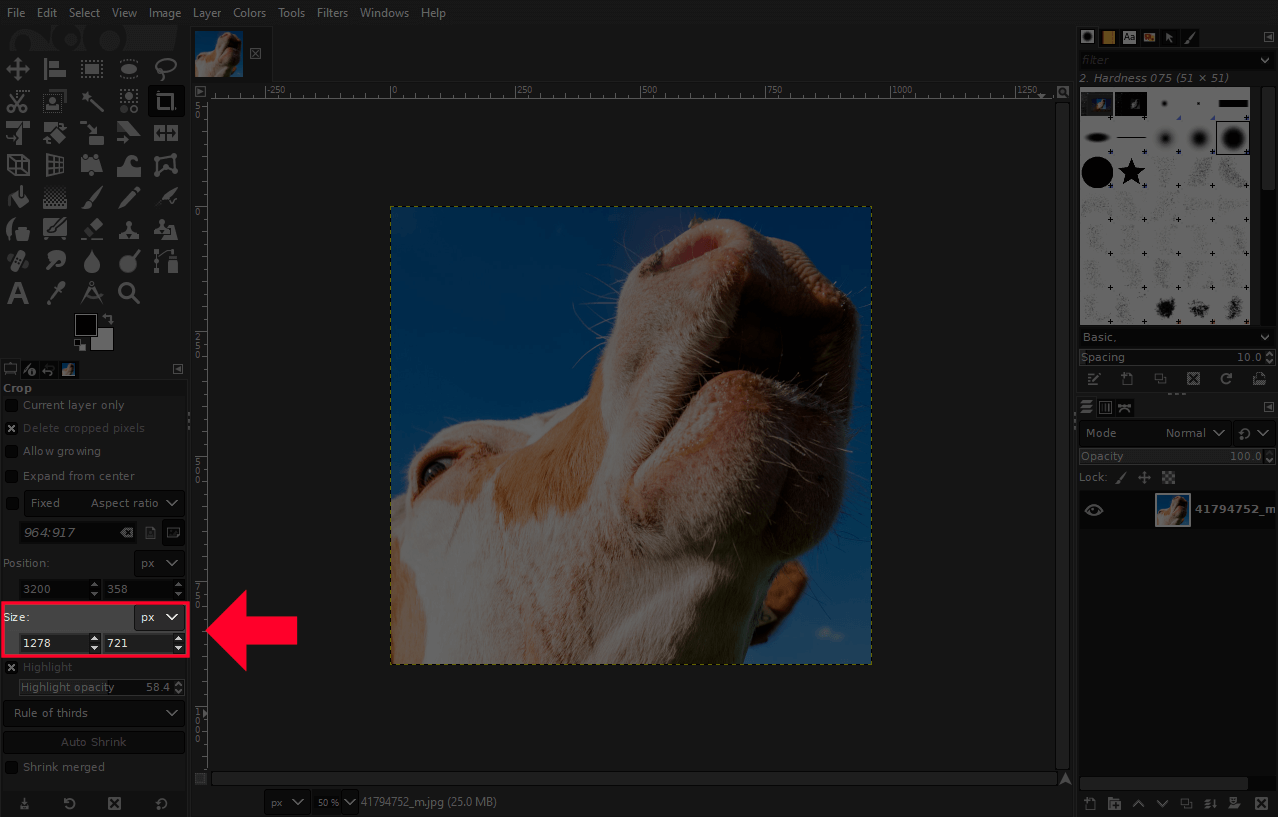
The Size input boxes allow you to crop an image based on a numerical value.
If you do not see these tool options on your screen then first make sure you have the Crop Tool selected, then navigate to:
Windows > Dockable Dialogs > Tool Options
In the Tool Options menu, look for the input values labeled as Size. There should be two of them side-by-side.
The input value on the left represents the width of the crop, whereas the one on the right represents the height. The default unit of measurement is pixels (px), but you can change that using the dropdown menu just above it if you’d like.
To crop an image with GIMP by inputting a predetermined size, simply type that size into the width and height input boxes, then click and drag the selection on your canvas to place it where you’d like your image to be cropped. Press Enter to apply the changes and crop your image.
Crop Tool Settings Explained
Now that we’ve gone over how to crop an image with GIMP, let’s go over some of the features contained within the Crop Tool. Understanding these tool options and how they work can make image cropping an easier process.
For reference, the tool options are as follows:
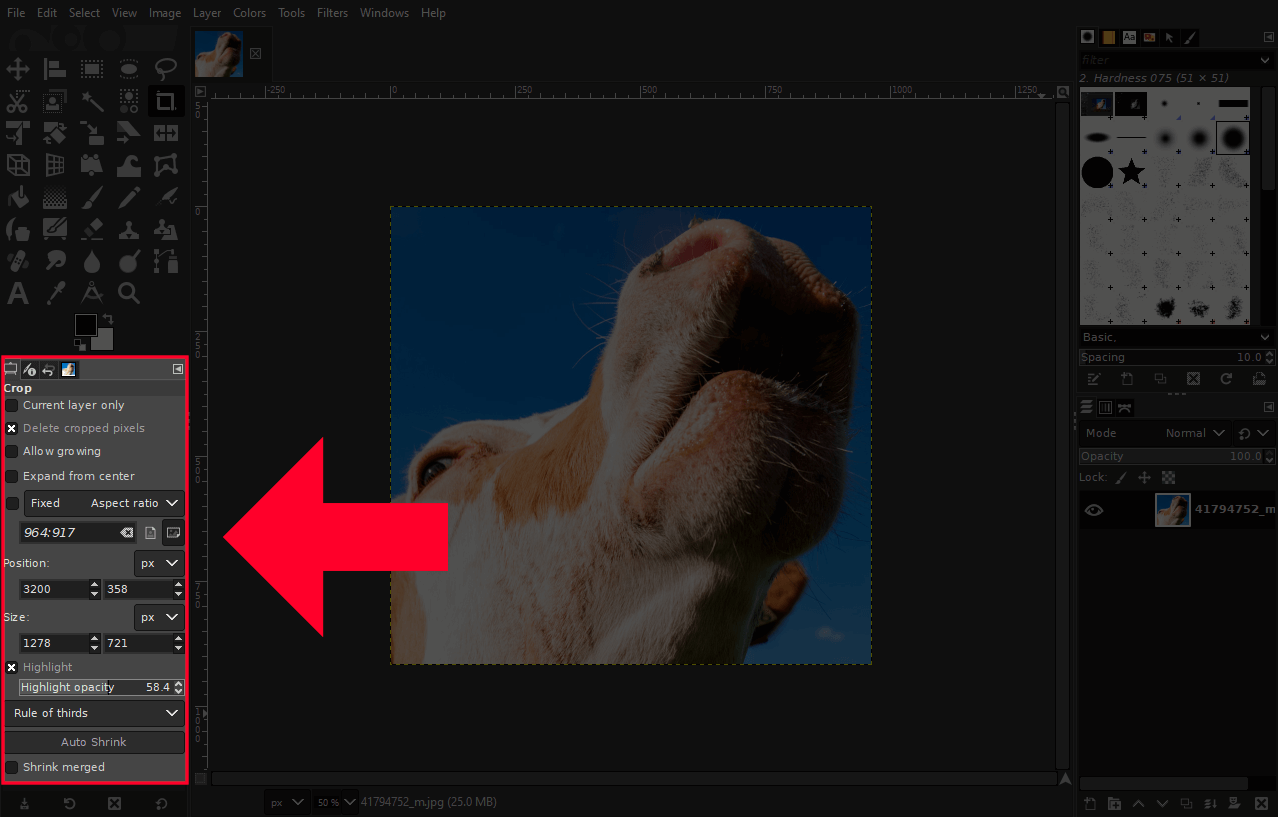
The Tool Options menu is located on the bottom-right of the interface.
Current layer only
This option only applies if you’re working with a document that has multiple layers. If you’re just cropping an image then you can, in most cases, disregard it.
By default, the Crop Tool works be cropping the entire document you’re working on. This means that any additional layers you may have in your document will also be cropped. Enabling this option will make it so that only the layer you have activated will be cropped. The other layers, if applicable, will remain unchanged.
Delete cropped pixels
Whenever you crop an image with GIMP, the Crop Tool automatically deletes the area of the image that is excluded from the crop, meaning it’s gone forever. You can change that behavior by enabling this setting though.
With the delete cropped pixels option enabled, you image will still be cropped as intended, only GIMP will preserve the excluded areas so you can go back and undo the crop later on if you’d like.
The benefit of enabling this setting is that it’s a more non-destructive way of cropping photos.
Allow growing
The allow growing setting makes it so that you can expand your crop outside of the boundaries of your image.
By default, the Crop Tool is confined to the area within your image, meaning you can’t create a crop selection that exceeds it. However, enabling this setting allows you to resize the canvas beyond the image’s frame.
Expand from center
Much like any other selection you may create in GIMP, clicking and dragging functions by creating one of the corners of the selection as the start point.
So for example, if you click and drag down and to the right to create your crop selection, the top-left corner of the crop will be the starting point and the bottom-right corner will be the end point.
With the expand from center option enabled, your selection will be created by using the area that you clicked on as the center point of the selection, and then grow outwards and you click and drag.
This can be useful when cropping images where you need the subject to be in the center of the frame.
Aspect ratio
The aspect ration setting will allows you to preserve a predetermined aspect ratio when creating your selection.
By default, clicking and dragging allows you to create a crop selection whimsically, where the width and height change independent of each other. Enabling the aspect ratio setting will lock the proportions so that the width and height of your selection only change in proportion to each other.
This can be useful if you need to crop an image as a perfectly symmetrical square, or maybe you’d like to use your image as a thumbnail for a YouTube video and need to ensure that the crop is consistent with a 1280 x 720 proportion.
Position
The position setting allows you to pinpoint a specific area of your image to crop using a numerical value relative to the X and Y axis.
The left input box represents the X axis, whereas the box on the right represents the Y axis.
Use this setting if you’d like to crop an image in GIMP based on a location on the X and Y axis.
Size
The size setting, as we’ve previously gone over, allows you to crop an image based on a predetermined numerical value. Refer back to the part of the lesson where we went over this for more details.
In addition to pixels, you can also size your crop using any of the following units of measurement:
- Pixels
- Percent
- Inches
- Millimeters
- Points
- Centimeters
- & More
Highlight
The highlight option is probably the most useful and helpful feature of this tool. Enabling it will darken the areas of your image that will be excluded from the crop, making it easier to see exactly what it is you’ll be cropping:
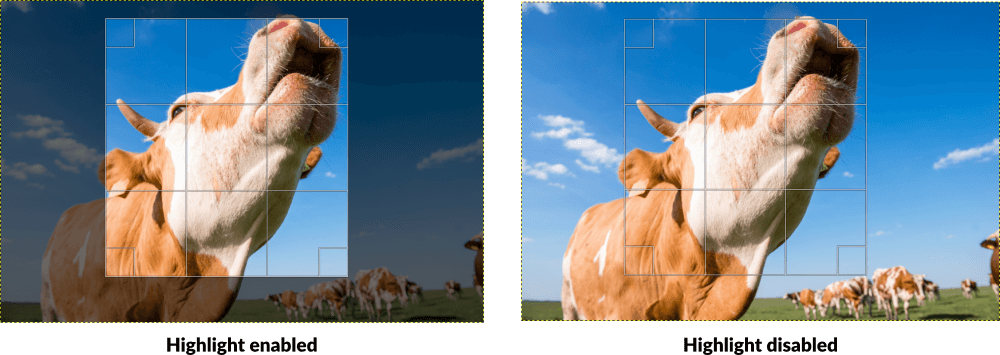
Enabling the highlight setting makes it easier to determine what will be cropped.
Without it enabled, you may have a different time determining exactly where the crop lies.
The highlight opacity slider allows you to adjust how visible the highlight is. As you could imagine, you’ll have to adjust this based on the composition of your image.
Guides
Finally, the guides setting allows you to place a grid over your crop selection so that you can use it as a reference to help accurately determine where to place your crop.
These grid lines aren’t actually part of the design in any way. They are just there for your reference.
The guide options that you have to choose from are as follows:
- None (no guides)
- Center lines
- Rule of thirds
- Rule of fifths
- Golden sections
- Diagonal lines
Conclusion
As someone who uses many different graphic design applications, I’d have to say that GIMP is, without question, my favorite tool for cropping images. It has all of the features you would expect when cropping photos, it’s easy to use, and being the lightweight application that it is, it loads and exports files much quicker than a clunkier app like Photoshop does. If using GIMP to crop images is good enough for me then I see no reason why it shouldn’t be good enough for you too!
If you have any questions or need clarification on any of the steps we’ve gone over in this lesson, simply leave a comment below.
Learn To Master The SoftwareGain a complete understanding of your favorite design apps with my comprehensive collection of video courses. Each course grants access to our private community where you can ask questions and get help when needed.
|
||||||||||||||||||||||||||||||||


