How To Invert Colors In Illustrator | Vector Objects and Images
How To Invert Colors In Illustrator | Vector Objects and Images https://logosbynick.com/wp-content/uploads/2021/09/illustrator-invert-colors.png 800 470 Nick Saporito https://secure.gravatar.com/avatar/8e31bf392f0ba8850f29a1a2e833cdd020909bfd44613c7e222072c40e031c34?s=96&d=mm&r=gInverting the colors of an image may be a commonplace photo editing task, but it’s also something that can be done in most vector design applications. Adobe Illustrator is no exception to this. The method used to invert colors in Illustrator works for both vector paths and for raster images so long as they are embedded and not linked.
Color inversion was once a requisite tool for analog photography that allowed a black and white photo to become recognizable. These days, however, it’s more so used as a creative effect to add artistic flare to your design work. It has also reportedly been used to help those with color blindness differentiate shades and colors that may not be visible to them.
Regardless of whatever your need for color inversion may be, Illustrator has you covered. In this tutorial we’ll be going over how to invert colors in Illustrator for both vector objects and rasterized images.
Invert Colors In Illustrator
The following video tutorial demonstrates just how quick and easy it is to invert colors in Illustrator:
The way color inversion works is that each color is changed to its opposite color on a color wheel:
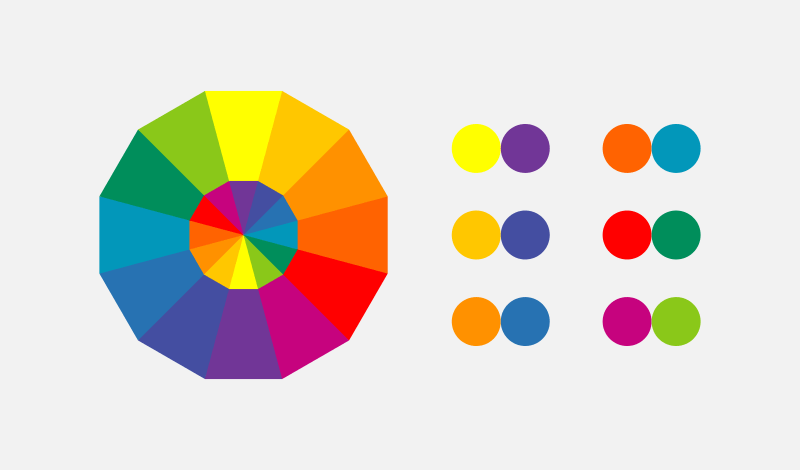
Inverting a color changes it to its opposite color on the color wheel.
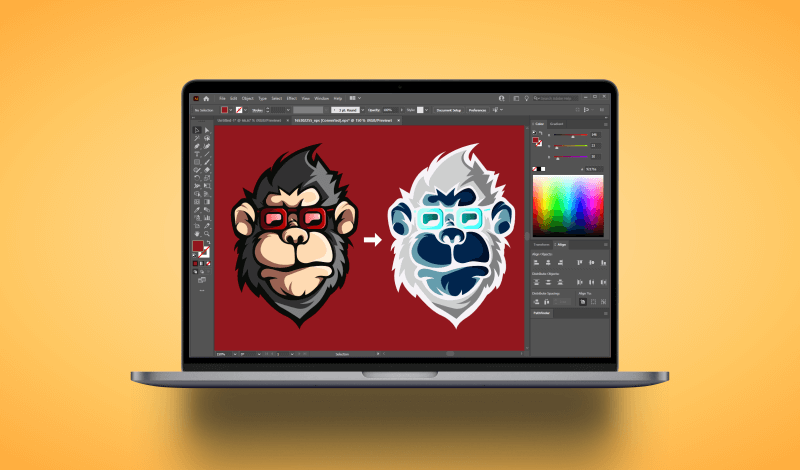
For this demonstration I will be using the following example design:
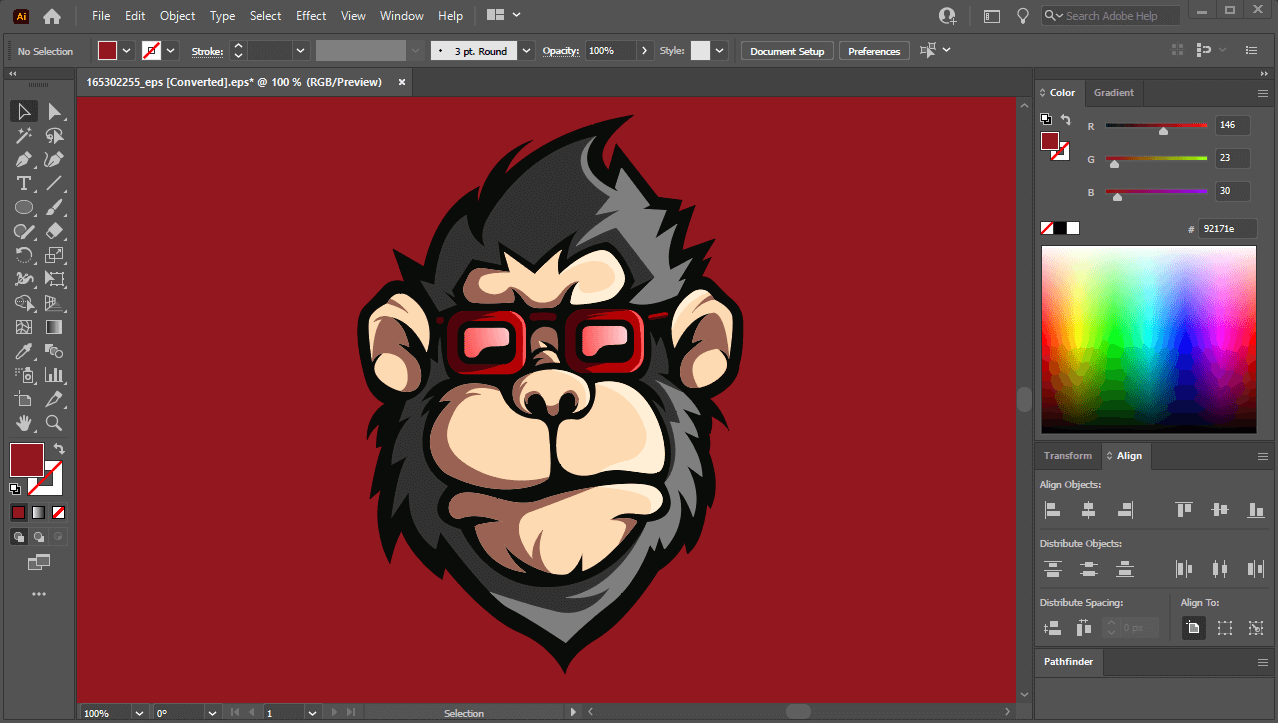
Example design, comprised entirely of vectors.
Invert The Colors Of A Vector Object
The example graphic being used here is a vector illustration. In order to invert the colors of this vector illustration, all I have to do is select everything that I’d like to invert and use the menu system to navigate to:
Edit > Edit Colors > Invert Colors
This will effectively invert the colors of your image:
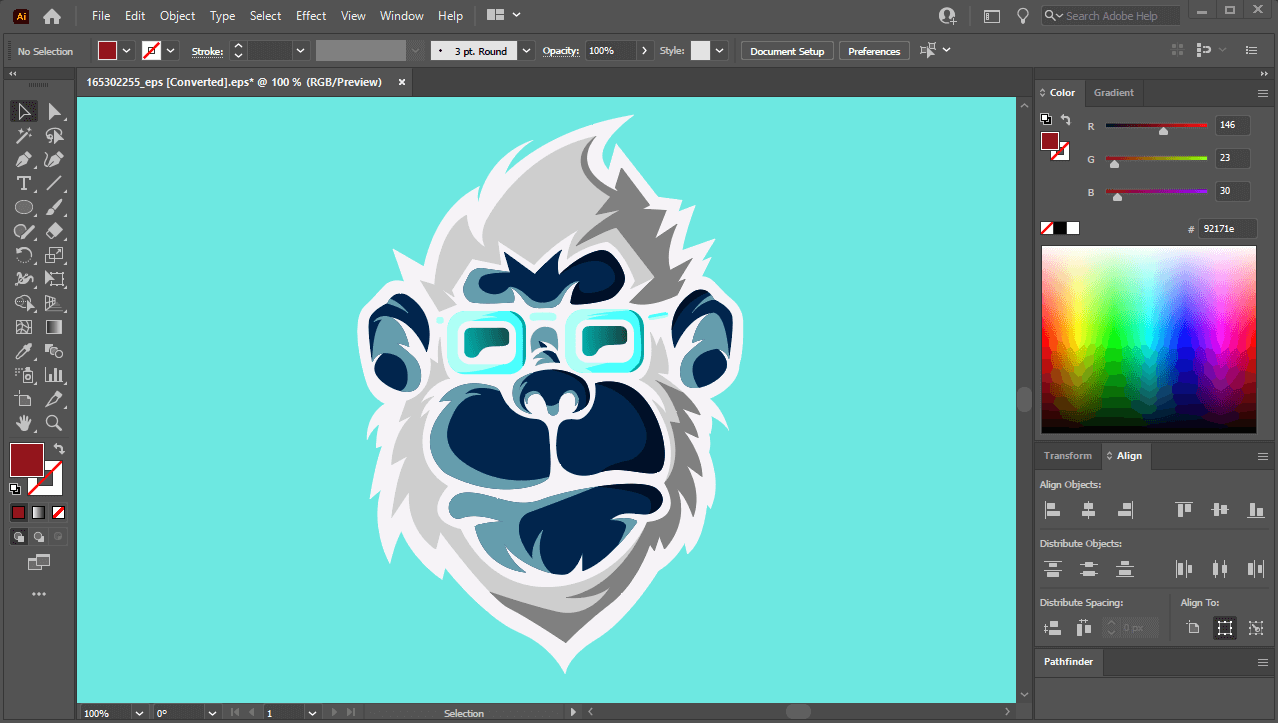
The vector objects have all been inverted — or changes to the shades that oppose them on the color wheel.
Once completed, you can select each of your vector objects individually and check the color status to confirm that the colors have indeed been inverted.
Invert The Colors Of A Rasterized Image
What may make Illustrator the best tool for color inversion is that it doesn’t just let you invert the colors of vector paths, but it also works on rasterized images too.
The same process for inverting vector objects is also used to invert raster photos. However, there is one major caveat: the images must be embedded and not linked.
Embedded VS Linked Images
As we’ve gone over in a previous tutorial, embedding an image essentially creates a new copy of that image that exists only within your Illustrator document. Changes made to it will not affect the original image that is saved (or “linked”) to your hard drive.
By default, imported images are linked instead of embedded, meaning the “Invert Colors” option will be grayed out if you try to select it. To rectify this we must embed the image before we can invert its colors.
To embed your image, first open the Links menu by navigating to:
Windows > Links
The menu is essentially an index of all the images being used in your document:
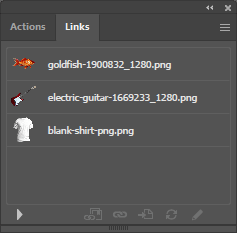
The Links menu is a list of all the images contained within your document.
Click on your image in the Links menu to select it, then click on the hamburger-style menu icon in the top-right corner:
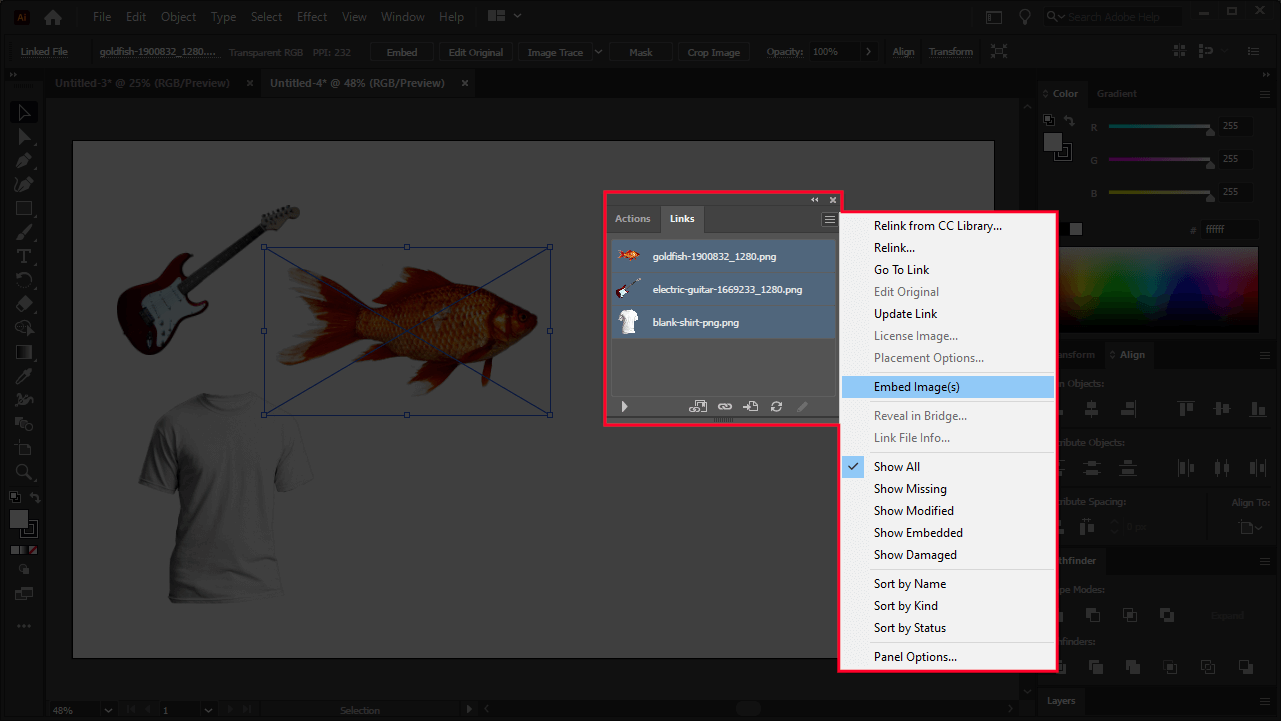
You can embed your images using the menu icon in the top-right corner.
Select Embed Image(s) from the menu.
Once selected, your image will be embedded into the document and you can invert its colors by selecting it navigating to:
Edit > Edit Colors > Invert Colors
This will effectively invert the colors of your image:
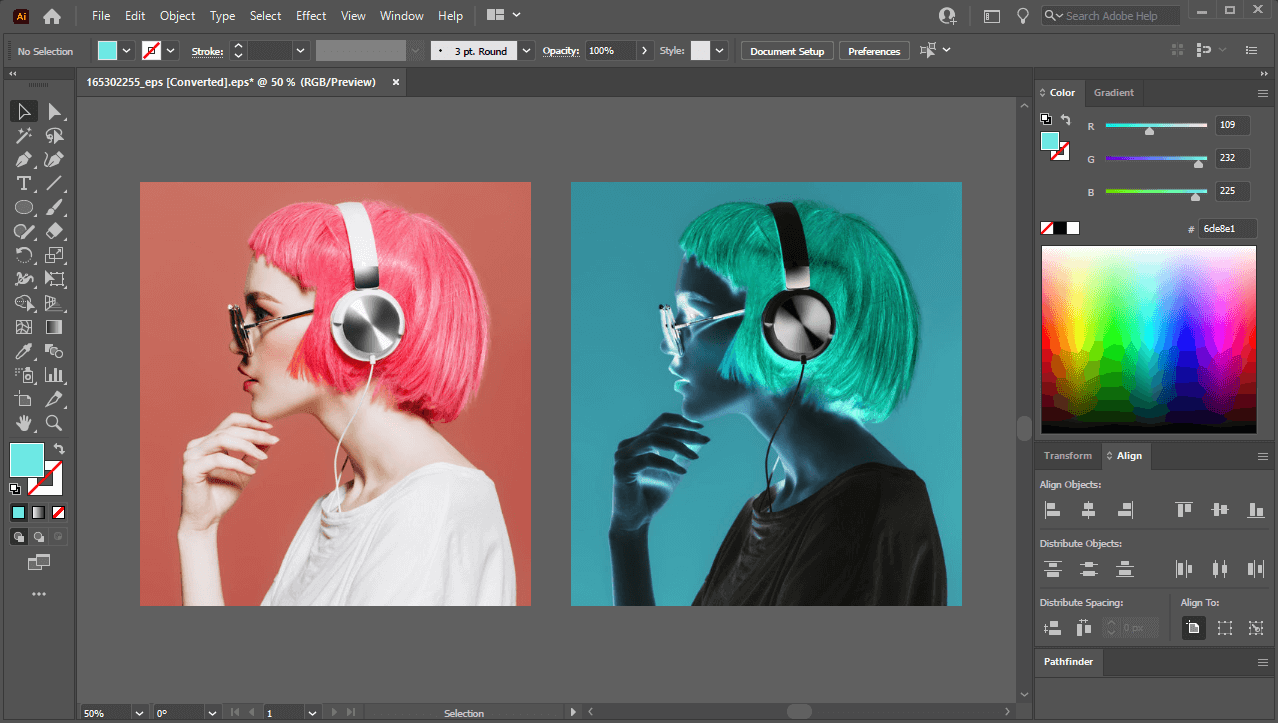
Embedded images can have their colors inverted using the same method.
If at any point you’d like to undo these changes you can simply select the photo and repeat this step to invert the color again, which will switch them back to their original shades.
Conclusion
One distinct advantage you’ll enjoy whenever you invert colors in Illustrator is that, unlike other applications, Illustrator actually inverts the fill colors of your vector objects instead of applying a filter/layer effect over them. This makes it a true color inversion, which is something that isn’t possible in other vector design tools.
And, of course, we can’t forget about how beneficial it is that we can invert the colors of photographs as well, making Illustrator not just a powerful vector tool, but a handy photo editing tool as well.
If you have any questions or need clarification on any of the steps taken in this lesson then simply leave a comment below.
Learn To Master The SoftwareGain a complete understanding of your favorite design apps with my comprehensive collection of video courses. Each course grants access to our private community where you can ask questions and get help when needed.
|
||||||||||||||||||||||||||||||||


